Asset Groups | RS Pathfinder
Formerly known as Jump Groups
What are Asset Groups?
Asset Groups are organizational tools that allow administrators to manage and group Assets, granting members varying levels of access to those items.
How are Asset Groups useful to my organization?
Asset Groups enhance security and efficiency by organizing Assets and controlling access to them. Administrators can assign specific permissions to team members, ensuring appropriate access to remote systems while maintaining compliance and safeguarding sensitive data.
How do I access the Asset Groups page?
- Sign into app.beyondtrust.io.
The BeyondTrust Home page displays. - From the left menu, click Remote Support > Asset Management.
The Jump Clients page opens. - At the top of the page, click Asset Groups.
The Asset Groups page displays.
The Asset Groups page
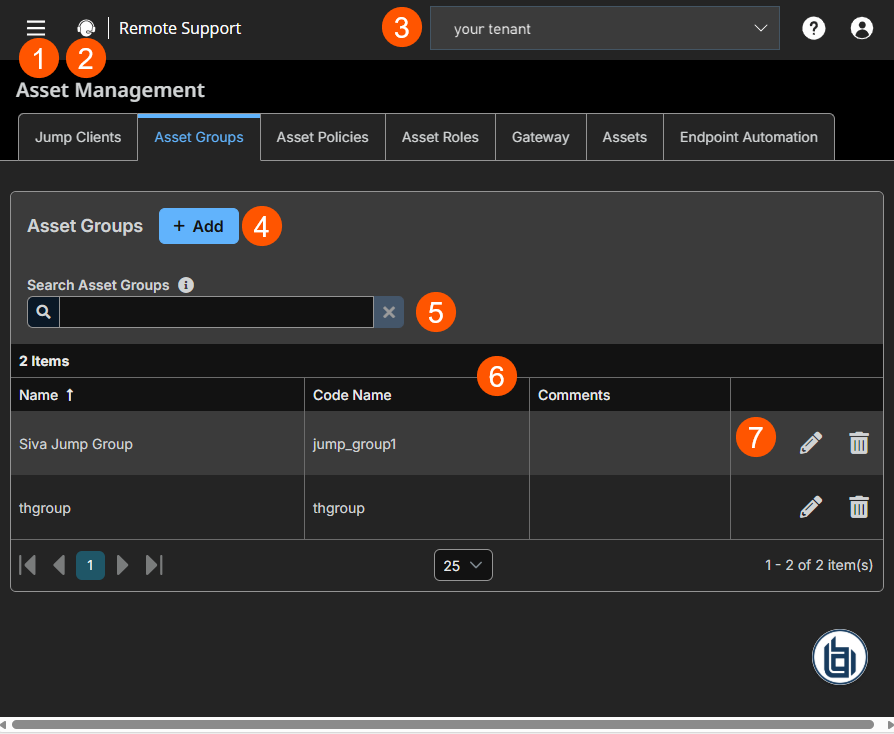
- Left menu: Easy access to all pages in Remote Support, including Status, Consoles & Downloads, My Account, Configuration, Asset Management, Vault, Console Settings, Users & Security, Reports, Public Portals, Dashboards, Management, and Appliance pages.
- Status: Opens the Status page.
- Header: Change your tenant site, manage your profile, and access documentation.
-
Add: Adds a new Asset Group.
-
Search: Find a specific Asset Group.
-
Asset Group columns: List of Asset Group columns.
Asset Groups columns
- Name: Unique name of the Asset Group.
- Code Name: Set a code name. If not provide, one is automatically assigned.
- Comments: Add a note about the Asset Group.
Search Asset Groups
To quickly find an existing group in the list of Asset Groups, enter the name, part of the name, or a term from the comments. The list filters all groups with a name or comment containing the entered search term. The list remains filtered until the search term is removed, even if you go to other pages or log out. To remove the search term, click the X to the right of the search box.
Add an Asset Group
-
At the top of the page, click + Add.
The Add Group page displays. -
Enter a unique Name for the group. This name helps when adding Assets to a group and with determining which users and group policies are members of an Asset Group.
-
Enter a Code name for integration purposes. If you do not set a code name, one is created automatically.
-
Enter Comments to summarize the purpose of this Asset Group.
-
Under Group policies click the link to view a list of the group policies that assign users to this Asset Group.
-
Configure the Allowed users for the group:
-
To add a user, search in New Member Name for users to add to this Asset Group. Select the user's role in the New Member Role dropdown to set their permissions specific to Assets in this Asset Group. You can select User's default to use the default Asset Roles set on the Users & Security > Group Policies page or the Users & Security > Users page. An Asset Role is a predefined set of permissions regarding Asset management and usage.
-
Existing Asset Group users are shown in the table, along with their assigned role and how the role was granted. You can filter the view by entering a string in the Filter by name text box. Click
 to edit a user's settings or click
  to delete a user from the Asset Group.
-
-
At the top of the page, click Save.
To add groups of users to an Asset Group, go to Users & Security > Group Policies and assign that group to one or more Asset Groups.
Edit and delete functionality may be disabled for some users. This occurs either when a user is added via group policy or when a user's system Asset Role is set to anything other than No Access.
You can click the group policy link to modify the policy as a whole. Any changes made to the group policy apply to all members of that group policy.
You can click the user link to modify the user's system Asset role. Any changes to the user's system Asset role apply to all other Asset Groups in which the user is an unassigned member.
You also can add the individual to the group, overriding their settings as defined elsewhere.
Edit a Group
- From the table, locate the Asset Group you want to edit.
- Click the pencil
 .
.
The Edit Group page displays. - Edit the necessary fields.
- Click Save.
Delete an Asset Group
- From the table, locate the Asset Group you want to delete.
- Click the trash can.

- Click Yes in the confirmation dialog.
The Asset Group is successfully deleted.
Maintenance of duplicate Jump Clients
Create a duplicate Jump Client
- From the Desktop Rep Console, find the Jump Client you want to create a duplicate of.
- Either select Copy on the toolbar above, or right-click on the Jump Client and select Copy.
- Select an Asset Group. It must be the same Asset Group as the original.
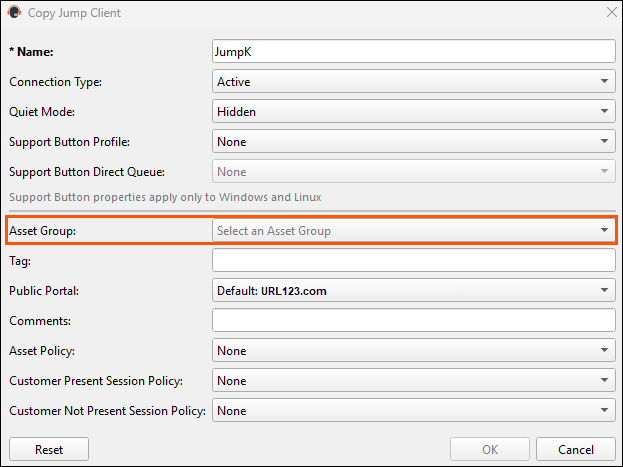
- Click OK.
- Click Yes in the confirmation dialog to create the duplicate Asset.
Updated 3 days ago
