Start a support session | RS for Web
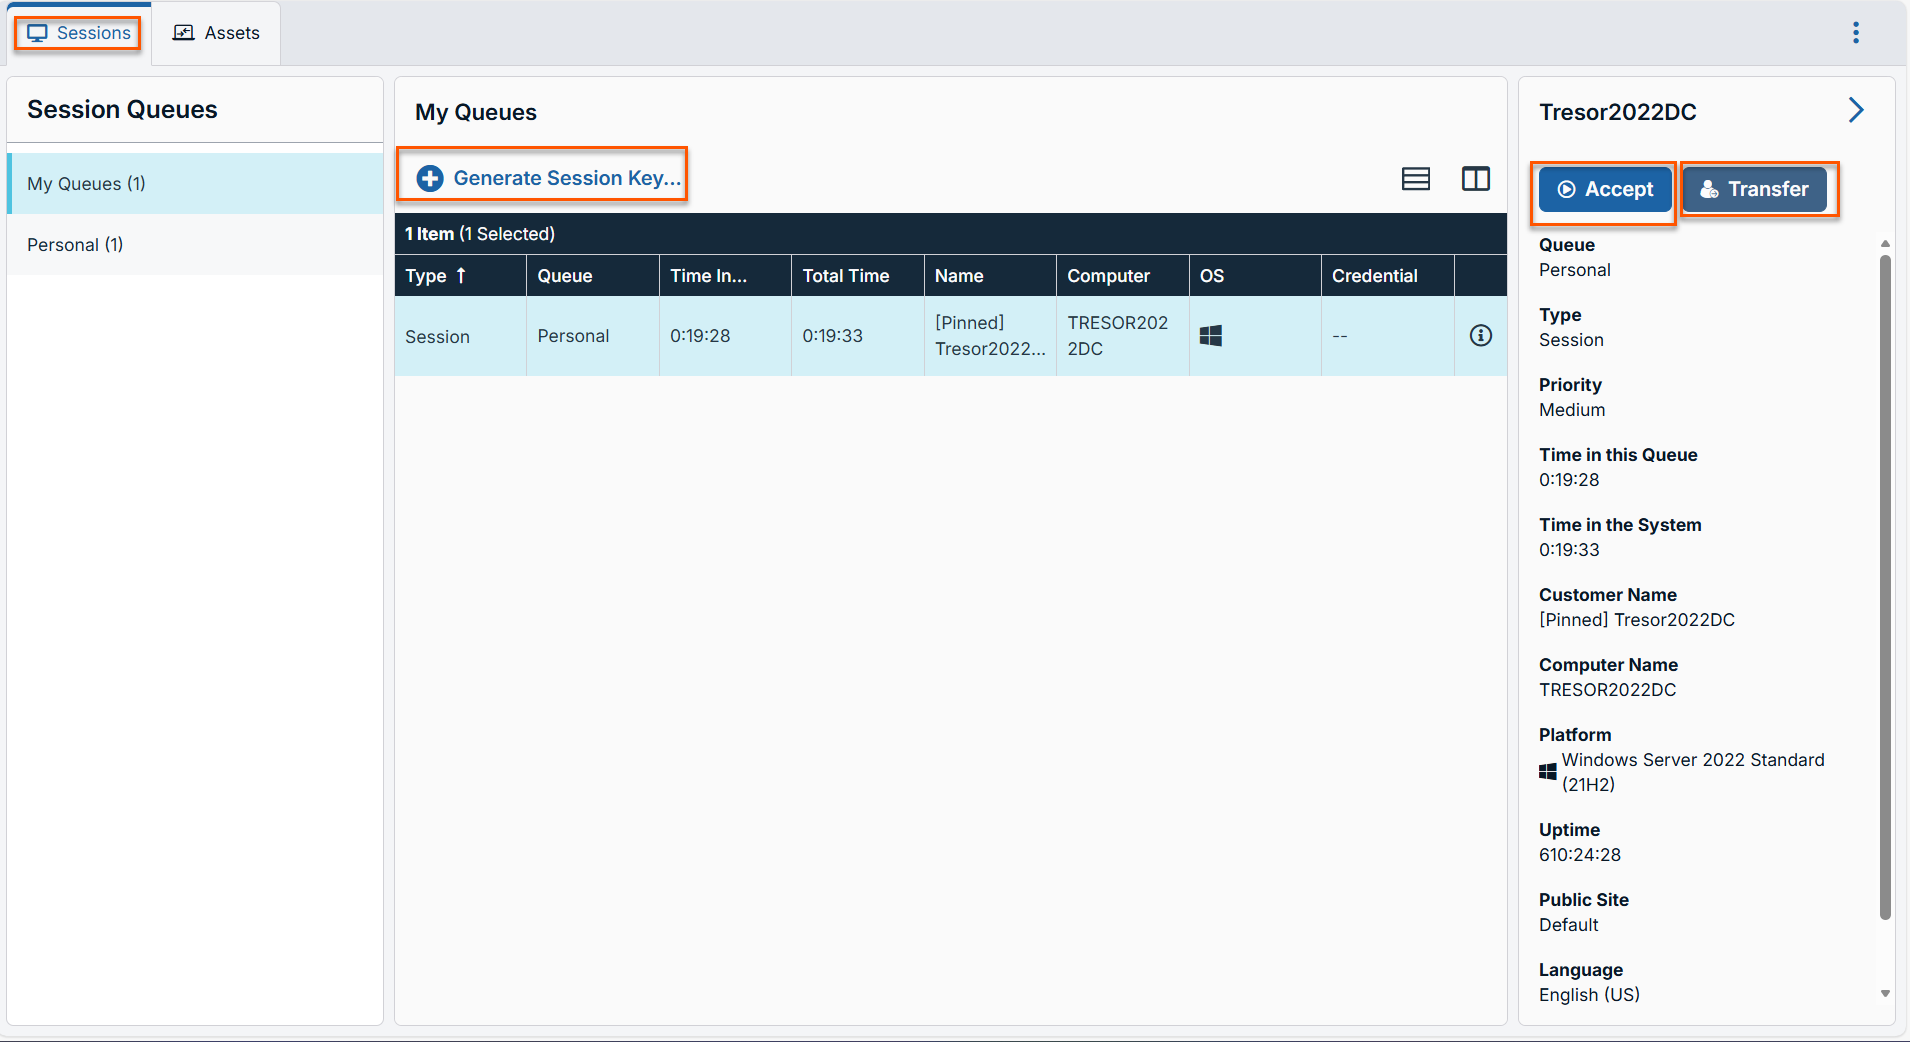
Session queues provide information about and access to customers who are waiting for support. The Personal queue contains customers with whom you are currently in session or who are waiting for a session with you specifically. A waiting session appears in your personal queue if it was transferred to you, or if the customer initiated it by entering a session key you generated, by selecting your name from the public site, or by clicking a Support Button tied to you. This queue also contains invitations for you to join a shared session.
You also have queues for any teams of which you are a member. If a customer initiates a session by selecting an issue type from an issue submission form, that customer enters a specific team queue based on which team owns that issue. A customer also enters a team queue if they click a Support Button tied to a team. A session may also enter a queue if it is transferred intentionally or due to waiting session rules, or if the representative's connection is lost in the middle of a session. These queues also contain invitations for any representative in the team to join a shared session.
Click the star to the left of a team name to mark that queue as a favorite. If a team chat message is sent, an orange chat bubble appears in place of the star.
Customers can also request assistance directly from a web page which contains a help link. This initiates a browser sharing session, which allows a representative to chat and view the customer's web page. Administrators can generate custom links in order to direct browser sessions to the correct representative or team queue. In the queue, browser sharing sessions are identified by the [Browser] prefix next to the customer's name.
Additionally, when a new session enters one of your queues, a popup alert appears in the lower-left corner of your screen. You can click the View button to see the session details in queue.
Click a queue name to view its sessions. Click a session entry to view details about the support request. To begin supporting the selected session, click the Accept button. Accepting a session switches your view to session view. You can run multiple sessions simultaneously.
Alternatively, you can transfer a session to another queue. Click the Transfer button. Choose Support Teams or Representatives. Select the queue to which you wish to move the session and then click the TRANSFER button.
Session keys
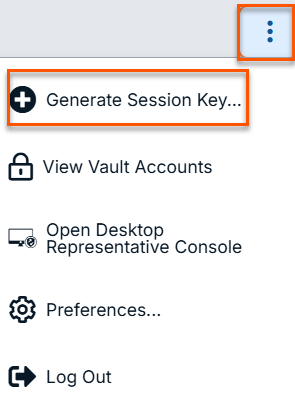
One method to start a support session is for your customer to submit a one-time, randomly generated session key on your public site. Depending upon your account permissions, you can generate session keys for this purpose. Click the Generate Session Key button at the top right of the screen. This opens a menu from which you can edit the session key details.
Set how long you want this session key to remain valid. The expiration time applies only to the length of time the key can be used to start a session and does not affect the length of the session itself.
You can also select the public portal through which you want your customer to enter the session.
Direct your customer either to go to the unique URL or to enter the session key on your public site. Click on the session key or the URL to copy it to your clipboard.
You can also send your customer an email invitation that contains the unique URL.
After running the customer client, the customer appears in your personal queue.
Manage multiple support sessions
If you have multiple support sessions in progress, you have the ability to return to any other session at any time. To return to a system you are already accessing in another session, click on the desired support session at the top of the screen.
When a new session enters one of your queues, a popup alert appears in the lower- left corner of your screen. You can click View to see the session details in queue.
When supporting a mobile client, the web representative console provides View Only support.
