Static routes | RS On-prem
What is the static routes page?
The Static Routes page in the B Series Appliance web interface allows administrators to configure static routes for network traffic, defining paths that network packets should take to reach specific destinations. These routes are manually configured rather than determined automatically by the system.
How is it useful to my organization?
This page is useful for directing traffic to specific subnets or networks, ensuring that the B Series Appliance can communicate effectively with devices on different parts of the network. It provides better control over routing and can improve network performance and security by specifying custom paths for traffic.
How do I access the Static Routes page?
- Use a Chromium-based browser to sign in to your B Series Appliance. The URL is provided in the BeyondTrust welcome email and includes your site URL followed by /appliance.
- From the top menu, click Networking.
The IP configuration page opens and displays by default. - At the top of the page, click Static routes.
The Static routes page displays.
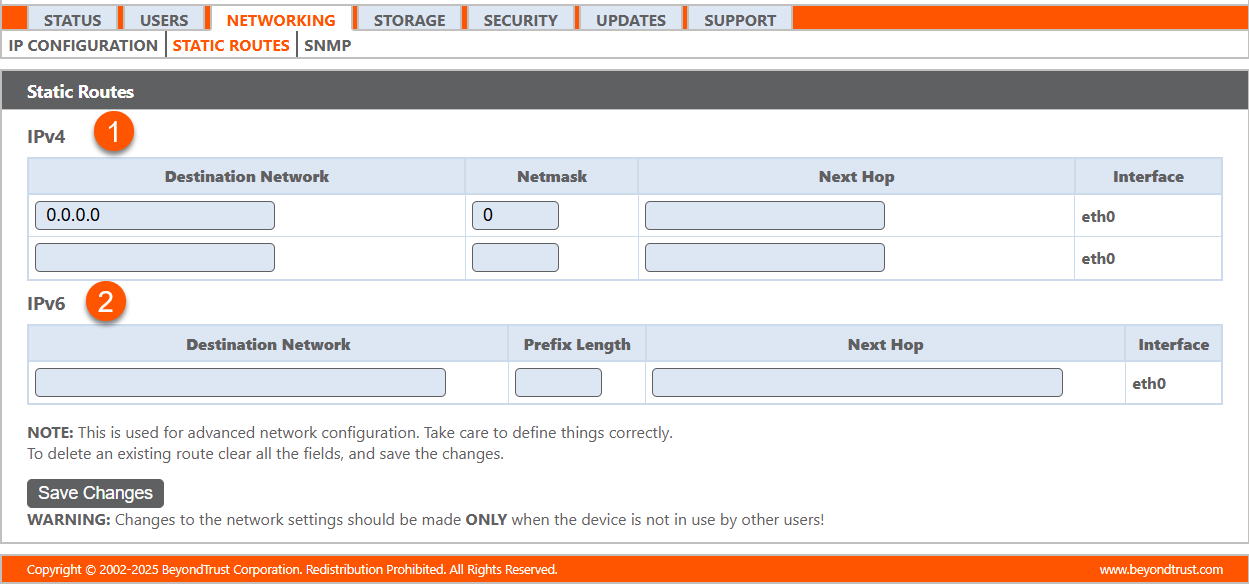
- IPv4: Configure static routes for IPv4 addresses.
- IPv6: Configure static routes for IPv6 addresses.
Configure static routes
Should a situation exist in which two networks are unable to talk to each other, you can establish a static route so that an administrator with a computer on one network can connect through the B Series Appliance to a computer on the other network, provided that the B Series Appliance is in a place where both networks can communicate with it individually.
Only advanced administrators should attempt to set up static routes.
Static routes can also be created in the console. For more information, see Console administration.
- Choose whether you are configuring an IPv4 or IPv6 static route. The two options will have different configuration fields.
- Configure IPv4:
- Destination Network: Enter the IP address of the network to which traffic will be routed.
- Netmask: Enter the subnet mask that corresponds to the destination network.
- Next Hop: Provide the IP address of the next-hop gateway.
- Interface: The network interface through which the B Series Appliance communicates.
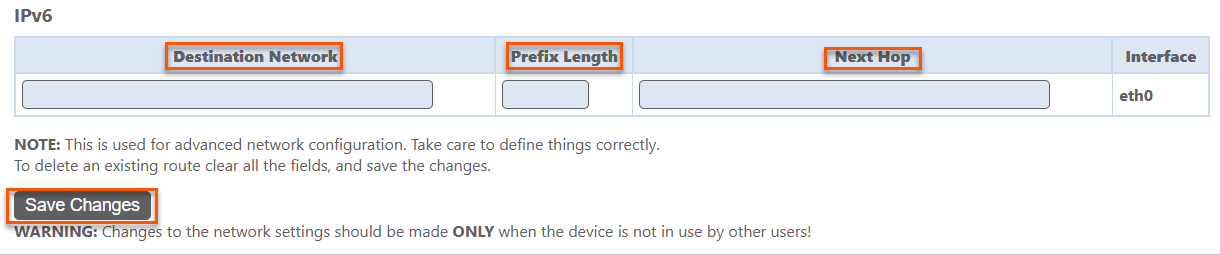
- Configure IPv6:
- Destination Network: Enter the IPv6 address of the network to which traffic will be routed.
- Prefix Length: Specify the prefix length for the destination network (this replaces the netmask in IPv4).
- Next Hop: Provide the IPv6 address of the next-hop gateway.
- Interface: The network interface through which the B Series Appliance communicates.
- Click Save changes to apply your modifications.
Updated 5 months ago
