Session actions | RS for iOS
When you first begin a support session, a new screen opens.
To access session actions on an iPhone, tap the Menu button at the top of the screen.
Elevate the customer client 
Elevate a click-to-chat session to the full customer client, or elevate the full customer client to have administrative rights (requires administrative credentials).
When you elevate a click-to-chat session, you gain access to more robust support features such as screen sharing and file transfer.
Similarly, elevating the full customer client enables you to switch user accounts, deploy Jump Clients in service mode, and control protected windows and UAC dialog boxes. Elevation does not change the user context of the active user and is not the same as logging out the active user and logging back in as an administrator.
Elevation to admin rights is currently available only for Windows and Mac computers. Administrators can set the customer client to automatically request elevation at session initiation on Windows systems.
-
To elevate the customer client, tap the Elevate button.
-
If Prompt Customer is selected, tap OK to request administrative credentials from the customer.
-
Alternatively, tap Elevation Method to choose an elevation method.
-
If you have administrative credentials, select Specific User to provide a username and password yourself, then tap OK to elevate the client.
For more information about manual vs automatic elevation, see the Desktop rep console user guide.
Transfer the session 
Give ownership of a session to another representative. Only the session owner can transfer a session.
-
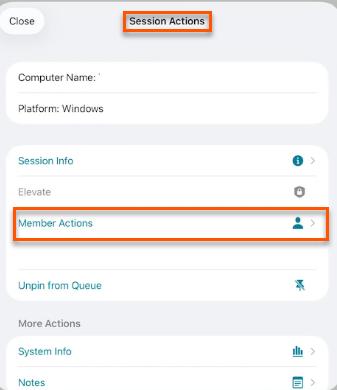
To transfer a session to another team or representative, tap Member Actions.
-
From the menu, select Transfer Session.
-
Browse the list of available teams or search for a specific team name. Select the queue to which you wish to move the session. Then tap the Transfer button.
You may also transfer a session to another representative's personal queue. Tap the Representative button at the top of the menu. Locate the representative by browsing or searching, and select their name. Then tap the Transfer button.
Share a session with another rep
Invite one or more representatives to collaborate on a session. Only the session owner can send invitations. Invitations do not time out as long as you remain the session owner. Multiple active invitations cannot exist for the same user to join the same session.
-
To share a session with another representative, tap Member Actions.
-
From the menu, select Share Session.
-
There are several ways you can invite a representative to join a session.
-
Tap Invite External Representative to share a one-time session with a representative who does not have an account on your appliance.
- On the screen that appears, tap Security Profile. These profiles are created in the administrative interface and determine the level of permission the external representative will have. Tap a profile to read its full description.
- Enter the representative’s name. This name will appear to the customer and in reports.
- Tap Comments to enter details about why this representative has been invited.
- Tap Create Key. A screen containing the session key and direct URL appears.
- If your appliance has more than one public site, tap Public Portal to select the site through which the external rep should connect.
- Provide the session key and URL to the external representative, either by copying these into a message or by tapping Email at the top of the screen.
- The external rep must download and run the representative console; this installation is an abbreviated process of the full representative console installation.
An invited representative has access only to the session tab and has a limited set of privileges. They can never be the session owner. If the primary representative leaves the session and no other licensed representatives are participating, the external representative is automatically logged out.
You can invite more than one external representative to a support session. Be aware that each external representative does allocate a BeyondTrust license.
-
Tap a team name. Select Any Representative to send an invitation to the team queue so that any representative in the selected team can join the session.
-
Tap a team name. Locate the representative with whom you wish to share the session by scrolling through its members.
-
Tap Request Help to target your request at a specific support issue. Only issues that have been configured to allow help requests are displayed in this list. Select the issue for which you wish to request help, then tap Request.
-
Tap Representatives to view a list of available representatives.
Representatives are listed only if they are logged into the console or have extended availability enabled. Depending on your permissions, you see only teams you belong to, or you also see other teams with available representatives. You can send multiple invitations.
When you invite a representative with extended availability enabled, they receive an email notification.
-
-
To revoke an active invitation, tap Cancel Invitation, then tap Cancel.
An invitation is made inactive when one of the following events occurs:
-
The inviting user cancels the invitation
-
The inviting user leaves or transfers ownership of the session
-
The session ends
-
The invited user accepts the invitation
-
The invited user declines the invitation
-
Remove a member from a shared session
If you are the session owner of a shared session, you can remove another user at any time.
-
To remove the customer or another rep from a shared session, tap Member Actions.
-
From the menu, select Remove Member.
-
Select the participant you wish to remove.
-
TapRemove.
Deploy a Support Button 
While in a session, you can deploy a Support Button to the remote computer, providing a quick method for your customer to request support.
-
Tap Deploy Support Button.
-
To edit the description, tap Description and modify the text.
-
Tap Profile to open a list of Support Button profiles from which you can select.
-
Tap Queue to select the queue to which this Support Button should link. Once the Support Button is deployed, your customer can use it to directly enter the queue specified here.
-
To set how long this Support Button should last, tap Expiration. The customer can use this button to start sessions only as long as specified. This time does NOT affect how long the installer remains active or how long a session can last.
-
Tap Add. This creates a Support Button on the remote endpoint. Your customer can now use the Support Button to quickly request support.
-
You also may delete the Support Button from the remote system. Tap Remove Support Button. When prompted to confirm that you want to uninstall the Support Button, tap Yes.
Pin a Jump Client 
While in a session, you can pin a Jump Client to the remote computer, enabling later unattended access to that system.
-
Tap Pin Jump Client. This opens a list of Asset Groups to which you are allowed to pin the Jump Client.
-
From the list of available Asset Groups, select the group to which you wish to pin the Jump Client.
-
Pinning the Jump Client to your personal list of Assets means that only you can access this remote computer through its Jump Client.
-
Pinning the Jump Client to a specific Asset Group to allow access to members of that group.
-
-
If you no longer need unattended access to a remote system, tap Unpin Jump Client to remove it. When prompted to confirm that you want to uninstall the Jump Client, tap Yes.
Close the session 
-
To exit a session, tap End or Hold Session. A popup gives you one or more options.
-
If you are the session owner, End Session closes the session page in your representative console and removes any additional representatives who may be sharing the session. It also uninstalls the customer client from the remote system.
-
If you choose Hold Session, your session page closes, but the session returns to your personal queue. If any additional representatives are sharing the session, they remain in session.
-
If you are not the session owner, Leave Session removes you from the session. The session continues to be supported by the session owner.
-
Updated 3 days ago
