Jump Clients | RS for Desktop
To access an individual computer without end-user assistance, install a Jump Client on that system either from within a session or from the Jump Clients page of the administrative interface. Your account settings determine what Asset permissions you have, including which Asset Groups you can access and which types of Assets you are allowed to use.
Use a Jump Client
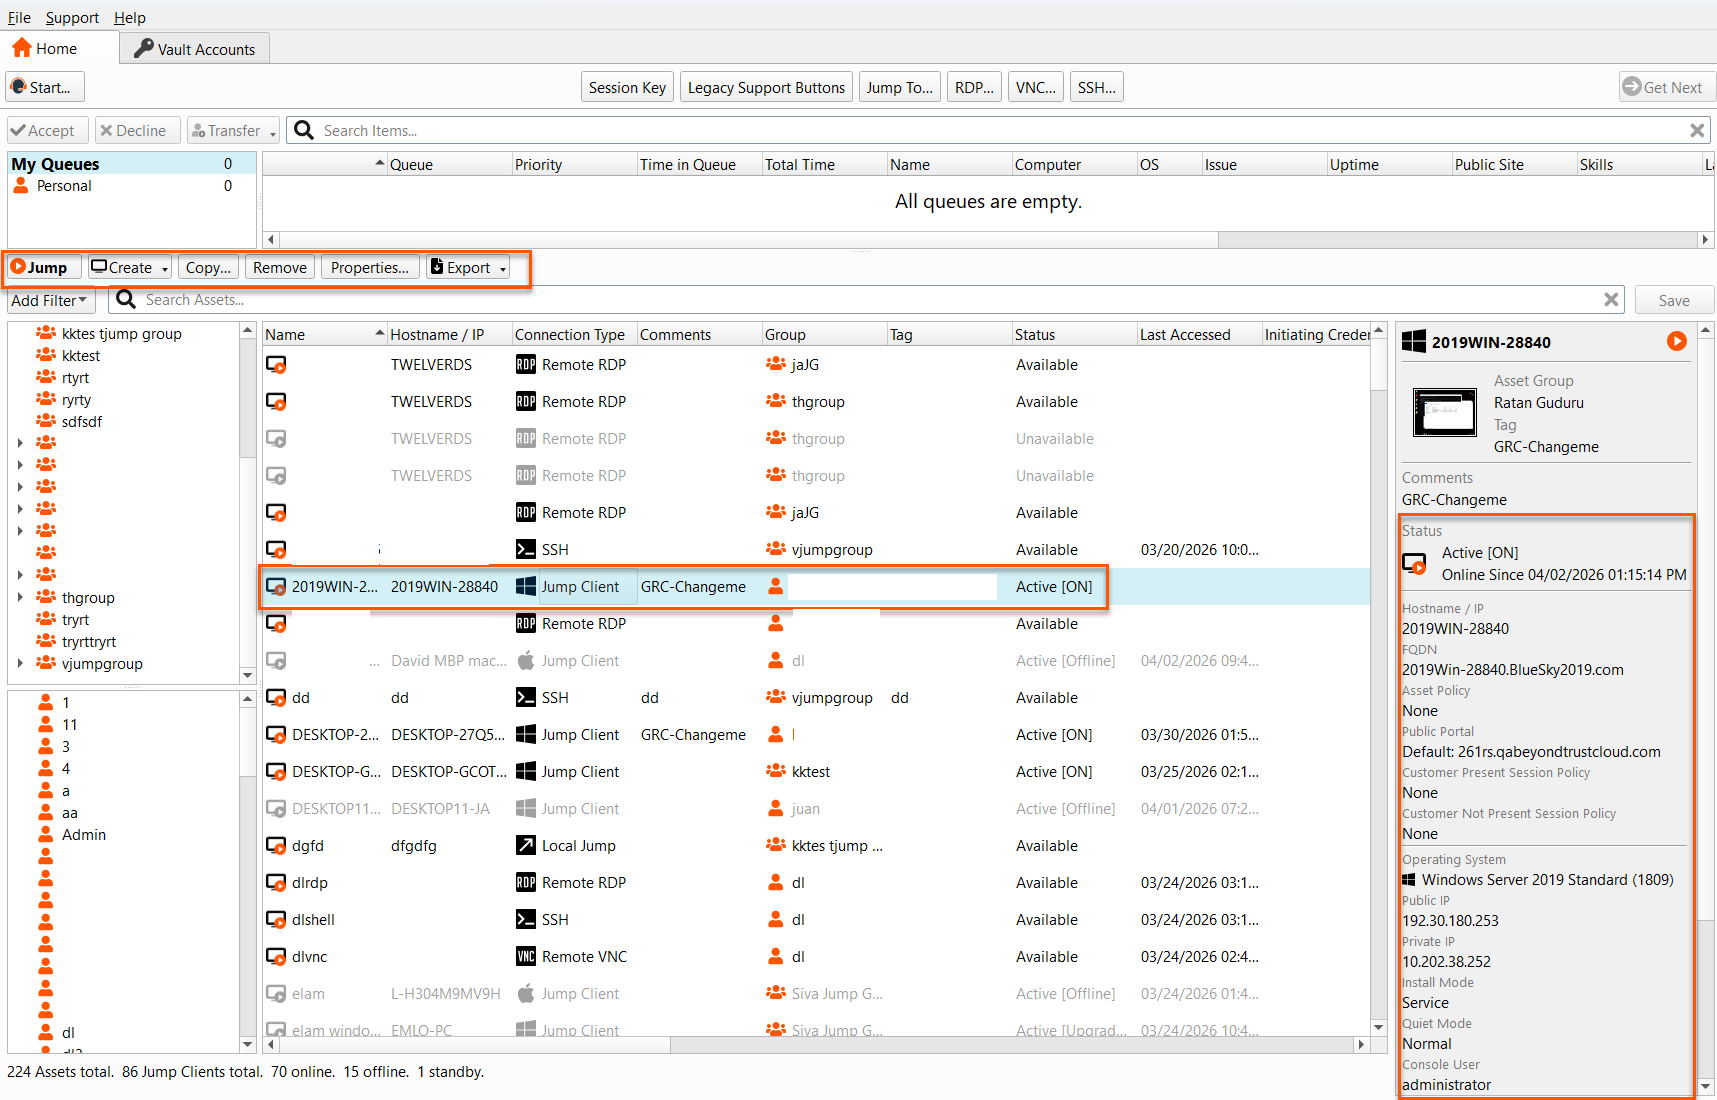
To use a Jump Client to start a session, select the Jump Client from the Asset Management Interface and click the Jump button.
You can select up to ten Assets and start them with a single click. To start a session with all Assets in an Asset Group, right-click the group and select Start a session with n items. The Asset Group must contain no more than ten Assets for this feature to be available.
Each session opens in its own tab. If an Asset requires credentials and does not have predefined credentials, you are prompted to enter them.
- Assets can be set to allow multiple users to simultaneously access the same Asset. If set to Join Existing Session, other users are able to join a session already underway. The original owner of the session receives a note indicating another user has joined the session, but is not allowed to deny them access.
- For more information on simultanous connections, see Simultanous connections on the Assets page and the Asset Policies page.
Sort Jump Clients
To facilitate browsing the Jump Clients list, you may drag the columns into any order you wish, and then sort a column by clicking the column header. The representative console remembers the column order and the sort order the next time the representative console is launched.
Search for a Jump Client
In addition to browsing for Assets, you can search and filter based on multiple fields. Click Add Filter, then select a category. Enter the text you want to filter by into the empty filter. You can add multiple filters as needed.
Enter a string in the search field and then press Enter. To change the fields you are searching, click on the magnifying glass and check or uncheck any of the available fields.

Jump Client details pane
When you select a Jump Client, a details pane appears to the right of the Asset Management Interface. Which details are shown here is determined by the Jump Client Statistics setting in the /login interface as well as by the remote operating system.
If a Jump Client goes offline and does not reconnect to the B Series Appliance for the number of days set by the Jump Client Settings in the /login interface, it is labeled as lost. No specific action is taken on the Jump Client. It is labeled as lost only for identification purposes, so that an administrator can diagnose the reason for the lost connection and take action to correct the situation. In the details pane, you will see the scheduled deletion date if the Jump Client does not come back online.
After a software update, Jump Clients update automatically. The number of concurrent Jump Client upgrades is determined by settings on the /login > Asset Management > Jump Clients page. If a Jump Client has not yet been updated, it is labeled as Upgrade Pending, and its version and revision number appear in the details pane. You can modify and connect to an outdated Jump Client.
Wake-On-Lan (WOL)
Wake-On-Lan (WOL) allows you to remotely turn on or wake up machines configured for WOL from BeyondTrust. In a configured environment, customers can power off their machine but still receive BeyondTrust support, if needed.
WOL is not a BeyondTrust technology. The BeyondTrust software integrates with existing WOL systems. To use WOL through BeyondTrust, the system must have WOL enabled, and the network must allow WOL packets to be sent.
To enable support for WOL in BeyondTrust, turn on the WOL setting in the administrative /login interface under Asset Management > Jump Clients. When enabling the WOL option, keep the following items in mind:
- WOL does not work for wireless clients. A wired network connection is required.
- WOL is supported by the underlying system hardware, which is independent of the installed OS.
To wake an active Jump Client using WOL, right-click an existing Jump Client from within the representative console. Attempt to wake the system by clicking the Attempt to wake up a Jump Client option.
The wake option is only available when selecting a single Jump Client. It is not available when multiple Jump Clients are selected.
WOL packets are sent from other Jump Clients residing on the same network as the target machine. When an active Jump Client is installed or checks-in, it registers its network information with the B Series Appliance, and the B Series Appliance uses this information to determine which Jump Clients are on the same network.
Once attempting to wake up a selected Jump Client, the WOL option greys out for 30 seconds before being able to attempt to send another wake up request. If no other Jump Clients are available on that same network to send WOL packets to the target machine, the rep receives a message indicating that no other Jump Clients are available on the network. When sending a WOL packet, the rep has an advanced option to provide a password for WOL environments requiring a secure WOL password. A WOL packet is a one-way packet, and no confirmation of success is given to the rep besides seeing the client come online in the representative console.
Copy Assets
Jump Clients and other Assets can be copied and assigned to multiple Asset Groups. This allows administrators to apply separate policies and group permissions without needing an additional Jump Client installation or Asset setup on the target endpoint. Users with the necessary permissions can copy Assets by right-clicking the Asset or selecting the option at the top of the Asset tab.
Jump Client properties
Organize and manage existing Assets by selecting one or more Assets and clicking Properties.
Enter a Name for the Asset. This name identifies the item in the session tabs. This string has a maximum of 128 characters.
If Starts Quietly is checked, the customer client does not take focus and remains minimized in the taskbar or dock when a session is started.
Move Assets from one Asset Group to another using the Asset Group dropdown. The ability to move Assets to or from different Asset Groups depends upon your account permissions.
Further organize Assets by entering the name of a new or existing Tag. Even though the selected Assets are grouped together under the tag, they are still listed under the Asset Group in which each is pinned. To move an Asset back into its top-level Asset Group, leave this field blank.
Select the Public Portal through which this Asset should connect. If a session policy is assigned to this public portal, that policy may affect the permissions allowed in sessions started through this Asset. The ability to set the public portal depends on your account permissions.
Assets include a Comments field for a name or description, which makes sorting, searching, and identifying Assets faster and easier.
To set when users are allowed to access this Asset, choose a Asset Policy. These policies are configured by your administrator in the /login interface.
Choose a Session Policy to assign to this Asset. The session policy assigned to this Asset has the highest priority when setting session permissions. The ability to set a session policy depends on your account permissions.
Choose session policies to assign to this Asset. Session policies assigned to this Asset have the highest priority when setting session permissions. The Customer Present Session Policy applies when the end user is determined to be present. Otherwise, the Customer Not Present Session Policy applies.
The way customer presence is determined is set by the Use screen state to detect Customer Presence Asset setting in the /login interface. When enabled, a customer is considered present only if a user is logged in, the system is not locked, and a screen saver is not running. When disabled, a customer is considered present if a user is logged in, regardless of the screen state. Customer presence is detected when the Asset session starts. The session policy used for the session does not change throughout the session, regardless of any changes in the customer's presence while the session is in progress. The ability to set a session policy depends on your account permissions.
When pinning a Jump Client from within a session and customizing its properties beforehand, you also have the option to set when the Jump Client expires. This can be never, at a specific time and date, or after a certain length of time. An expired Jump Client automatically uninstalls from the remote system and is removed from the list in the Jump Client interface.
If you no longer need access to a remote system, select the Jump Client and click the Remove button, or right-click the Jump Client and select Remove from the menu. You may select multiple Jump Clients to remove them all at the same time.
If the remote user manually uninstalls a Jump Client, the deleted item is either marked as uninstalled or completely removed from the list of Assets in the representative console. This setting is available at /login > Asset Management > Jump Clients. If the Jump Client cannot contact the B Series Appliance at the time it is uninstalled, the affected item remains in its offline state. If a Jump Client goes offline and does not reconnect to the B Series Appliance for 180 days, it is automatically uninstalled from the target computer and is removed from the Asset Management Interface.
Use Jump Clients to access unattended Android devices
A persistent connection can be established with an Android device by pinning a Jump Client to the device. This provides the ability to have unattended support sessions. You can deploy Jump Clients using either of the methods below.
- Bandwidth usage and battery life are minimally affected by establishing a persistent connection.
- Persistent connections to an unattended Android device can occur only when the devices have both the BeyondTrust Support Client and BeyondTrust Jump Client App installed from the Google Play Store.
For more information, see Download the support client and Jump Client apps.
Pin an Android Jump Client from the representative console
- While in a support session with the Android device, click on the Pin as Jump Client icon.
- After pinning, the Android device appears as an Asset in the Asset list. If the Pin a Jump Client icon is gray, the Android Jump Client is not installed on the Android device.
- Meanwhile, the BeyondTrust Jump Client app on the device displays the client as pinned, with a date and timestamp.
Options are available for the Jump Client to be disabled if the device relies on battery power or on data to connect.
Email a link from the /login interface to install and Android Jump Client
-
From the /login interface, navigate to Asset Management > Jump Clients > Jump Client Mass Deployment Wizard.
-
Complete the information needed for your Jump Client, such as Asset Group, Public Portal, etc.
-
Click Create.
-
From the Download or Install the Client Now section, choose Android as your platform.
-
Verify that the BeyondTrust Jump Client app is installed on the Android device. If not, navigate to the Google Play App store to download the app.
-
To download the Jump Client to the device, open a browser on the Android device and go to the URL provided by the Mass Deployment Wizard.
- You can also email the URL to the Android device by clicking on the Email link located in the Deploy to Email Recipients section.
- Android prevents the application from being fully functional until the user opens the app at least once. This should be done after the application has been installed, and before attempting to pin a session to it.
Updated 5 days ago
