Schedule | RS On-prem
What is a public portal schedule?
A public portal schedule defines specific time periods during which a public portal is accessible to customers for initiating support sessions.
How is a public portal schedule useful?
Scheduling allows administrators to control when customers can access a public portal, ensuring availability aligns with support team hours or other organizational requirements.
How do I access the Schedule page?
- Use a Chromium-based browser to sign in to your Remote Support URL.
This URL is provided in the BeyondTrust welcome email and includes your site URL followed by /login. - From the left menu, click Public Portals.
The Public Sites page opens and displays by default. - At the top of the page, click Schedule.
The Schedule page displays.
-
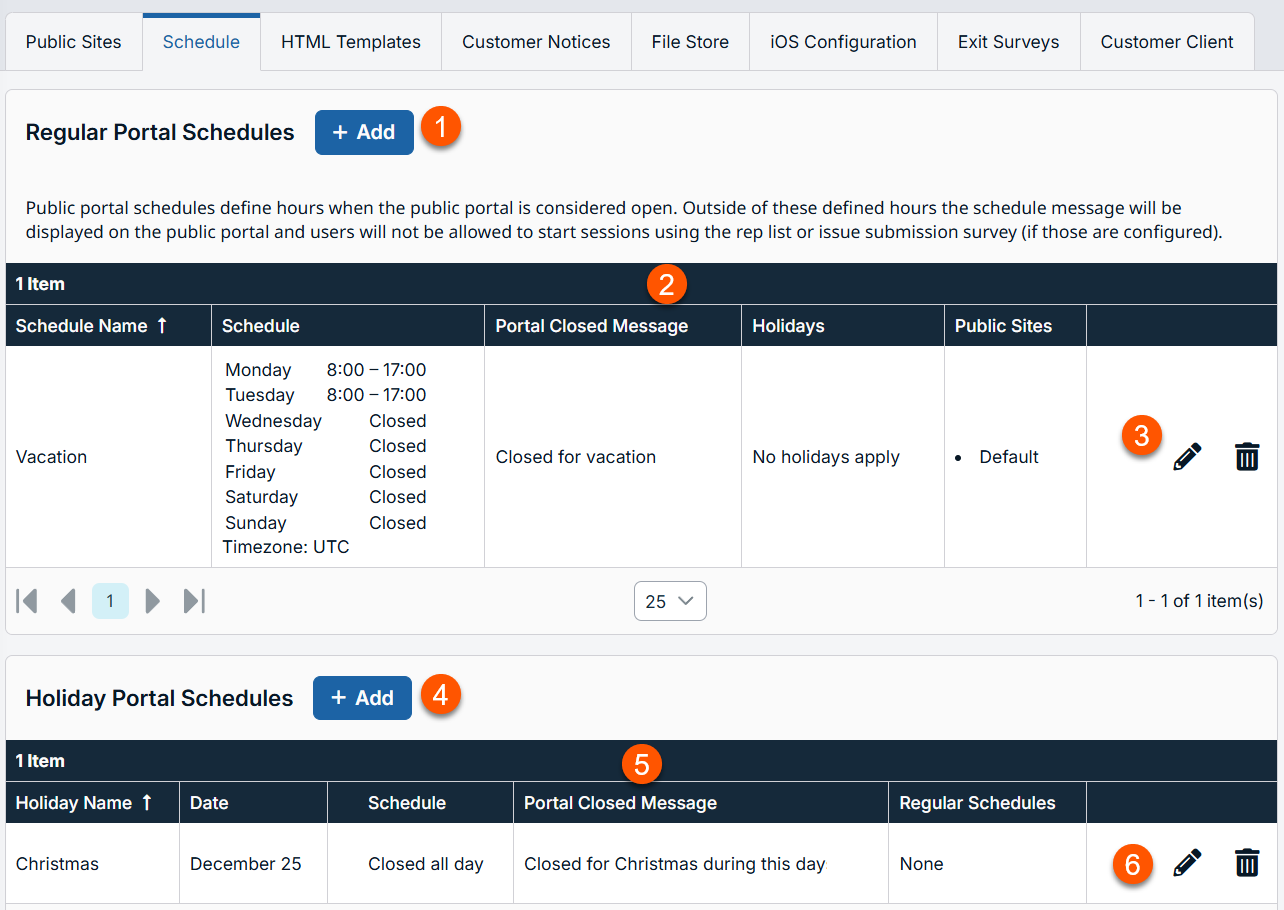
Add: Adds a new regular portal schedule.
-
Regular Portal Schedule columns: List the Regular Portal Schedule columns.
Regular Schedule columns
- Schedule Name: Unique name of the regular schedule.
- Schedule: Defines when customers can initiate support sessions.
- Portal Closed Message: Displays text outside of regularly scheduled hours.
- Holidays: Selects the holiday schedule.
- Public Sites: Lists if the schedule applies to the public site.
-
Portal Schedule list options: Edit or delete a regular portal schedule.
-
Add: Adds a new holiday portal schedule.
-
Holiday Portal Schedule columns: List Holiday Portal Schedule columns.
Holiday Portal Schedule columns
- Holiday Name: Unique name of the holiday.
- Schedule: Defines when customers can initiate support sessions.
- Date: Dates of the holiday.
- Portal Closed Message: Displays text outside of regularly scheduled hours.
- Regular Schedules: Select the schedule by using checkboxes.
-
Holiday Portal list options: Edit or delete a holiday portal schedule.
Regular portal schedules
Configure one or more schedules of regular business hours for your public portals. Outside of these scheduled hours, session start methods other than session keys are removed from your public site, and a portal closed message displays on your public site.
Add new schedule
- Use a Chromium-based browser to sign in to your Remote Support URL.
This URL is provided in the BeyondTrust welcome email and includes your site URL followed by /login. - From the left menu, click Public Portals.
The Public Sites page opens and displays by default. - At the top of the page, click Schedule.
The Schedule page displays. - Click Add.
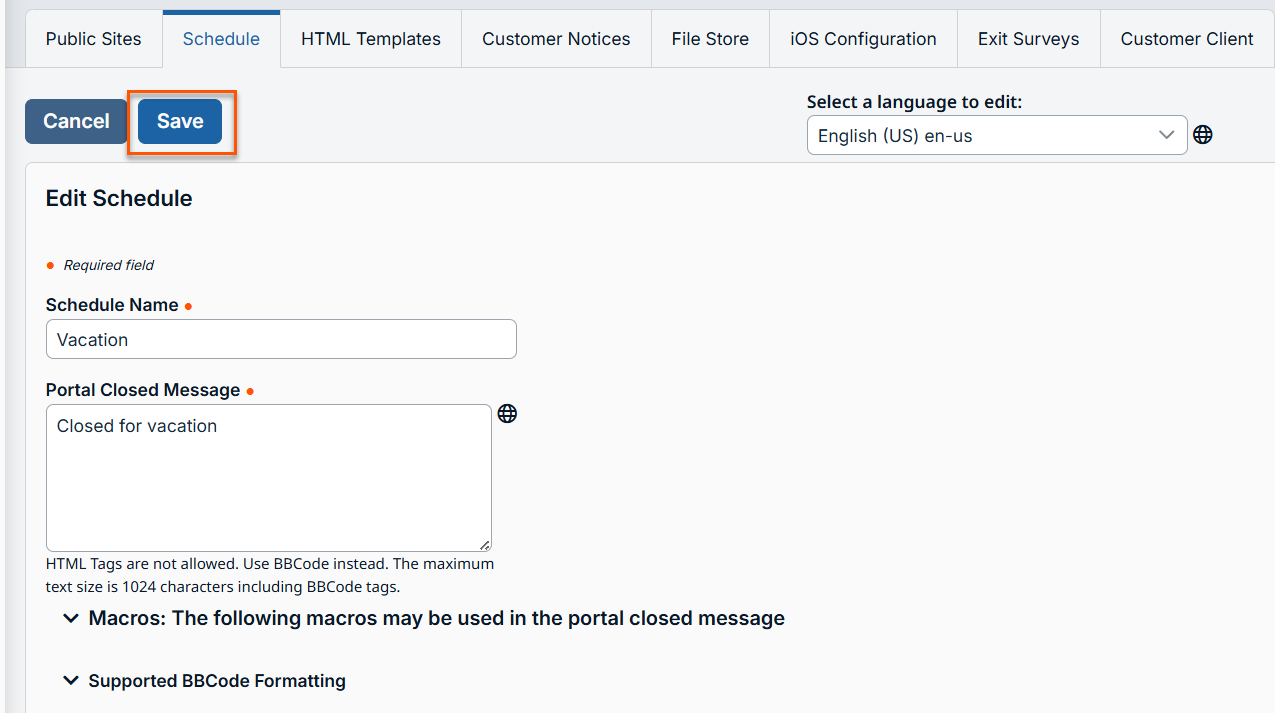
- For Schedule name, create a unique name to help identify this schedule.
- For Portal Closed Message, create the text to display outside of regularly scheduled hours. Messages can contain macros indicating the next open business day and time. You can use macros, as well as BBCode to do some low level formatting, such as adding bold, colors, or hyperlinks. Click on Macros or BBCode to display a list of codes and their resulting applications.
- In the Schedule section, set a schedule to define when customers can initiate support sessions. Set the time zone you want to use for this schedule, and then add one or more schedule entries. For each entry, set the start day and time and the end day and time.
If, for instance, the time is set to start at 8 am and end at 5 pm, a customer can start a session at any time during this window. Sessions already in progress are allowed to continue past the schedule end. If session keys are enabled, a representative can send a customer a session key to start a session even outside of the public site schedule. - For the Apply to the following public sites section, if you have more than one public site, select which should follow this schedule.
- For Use these Holidays section, select any created holidays which should apply to this schedule. Associations made here also apply to the holiday schedule settings.
Edit a schedule
- Use a Chromium-based browser to sign in to your Remote Support URL.
This URL is provided in the BeyondTrust welcome email and includes your site URL followed by /login. - From the left menu, click Public Portals.
The Public Sites page opens and displays by default. - At the top of the page, click Schedule.
The Schedule page displays. - From the Regular Schedule Portal table, select a schedule.
- Click the pencil to edit the schedule.
- Make the necessary changes and click Save.
Delete a schedule
- Use a Chromium-based browser to sign in to your Remote Support URL.
This URL is provided in the BeyondTrust welcome email and includes your site URL followed by /login. - From the left menu, click Public Portals.
The Public Sites page opens and displays by default. - At the top of the page, click Schedule.
The Schedule page displays. - From the Regular Schedule Portal table, select a schedule.
- Click the trash can to delete the schedule.
- A confirmation dialog box displays, click Yes.
Holiday portal schedules
When a holiday schedule is applied to a regular schedule, the hours set in the holiday schedule override the normal business hours. Holiday schedules can be used to set days off, days with abbreviated hours, or even days with extended hours.
Add new holiday schedule
- Use a Chromium-based browser to sign in to your Remote Support URL.
This URL is provided in the BeyondTrust welcome email and includes your site URL followed by /login. - From the left menu, click Public Portals.
The Public Sites page opens and displays by default. - At the top of the page, click Schedule.
The Schedule page displays. - Click Add.
- For Holiday name, create a unique name to help identify this schedule.
- For Date, enter the date when this holiday schedule should apply.
- For Portal Closed Message, create the text to display outside of regularly scheduled hours. Messages can contain macros indicating the next open business day and time. You can use macros, as well as BBCode to do some low level formatting, such as adding bold, colors, or hyperlinks. Click on Macros or BBCode to display a list of codes and their resulting applications.
- In the Schedule section, set either select Closed all day or set a start time and end time.
- For the Apply to the following portal schedules section, select any created regular schedules to which this holiday schedule should apply. Associations made here also apply to the regular portal schedule settings.
For more information, see Notices and business hours.
Edit a holiday schedule
- Use a Chromium-based browser to sign in to your Remote Support URL.
This URL is provided in the BeyondTrust welcome email and includes your site URL followed by /login. - From the left menu, click Public Portals.
The Public Sites page opens and displays by default. - At the top of the page, click Schedule.
The Schedule page displays. - From the Holiday Schedule Portal table, select a schedule.
- Click the pencil to edit the schedule.
- Make the necessary changes and click Save.
Delete a holiday schedule
- Use a Chromium-based browser to sign in to your Remote Support URL.
This URL is provided in the BeyondTrust welcome email and includes your site URL followed by /login. - From the left menu, click Public Portals.
The Public Sites page opens and displays by default. - At the top of the page, click Schedule.
The Schedule page displays. - From the Holiday Schedule Portal table, select a schedule.
- Click the trash can to delete the schedule.
- A confirmation dialog box displays, click Yes.
Updated 14 days ago
