Shell | RS for Desktop
With Shell shortcuts, quickly connect to an SSH-enabled or Telnet-enabled network device to use the command line feature on that remote system. For example, run a standardized script across multiple systems to install a needed patch, or troubleshoot a network issue.
To perform a Jump through BeyondTrust, you must have access to a Gateway with Jump enabled, and you must have the user account permission Allowed Connect Types: SSH.
To start a Shell Session, open the SSH dialog from:
- The Support menu of the representative console
- The SSH button at the top of the representative console
- Or Create a Jump in the web rep console
Your Gateway may be configured for provisioned connection only.
-
From the Gateway dropdown, select the network that hosts the computer you wish to access. If you generally access the same Gateway, check Remember as my preferred choice. Select the provisioned system you wish to access.
-
Alternatively, your Gateway may be configured for open access or limited access.
-
From the Gateway dropdown, select the network that hosts the computer you wish to access. If you generally access the same Gateway, check Remember as my preferred choice.
-
To access a provisioned system, check Use Provisioned and select the system from the dropdown.
-
Alternatively, enter the Hostname / IP of the system you wish to access. If your Gateway is configured for limited access, the remote system must be in the delimited IP address range.
-
You can choose to Send Keep-Alive Packets to keep idle sessions from ending. Enter the number of seconds to wait between each packet sent.
-
Choose the Protocol to use, either SSH or Telnet.Port automatically switches to the default port for the selected protocol but can be modified to fit your network settings. Select the Terminal Type, either xterm or VT100.
-
Click SSH.
If attempting to connect to an SSH device without a cached host key, you receive an alert that the server's host key is not cached and that there is no guarantee that the server is the computer you think it is.
If you choose Save Key and Connect, then the key is cached on the Gateway's host system so that future attempts to connect to this system do not result in this prompt. Connect Only starts the session without caching the key, and Abort ends the Shell Session.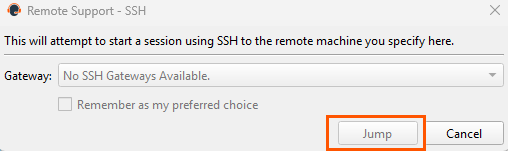
-
If you connect to an SSH device with keyboard interactive MFA enabled, there is a secondary prompt for input.
-
When you connect to a remote device, a command shell session immediately starts with that device. If you connect to a provisioned SSH device with an unencrypted key or with an encrypted key whose password has been cached, you are not prompted for a password. Otherwise, you are required to enter a password. You can then send commands to the remote system.
Shell shortcuts
With Shell shortcuts, quickly connect to an SSH-enabled or Telnet-enabled network device to use the command line feature on that remote system. For example, run a standardized script across multiple systems to install a needed patch, or troubleshoot a network issue.
Create a Shell shortcut
- To create a Shell shortcut, click the Create button in the Asset Management Interface. From the dropdown, select SSH. Shell Assets appear in the Asset Management Interface along with Jump Clients and other types of Assets.
Shell shortcuts are enabled only if their Gateway is configured for open or limited connection.
- Organize and manage existing Assets by selecting one or more Assets and clicking Properties.
To view the properties of multiple Assets, the items selected must be all the same type (e.g., all Jump Clients, all Remote Jumps, etc.). To review properties of other types of Assets, see the appropriate section in this guide.
- Enter a Name for the Asset. This name identifies the item in the session tabs. This string has a maximum of 128 characters.
- From the Gateway dropdown, select the network that hosts the computer you wish to access. The representative console remembers your Gateway choice the next time you create this type of Asset. Enter the Hostname / IP of system you wish to access.
- Choose the Protocol to use, either SSH or Telnet.
- Port automatically switches to the default port for the selected protocol but can be modified to fit your network settings.
- Enter the Username.
- Select the Terminal Type, either xterm or VT100.
- You can also select to Send Keep-Alive Packets to keep idle sessions from ending. Enter the number of seconds to wait between each packet send.
- Move Assets from one Asset Group to another using the Asset Group dropdown. The ability to move Assets to or from different Asset Groups depends upon your account permissions.
- Further organize Assets by entering the name of a new or existing Tag. Even though the selected Assets are grouped together under the tag, they are still listed under the Asset Group in which each is pinned. To move an Asset back into its top-level Asset Group, leave this field blank.
- Select the Public Portal through which this Asset should connect. If a session policy is assigned to this public portal, that policy may affect the permissions allowed in sessions started through this Asset. The ability to set the public portal depends on your account permissions.
Assets include a Comments field for a name or description, which makes sorting, searching, and identifying Assets faster and easier. - To set when users are allowed to access this Asset, choose a Asset Policy. These policies are configured by your administrator in the /login interface.
- Choose a Session Policy to assign to this Asset. The session policy assigned to this Asset has the highest priority when setting session permissions. The ability to set a session policy depends on your account permissions.
Use a Shell shortcut
- To use an Asset to start a session, select the Asset from the Asset Management Interface and click the Jump button.
- If attempting to connect to an SSH device without a cached host key, you receive an alert that the server's host key is not cached and that there is no guarantee that the server is the computer you think it is.
- If you choose Save Key and Connect, then the key is cached on the Gateway's host system so that future attempts to connect to this system do not result in this prompt. Connect Only starts the session without caching the key, and Abort ends the Shell Session.
- If you connect to an SSH device with keyboard interactive MFA enabled, there is a secondary prompt for input.
- When you connect to a remote device, a command shell session immediately starts with that device. If you connect to a provisioned SSH device with an unencrypted key or with an encrypted key whose password has been cached, you are not prompted for a password. Otherwise, you are required to enter a password. You can then send commands to the remote system.
Updated about 1 month ago
