
Install Entitle agent with HashiCorp Vault on AWS EKS | Entitle
This guide installs the Entitle agent on an AWS EKS cluster using HashiCorp Vault as the secret store (kmsType="hashicorp_vault").
By the end of this installation, you have a working Entitle agent on your EKS cluster that stores all its integration secrets in your HashiCorp Vault (Community, Enterprise, or HCP). No AWS Secrets Manager, no IAM policy or role, and no IAM OIDC provider is required.
The agent supports two Vault authentication modes:
- Vault JWT (workload identity) — recommended, and the main path in this guide. The agent logs in to Vault with its Kubernetes service account token, so no long-lived Vault token is stored anywhere.
- Static Vault token — a pre-provisioned Vault token embedded in the connection string. See Alternative: static Vault token.
Prerequisites
- Outbound connections permitted per the Entitle agent network access requirements.
- Helm v3, kubectl, and the AWS CLI.
- An EKS cluster you have admin access to.
- A HashiCorp Vault instance reachable from the cluster, and admin access to it (the
vaultCLI withVAULT_ADDRandVAULT_TOKENset). On Vault Enterprise or HCP, also exportVAULT_NAMESPACE=<your namespace>, for exampleadmin. - For JWT mode, Vault must be able to reach the cluster's public OIDC issuer URL (
https://oidc.eks.<region>.amazonaws.com/id/<id>) to fetch its discovery document and signing keys.
Process
Generate an agent token
In Entitle, navigate to Org settings > Tokens. Click Add under Agent tokens . Reveal and copy the token for later use.
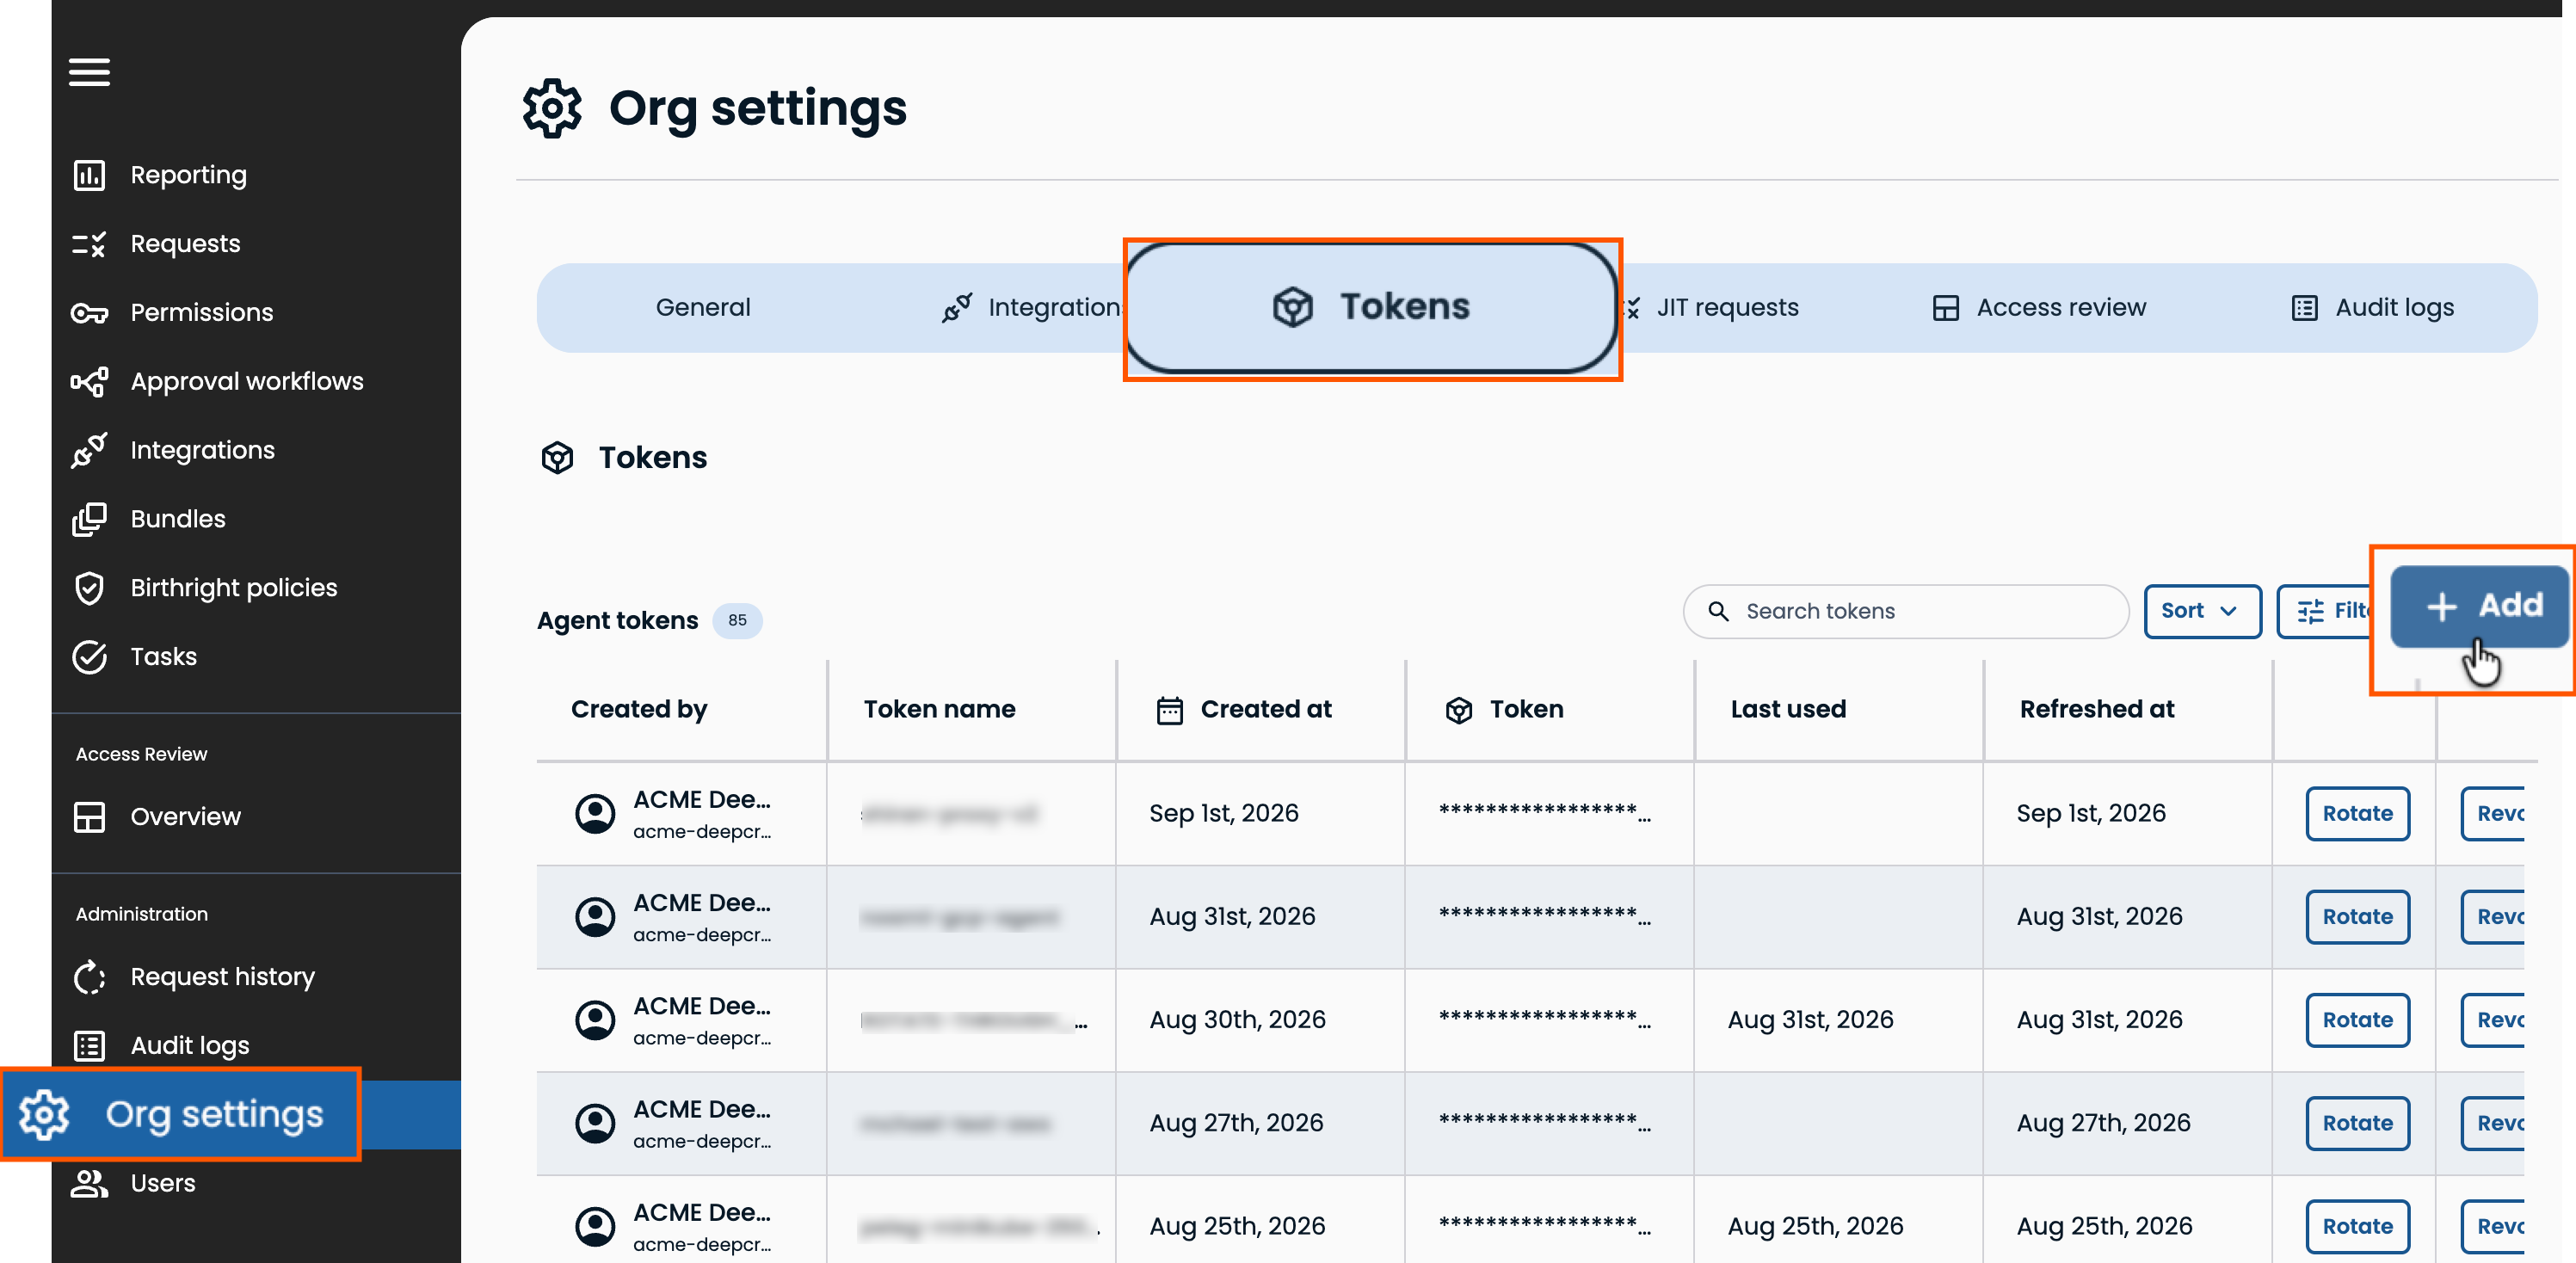
Each token is tied to a single agent, unless the agents are fully redundant. For redundancy architecture guidance, contact BeyondTrust.
Add the Helm repositories
Add the Datadog and Entitle Helm repositories to your cluster.
helm repo add datadog https://helm.datadoghq.com
helm repo add entitle https://anycred.github.io/entitle-charts/
Set variables
export CLUSTER_NAME=<YOUR_CLUSTER_NAME>
export TOKEN=<TOKEN_FROM_ENTITLE_ORG_SETTINGS>
export ORG_NAME=<YOUR_ORGANIZATION_NAME>
export NAMESPACE=entitle
export VAULT_HOST=<YOUR_VAULT_HOST>
export VAULT_PORT=8200
export HASHICORP_NAMESPACE=admin   # Vault Enterprise/HCP only — ignore for Vault Community
export HASHICORP_KV_MOUNT=Entitle| Variable | Value |
|---|---|
CLUSTER_NAME | Your EKS cluster name. |
TOKEN | The Entitle agent token from Step 1. |
ORG_NAME | Your organization's name. |
NAMESPACE | The agent's namespace. Changing this from entitle is strongly discouraged. |
VAULT_HOST / VAULT_PORT | Your Vault's address as reachable from inside the cluster. |
HASHICORP_NAMESPACE | Vault Enterprise or HCP namespace, commonly admin. Not used on Vault Community. |
HASHICORP_KV_MOUNT | The Vault mount path where the KV engine is created and secrets are stored. |
Update kubeconfig
aws eks update-kubeconfig --name $CLUSTER_NAME --region us-east-2 # or your regionGet the cluster's OIDC issuer URL
Vault uses this URL as its OIDC discovery URL when it validates the agent's service account JWT.
export ISSUER_URL=$(aws eks describe-cluster --name "${CLUSTER_NAME}" --query "cluster.identity.oidc.issuer" --output text)
echo "${ISSUER_URL}"

# Confirm the issuer's OIDC metadata is publicly reachable. Vault must be able to reach it too,
# so run this from a host on the same network as Vault where possible.
curl -fsS "${ISSUER_URL}/.well-known/openid-configuration" >/dev/null && echo "issuer reachable"No IAM OIDC provider is needed. That applies only to IRSA, which the AWS Secrets Manager path uses. Do not run
eksctl utils associate-iam-oidc-providerfor this guide.
Configure Vault for JWT auth
Run the following with the vault CLI pointed at your Vault, adjusting ttl and max_ttl as needed.
# 1. Mount JWT auth at a dedicated path
vault auth enable -path=jwt-entitle jwt

# 2. Configure it with this cluster's OIDC issuer URL (from Step 5)
vault write auth/jwt-entitle/config \
    oidc_discovery_url="${ISSUER_URL}" \
    default_role="entitle-agent"

# 3. Confirm the config is updated
vault read auth/jwt-entitle/config

# 4. Create the ACL policy
vault policy write entitle-agent - <<'EOF'
path "sys/mounts"         { capabilities = ["read"] }
path "sys/mounts/Entitle" { capabilities = ["create", "update"] }
path "Entitle/*"          { capabilities = ["create", "read", "update", "delete", "list"] }
EOF

# 5. Create the role
vault write auth/jwt-entitle/role/entitle-agent - <<EOF
{
  "role_type": "jwt",
  "user_claim": "sub",
  "bound_subject": "system:serviceaccount:${NAMESPACE}:entitle-agent-sa",
  "bound_audiences": "https://kubernetes.default.svc",
  "bound_claims": {"/kubernetes.io/namespace": "${NAMESPACE}"},
  "policies": "entitle-agent",
  "ttl": "1h",
  "max_ttl": "1h"
}
EOFThe
sys/mountsread capability in command 4 lets agent versions 26.08 and later auto-detect your KV engine version. Older agents work without it.
If you set
HASHICORP_KV_MOUNTto something other thanEntitle, update the policy paths to match your custom mount path instead ofsys/mounts/EntitleandEntitle/*.
On EKS, the service account token audience is
https://kubernetes.default.svc, unlike AKS and GKE, where it is the OIDC issuer URL. Vault 1.17 and later requirebound_audienceswhenever the JWT carries anaudclaim.
The agent creates or reuses a KV v2 secrets engine mounted at Entitle/ and keeps all its secrets under it.
Install the Helm chart
helm repo update entitle && \
helm upgrade --install entitle-agent entitle/entitle-agent \
    --set platform.mode="aws" \
    --set kmsType="hashicorp_vault" \
    --set datadog.datadog.tags={company:${ORG_NAME}} \
    --set agent.token="${TOKEN}" \
    --set-string externalKmsParams.hashicorp.connectionString="https://${VAULT_HOST}:${VAULT_PORT}?role=entitle-agent&auth_mount=jwt-entitle&namespace=${HASHICORP_NAMESPACE}&kv_mount=${HASHICORP_KV_MOUNT}" \
-n ${NAMESPACE} --create-namespaceIf you run Vault Community, remove
&namespace=${HASHICORP_NAMESPACE}from the connection string.
Connection string query parameters:
| Parameter | Default | Notes |
|---|---|---|
role | — | Required for JWT mode. The Vault role created in Step 6. |
auth_mount | jwt | The JWT auth mount path, jwt-entitle in this guide. |
namespace | none | Vault Enterprise and HCP only, for example &namespace=admin. Omit for Vault Community. |
kv_mount | Entitle | Custom KV mount path, agent 26.08 and later. The agent creates single-segment names if they don't exist. Nested paths such as team/entitle/kms assume a pre-created, customer-owned engine. |
jwt_path | in-pod service account token | Leave unset. The default is correct on EKS. Do not point it at the IRSA token file /var/run/secrets/eks.amazonaws.com/serviceaccount/token. |
If your Vault uses a certificate from a private CA, provide the CA bundle through the chart's
customCavalues so the agent trusts it.
Verify the installation
On startup, the agent's healthcheck init container performs a full secret write, read, and delete cycle against Vault, plus Kafka and S3 network checks, before the agent starts.
kubectl -n ${NAMESPACE} get pods           # agent pod reaches Running 2/2
kubectl -n ${NAMESPACE} logs -l app.kubernetes.io/name=entitle-agent -c entitle-agent-healthcheck --tail=50
# Look for "HashicorpVaultValidator ran successfully"
On the Vault side:
vault secrets list | grep Entitle
# The "Entitle/" engine is described as "Secret engine created and used by Entitle"
Troubleshoot an invalid audience error
If the agent fails to log in to Vault with invalid audience, confirm the cluster's actual token audience and re-run command 5 from Step 6 with that value in bound_audiences.
kubectl -n ${NAMESPACE} create token entitle-agent-sa | cut -f2 -d. | base64 -d 2>/dev/null | jq .aud
# Typical EKS output: ["https://kubernetes.default.svc"]
Alternative: static Vault token
If you prefer not to configure JWT auth, you can pass the agent a pre-provisioned Vault token directly in the connection string. Create the token with the same entitle-agent ACL policy from Step 6 — only command 4 is needed — then install with:
helm repo update entitle && \
helm upgrade --install entitle-agent entitle/entitle-agent \
    --set platform.mode="aws" \
    --set kmsType="hashicorp_vault" \
    --set datadog.datadog.tags={company:${ORG_NAME}} \
    --set agent.token="${TOKEN}" \
    --set-string externalKmsParams.hashicorp.connectionString="https://<VAULT_TOKEN>@${VAULT_HOST}:${VAULT_PORT}" \
    -n ${NAMESPACE} --create-namespace
Skip Steps 5 and 6, except policy command 4. Verify as described in Step 8.
The static token is stored in a Kubernetes secret in the agent's namespace. Use JWT mode where possible.
Updated 16 days ago
