GCP PostgreSQL | Entitle
What is GCP PostgreSQL?
Google Cloud Platform (GCP) PostgreSQL is a managed relational database service built on the open-source PostgreSQL engine. It allows users to deploy scalable, secure databases without managing the underlying infrastructure. The service includes built-in support for high availability, automated backups, replication, point-in-time recovery, and encryption.
How is this integration useful?
Integrating GCP PostgreSQL with Entitle helps eliminate manual provisioning of database roles and credentials, reduces the risk of over-permissioned accounts, and ensures that access to sensitive data is granted only when needed and only to authorized users. With auditability and policy enforcement built in, teams can maintain least-privilege access across GCP PostgreSQL environments while improving operational efficiency and compliance posture.
With this integration, Entitle can manage the following resource types in GCP Postgres SQL:
- Databases
- Schemas
- Servers
- Tables
End-user experience
-
Upon receiving a JIT (Just-In-Time) access using Entitle, the employee will receive a pre-made command for accessing GCP PostgreSQL via Teams/Slack.
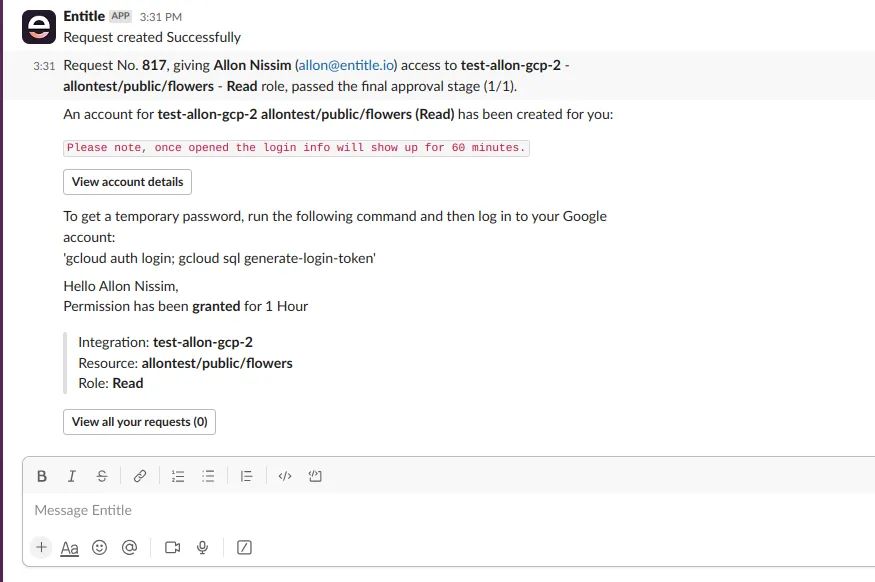
-
The employee will log in to GCP and create a login password with the following command:
gcloud auth login; gcloud sql generate-login-token -
The employee will connect to PostgreSQL by following the instructions given in the Connect using the Cloud SQL Auth Proxy Google Cloud guide.
Prerequisites
- Make sure you have Entitle's agent installed before proceeding with this guide.
For further details, see Entitle's agent guide.
- You need a Google organization owner account.
- Access to your GCP PostgreSQL service account in GCP, as well as service account keys in both GCP and Postgres.
Should you need to allowlist this integration, these are the IP addresses from which Entitle's service reaches the integration:
- Entitle EU (Cloud deployment)
- 34.243.199.171
- 54.216.133.226
- Entitle US (Pathfinder deployment)
- 52.45.229.219
- 54.88.235.213
- 3.224.15.134
- Entitle CA (Pathfinder deployment)
- 35.182.218.208
- 15.156.179.153
Create a service account in GCP
If you're using an existing service account, proceed to step 5 in the following section.
-
Navigate to the GCP instance console. Make sure the project you wish to create a service account for is the appropriate one.
-
In the search bar, search for Service Accounts and select it from the results.

-
On the Service Accounts screen, click Create Service Account.

-
In the Service account details: Choose a service account ID or otherwise choose a name of your choice, and this field will be filled in automatically. Click Create and continue.
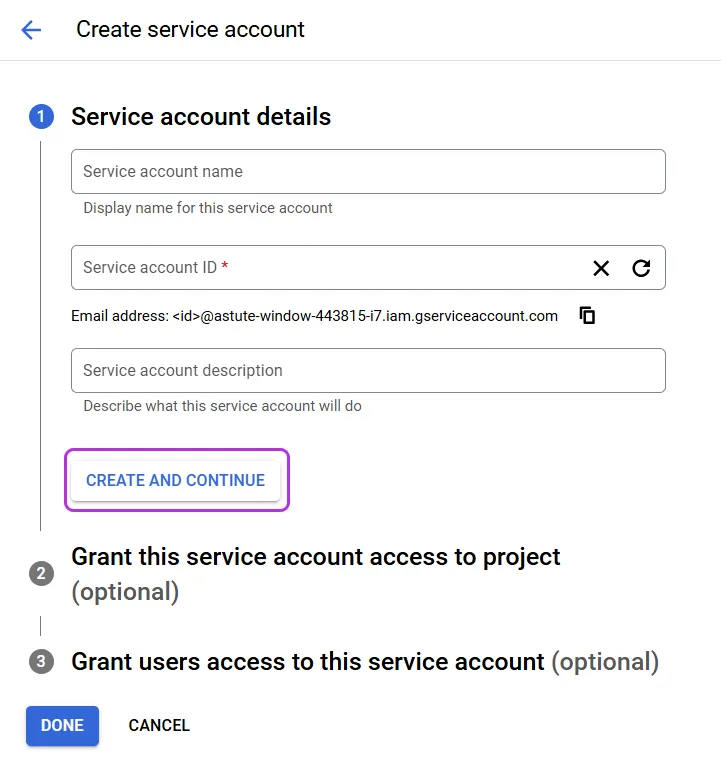
-
In Grant this service account access to project, search for the following roles in the list and add them one after another:
-
Cloud SQL Admin
-
Project IAM Admin

-
-
Click Done to create a new service account or save an existing one.
Create a key for the service account in GCP
-
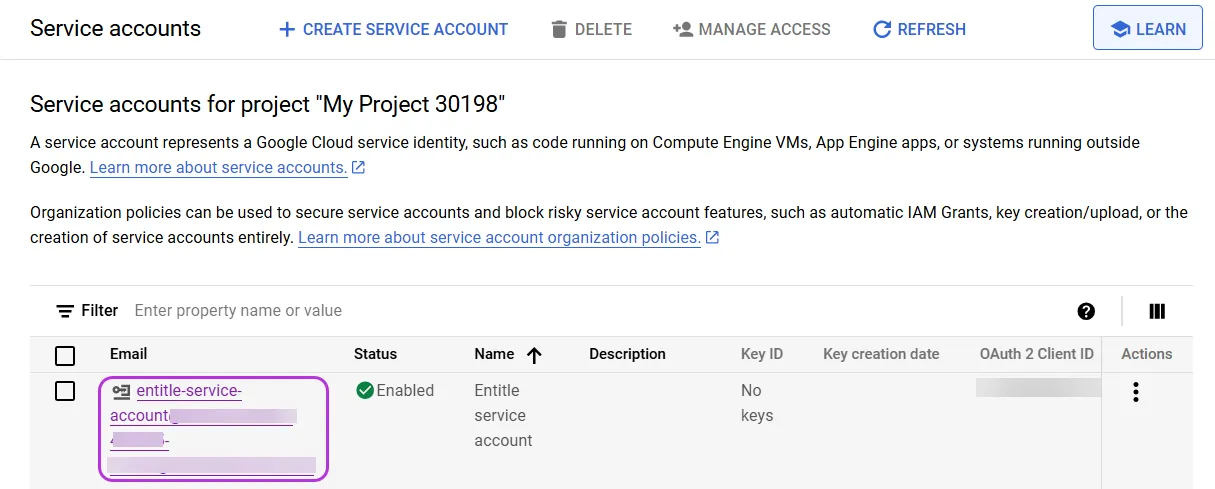
Navigate to the Service Accounts screen in the GCP instance console.
-
Click on your newly created service account email.
-
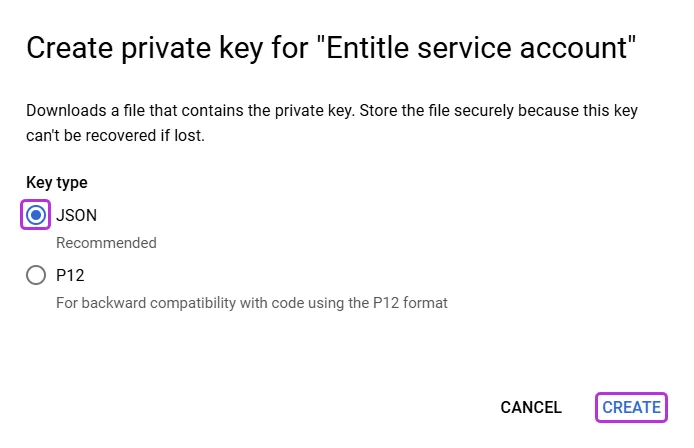
Click Keys > Add key > Create new key.
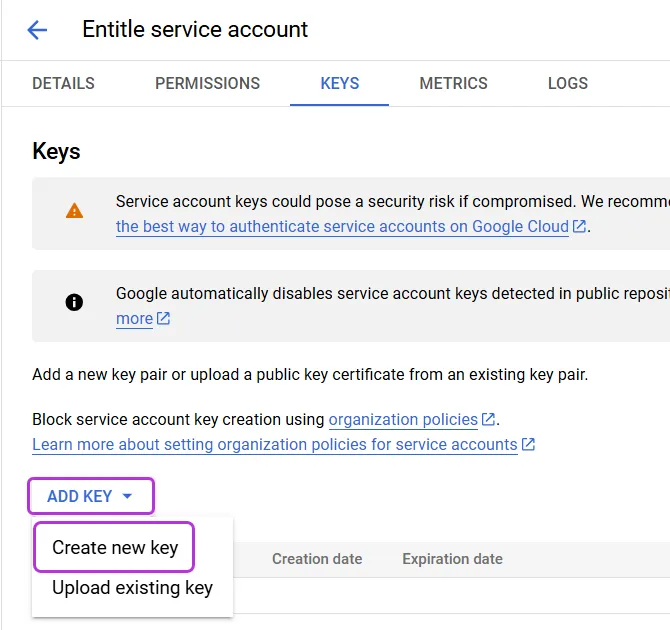
-
In the new pop-up window, choose JSON from the key type options and click Create. The key will download to your computer.
Configure domain-wide delegation
Your service account needs to have domain-wide delegation on certain scopes.
-
Go to the Manage Domain-Wide Delegation page
-
Click Add new.

-
In the Client ID field, enter the 21-digit number obtained from the key JSON file under the
client_idfield. -
In the OAuth scopes field, enter the following scopes:
https://www.googleapis.com/auth/admin.directory.user.readonly,
https://www.googleapis.com/auth/admin.directory.group.readonly
Create a service account in Postgres
- Connect to any database (users are cluster-general) using the GCP console or any other Postgres client. If you're using the GCP console, run:
gcloud sql connect <database-name> --user=postgres --quiet - Run the following query on your Postgres cluster, after you have replaced the following fields with your credentials:
service_account_entitle: You may leave it or replace it as you wish.PASSWORD: Your password (appears once in the query).
CREATE ROLE service_account_entitle WITH LOGIN CREATEROLE INHERIT CONNECTION LIMIT -1 PASSWORD '<PASSWORD>';
GRANT "cloudsqlsuperuser" TO service_account_entitle;
Create the integration in Entitle
- Log in to Entitle and go to the Integrations page.
- Click Add Integration.
- In the Application field, enter GCP Postgres.
- In the Save on dropdown, select Save on cloud or your hosted agent.
- In the Connection section:
- In your GCP instance console Cloud overview > Project info, locate:
- The project ID: Insert it in the
project idfield - The project (instance) name: Insert it in the
instance_namefield - The region: Insert it in the
regionfield
- The project ID: Insert it in the
- In the
userandpasswordfields, insert the username and the password you created in the Create a service account in Postgres step. - Optional: in the
optionsfield, you can add the database names you wish to connect to. If you wish to connect to all databases, leave it empty. - In the
gcp_configfield, insert thegcp_configpart of the Service Account key created in the Create a key for the service account in GCP step.Example connection JSON{ "project_id": "<project id found in the instance console overview>", "instance_name": "<instance name found in the instance console overview>", "region": "<region name found in the instance console overview>", "postgres_config": { "user": "<username>", "password": "<users password>", "options": { "databases_constraints": ["<To connect to specific databases, list their names. To connect to all, leave it empty.>"] } }, "gcp_config": { "credential_subject": "<an email of an admin in your organization which has permission to view all users and groups>", "service_account_key": { "type": "<found in service account key json>", "project_id": "<found in service account key json>", "private_key_id": "<found in service account key json>", "private_key": "<found in service account key json>", "client_email": "<found in service account key json>", "client_id": "<found in service account key json>", "auth_uri": "<found in service account key json>", "token_uri": "<found in service account key json>", "auth_provider_x509_cert_url": "<found in service account key json>", "client_x509_cert_url": "<found in service account key json>" } } }
- In your GCP instance console Cloud overview > Project info, locate:
- Click Save.
What's next?Make sure your setup is complete by testing your integration.
Updated 5 months ago
