Okta SAML integration | Entitle
Overview
This guide is for creating IdP-initiated login flows to the Entitle web app through an Okta SAML application.
This use case is not applicable when Entitle operates as part of Pathfinder, as all authentication is handled through Pathfinder authentication. See Entitle on Pathfinder for more details.
Prerequisites
- Entitle Admin.
- Okta Admin.
- Entitle's logo, is attached below:

Should you need to allowlist this integration, these are the IP addresses from which Entitle's service reaches the integration:
- Entitle EU (Cloud deployment)
- 34.243.199.171
- 54.216.133.226
- Entitle US (Pathfinder deployment)
- 52.45.229.219
- 54.88.235.213
- 3.224.15.134
- Entitle CA (Pathfinder deployment)
- 35.182.218.208
- 15.156.179.153
Set up Okta to authenticate in Entitle
- Log in to the Okta admin console.
- Select Applications and choose Create App Integration.
- Choose a SAML 2.0 application.
.png")
-
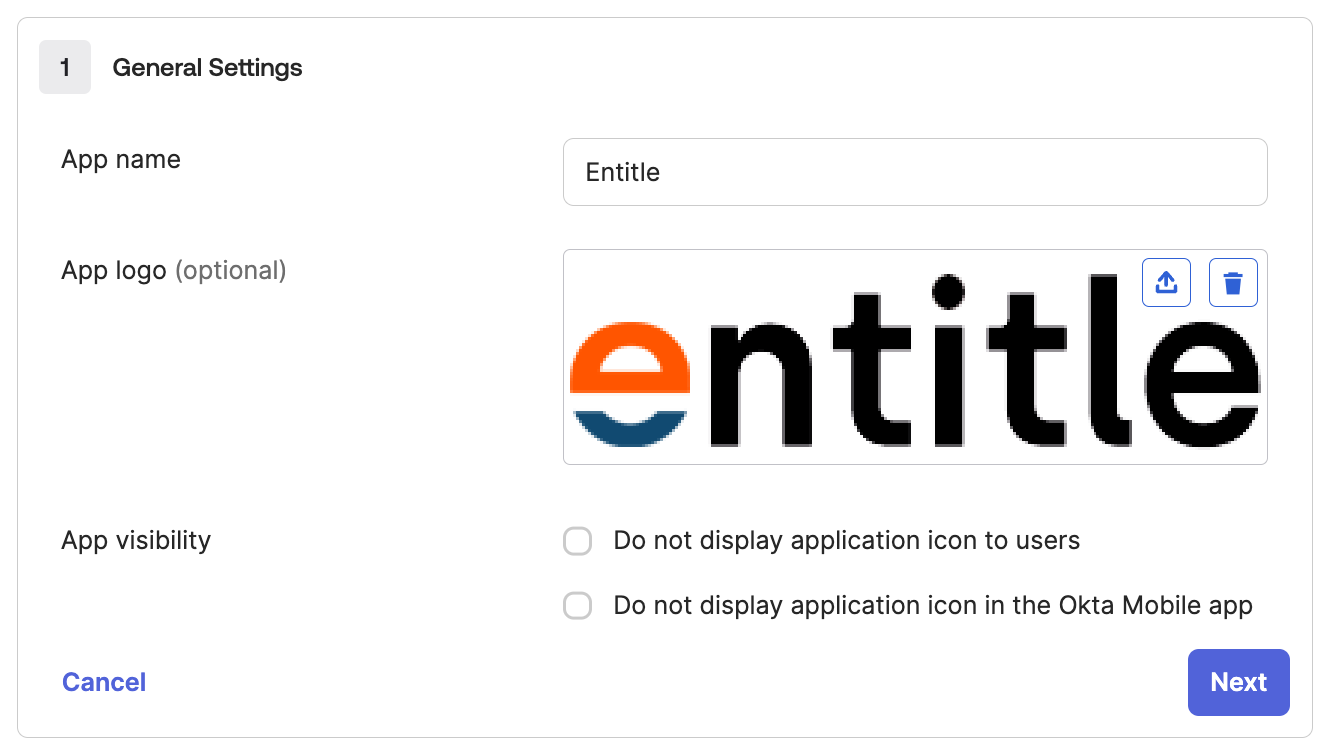
Fill in the following in the forms in the App Configuration section:
-
App name: Enter Entitle.
-
App logo: Optionally, upload the Entitle logo.
-
App visibility: Choose where the app icon should appear.
-
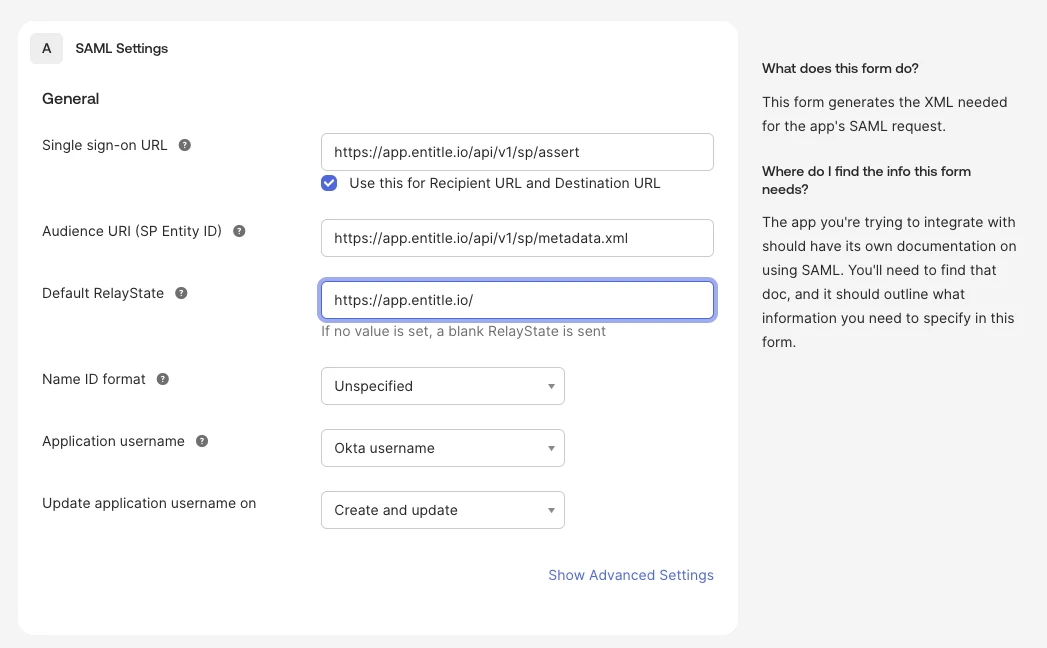
SAML settings
- Single sign-on URL: Enter
https://app.entitle.io/api/v1/sp/assert. Then check Use this for Recipient URL and Destination URL. - Audience URI (SP Entity ID): Enter
https://app.entitle.io/api/v1/sp/metadata.xml. - Default RelayState: Enter
https://app.entitle.io/. - Name ID format: Leave this unspecified.
- Application username: Select Okta username.
- Update application username on: Select Create and update.
- Single sign-on URL: Enter
-
Attribute statements: Create three attribute statements.
-
firstName: user.firstName
-
lastName: user.lastName
-
email: user.email
.png")
If you do not see the Attribute statements section, add them after creating the application.
Add attribute statements to an existing integration
-
Go to the application page and select the Sign on tab.
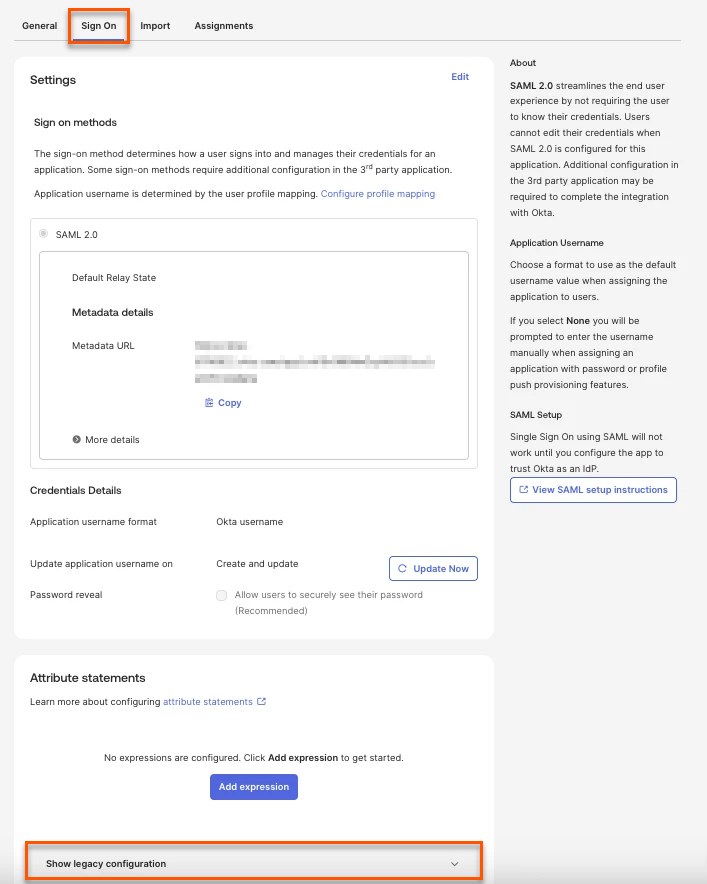
-
In the Attribute statements section, click Show legacy configuration.
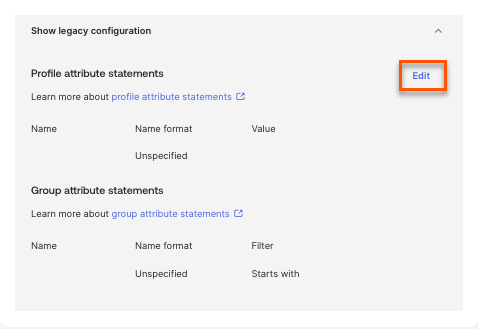
-
In this section, click Edit.
-
You can now add the three required attribute statements as shown above.
-
-
-
Add Okta app to Entitle
- Log in to Entitle and go to the Org Settings page.
- Under the Identity Providers, paste the URL to the metadata and click Save.

Test your Okta application
- Assign users or groups to the newly created Entitle app in Okta.
- Within a few minutes, you will be able to log in to Entitle with Okta, from the Entitle log in page.