Audit permissions | Entitle
Get a single, unified view of who has access to what across every connected integration, so you can catch risky access before it becomes a problem.
Use the Permissions page to:
- Visualize access relationships to identify risky access : See how users, accounts, and resources connect. Spot overprivileged or unknown identities, unwanted permission chains, or toxic combinations of access.
- Mediate access risks: Revoke permissions you've identified as risky, individually or in bulk.
Prerequisites
- An Entitle admin account
- At least one integration connected.
Visualize access relationships and identify risky access
Graph view
Use the graph view to look for the patterns that indicate risk: identities with more access than their role requires, unfamiliar or unexpected users, permission chains that shouldn't exist, or combinations of permissions that are individually fine but risky together.
In Entitle, go to Permissions, then select the User, Integration, Resource type, Resource, and Role to display in the graph. Each filter accepts multiple selections, and you can combine them in any order — except Role, which requires you to select a Resource first.
Permission paths are color-coded: purple for direct access (the user has direct JIT permission to the resource), green for indirect access (the role is granted through another role rather than assigned directly), and yellow where both exist between the same nodes.
Use the controls to move around the graph: return to center, zoom in, and zoom out. If you make a change you want to reverse, use undo or redo on the right side of the filters menu.
Any selection you set in the graph carries over if you switch to the table view, except for risk and sensitivity indicators, which are graph-only. Where do you see this?
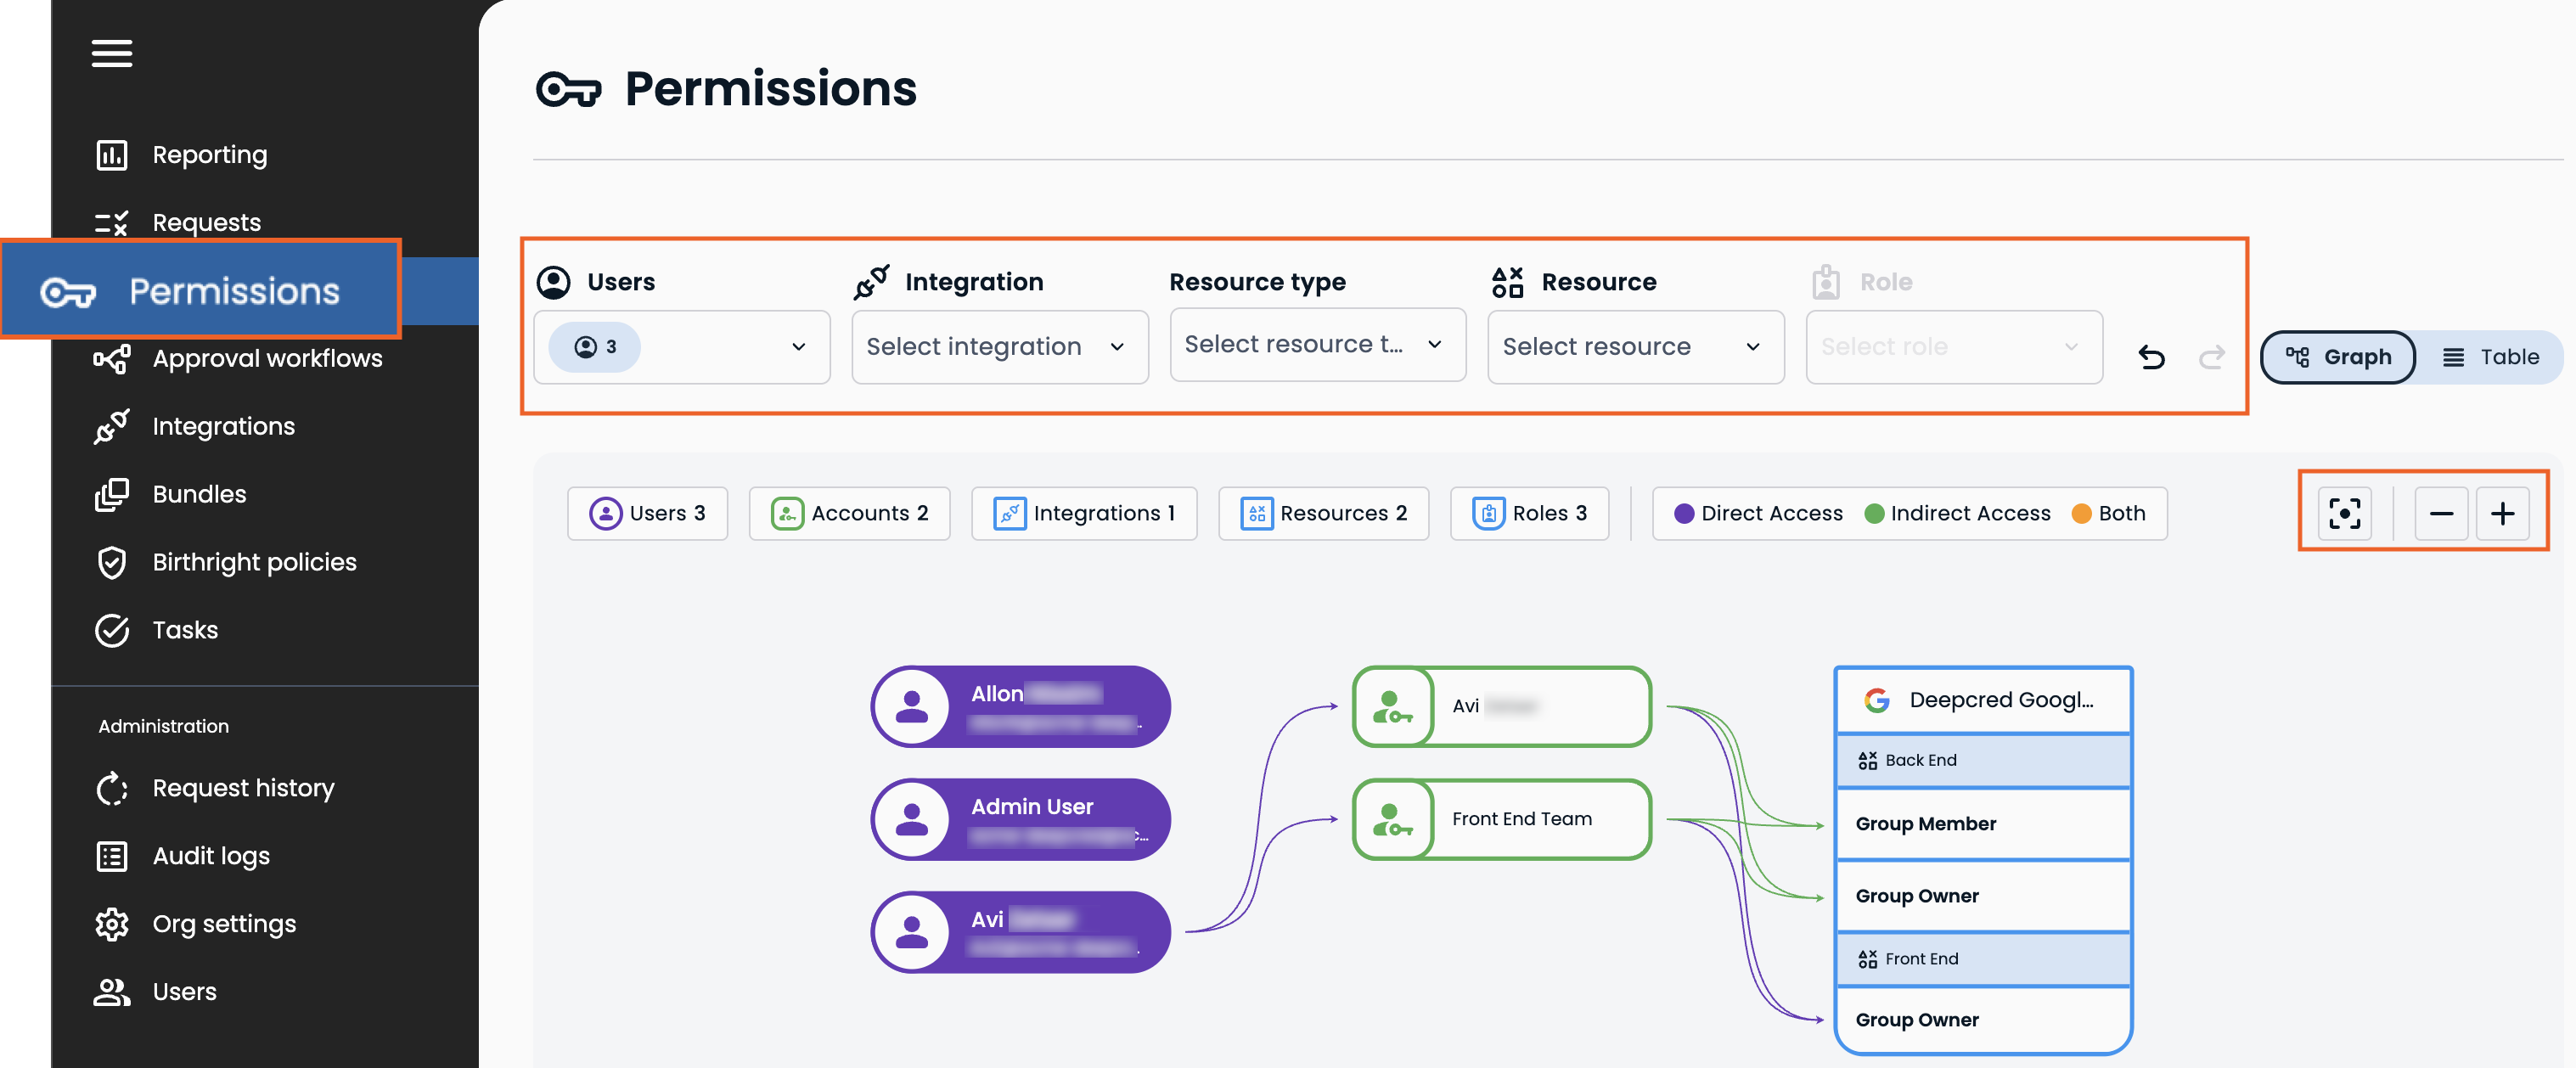
Table view
In Entitle, go to Permissions, then switch to the table view. You can Search the table to find a specific account, resource name, or role name.
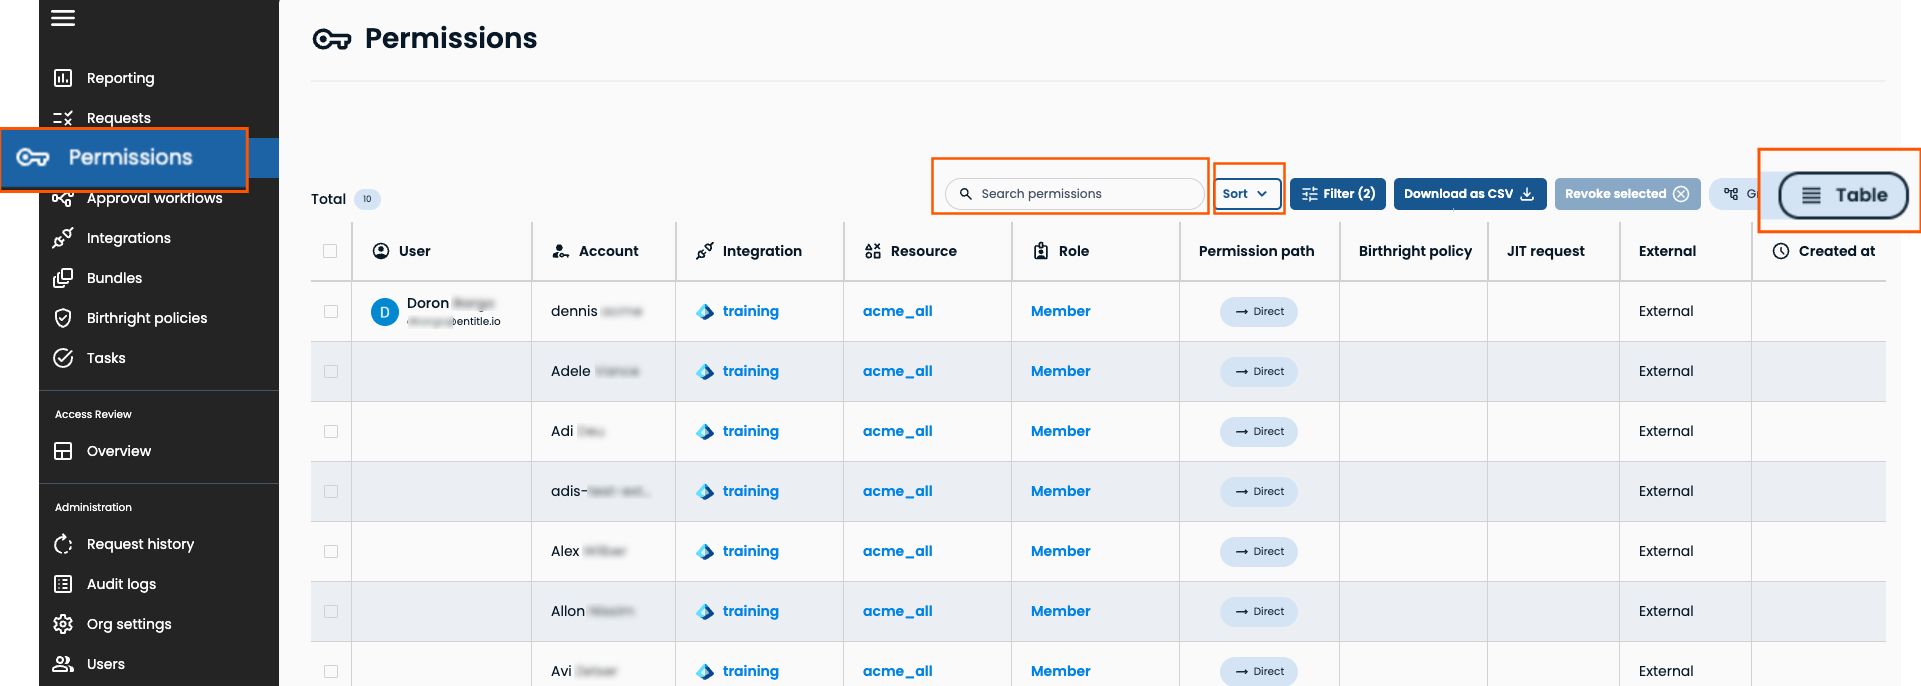
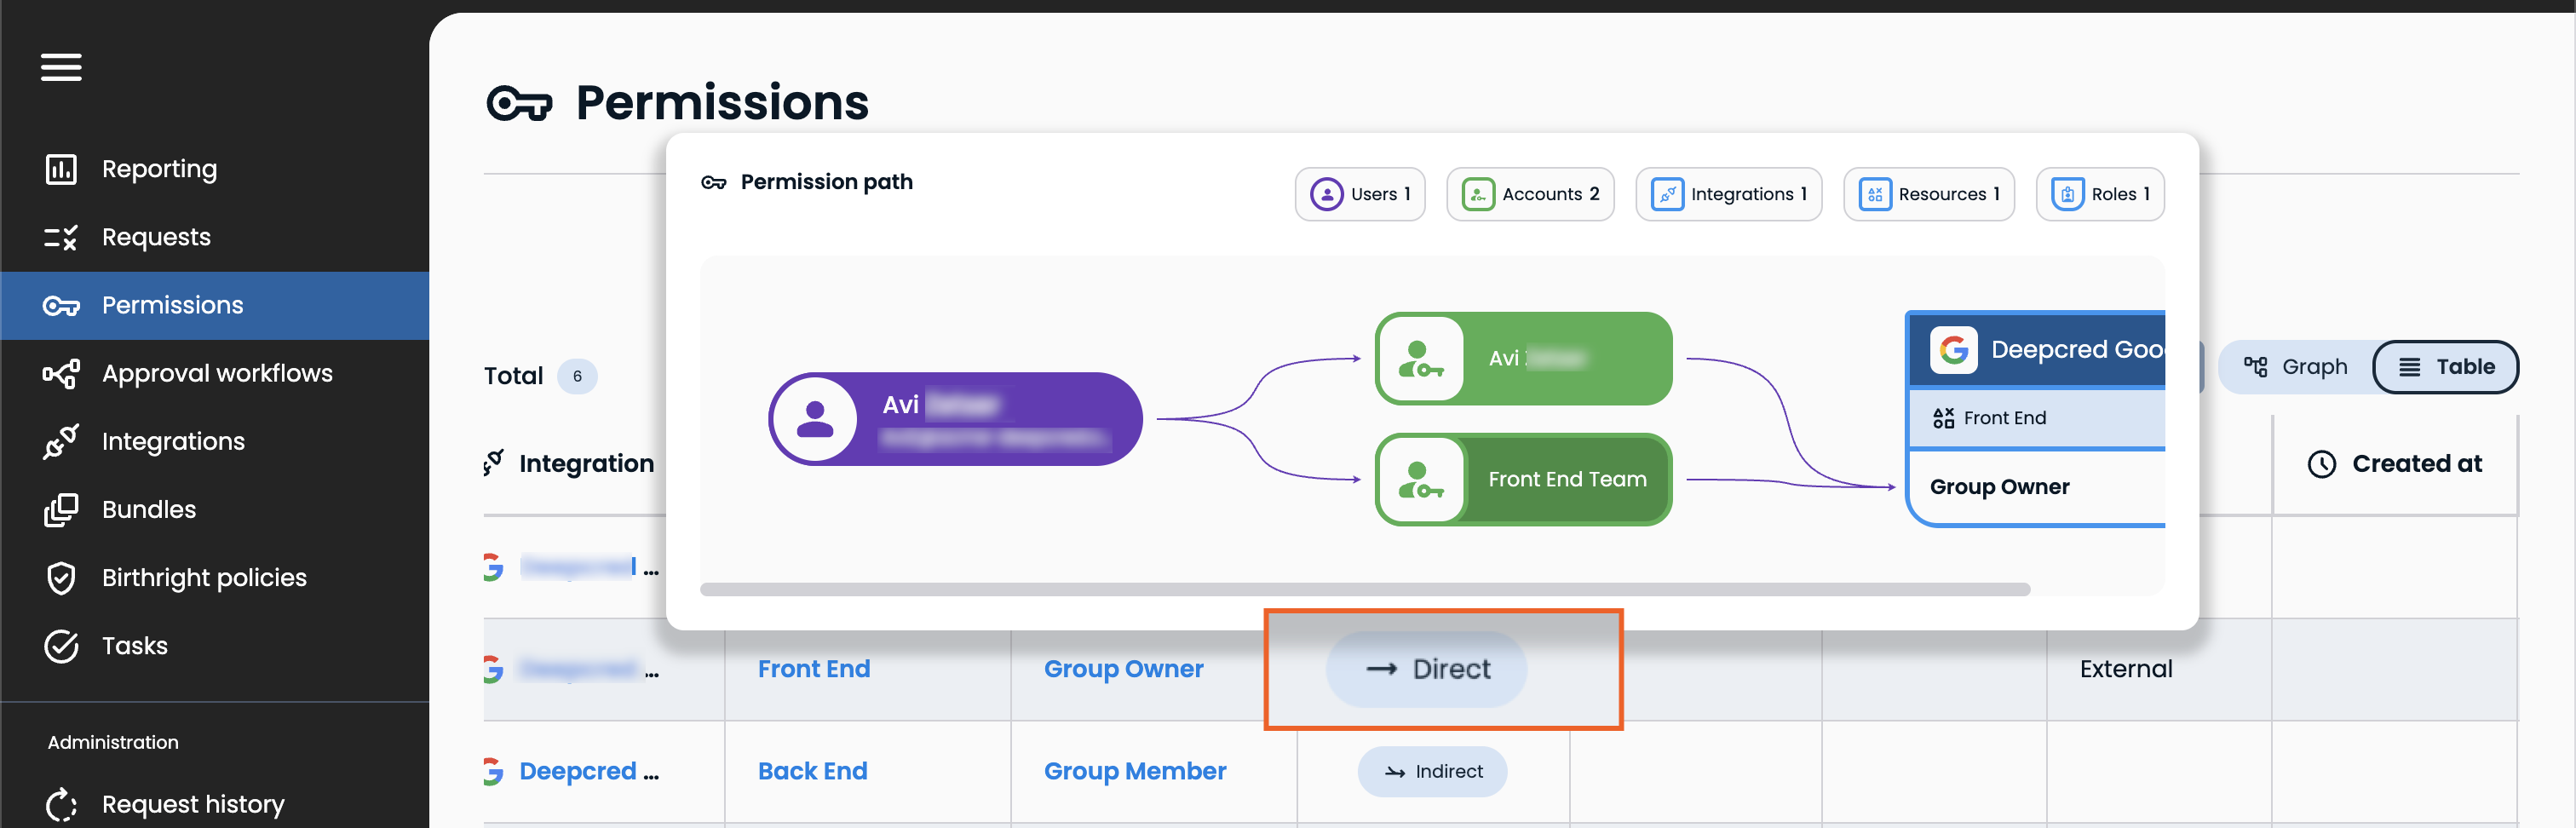
Hover over the Permissions path chip to review its path in graph form.
To add columns to the table or focus your results, click Filter, choose attributes, and complete the filter expression.
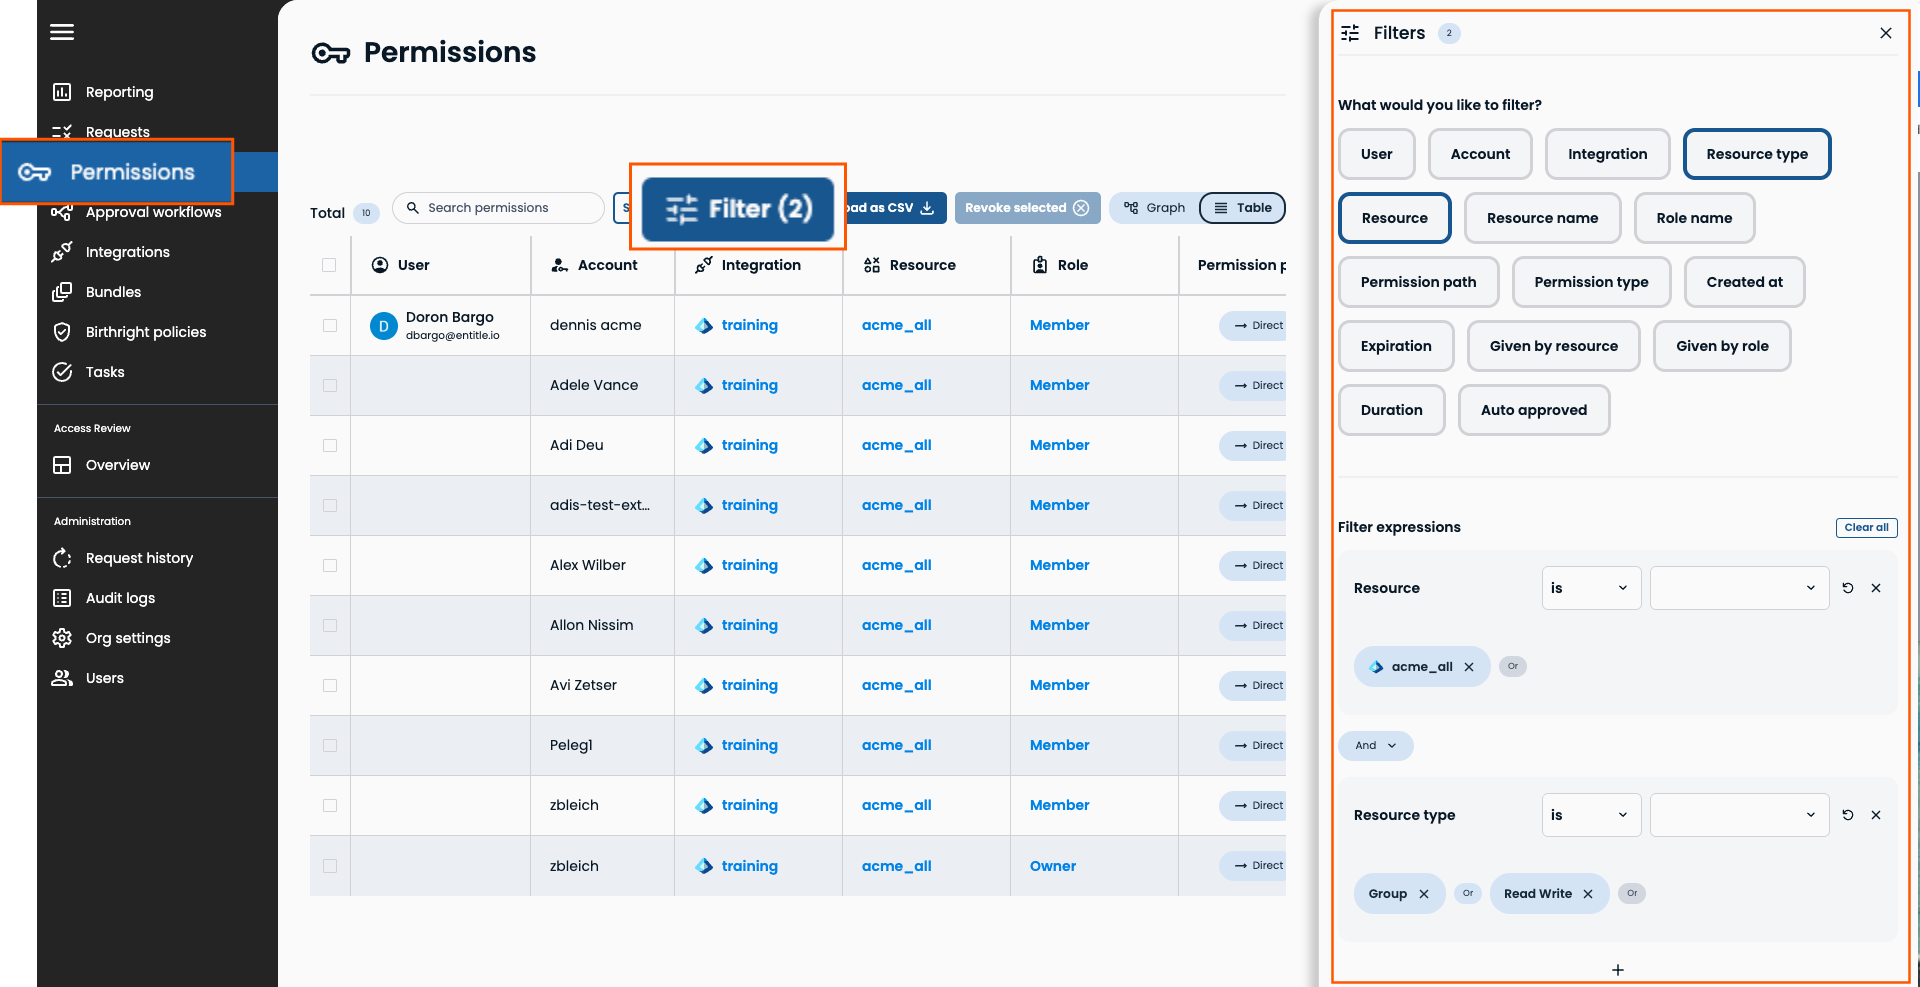
| Attribute | Description |
|---|---|
| User | Filter to a specific person, to see every account, resource, and permission that belongs to them. For example, review everything one employee has access to before an audit or offboarding. |
| Account | Filter to a specific account, to see the permissions tied to that login (rather than the person behind it). |
| Integration | Filter to a specific integration, to review permissions within one connected application or service. For example, audit every permission granted in GitHub without seeing unrelated access from other integrations. |
| Resource type | Filter to a category of resource within an integration, to focus on one kind of asset. For example, filter to only S3 buckets within AWS, or only databases within Snowflake. |
| Resource | Filter to a specific resource, to see everyone who has access to it. For example, find everyone with access to a single Git repository or Google Drive folder. |
| Resource name | Use to capture resources containing or excluding a certain phrase in their name. For example, to capture all resources with "admin" in the name. |
| Role name | Use to capture roles containing or excluding a certain phrase in their name. For example, to capture all roles with "admin" in the name. |
| Permission path | Filter by how access reaches the user, to separate permissions assigned directly from permissions inherited through another role or resource. For example, filter to Indirect to find access users hold through nested groups rather than direct assignment, or to Direct & Indirect to find users who hold a permission both ways at once. |
| Permission type | Filter by how the permission was granted, to separate access Entitle manages from access it doesn't. For example, filter to External to find permissions granted outside Entitle that may need to be brought under management, or to Birthright policy to review default access granted automatically rather than by individual request. |
| Created at | Filter by when the permission was created, to find recently granted access or long-standing permissions worth reviewing. For example, filter to the last 30 days to review everything granted this month. |
| Expiration | Filter by when the permission will expire, to find access that's about to lapse or that never expires. For example, filter to no expiration to find standing access that should have a defined end date. |
| Given by resource | Filter to indirect permissions granted through a specific resource, to trace where inherited access actually comes from. For example, find every permission users hold as a result of their membership in a particular group. |
| Given by role | Filter to indirect permissions granted through a specific role, to trace which role is the source of inherited access. For example, find every permission that traces back to an Admin role on another resource. |
| Duration | Filter by how long the access was originally set for, to find unusually short- or long-lived JIT requests. For example, filter to durations of a year or more to surface permissions granted for an unusually long time and worth reviewing for risk. |
| Auto approved | Filter to permissions that were granted through auto-approval rather than manual review, to see how much access is bypassing a human approver. For example, use this to check whether an auto-approval rule is being used as intended, or granting more access than expected. |
Mediate access risks
Revoke a permission
In Entitle, navigate to Permissions. Use the graph and table view to find permissions you want to act on (as described in this article). Scroll to the right of the permission table to click Revoke. Some permissions can't be revoked directly. For example, indirect permissions and those granted by a birthright policy. In this case, the column displays an indicator with a tooltip instead of Revoke. An empty field means the permission belongs to an unmanaged account and can't be revoked.
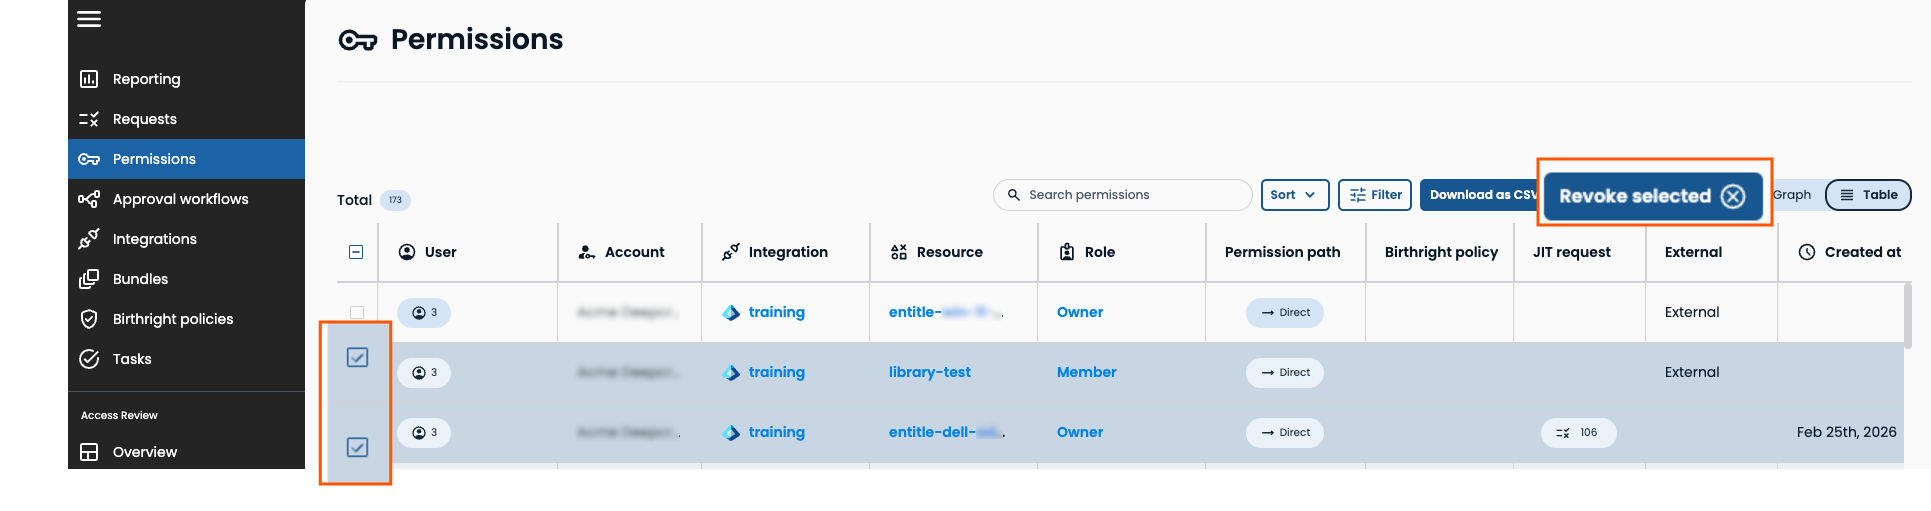
Revoke multiple permissions
To revoke multiple permissions at once, select the ones you want, then click Revoke selected. At least one selected permission must be direct and managed for the button to activate.
After clicking Revoke selected, Entitle walks you through reviewing the impact before anything is revoked:
- Additional permissions to be revoked: Entitle shows any other permissions that will be revoked as a result of your selection. For example, revoking a permission from a shared account revokes it for every user who shares that account. If you decide to keep a permission after seeing this, click Remove from revoke.
- Birthright policy permissions:Entitle lists any selected permissions that were granted by a birthright policy. Revoking these is only temporary, since the policy reassigns them on the next sync. Choose to revoke them anyway, or click Remove from revoke.
- Permissions that can't be revoked: Entitle lists any selected permissions that are indirect or unmanaged, since these can't be revoked through this flow.
Once you've reviewed these lists and adjusted your selection, confirm the revoke. Permissions are only revoked at this final step.
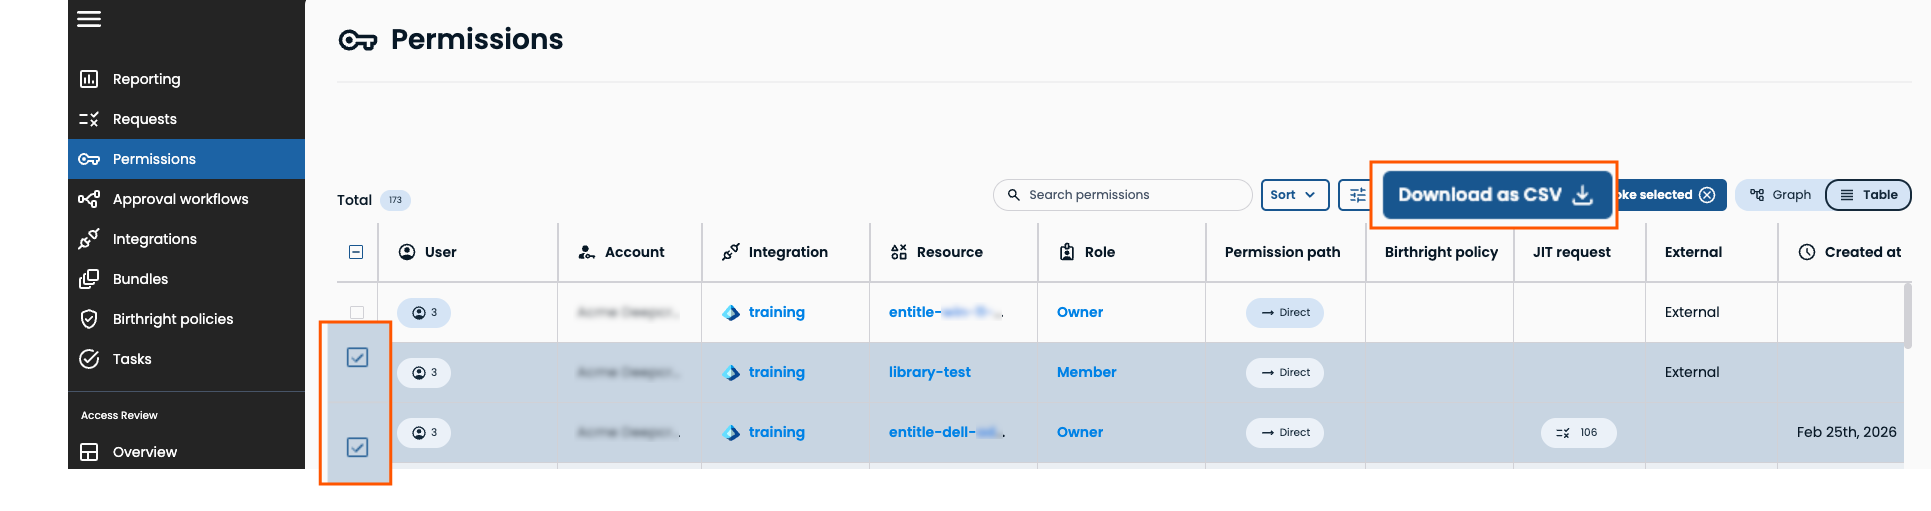
Export permission data
Select specific rows and click Download as CSV to export just those rows, or leave nothing selected to export the entire table.
Updated 5 days ago
