AWS SSO basic integration | Entitle
Learn how to manage SSO group memberships and permission set assignees on different accounts
How does it work?
- Entitle connects to the root account of your organization using a dedicated IAM Role with an inline policy.
- From the root account, Entitle retrieves and manages the SSO users, groups, and permission sets across multiple AWS accounts automatically.
- In the sub-accounts, Entitle collects and manages permission sets.
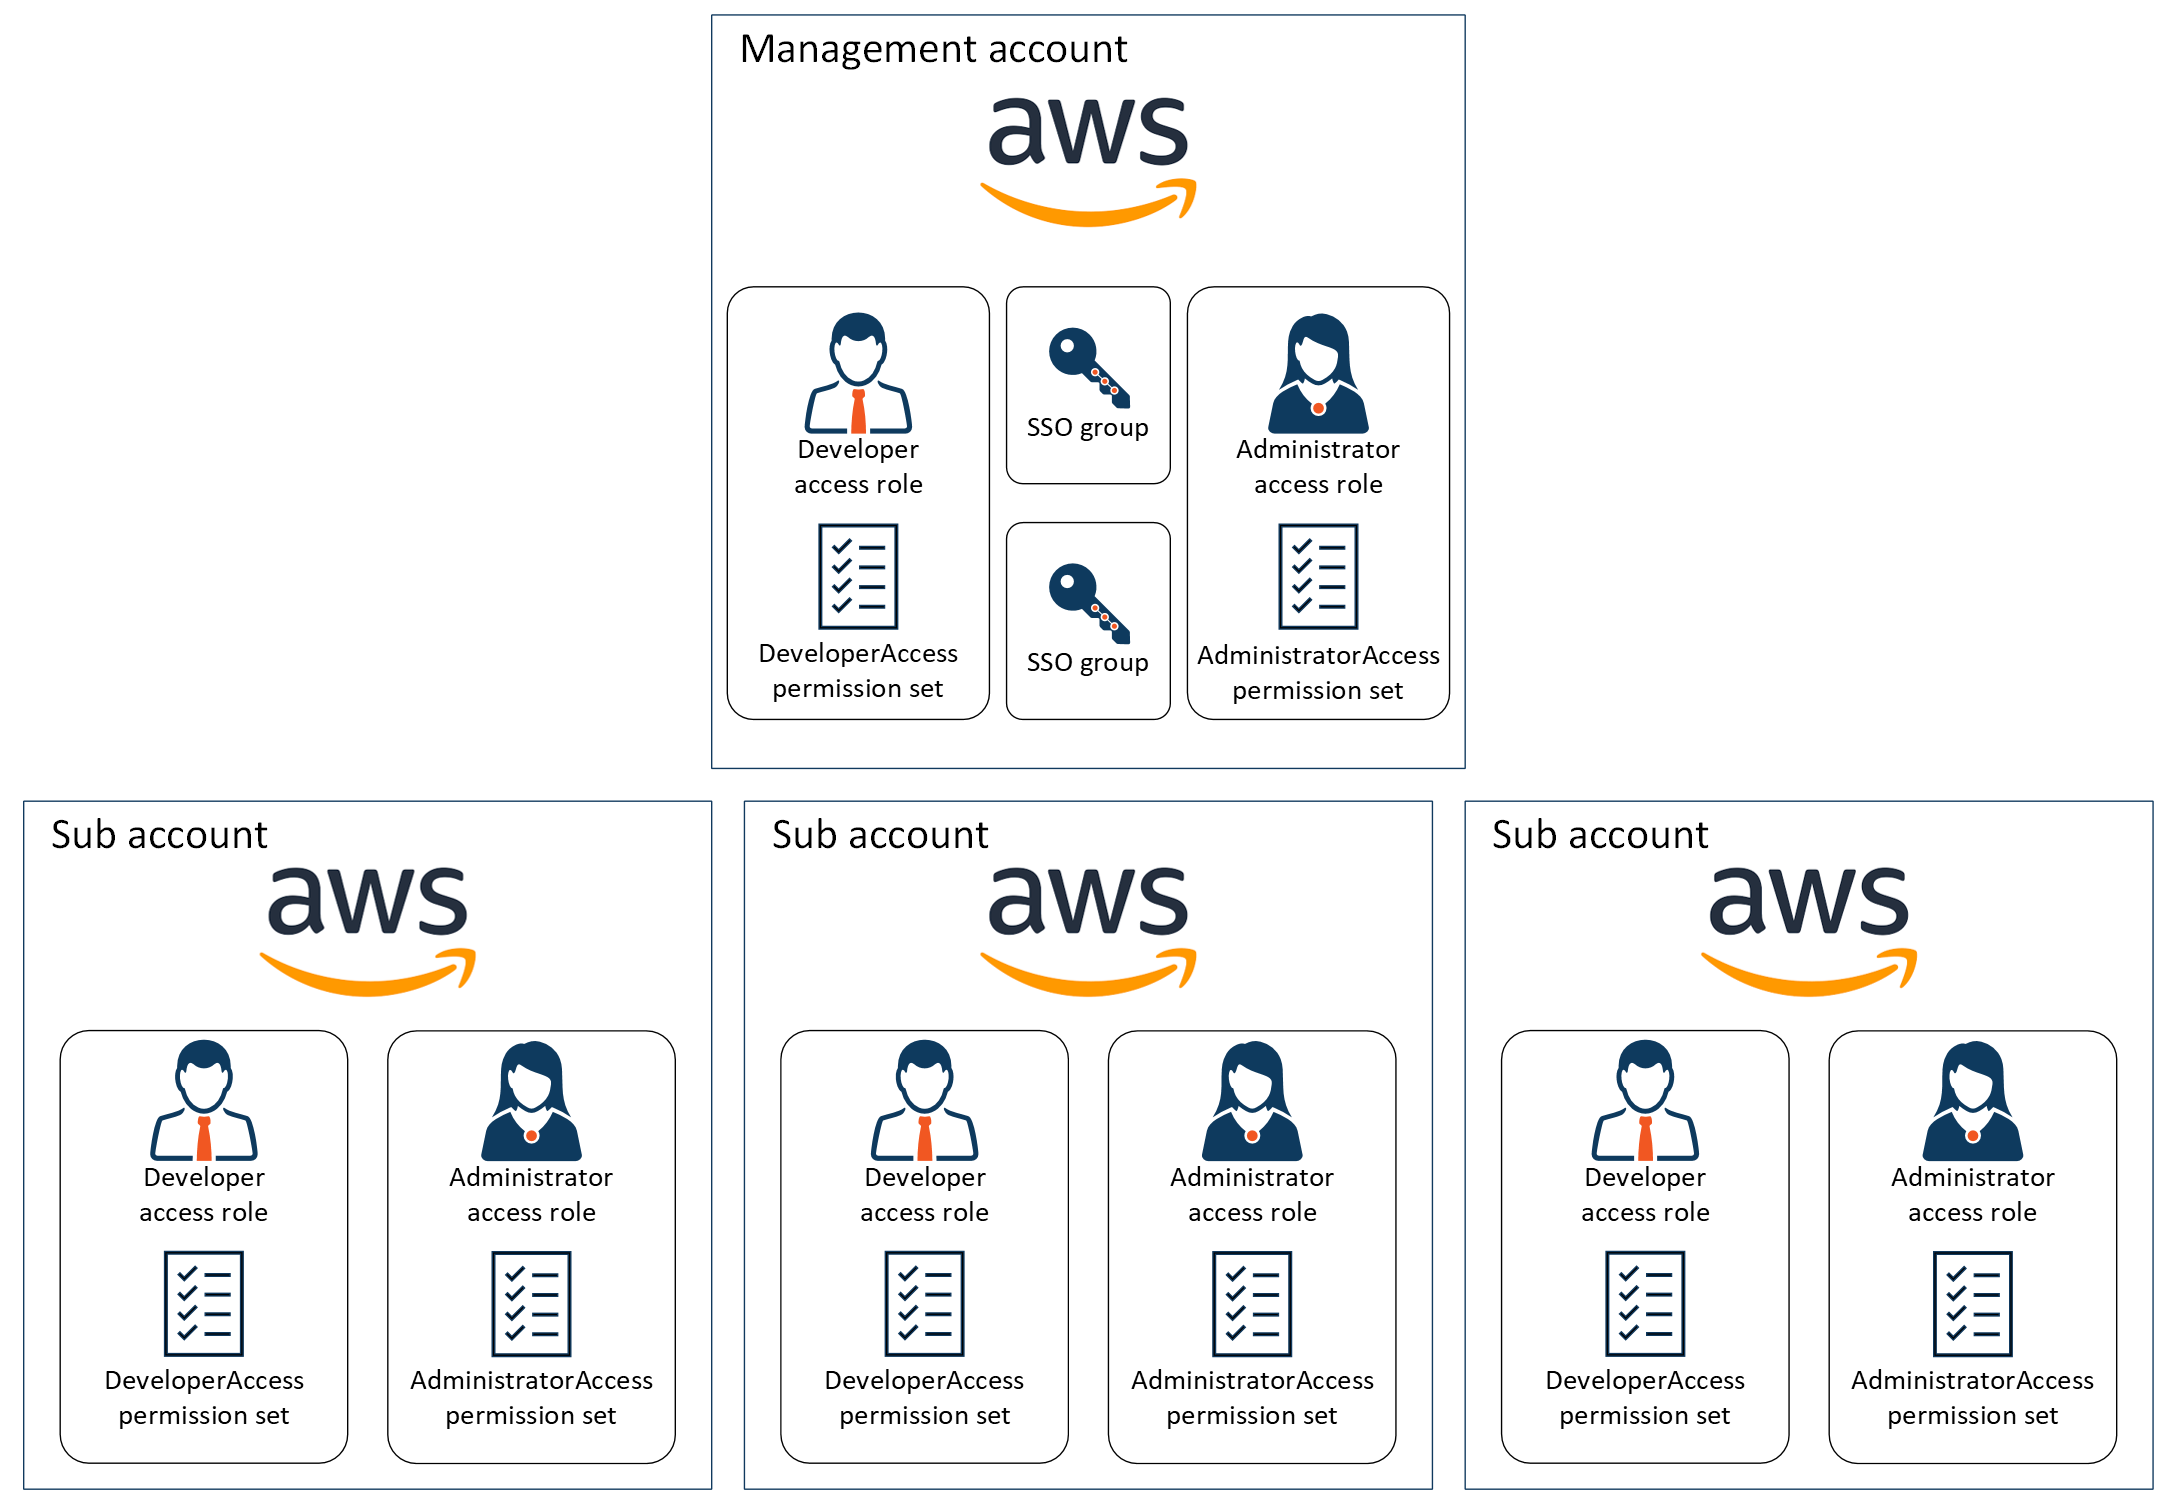
- Permission Sets
- When an access request is approved, temporary access to the permission set for the corresponding AWS account will be added to the employees' management console.
- When an access request expires, access to the permission set for the corresponding AWS account will be removed.
- SSO Groups
- When an access request is approved, the employee's account will be added to the SSO group.
- When an access request expires, the employee's account will be removed from the SSO group.
Prerequisites
To integrate AWS in Entitle, you will need to complete the following actions:
- Create an IAM Role with a trust relationship.
- Attach an access management policy to the role previously created.
- Extract the SSO ARN and region.
You can set up the AWS integration using either the AWS CLI or the AWS Management Console.
Both methods are described below—choose the one that best suits your preference.
Should you need to allowlist this integration, these are the IP addresses from which Entitle's service reaches the integration:
- Entitle EU (Cloud deployment)
- 34.243.199.171
- 54.216.133.226
- Entitle US (Pathfinder deployment)
- 52.45.229.219
- 54.88.235.213
- 3.224.15.134
- Entitle CA (Pathfinder deployment)
- 35.182.218.208
- 15.156.179.153
Set up AWS to work with Entitle
AWS CLI (Command Line Interface)
AWS CLI instructions
Prerequisites
- A user who is an SSO admin, with the AWS CLI on their device.
Step 1: Set up an IAM role and a management policy
-
Log in to AWS CLI and establish an admin session.
-
Copy the following environment variables by the following criteria in your CLI/text editor.
export ROLE_ARN='arn:aws:iam::321183744702:role/entitle-prod-ichilov@entitle'
export EXTERNAL_ID='<EXTERNAL_ID>'
export ROLE_ARN='arn:aws:iam::396913696231:role/entitle-prod-us-ichilov@entitle' export EXTERNAL_ID='<EXTERNAL_ID>'export ROLE_ARN='arn:aws:iam::321183744702:role/entitle-prod-ca-ichilov@entitle' export EXTERNAL_ID='<EXTERNAL_ID>'export ROLE_ARN='<Your agent-pod's AWS role ARN>' export EXTERNAL_ID='<EXTERNAL_ID>'- For on-prem deployments: Change the
ROLE_ARNvalue to be your agent pod's role ARN. - Entitle uses AWS's external ID feature. Create a value for External ID, set it as the
$EXTERNAL_IDenvironment variable, and save the value - you’ll need it later in this guide.
- For on-prem deployments: Change the
-
Create a trust policy:
cat > trust-relationship.json <<ENDOF { "Version": "2012-10-17", "Statement": [ { "Effect": "Allow", "Principal": { "AWS": "$ROLE_ARN" }, "Action": "sts:AssumeRole", "Condition": { "StringEquals": { "sts:ExternalId": "$EXTERNAL_ID" } } } ] } ENDOF -
Create an IAM role and copy the role's ARN, as it will be used later in this guide.
aws iam create-role --role-name EntitleBasicIntegrationRole --assume-role-policy-document file://trust-relationship.json -
Create an Entitle management policy based on the policy file in the URL attached, and copy the policy's ARN, as it will be used later in this guide.
curl -O https://entitle-public.s3.us-east-1.amazonaws.com/EntitleAwsBasicIntegrationManagementPolicy.json policy_arn=$(aws iam create-policy --policy-name EntitleBasicManagementPolicy --policy-document file://EntitleAwsBasicIntegrationManagementPolicy.json --query 'Policy.Arn' --output text) -
Attach the Entitle management policy to the Entitle role.
aws iam attach-role-policy --role-name EntitleBasicIntegrationRole --policy-arn $policy_arn
Step 2: Retrieve the SSO information
- Determine the region where your AWS SSO (AWS Identity Center) is configured. Then, set an environment variable based on that region.
REGION=us-east-1 // Change 'us-east-1' to your SSO region - Get the SSO instance ARN, and copy it as it will be used later in this guide.
aws sso-admin list-instances --region $REGION --output text --query 'Instances[0].InstanceArn'
AWS management console
AWS Management Console instructions
Step 1: Set up an IAM role and a management policy
In this step, you’ll configure a policy that Entitle needs to manage access to your AWS accounts. Later in the guide, you’ll create an IAM role and attach this policy to it.
-
Navigate to IAM from the top-left menu.
-
Click Roles.
-
Click Create Role.
-
Choose
Custom trust policy. -
Choose the Attach policies directly option.

-
Paste the following policy content:
{
    "Version": "2012-10-17",
    "Statement": [
        {
            "Effect": "Allow",
            "Principal": {
                "AWS": "arn:aws:iam::321183744702:role/entitle-prod-ichilov@entitle"
            },
            "Action": "sts:AssumeRole",
            "Condition": {
                "StringEquals": {
                    "sts:ExternalId": "<EXTERNAL_ID>"
                }
            }
        }
    ]
}
{ "Version": "2012-10-17", "Statement": [ { "Effect": "Allow", "Principal": { "AWS": "arn:aws:iam::396913696231:role/entitle-prod-us-ichilov@entitle" }, "Action": "sts:AssumeRole", "Condition": { "StringEquals": { "sts:ExternalId": "<EXTERNAL_ID>" } } } ] }{ "Version": "2012-10-17", "Statement": [ { "Effect": "Allow", "Principal": { "AWS": "arn:aws:iam::321183744702:role/entitle-prod-ca-ichilov@entitle" }, "Action": "sts:AssumeRole", "Condition": { "StringEquals": { "sts:ExternalId": "<EXTERNAL_ID>" } } } ] }{ "Version": "2012-10-17", "Statement": [ { "Effect": "Allow", "Principal": { "AWS": "<Your agent-pod's AWS role ARN>" }, "Action": "sts:AssumeRole", "Condition": { "StringEquals": { "sts:ExternalId": "<EXTERNAL_ID>" } } } ] } -
Entitle uses AWS's external ID feature. Create a value for External ID, set it as the
$EXTERNAL_IDenvironment variable, and save the value—you’ll need it later in this guide.- For on-prem deployments: Change the value under
Principal.AWSto your agent pod's role ARN.
- For on-prem deployments: Change the value under
-
Click Next.
-
Name that role
EntitleBasicIntegrationRoleand click Create role. -
Copy the role's ARN as it will be used later in this guide.
-
Search for your role and under Add permissions click Create inline policy
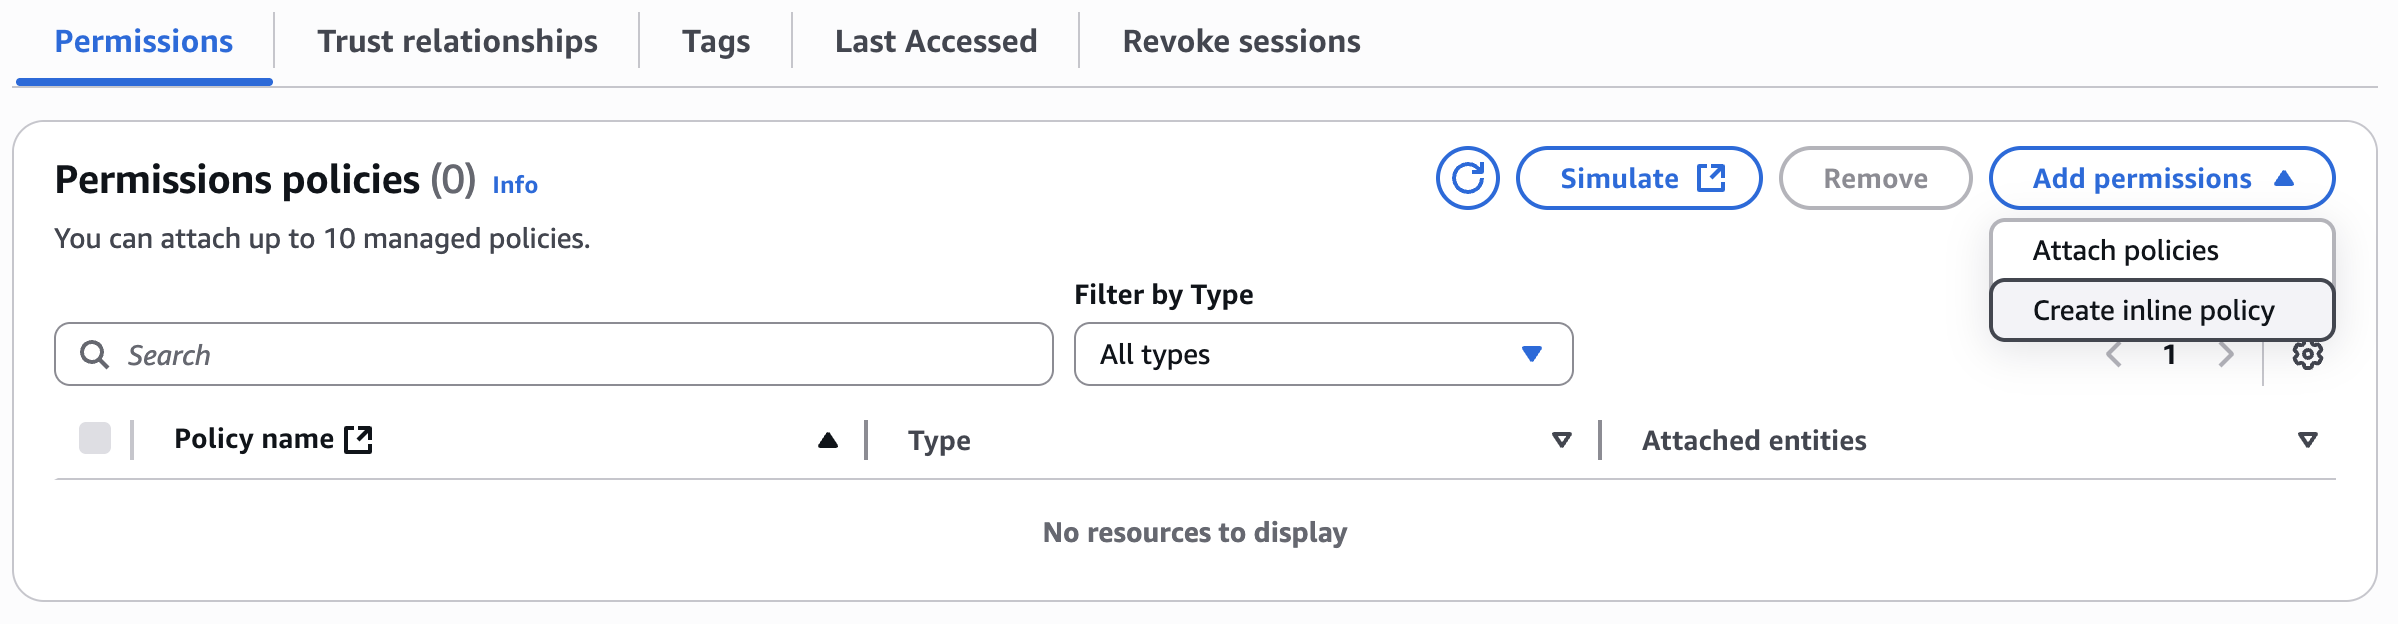
- Click JSON and paste the following policy:
{
  "Version": "2012-10-17",
  "Statement": [
    {
      "Sid": "VisualEditor0",
      "Effect": "Allow",
      "Action": [
        "identitystore:CreateGroupMembership",
        "identitystore:DeleteGroupMembership",
        "identitystore:DescribeGroup",
        "identitystore:DescribeGroupMembership",
        "identitystore:DescribeUser",
        "identitystore:GetGroupId",
        "identitystore:GetGroupMembershipId",
        "identitystore:GetUserId",
        "identitystore:IsMemberInGroups",
        "identitystore:ListGroupMemberships",
        "identitystore:ListGroupMembershipsForMember",
        "identitystore:ListUsers",
        "identitystore:ListGroups",
        "organizations:ListAccounts",
        "organizations:DescribeAccount",
        "organizations:ListTagsForResource",
        "sso:ListInstances",
        "sso:ListPermissionSets",
        "sso:DescribePermissionSet",
        "sso:ListAccountAssignments",
        "sso:DeleteAccountAssignment",
        "sso:CreateAccountAssignment",
        "sso:DescribeAccountAssignmentCreationStatus",
        "sso:DescribeAccountAssignmentDeletionStatus",
        "sso:ListTagsForResource",
        "iam:GetSAMLProvider",
        "iam:CreateRole",
        "iam:ListRolePolicies",
        "iam:GetRole",
        "iam:ListAttachedRolePolicies",
        "iam:AttachRolePolicy"
      ],
      "Resource": "*"
    }
  ]
}- Click Next.
- Insert a name for the policy and click Create.
Step 2: Retrieve the SSO information
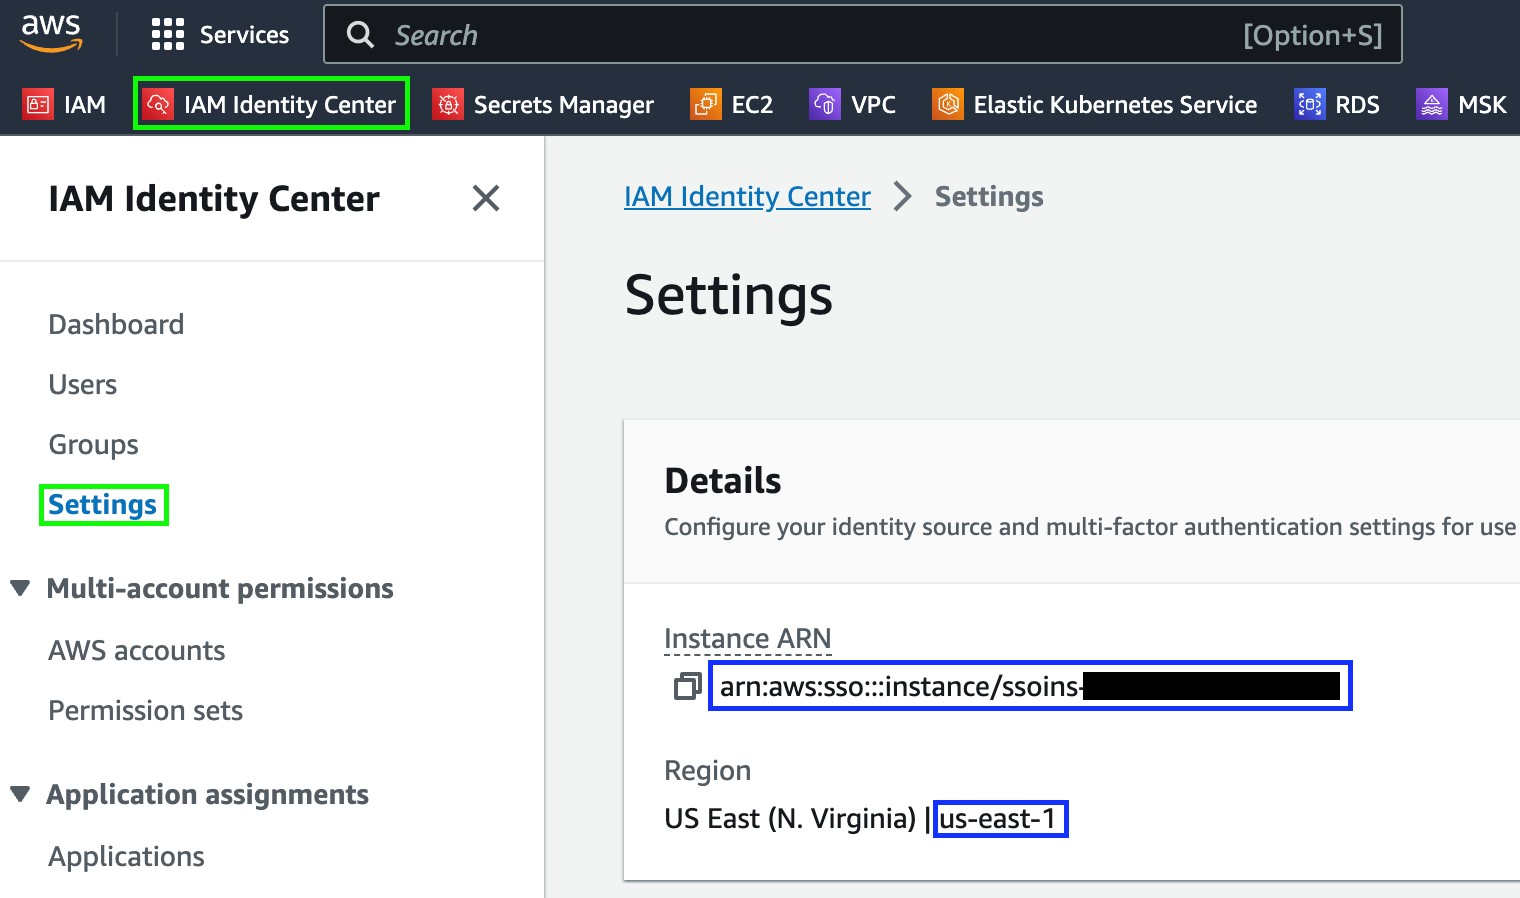
- Log in to your AWS account and navigate to your management account.
- Click IAM Identity Center on the top left.
- Click the Settings option on the left-side menu.
- Under the Details section, you will find the SSO instance ARN and the region in which the SSO resides. Copy both values, as you will use them later on in the configuration.
Set up the integration in Entitle
-
Log in to Entitle and go to the Integrations page.
-
After clicking the Add Integration button, type AWS in the Application field.
-
Start the integration setup following the instructions in Set up a new integration.
Do not enable Allow creating accounts for this integration type. This option is not supported for the basic integration.
-
Don’t forget to set the Save on field with your configuration, i.e., your own hosted agent or Entitle’s cloud.
-
Under Connection make sure
SSO Basic Integration - Pod Based Identityis selected.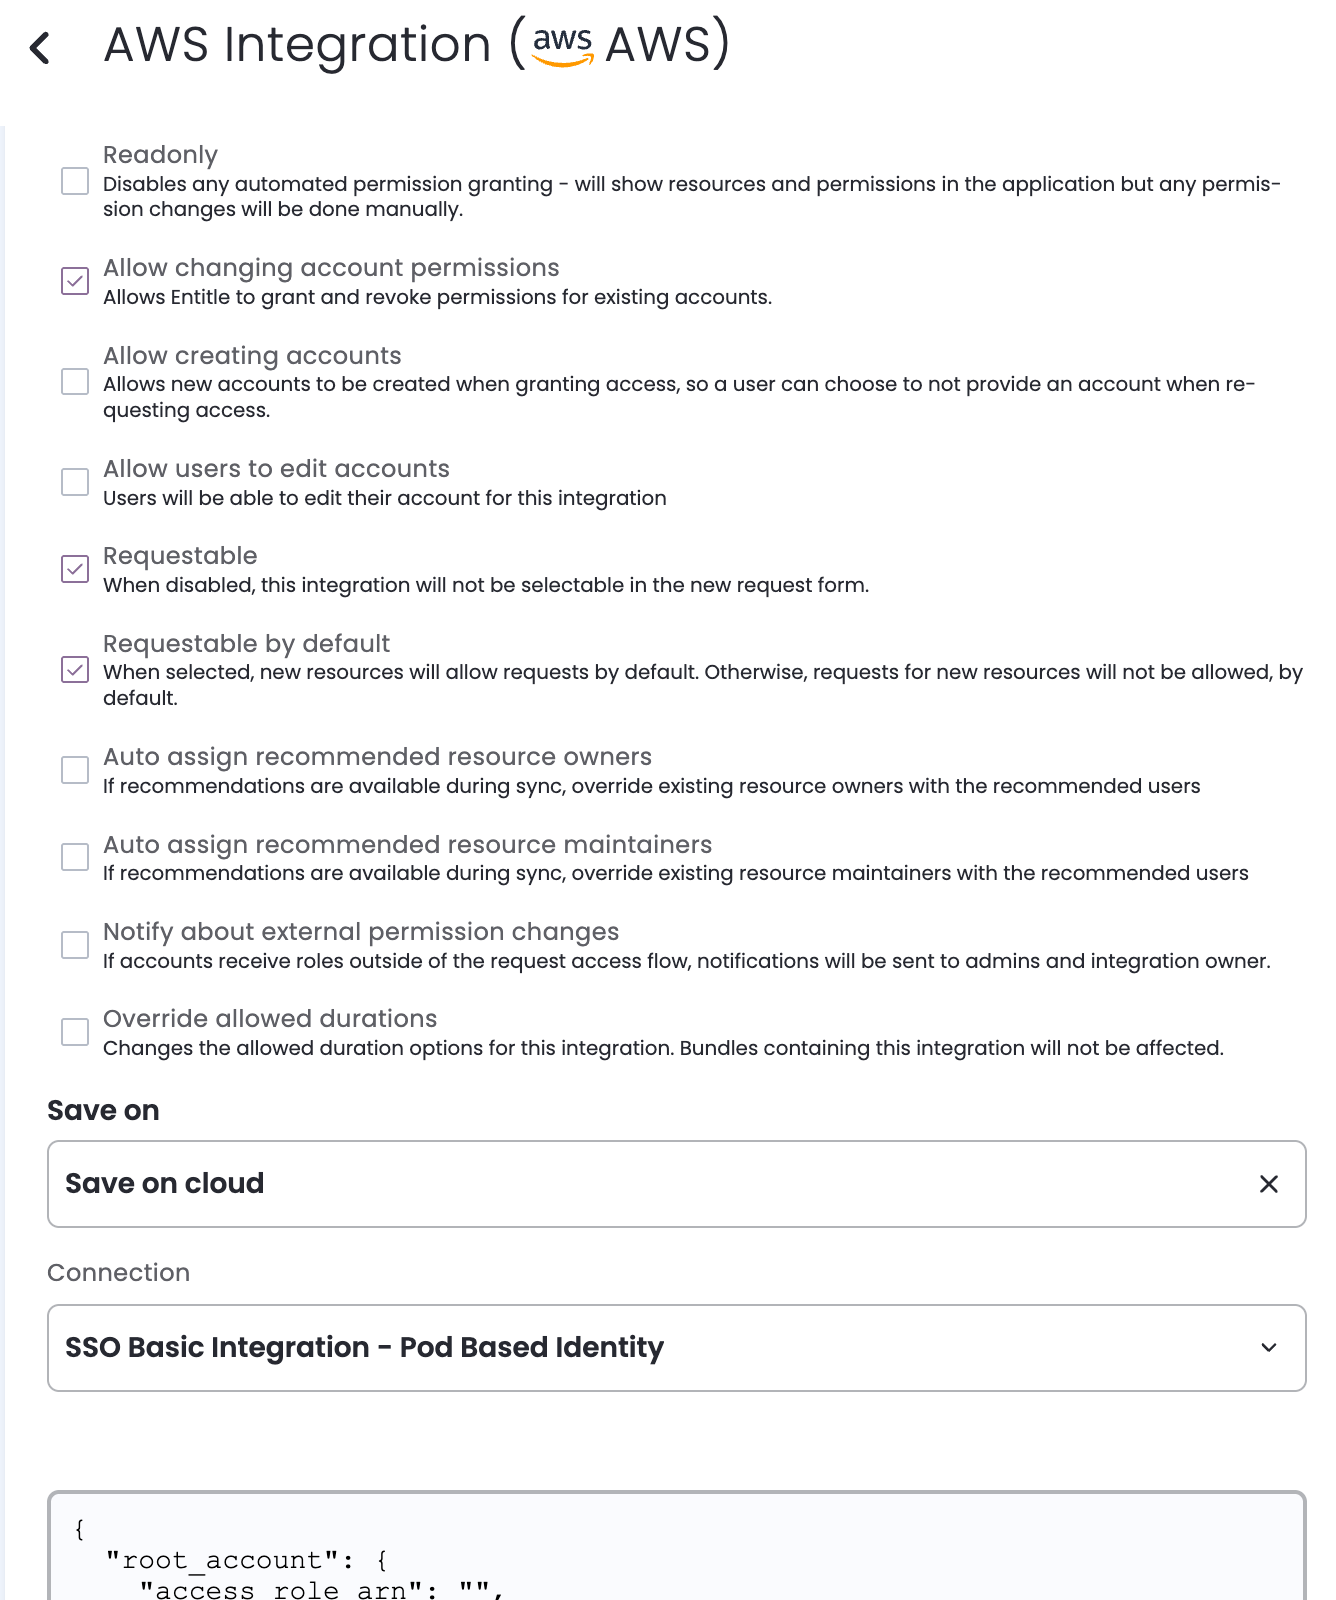
-
Under the
root_accountconfiguration:- Paste the ARN of the Entitle role as the
access_role_arnvalue. - Paste the region copied in Step 2, to the
regionvalue. - Paste the Entitle permission set ARN copied on Step 1, to the corresponding
entitle_permission_set_arnvalue. - Paste your external ID to the
external_idvalue.
- Paste the ARN of the Entitle role as the
-
Under the
optionsconfiguration, paste the SSO instance ARN copied on Step 2, to thesso_instance_arnvalue.
Example Connection JSON:
{
    "root_account": {
      "access_role_arn": "<ACCESS_ROLE_ARN>",
      "external_id": "<EXTERNAL_ID>",
      "region": "us-east-1" // Change to your SSO region
    },
    "options": {
      "sso_instance_arn": "<SSO_INSTANCE_ARN>"
    }
- Click Save.
What's next?Make sure your setup is complete by testing your integration.
Updated 3 months ago
