Okta access management | Entitle
Overview
Okta provides cloud software that helps companies manage and secure user authentication into applications, and for developers to build identity controls into applications, website web services, and devices.
Entitle can manage the following resource types in Okta:
- Group membership – groups
- Custom roles – custom admin roles
- Administrative roles – admin roles
- Applications assignment
This page will provide you with instructions on how to integrate Entitle with Okta.
General guidelines
Adding Entitle on Okta as a Service App/App Integration using the Service App Authentication option, Entitle will interact with Okta using the scoped OAuth 2.0 access token for machine-to-machine authentication. This is the recommended method because it is considered the most secure way to authenticate with Okta.
There are two permission scope options:
- Full functionality – To access all the features that Entitle provides, your service app must have the Super Admin role, as only Super Admins are allowed by Okta to manage other users or groups that have admin privileges.
- Partial functionality - It is possible to use Group Membership Admin and Report Admin roles together to enable basic functionality. In this case, you won’t be able to give/revoke access or even read any admin roles. This includes adding users to groups with admin roles. To enable this option, you must set the
is_super_adminoption tofalse.
It is also possible to restrict additional scopes by following the instructions below.
Should you need to allowlist this integration, these are the IP addresses from which Entitle's service reaches the integration:
- Entitle EU (Cloud deployment)
- 34.243.199.171
- 54.216.133.226
- Entitle US (Pathfinder deployment)
- 52.45.229.219
- 54.88.235.213
- 3.224.15.134
- Entitle CA (Pathfinder deployment)
- 35.182.218.208
- 15.156.179.153
Set up Okta to work with Entitle
If you want to create the token for the Partial functionality option, ensure the token's Admin Role setting is configured as Group Membership Admin and Report Admin roles.
Stage 1: Create a new app integration
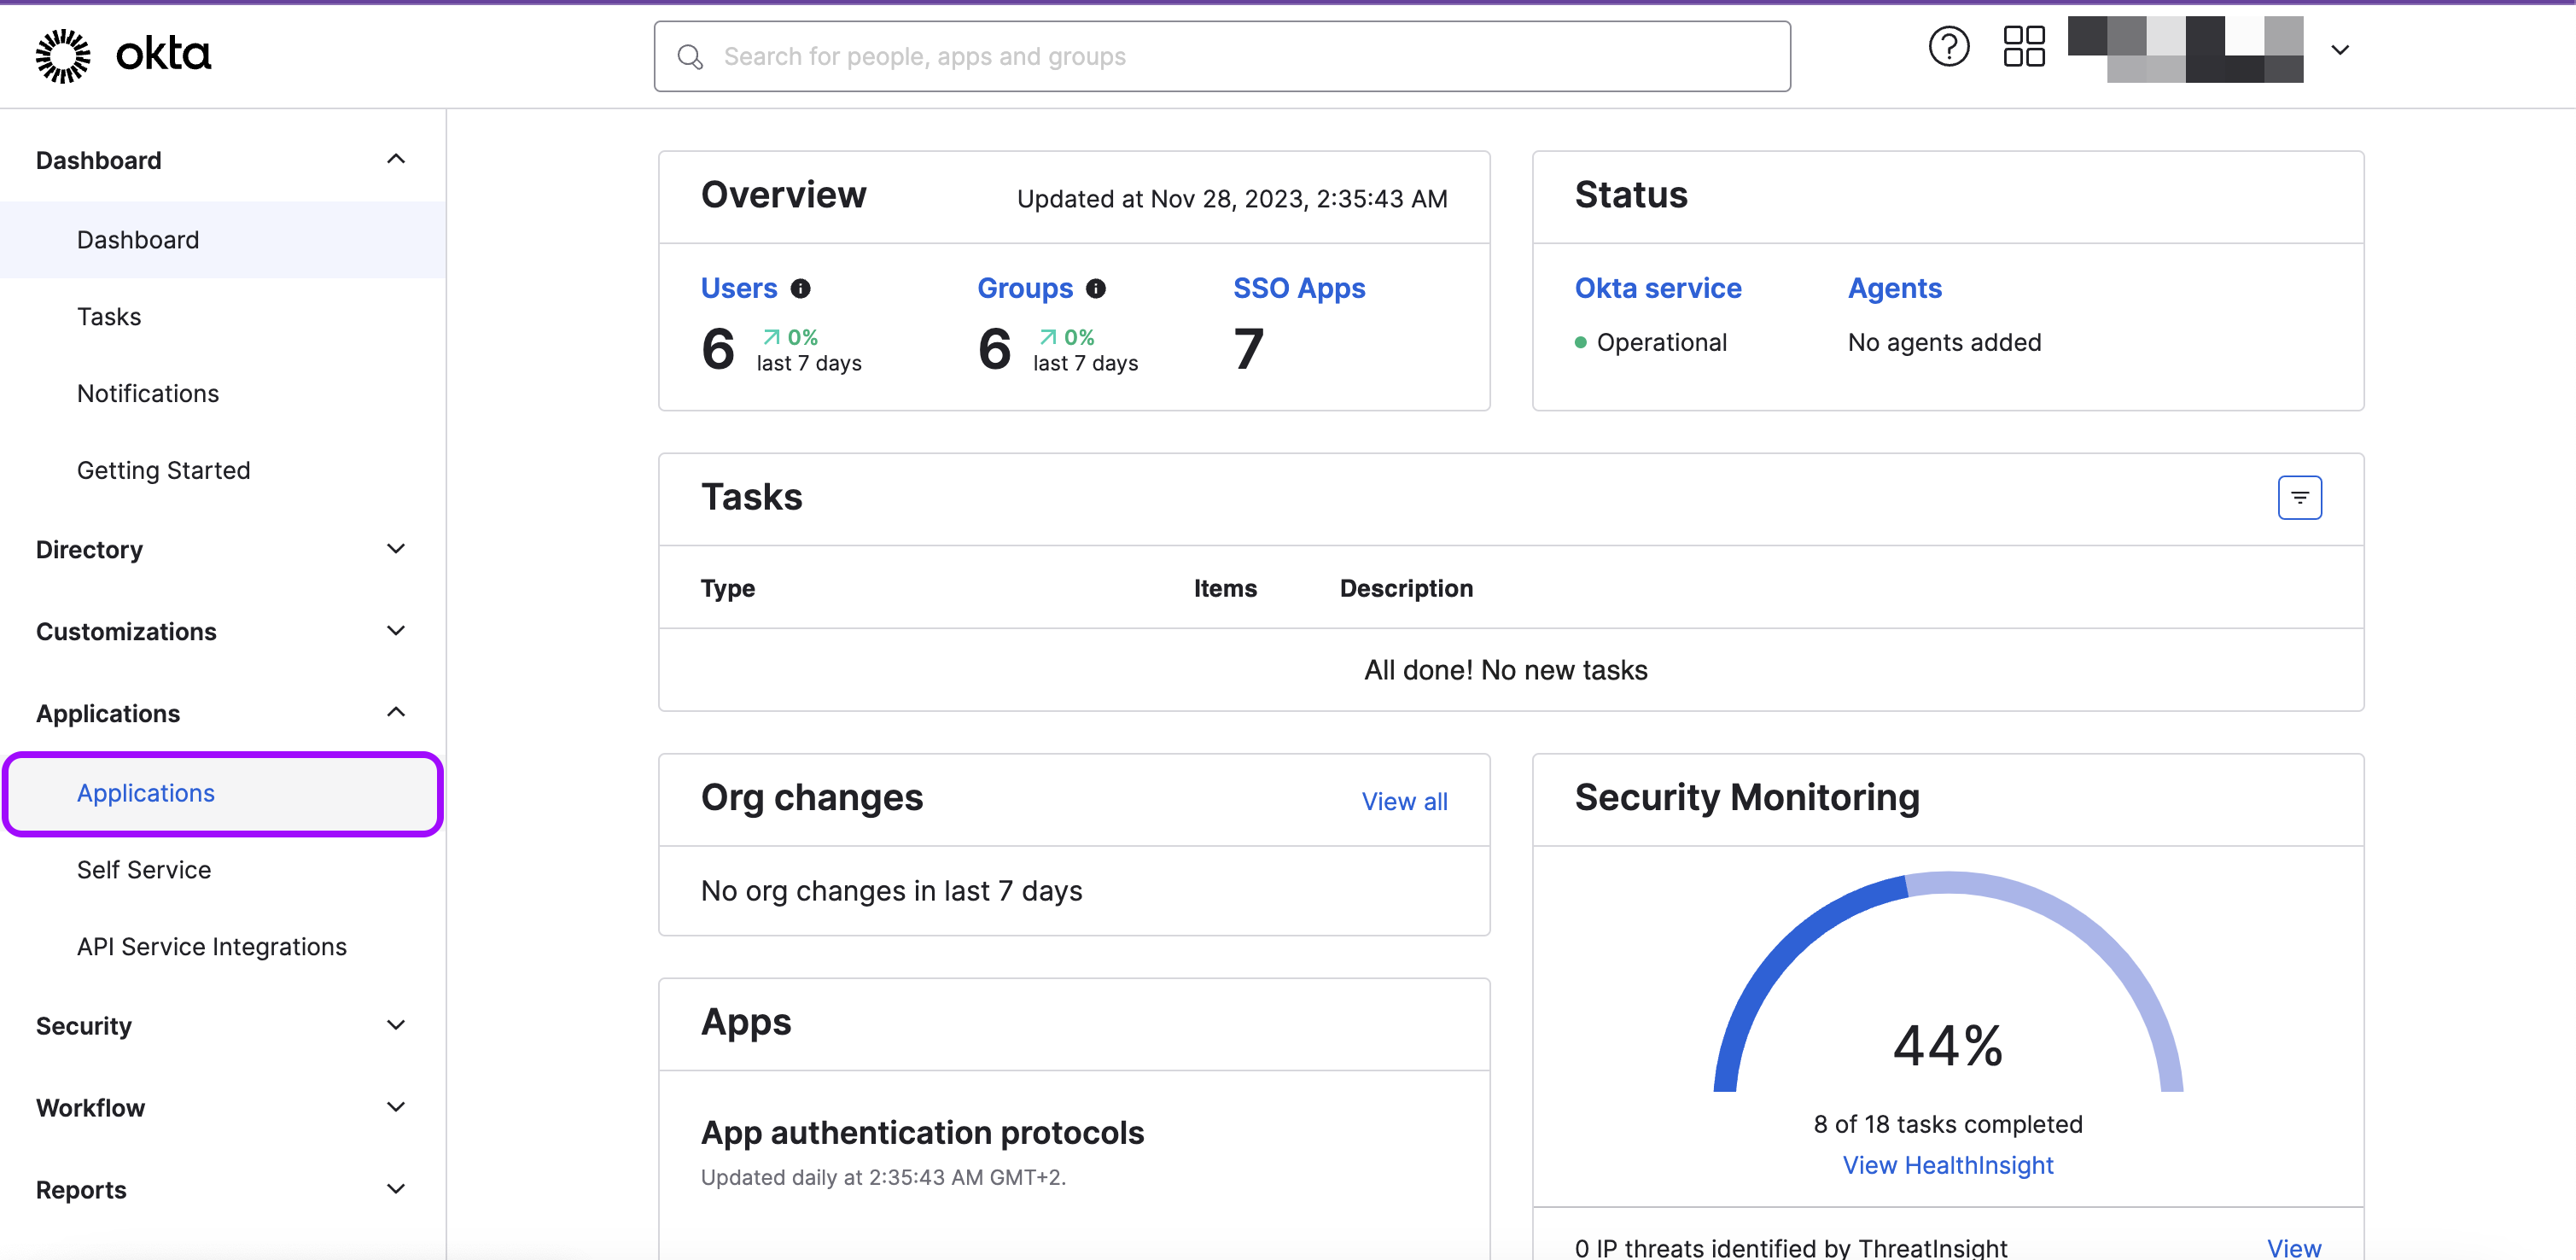
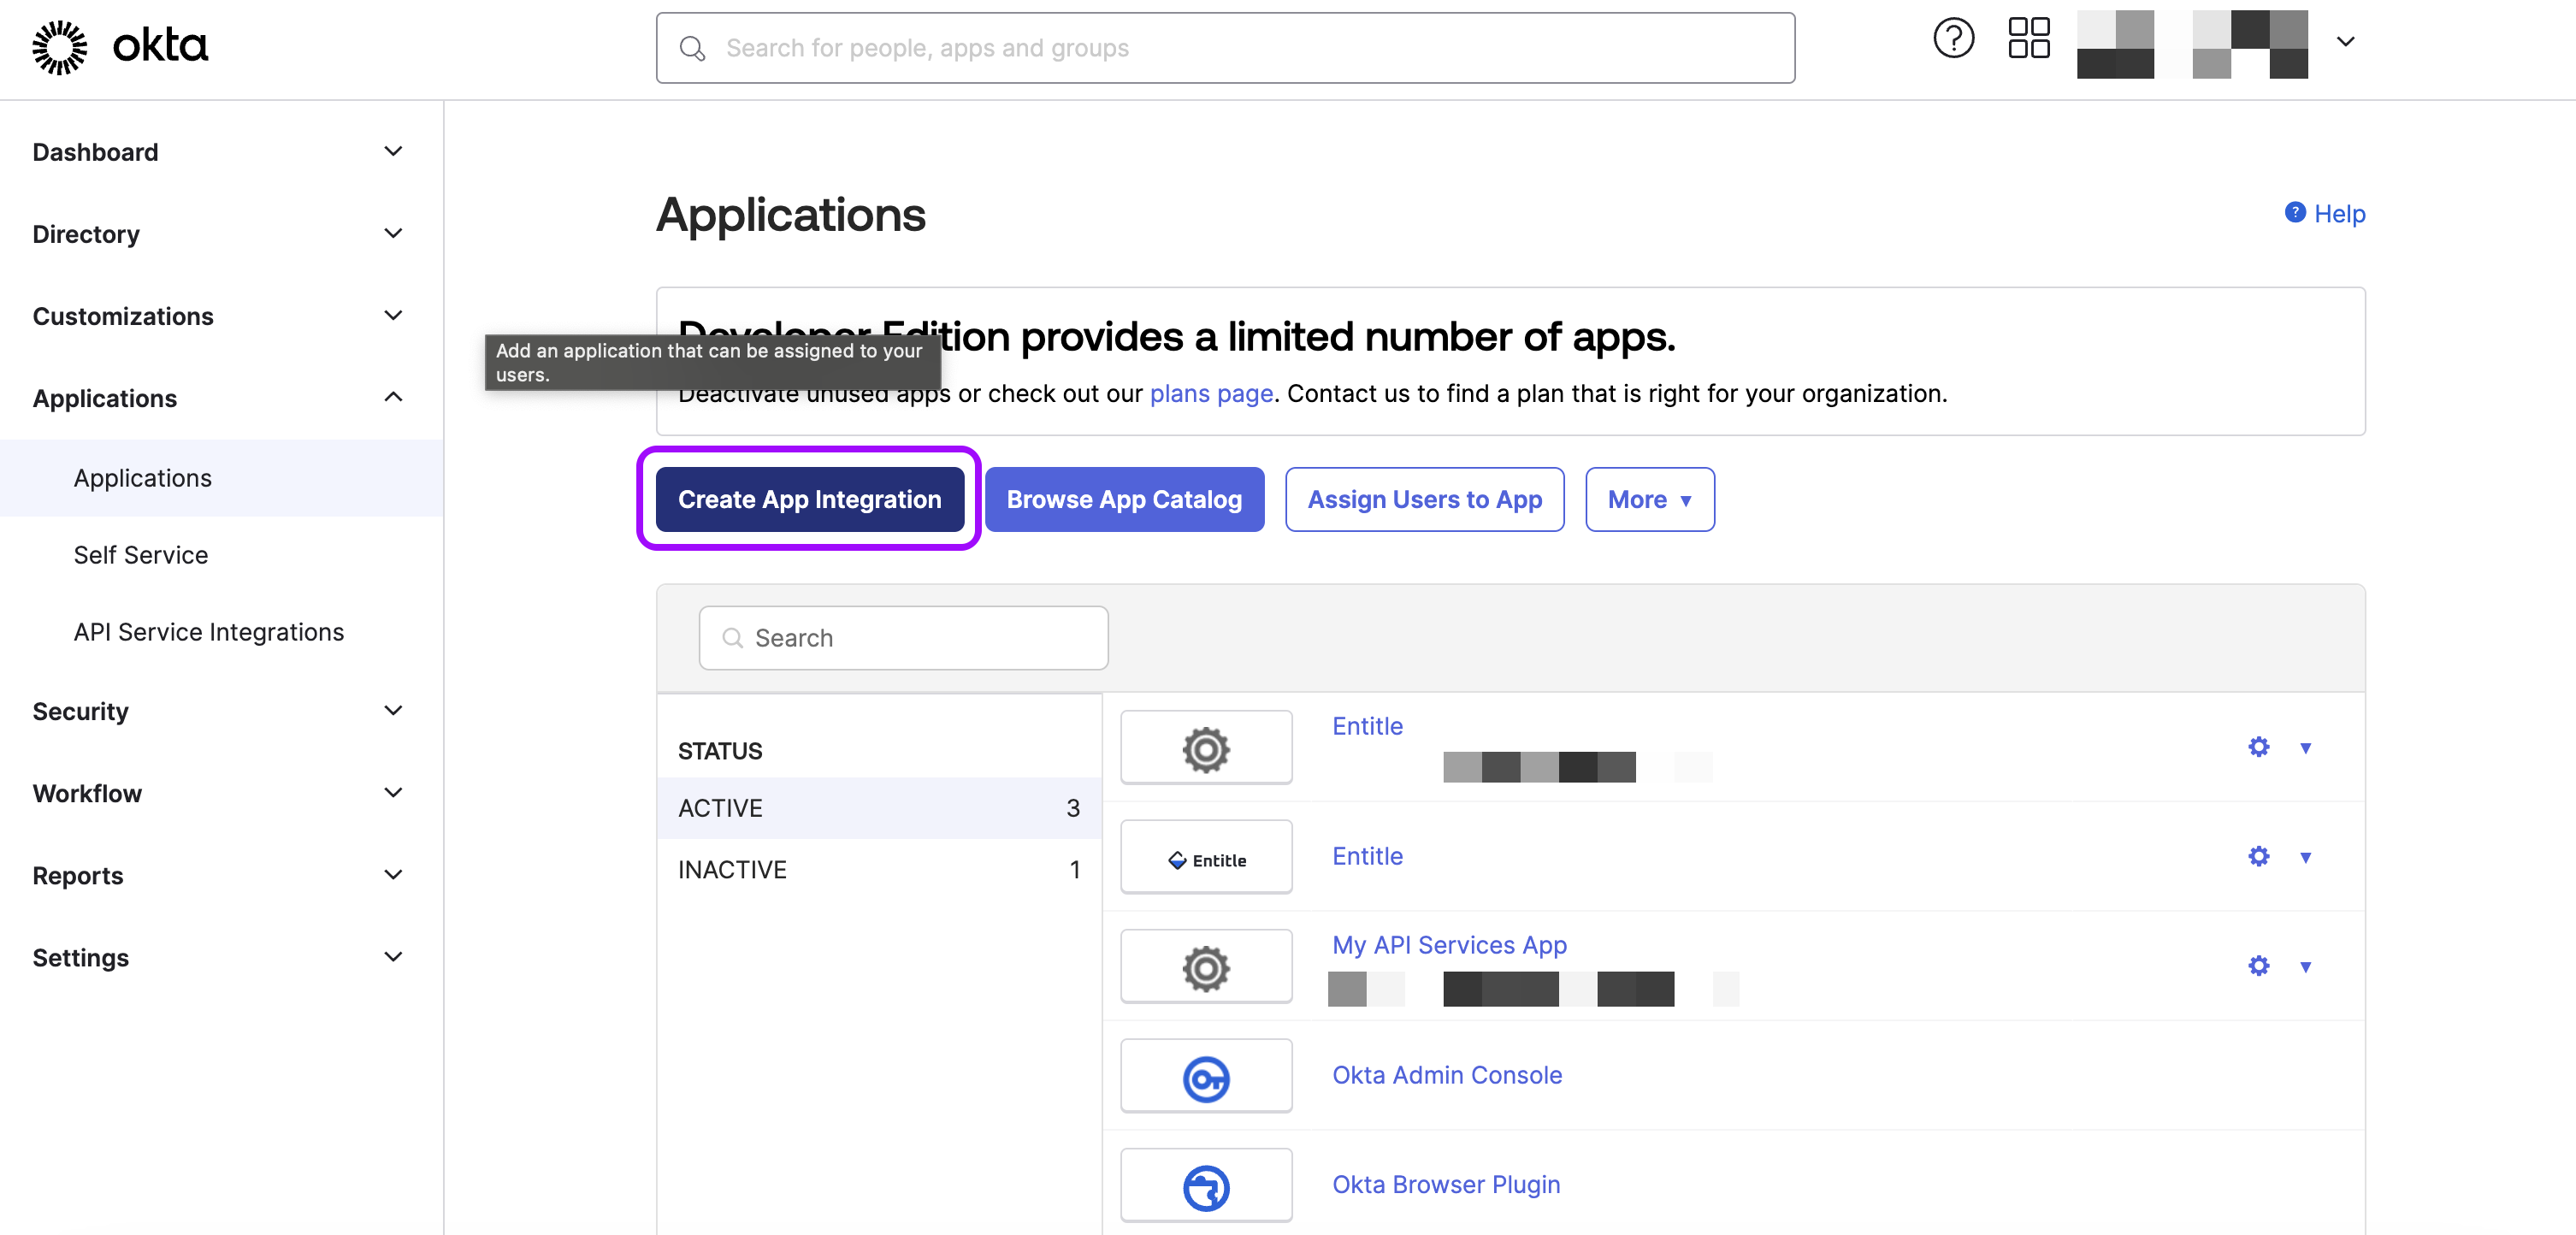
- On your Okta admin panel on the left side, click on the Applications tab and choose Applications.
-
Then click on Create App Integration.
-
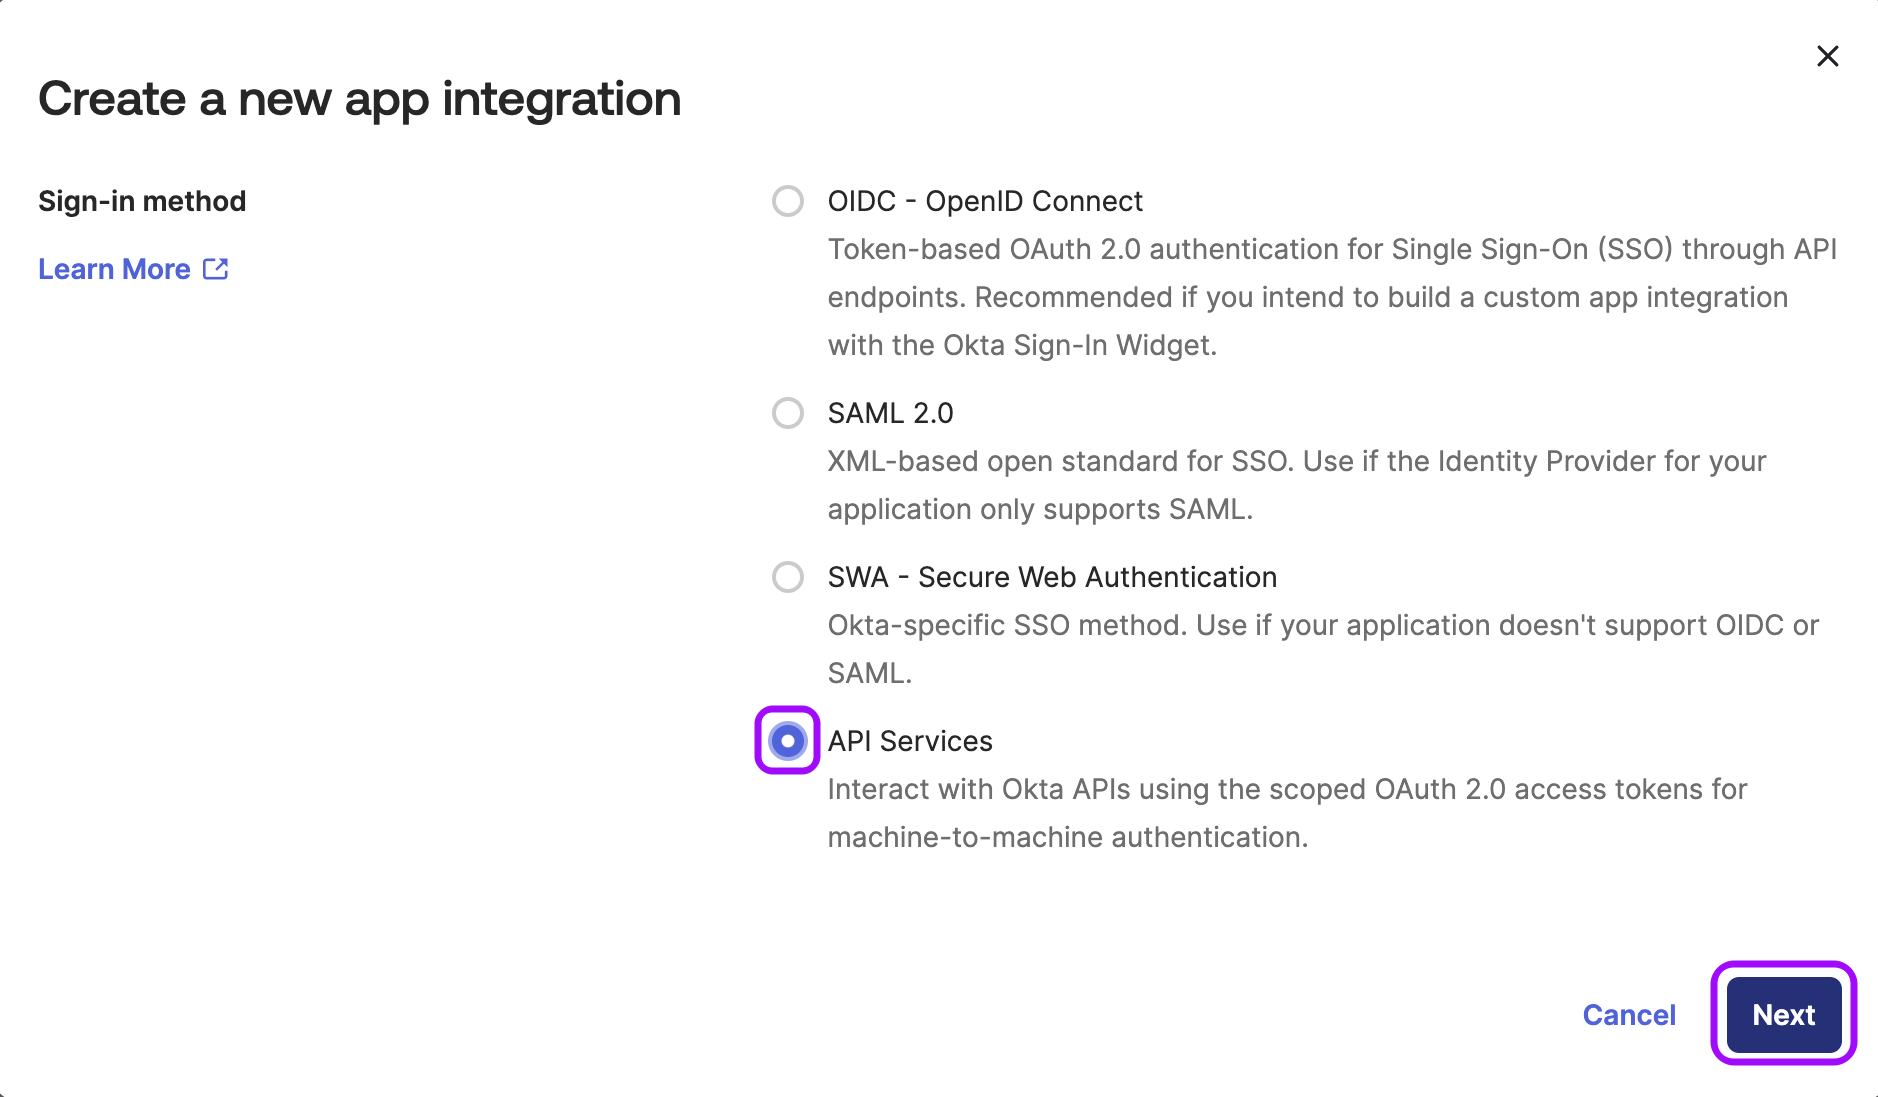
In the pop-up screen that appears, select the API Services option and click Next.
-
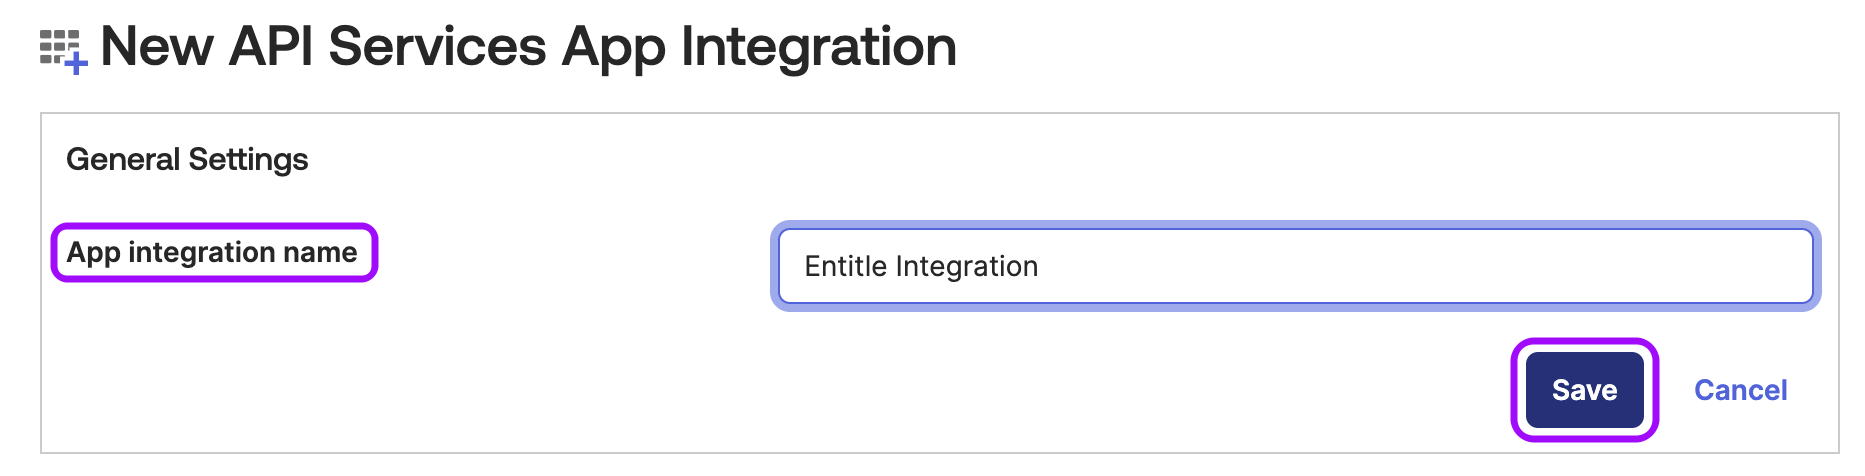
In the App integration name field, choose a name for the app and click Save.
-
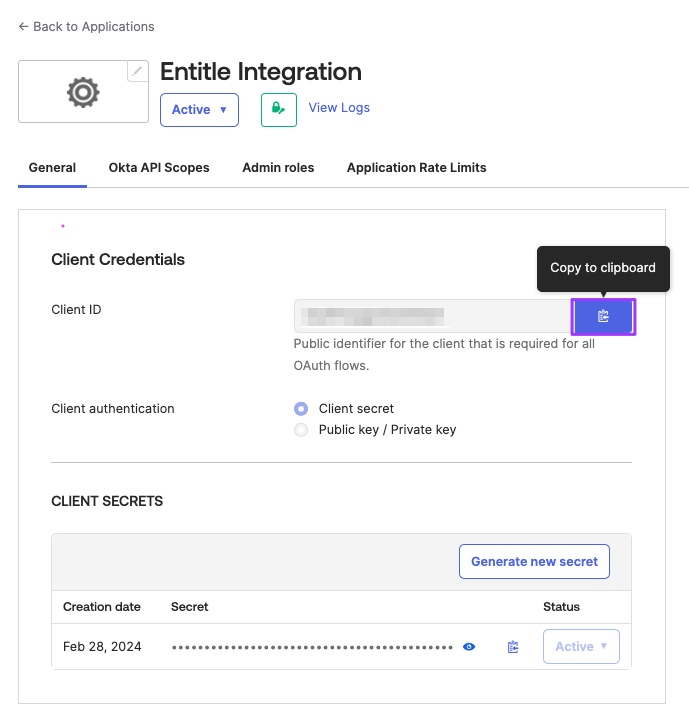
Under Client Credentials, click the Copy button next to the Client ID and keep it for later.
-
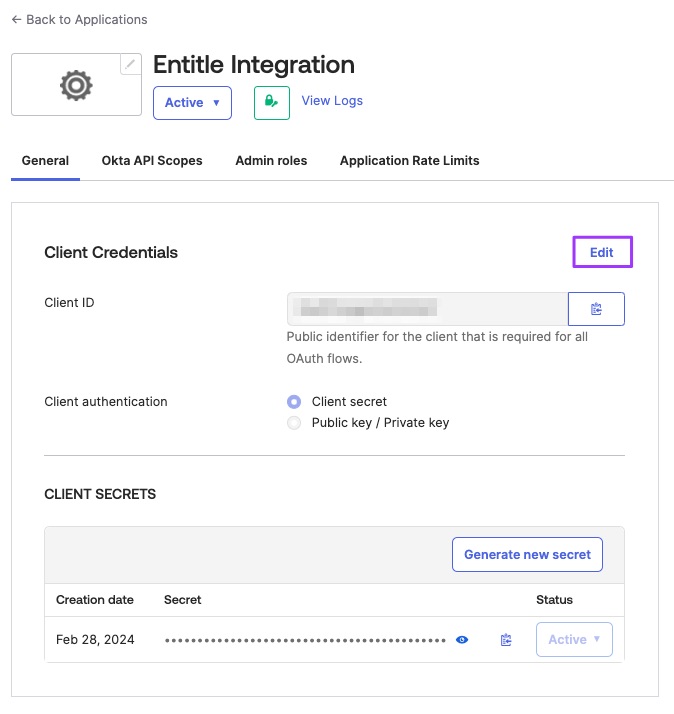
Then on the same page, click the Edit button right above the Copy button.
Stage 2: Generate a new key
-
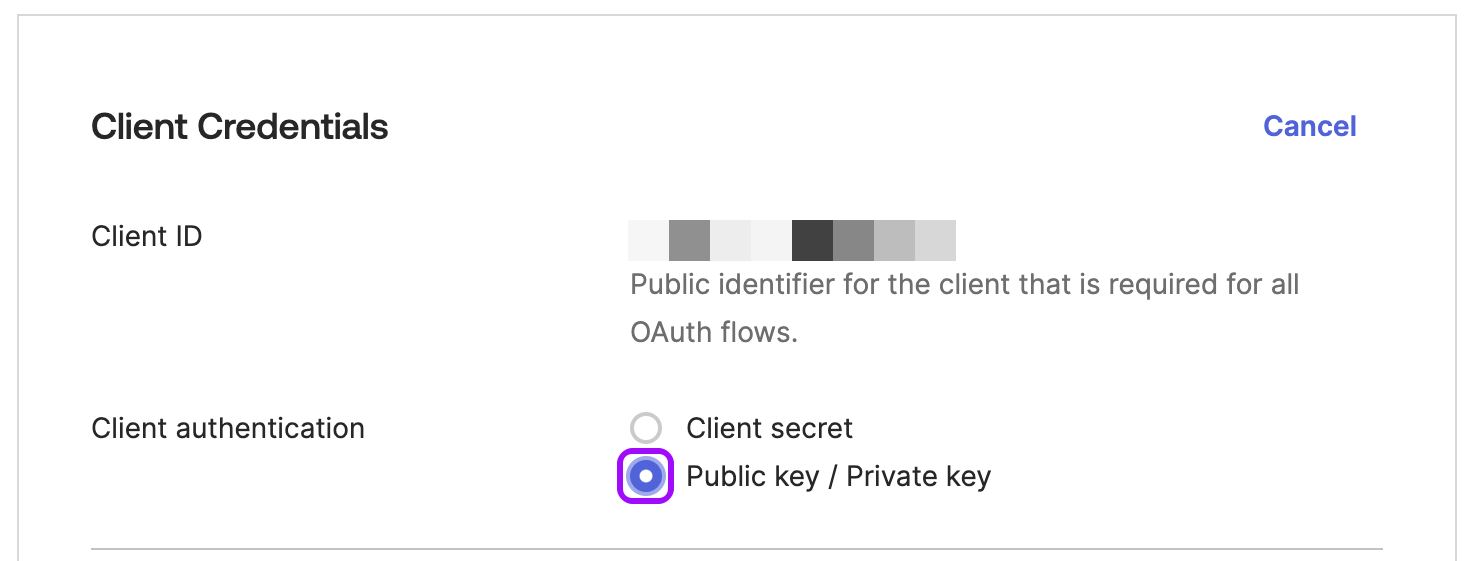
Under the Client authentication section, choose the Public key/Private key option.
-
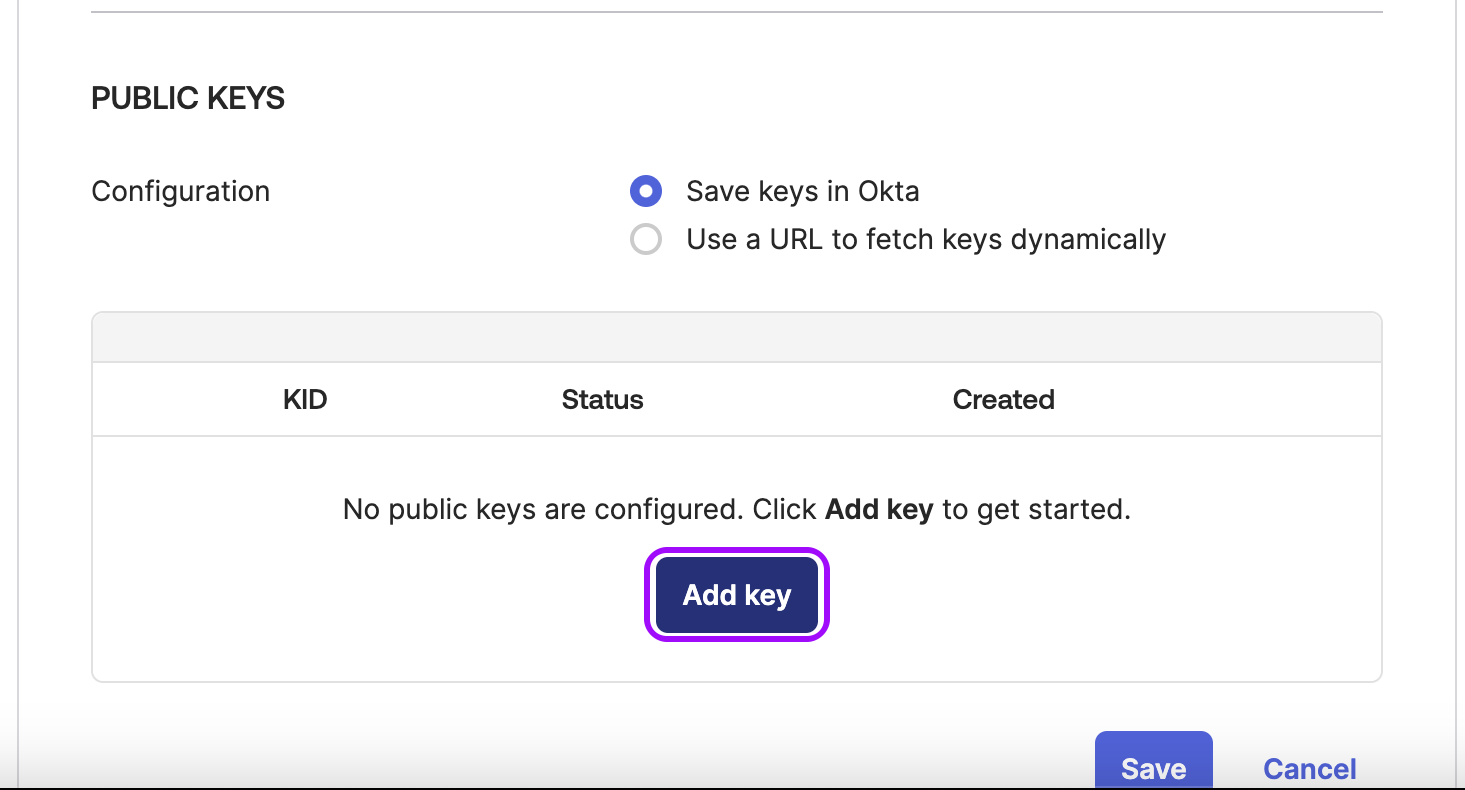
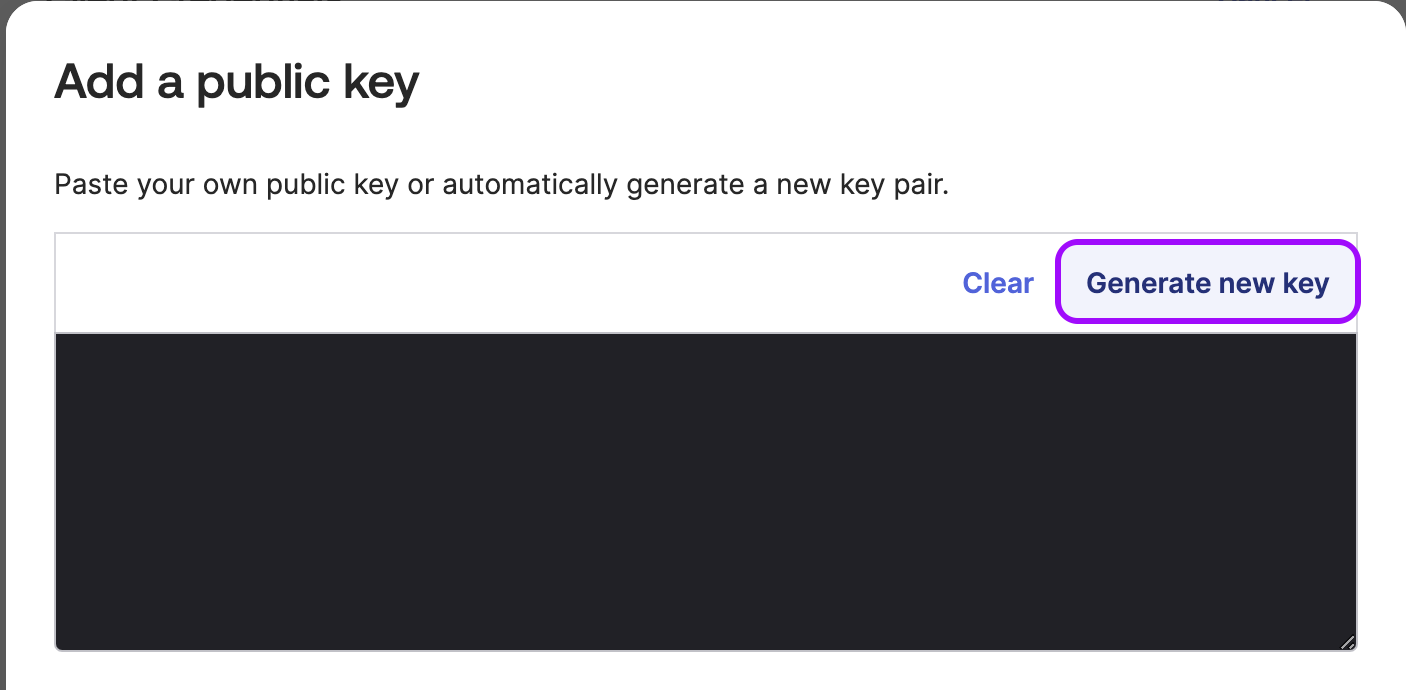
Under Public Keys, do not change the default option in the Configuration section. Then, click the Add Key button below it.
-
Click Generate new key. You should see your private key displayed on the screen.
-
Under the Private key section, click Copy to clipboard and click Done.
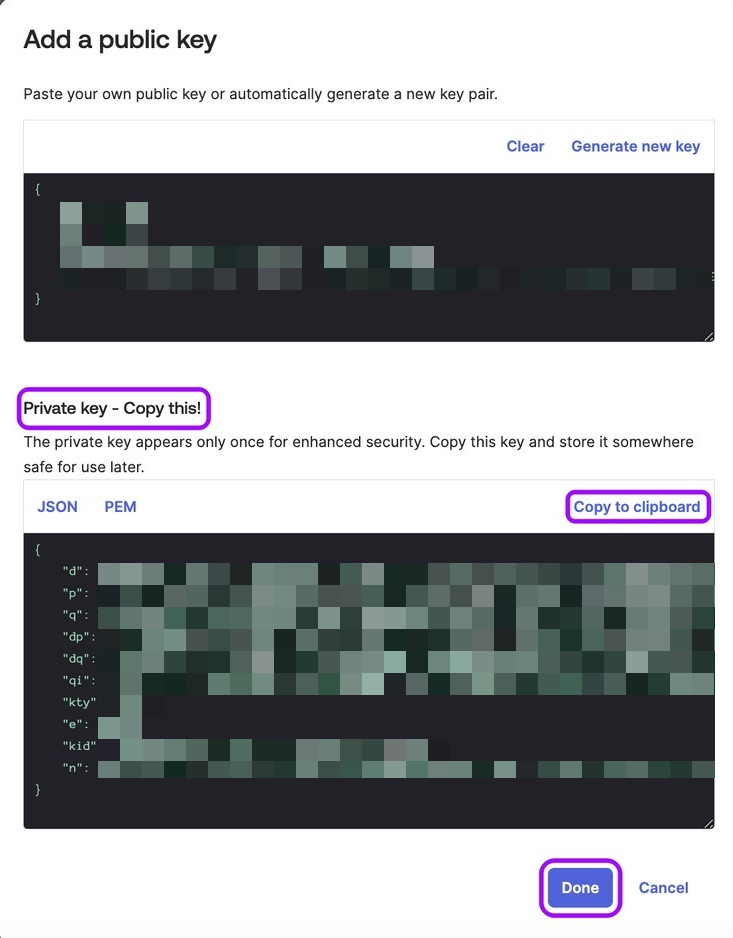
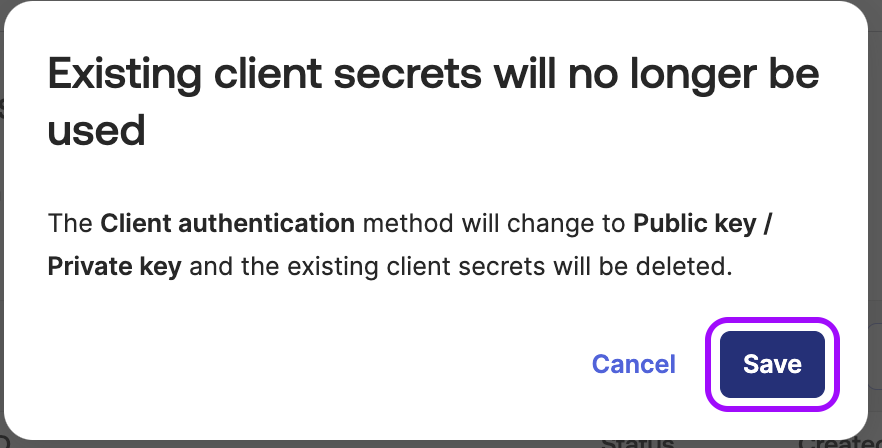
-
Click Save and then Save again to acknowledge the notice.

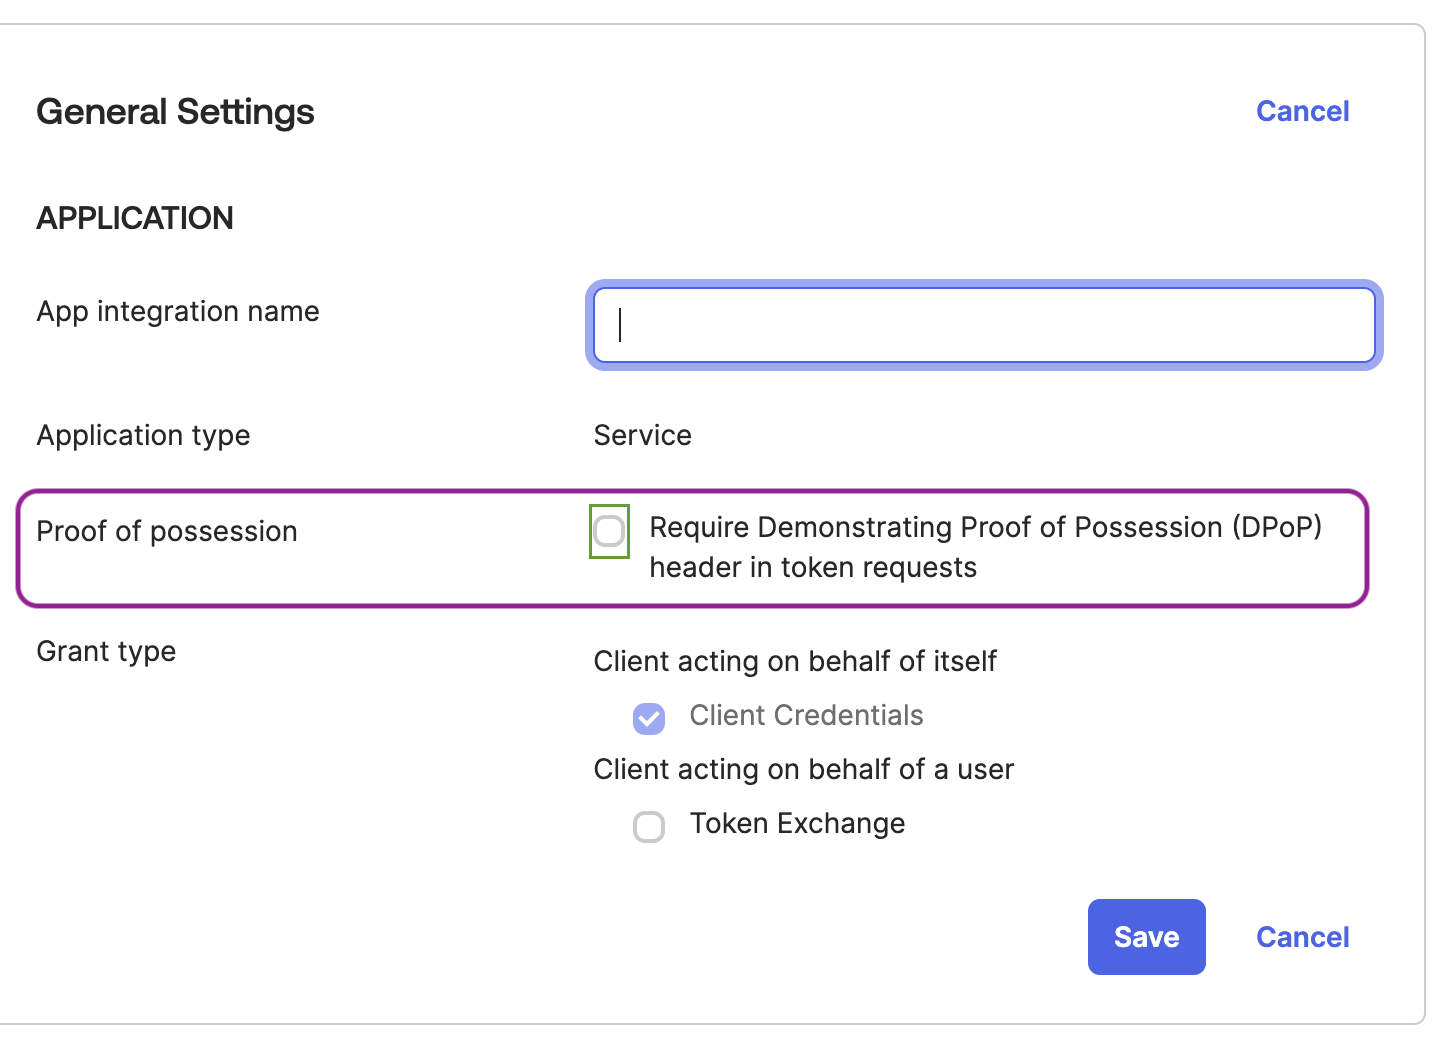
Stage 3: Disabling the Proof of Possession
In the General Settings section below, make sure the Proof of Possession is not checked, and click Save.
Stage 4: Grant permissions
-
In the Application section, click the Okta API Scopes tab.
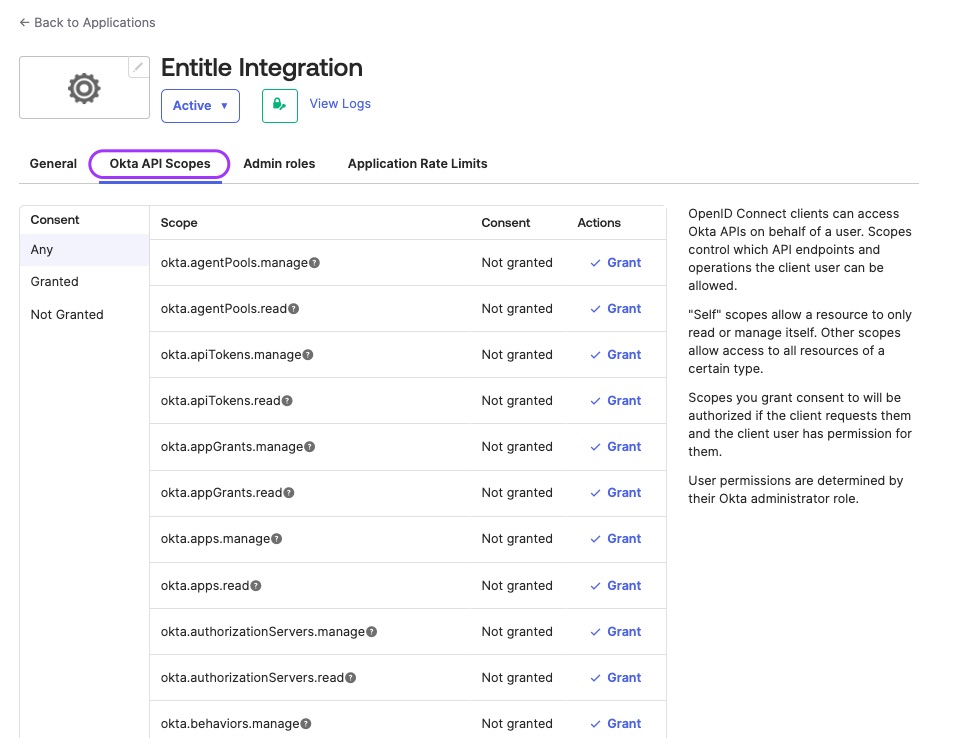
-
Click Grant and then Grant Access for the following API scopes:
okta.users.read
okta.groups.manage
okta.groups.read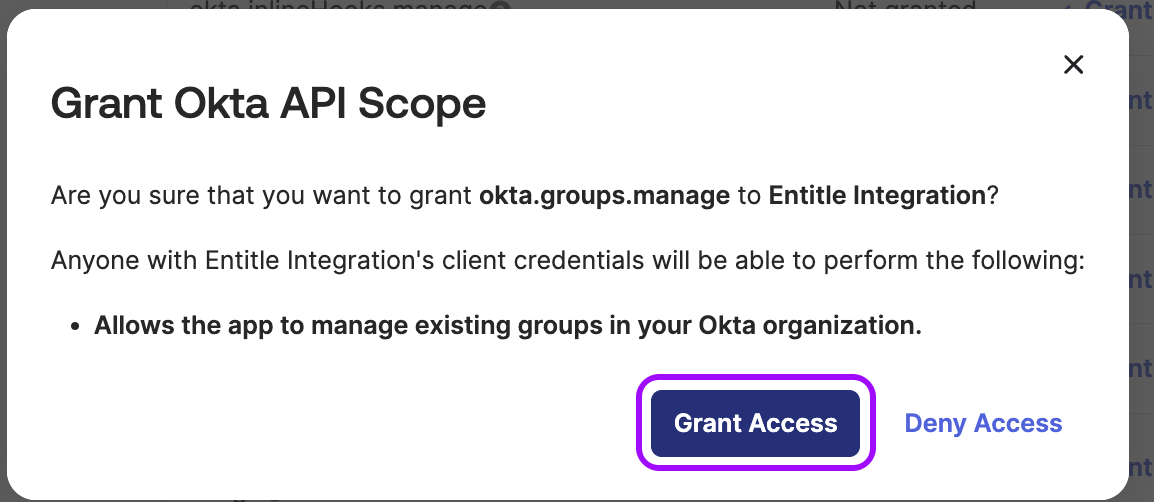
- If you wish to manage admin roles as well, add the following scopes:
okta.roles.manage
okta.roles.read- If you wish to manage application assignments as well, add the following scopes:
okta.apps.read
okta.apps.manage
Stage 5: Grant admin roles
- In the Application section, click the Admin Roles tab.
- Click on the Edit assignments button to the right.
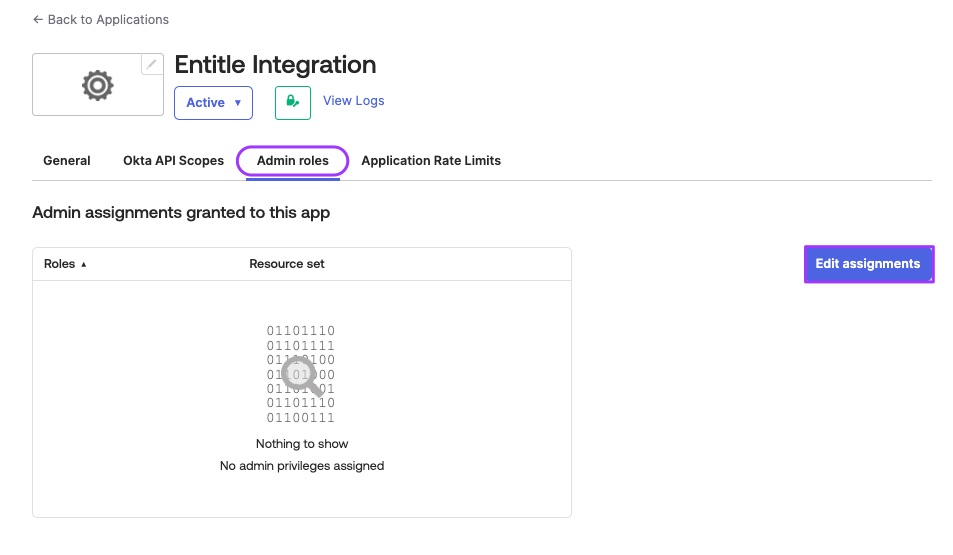
- Add the adequate assignment based on the scopes you wish to manage, and click on the Save Changes button at the end (note: the service app requires both the scopes and admin roles):
- If you wish to manage Okta
roles, assign the Entitle application to theSuper Administratorrole.- If chosen, you can skip the rest of the steps for this stage, and continue to the next part - Creating the integration in Entitle
- If you wish to manage Okta
applicationsassignment, assign the Entitle application to theApplication Administratorrole. - If you wish to manage Okta
groupsassignment, assign the Entitle application with theGroup Membership Administratorrole.
- If you wish to manage Okta
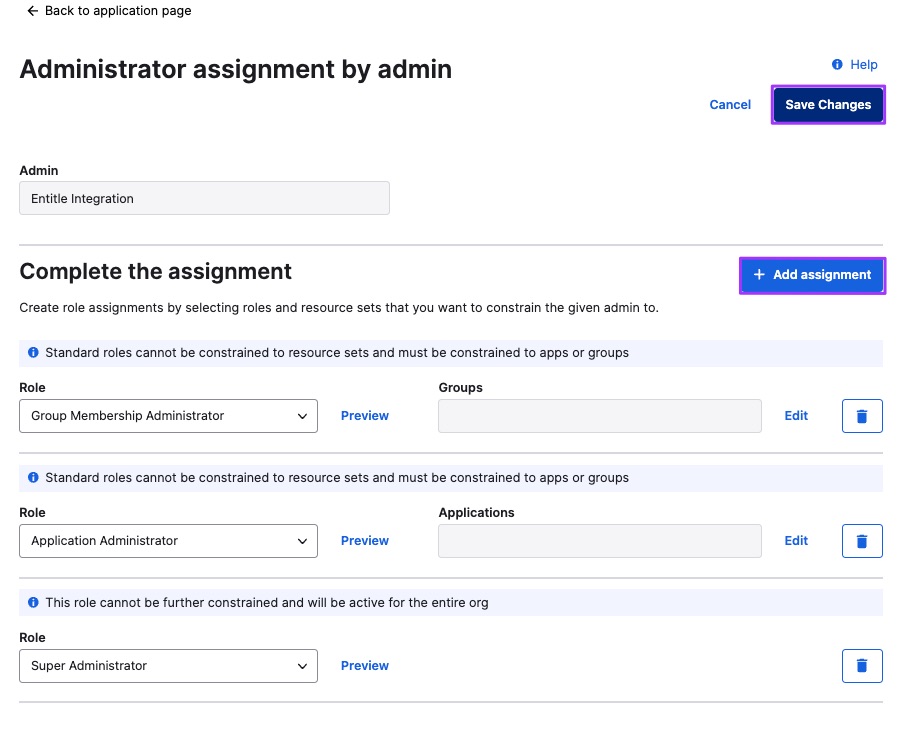
Add adequate assignments based on your chosen scopes
Group membership role limitations:
Customers may encounter situations where group membership cannot be granted, for example while creating a new bundle, or requesting group membership access in Slack or Teams and not being able to submit the request. This can occur due to the following conditions:
- The service account used for the integration lacks super-admin privileges, which are required for group membership management.
- The selected Okta group has admin roles, and non-super-admin accounts cannot add users to such groups.
To resolve this, ensure that the service account has super-admin privileges if managing membership for admin-role groups.
Creating the integration in Entitle
- Log in to Entitle and go to the Integrations page.
- After clicking the Add Integration button, type Okta in the Application field, and then under Connection choose the Service App option.
- Don’t forget to set the Save on field with your configuration, i.e. your own hosted agent or Entitle’s cloud.

- In the connection JSON, add the following information:
Private_key– place the different segments of the previously saved private key between the double quotes of the corresponding segments.Client_id– paste the client ID that you have copied earlier.orgUrl– enter the full domain of your Okta admin panel, including the ‘https://’ (e.g., https://xxxxx.okta.com).- In
optionssection - you can enable a couple of different options if you wish:- If you want to enable the Partial functionality option, enter the value
falsein theis_super_adminoption under the options section. - If you want to restrict Entitle to managing only Admin Roles and Custom Admin Roles (i.e., not group membership), under the O
ptionssection, enter the valuetruein theis_admin_roles_onlyoption. - If you want Entitle to use Okta's "group constraints" feature to grant specific roles within a particular group, enter the value
truein theinclude_role_constraintsoption. - If you have an API Access Management role in Okta and want Entitle to manage it, enter the value
_true_in the_api_acess_management_option.
- If you want to enable the Partial functionality option, enter the value
- Configure the required additional fields and click Save.
Example Connection JSON{ "Private_key": "OKTA_APP_PRIVATE_KEY", "Client_id": "OKTA_APP_CLIENT_ID", "orgUrl": "https://OKTA_TENANT_URL", "options": { "is_super_admin": true, "is_admin_roles_only": false, "include_apps": false, "include_role_constraints": true, "api_access_management": true } }
What's next?Make sure your setup is complete by testing your integration.
Updated 2 months ago
