Virtual applications | Entitle
Overview
Virtual applications in Entitle act as an abstraction layer, simplifying the end-user experience by providing access to virtualized applications without requiring users to understand the technical details of how access is granted. These applications appear as standalone apps within Entitle, with easy-to-understand resources and roles for accessing a particular application, which is often tied to less intuitive permission names.
Whether hosted on-premises or in the cloud, virtual applications are designed to abstract the complexity of underlying systems that control access, such as Identity Provider (IdP) group access, when those groups provision access to other applications (IdP mechanism).
How virtual applications simplify the end-user experience:
- Abstraction of technical details: Users see only the application name and icon, without exposure to underlying IdP groups or complex permissions. This shields them from the complexities of non-indicative resource/role names.
- Simplified access request: Users can request access to a virtual application directly, as though it were a standalone app that Entitle has a direct integration with. A user would recognize it on his access request screen and directly request access to join it.
- Streamlined user interface: The interface displays only essential details, hiding complexities like IdP groups and roles. Users encounter a clean, familiar application name, making the process straightforward and user-friendly.
This page will provide you with step-by-step instructions on how to create virtual applications in Entitle.
End-user experience
Below is a short explanation of how end-users can request access to virtual applications.
- For information on the full access request process in Entitle, see the End-user Web App guide.
- An end-user will not be aware of all the technicalities of how the access request is done when requesting access to a virtual application.
-
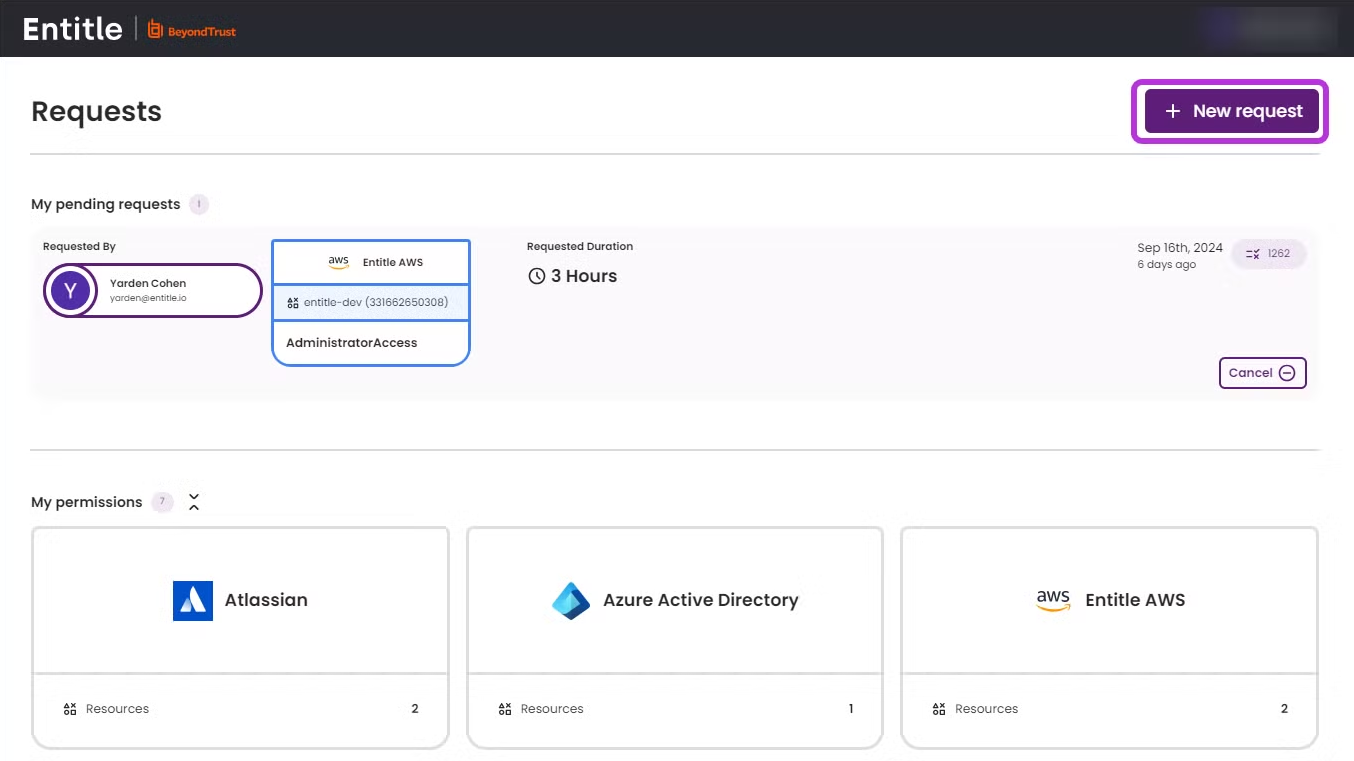
After clicking the New request button, the end-user will look for the specific application’s resources or roles they wish to request access to and then select their desired choices.
-
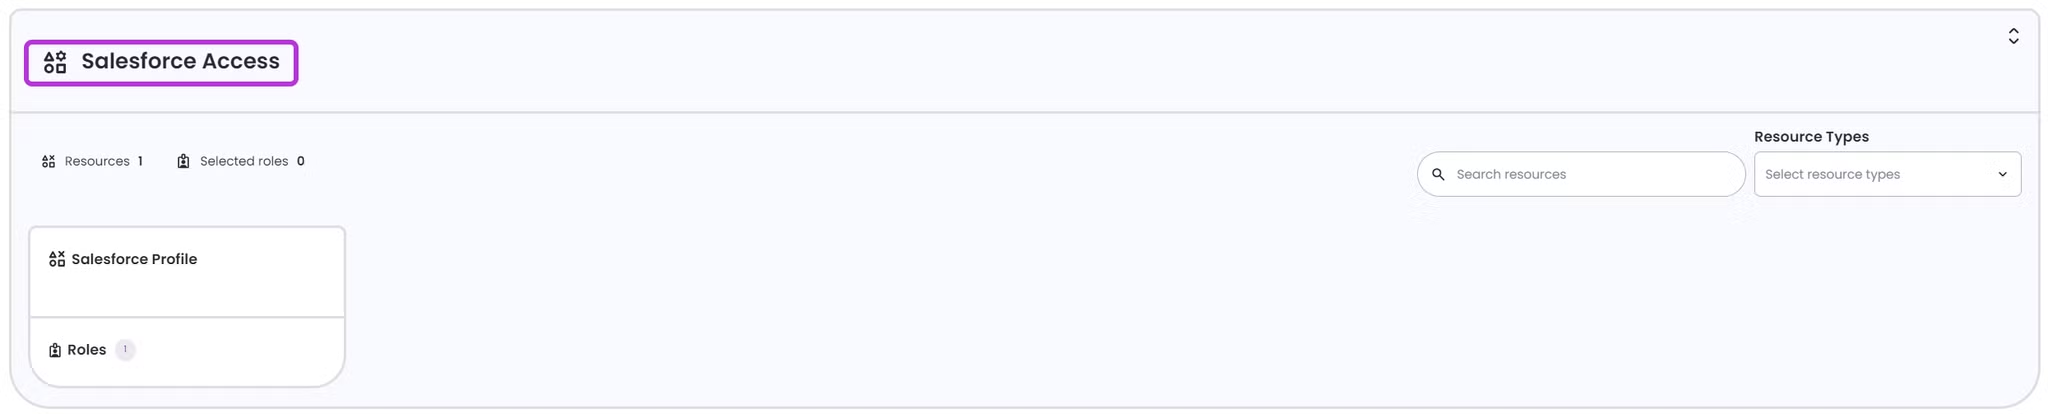
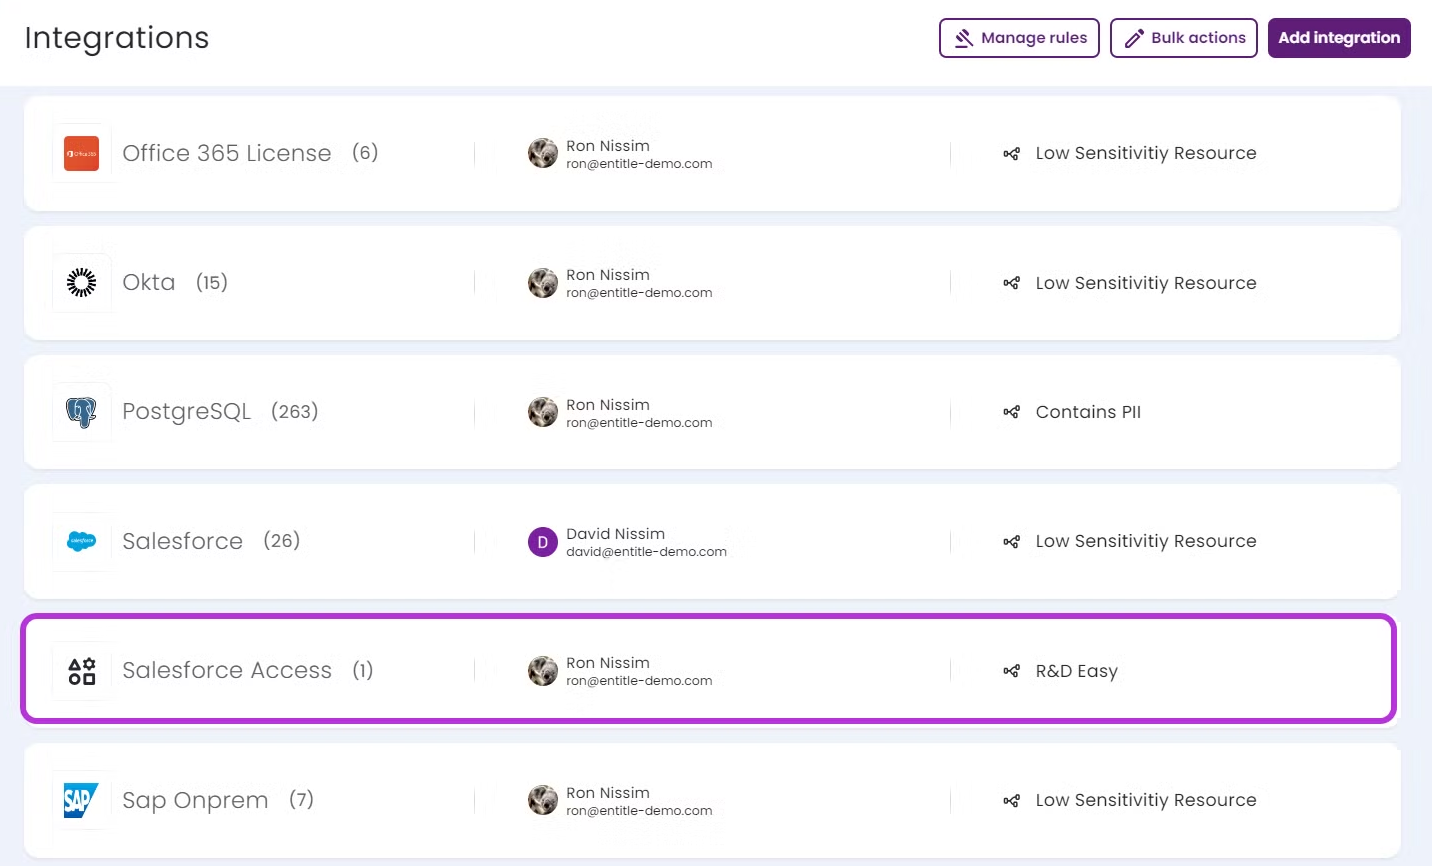
For example, an end-user who wants to request access to the Salesforce Access virtual application can look for it using the navigation bar (All/Apps/Bundles) or otherwise look for specific roles in the search bar.
-
From step 2 onwards, the access request process is identical to any other non-virtual application.
Access requests for virtual applications are not automatically approved; the admin must manually grant access to the application. Likewise, revoking access requires a manual process.
Prerequisites
- To set up new virtual applications and manage existing ones, you must have Admin permissions in Entitle. Keep in mind that end-users will only be able to request access to the virtual applications.
Set up a Virtual Application in Entitle
-
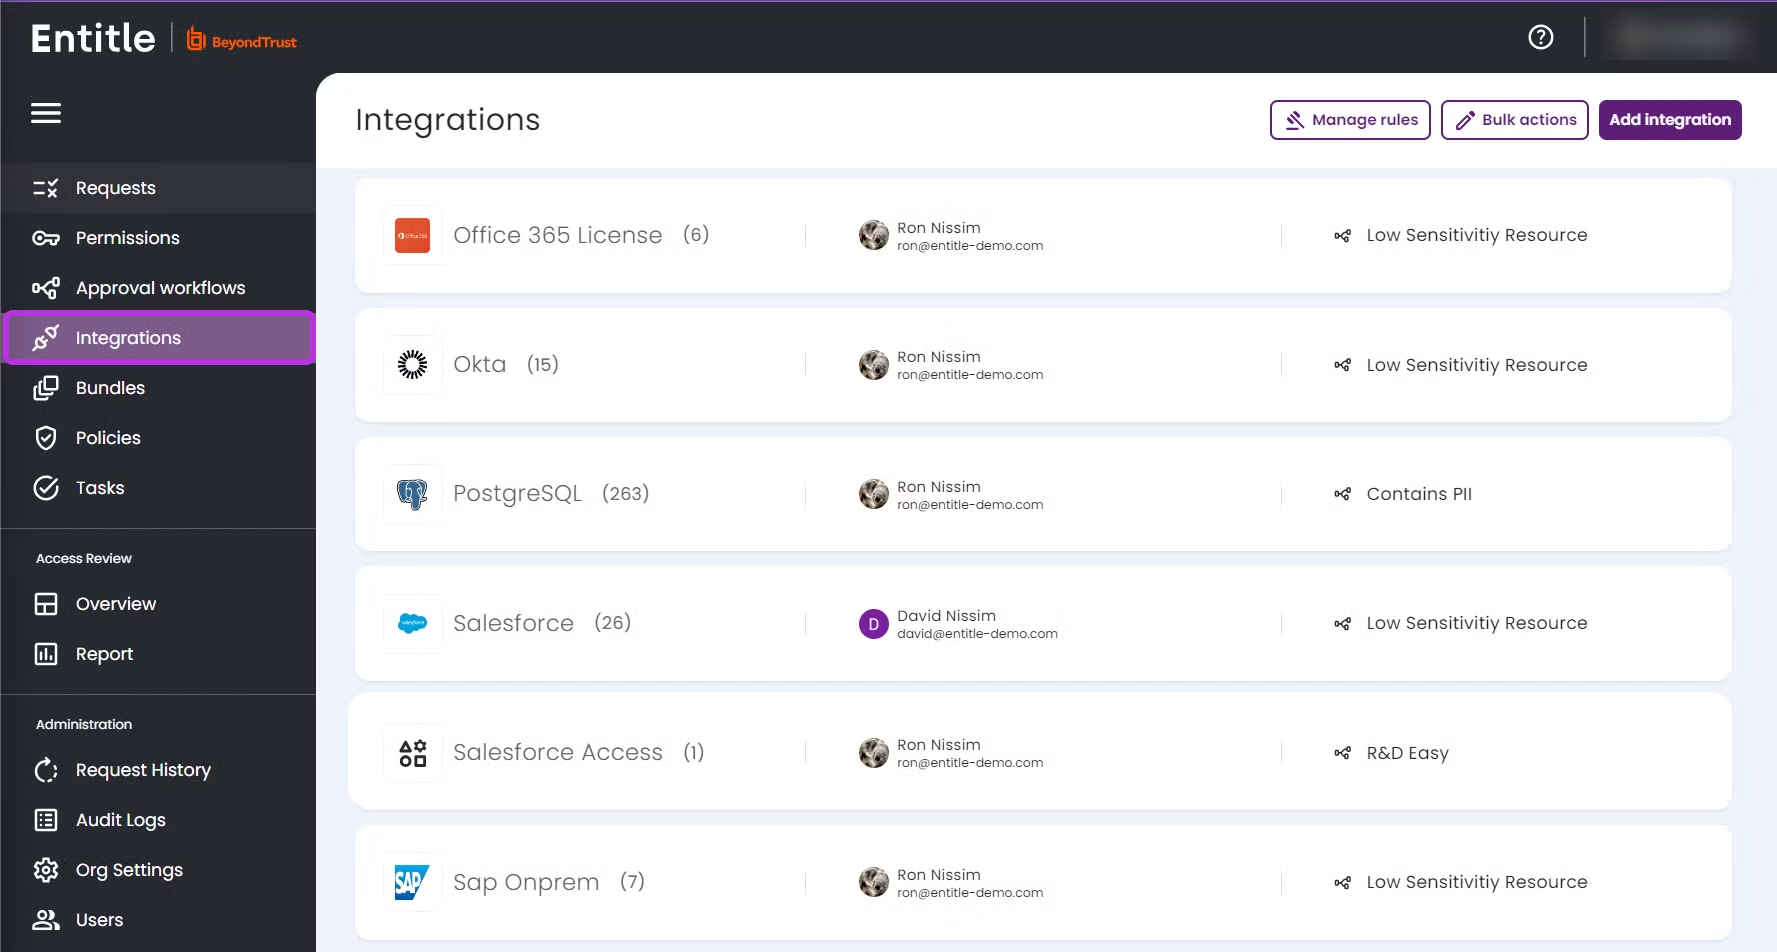
Log in to Entitle with an Admin account, navigate to the Integrations screen on the left-side menu.
- Click the Add integration button and insert Virtual Application in the Application field. Then, choose a Name for it and a Default Approval Workflow (you can change that later if needed).
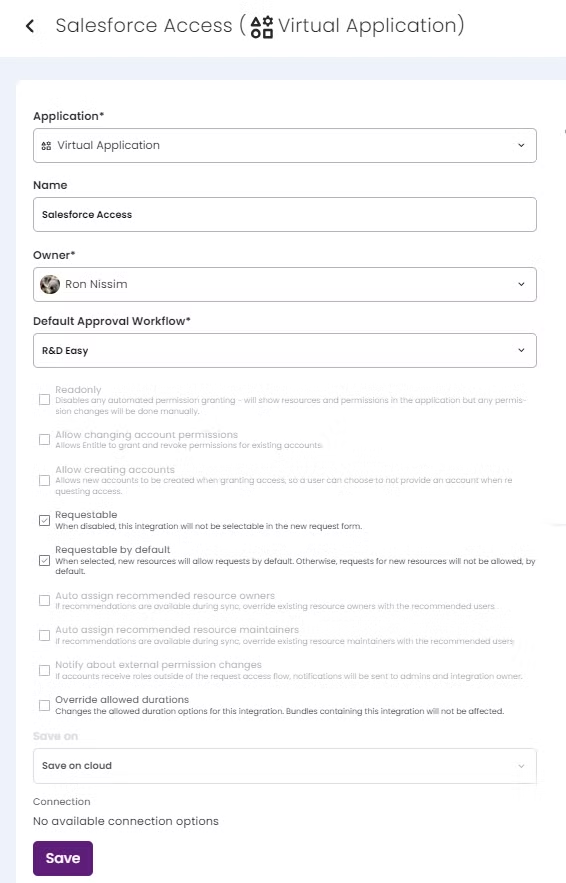
Virtual applications can only be saved on Entitle’s cloud and not on another agent, as they only refer to resources.
- Finally, click Save.
Manage your virtual applications
-
In the Integrations screen, click on your selected virtual application from the integrations list - notice it has the following automatic logo:
-
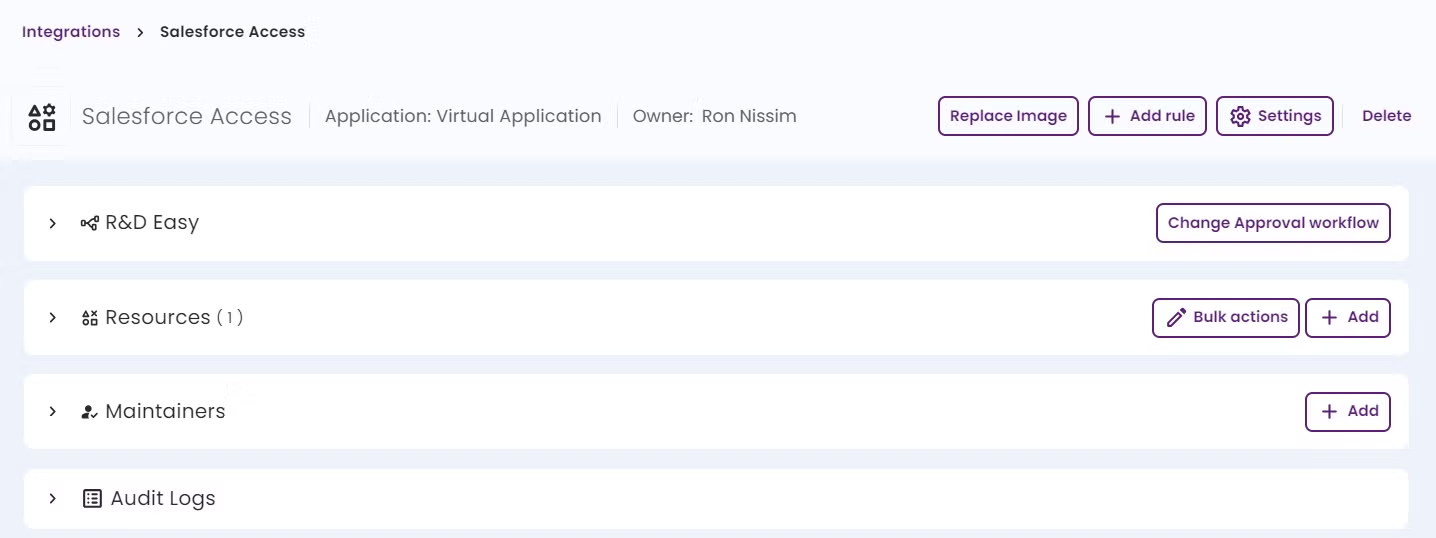
In the virtual application’s screen below, you will be able to do the following actions:
-
Make changes to the virtual application’s basic information:
- Owner and additional settings - click the Settings button in the top-right corner. If you wish to delegate the ownership to other users, simply search for them in the search bar. Make sure to click Save if you have made any changes.
- Icon - click on the Replace Image button found in the top-right corner.
- Name - click on the Virtual Application name found at the top of the screen.
- To delete the Virtual Application, click on the Delete button in the top-right corner.
-
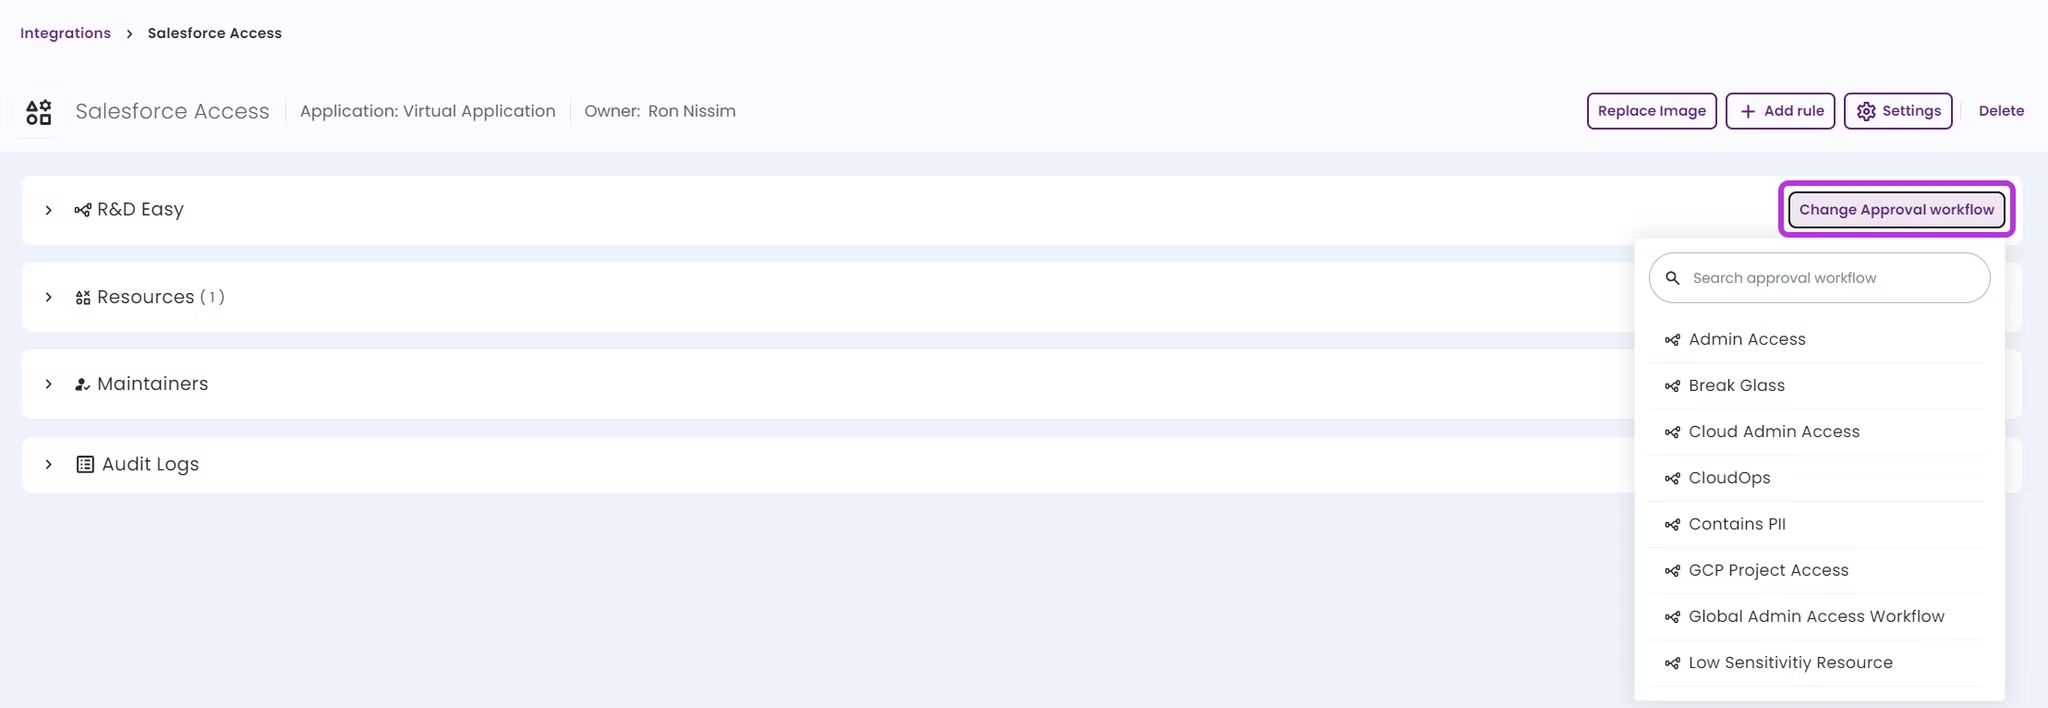
Click the Change Approval Workflow button if you wish to change it to a different workflow.
-
Manage Resources
-
To add a new resource, click the Add button found under the Resources section.
-
In the new pop-up screen, fill in the mandatory information:
-
Name of the resource.
-
Default Approval Workflow, in case it’s a different one from what was set earlier.
-
Default Role name.
-
Virtualized Integration.
-
Virtualized Resource.
-
Virtualized Role.
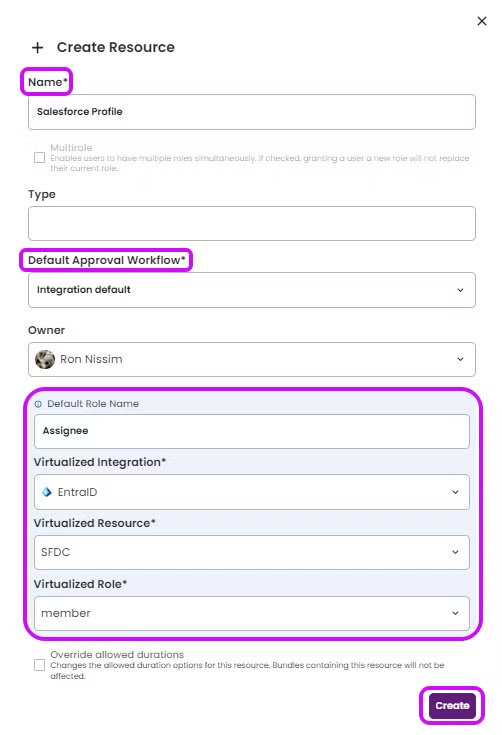
You can also choose to add the Type of resource and delegate the resource’s ownership to another user. Once done, click *Create.
-
-
Once returned to the virtual application’s screen, by clicking on the resource that you have created you will be able to see the role and its virtuality. You can add as many resources as you wish.
-
-
Add Maintainers if needed by clicking on the Add button in the Maintainers section. Once done, click Save.
-
See the virtual application’s Audit Logs history by expanding the Audit Logs section.
-
Create new Rules or Bulk Actions
-
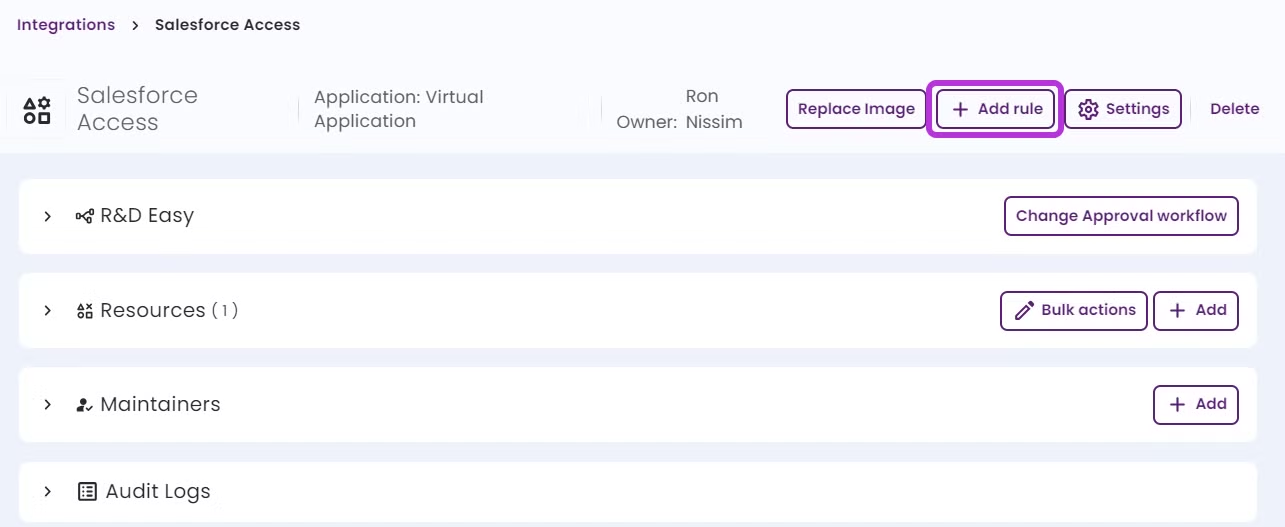
To create new Rules for resources and roles, click the Add rule button in the top-right corner of the Integrations screen. Then, follow the Rules guide.
-
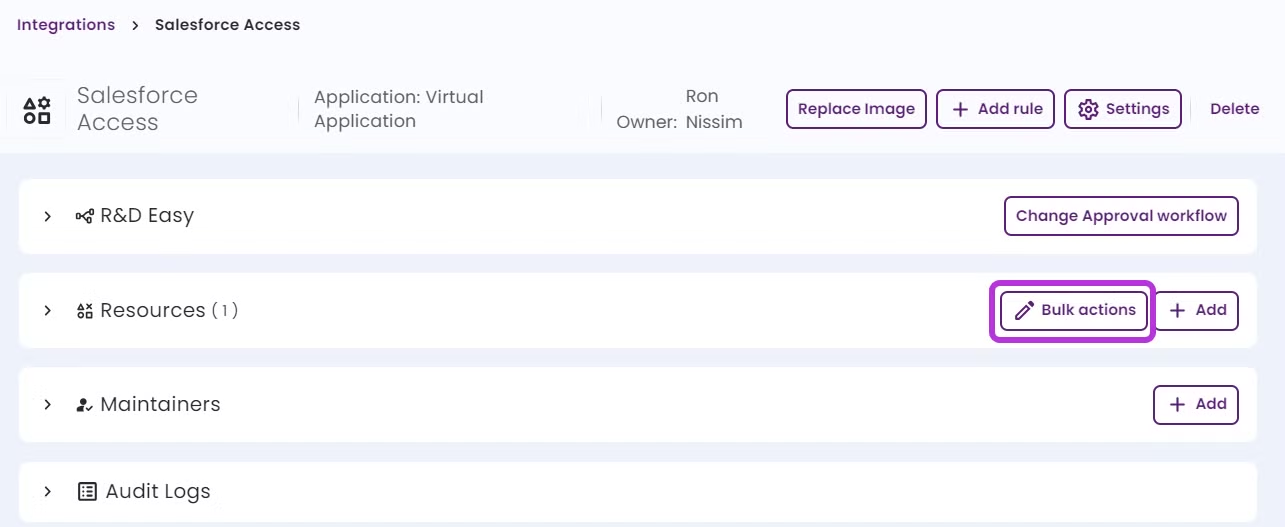
To create new Bulk Actions for integrations, resources, and roles, click the Bulk Actions button in the Resources section. Then, follow the Filtering and Bulk Actions guide.
-
-
Updated 3 months ago
