Microsoft 365 | Entitle
Overview
Microsoft 365 is a product family of productivity software, collaboration, and cloud-based services owned by Microsoft. It encompasses online services such as Outlook, OneDrive, Microsoft Teams, programs formerly marketed under the name Microsoft Office, and enterprise products and services associated with these products.
Entitle can manage Admin roles in Microsoft 365.
This page will provide you with instructions on how to integrate Entitle and Microsoft 365.
General guidelines
In case you have already integrated Azure AD with Entitle using this guide, you can use the same Entra application configuration and continue to the Set Up in Entitle section.
To integrate your Microsoft 365 with Entitle, you will need to:
- Create an application on Entra ID, and extract Client and tenant IDs.
- Create a secret, and extract its value.
- Provide Entitle with adequate permissions for the application.
Set up Microsoft 365 Directory to work with Entitle
Stage 1: Create an application
-
Go to the Microsoft Azure portal.
-
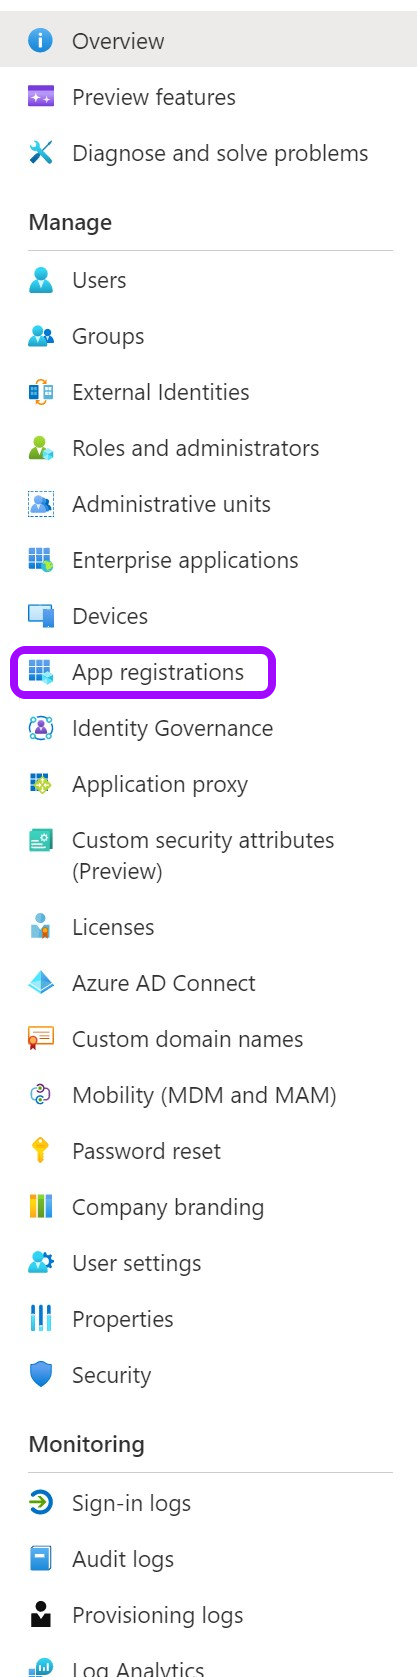
Click on Microsoft Entra ID.

-
Click on the App registrations tab in the left-side menu.
-
Then, click on New registration.

-
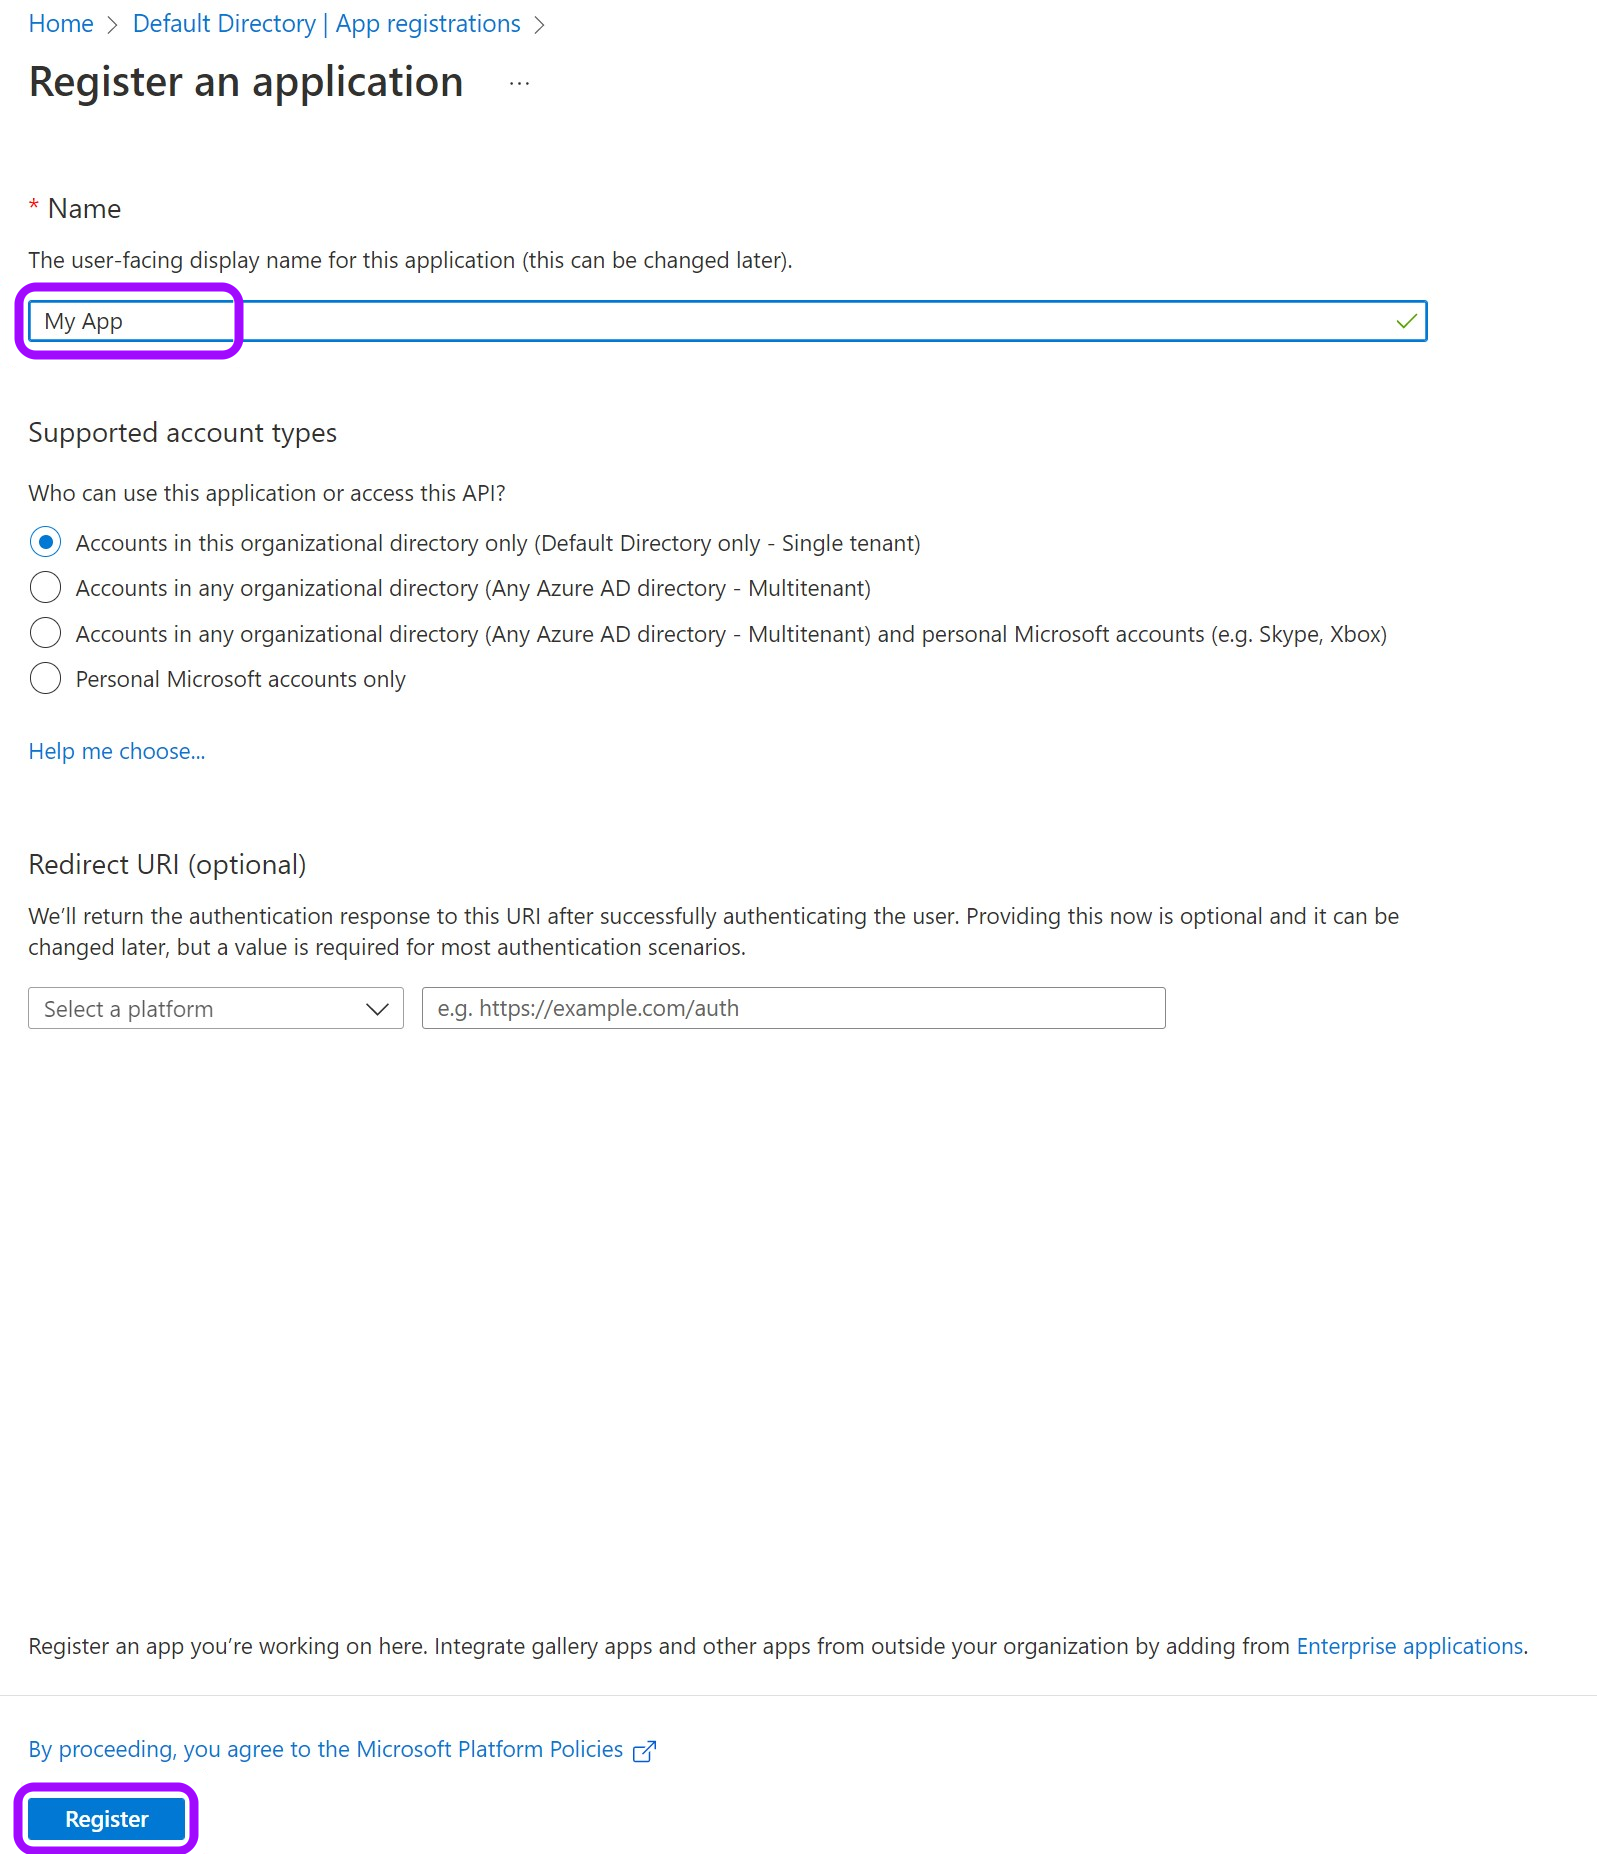
Give your app a Name and leave the rest as is. Then, click on Register.
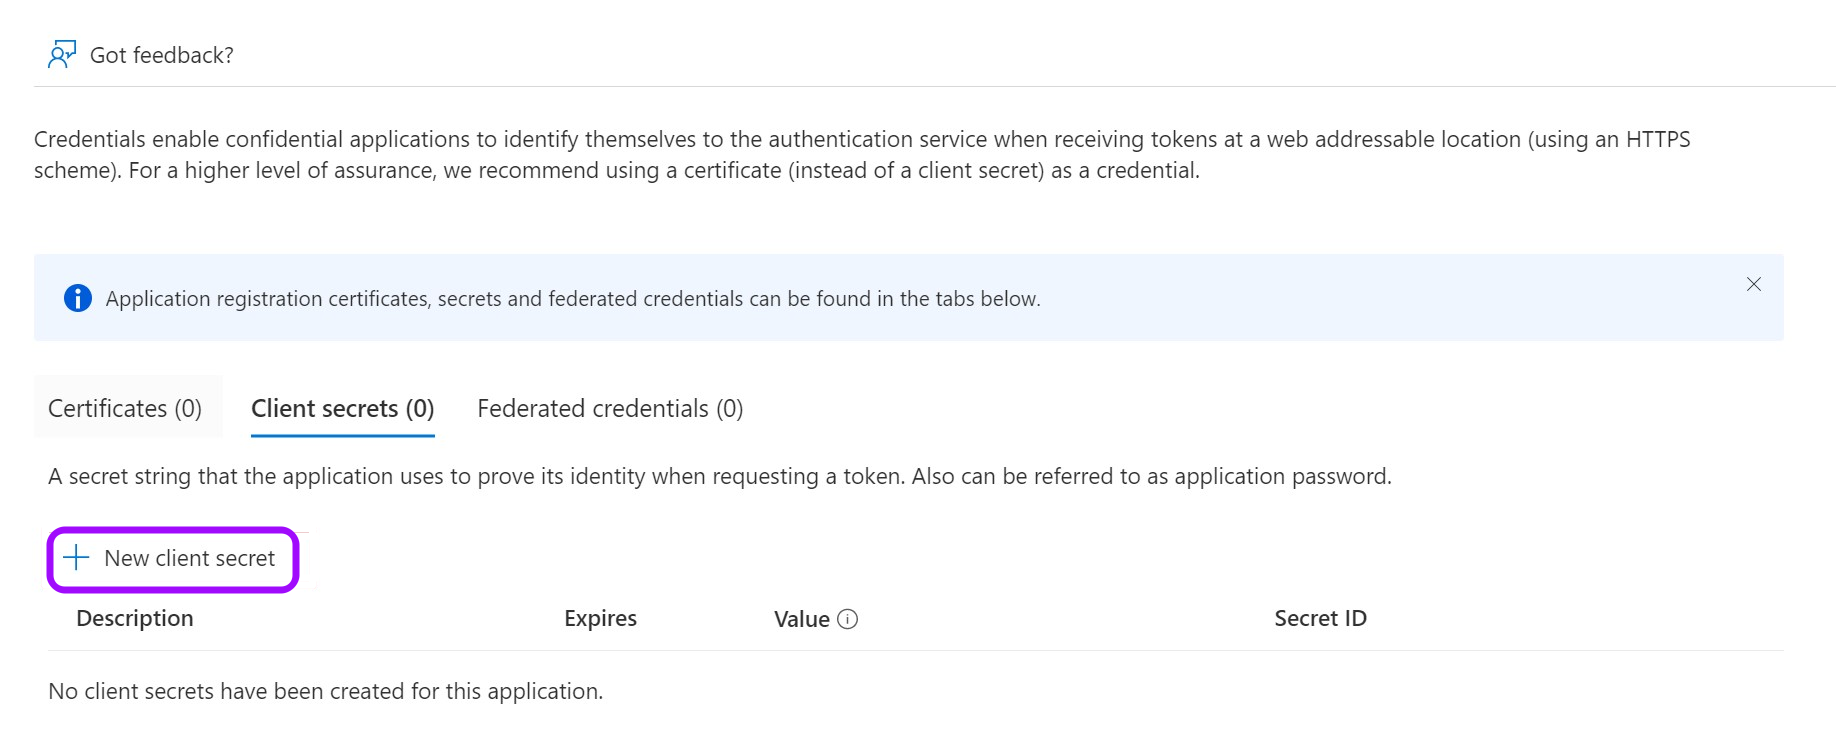
- Keep your Application (client) ID and Directory (tenant) ID for later. Then, click on Add a certificate or secret on the right side. Currently, this integration supports only certificates and secrets, not federated credentials.

- Click on New client secret.
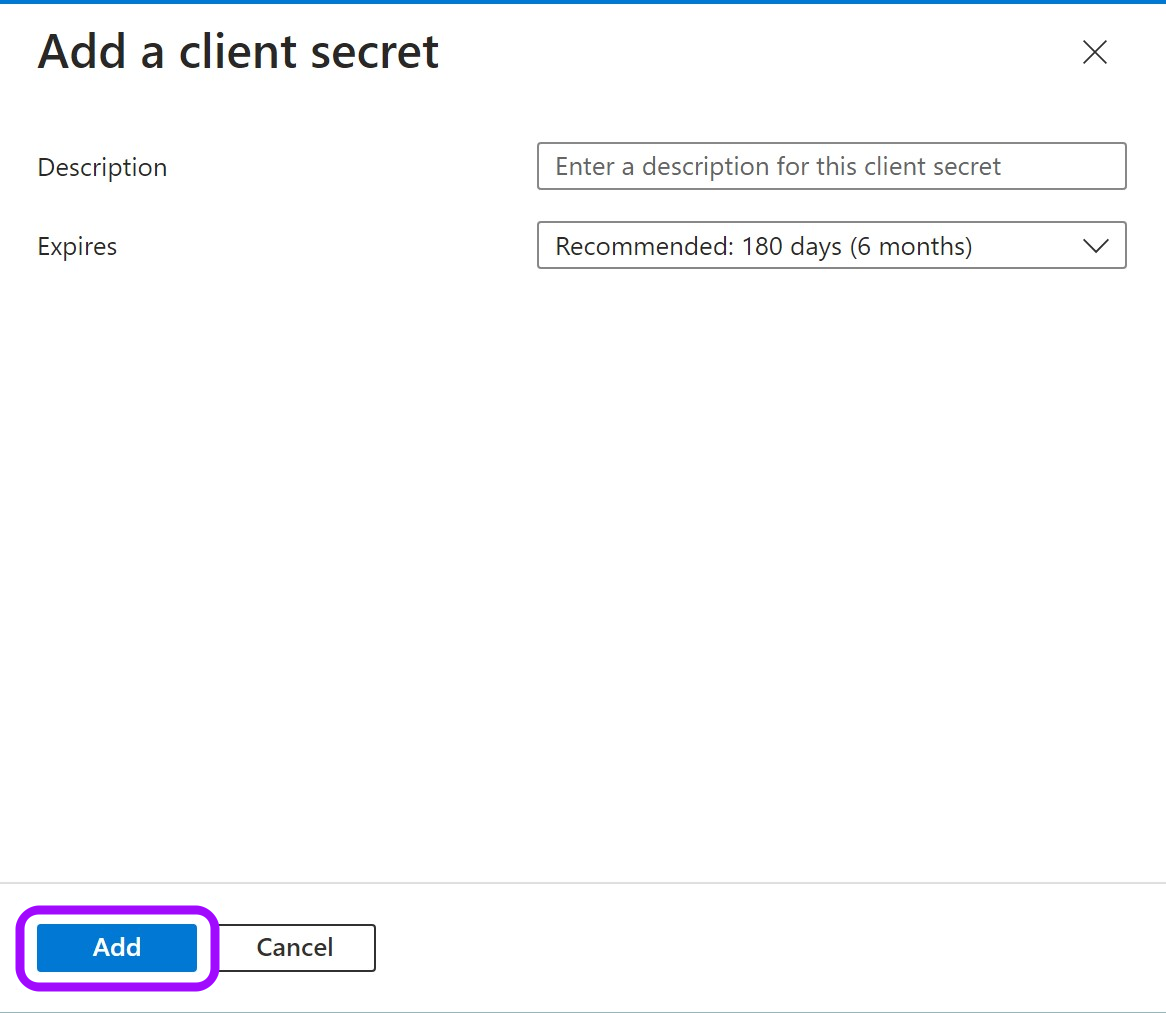
- In the pop-up window, choose a Description that you will remember and an expiration time of your choice. Keep in mind that you will have to create a new secret and hence a new integration when it expires. Once done, click Add.
- Click on the copy icon to copy your new Client Secret Value and keep it for later.

Stage 2: Assign permissions to Graph API
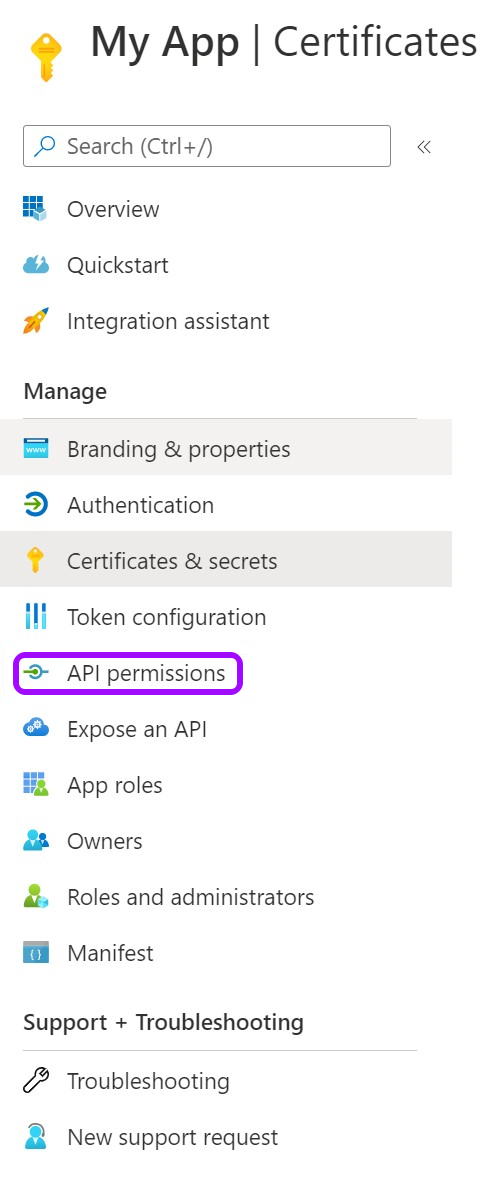
- Go to API permissions.
- Remove the existing permission by clicking on the "..." on the right, choose remove all permissions, and finally click on the blue Yes, remove button.

.png")

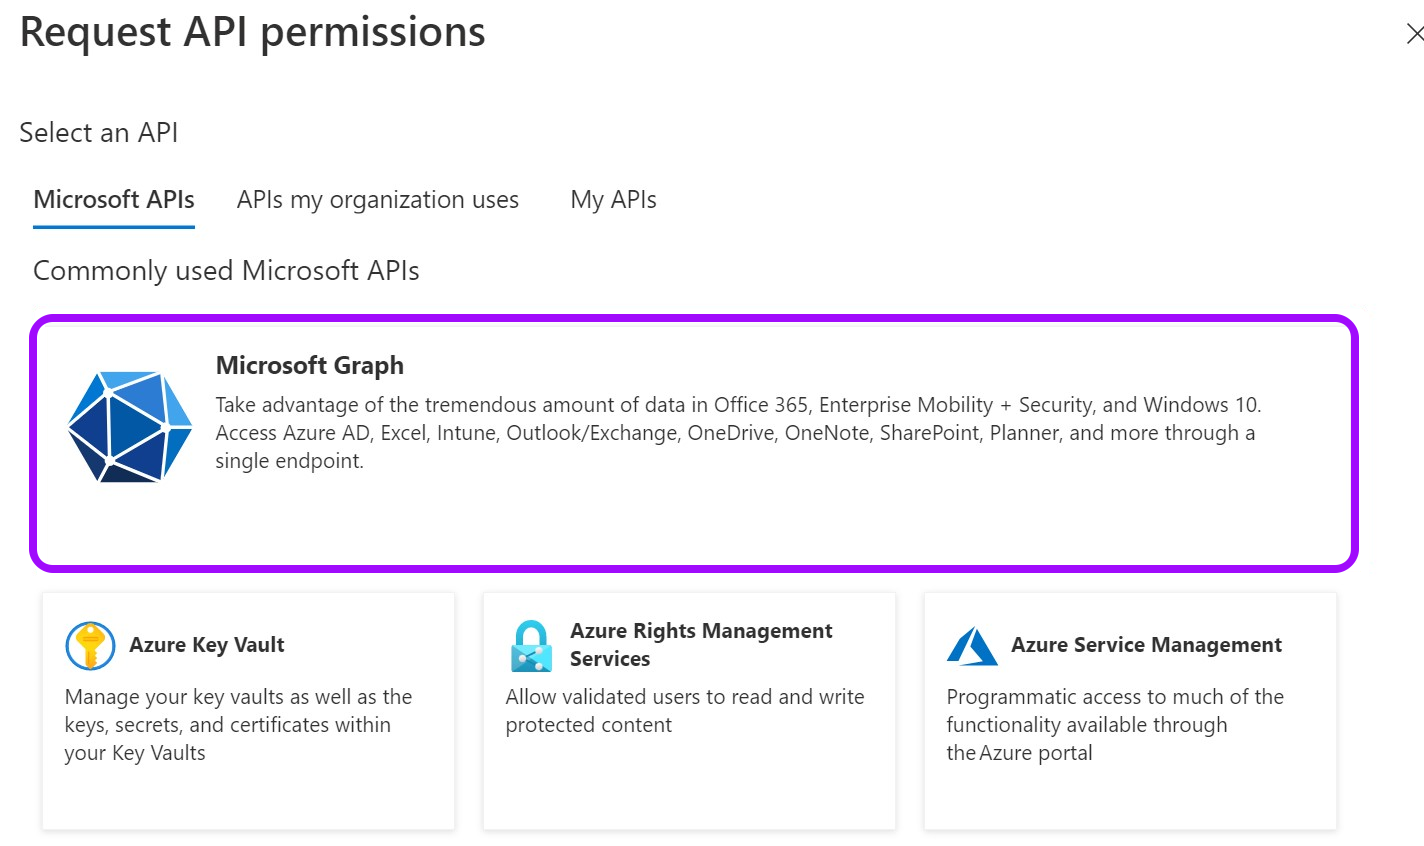
- Now, click on Add a Permission.

- Then pick Microsoft Graph.
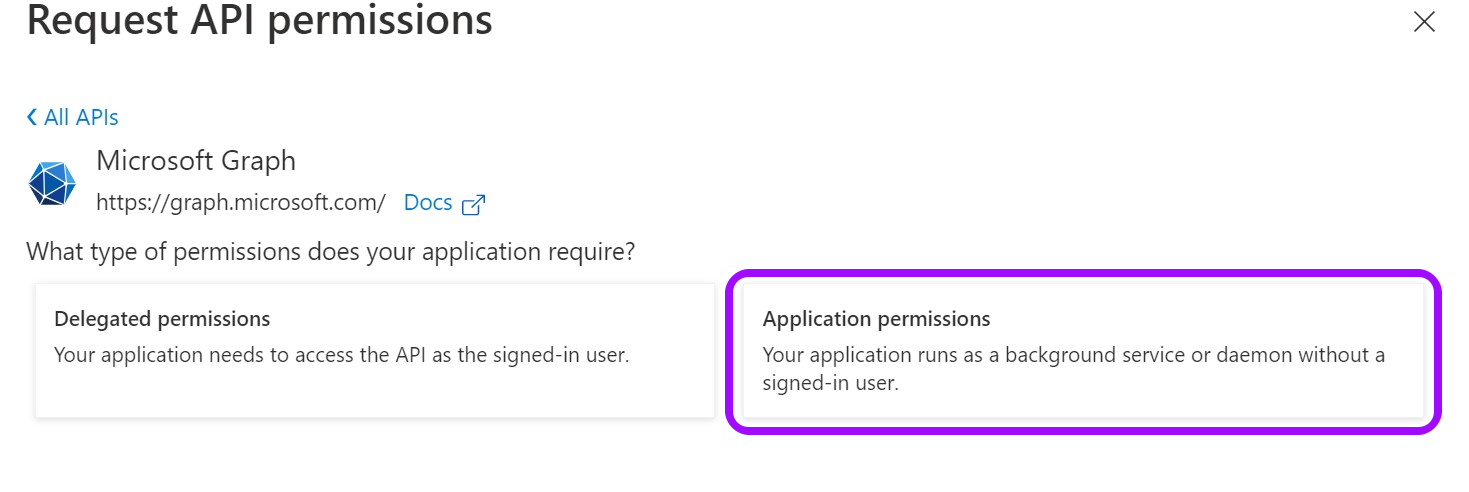
- Choose Application permissions.
-
Using the search bar that appears, find the following permissions and select them:
RoleManagement.ReadWrite.Directory, User.ReadWrite.AllExample.png")
-
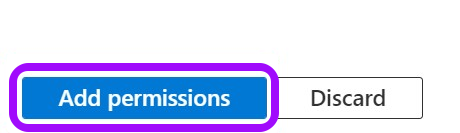
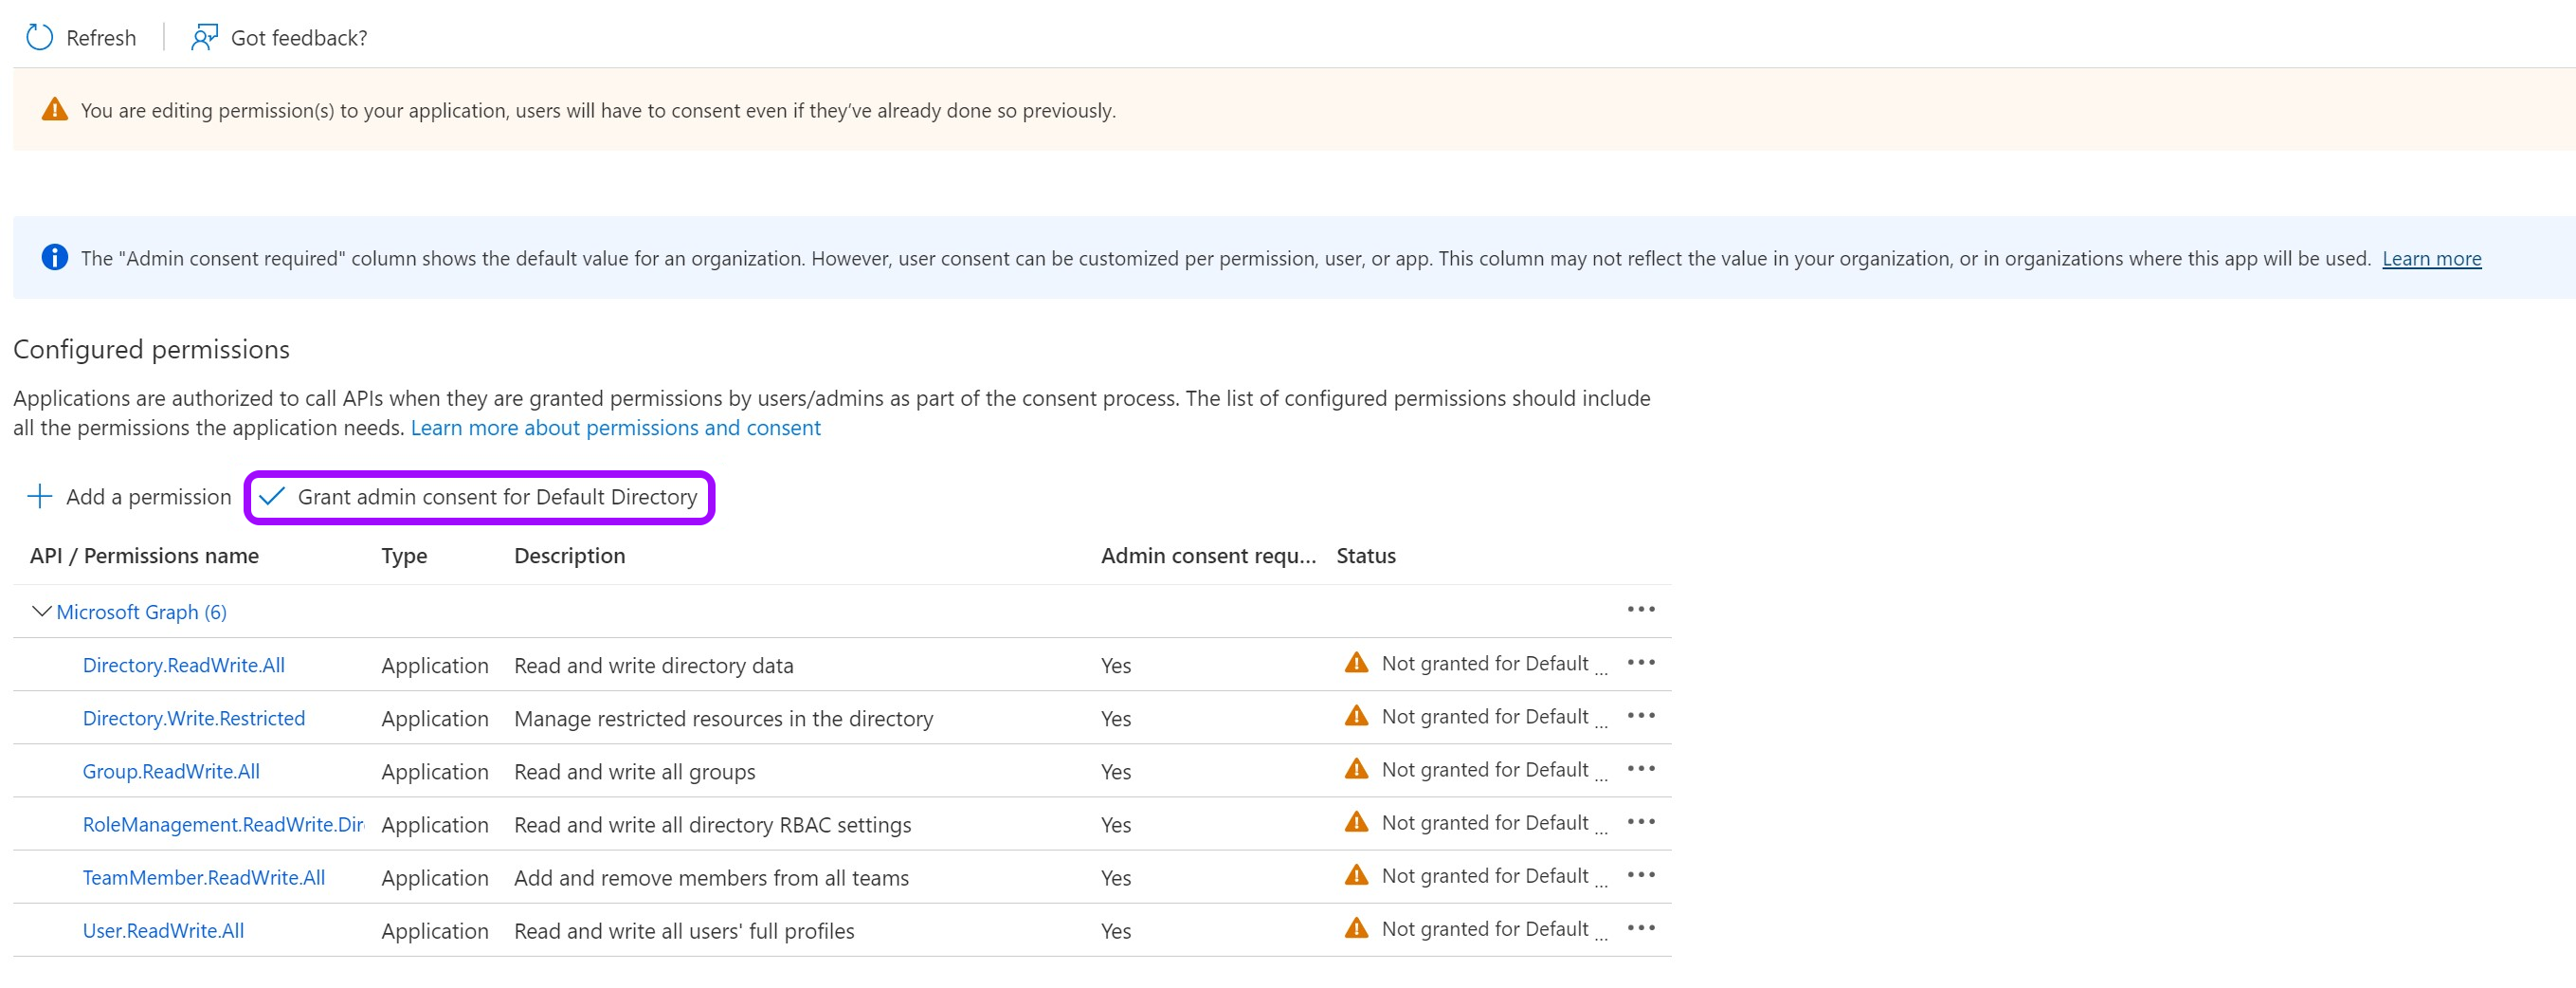
When you are done selecting all six permissions, click on Add permissions at the bottom of the screen.
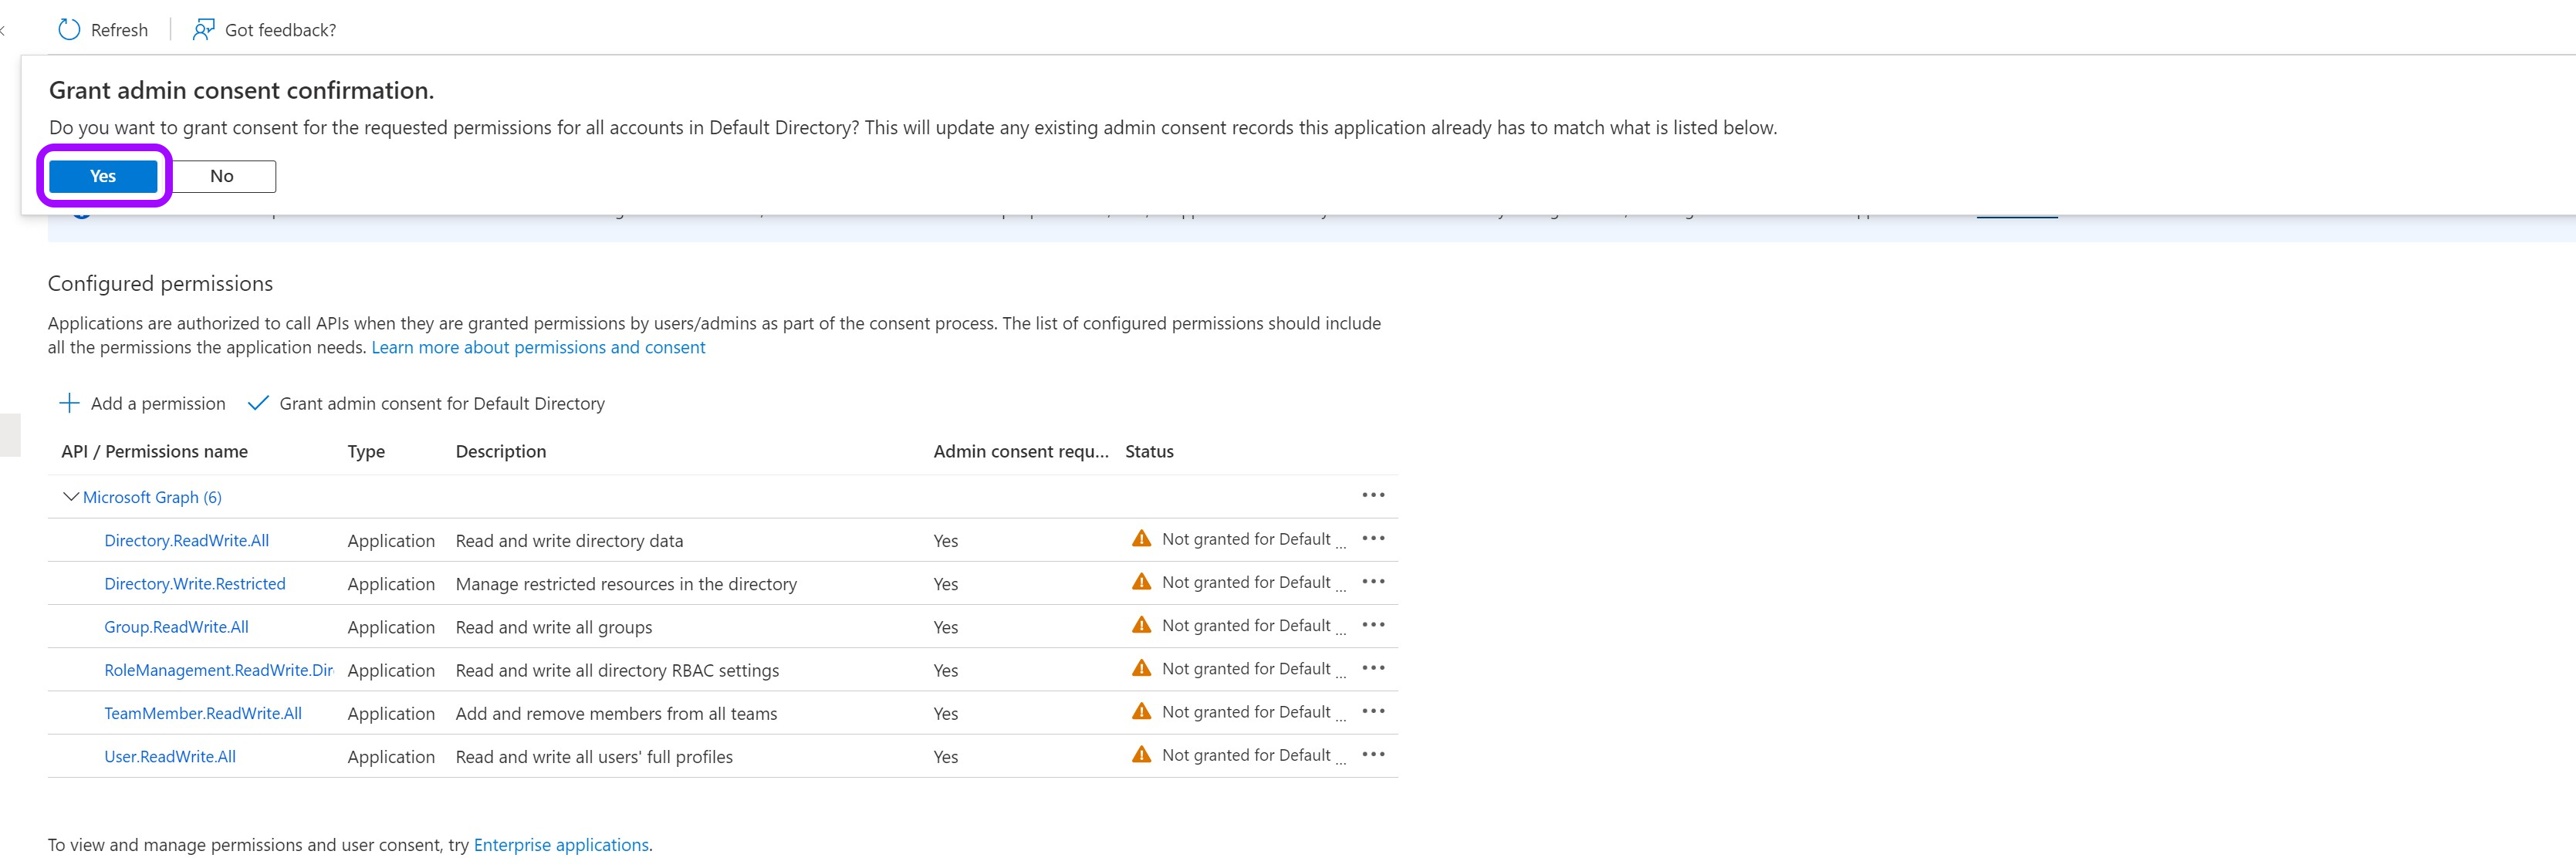
- Your screen should now look the same as the following image. Then, click on Grant admin consent for Default Directory, and then click Yes.
Creating the integration in Entitle
- Log in to Entitle and go to the Integrations page.
- After clicking the Add Integration button, type Microsoft 365 Admin Center in the Application field.
- Don’t forget to set the Save on field with your configuration, i.e. your own hosted agent or Entitle’s cloud.
-
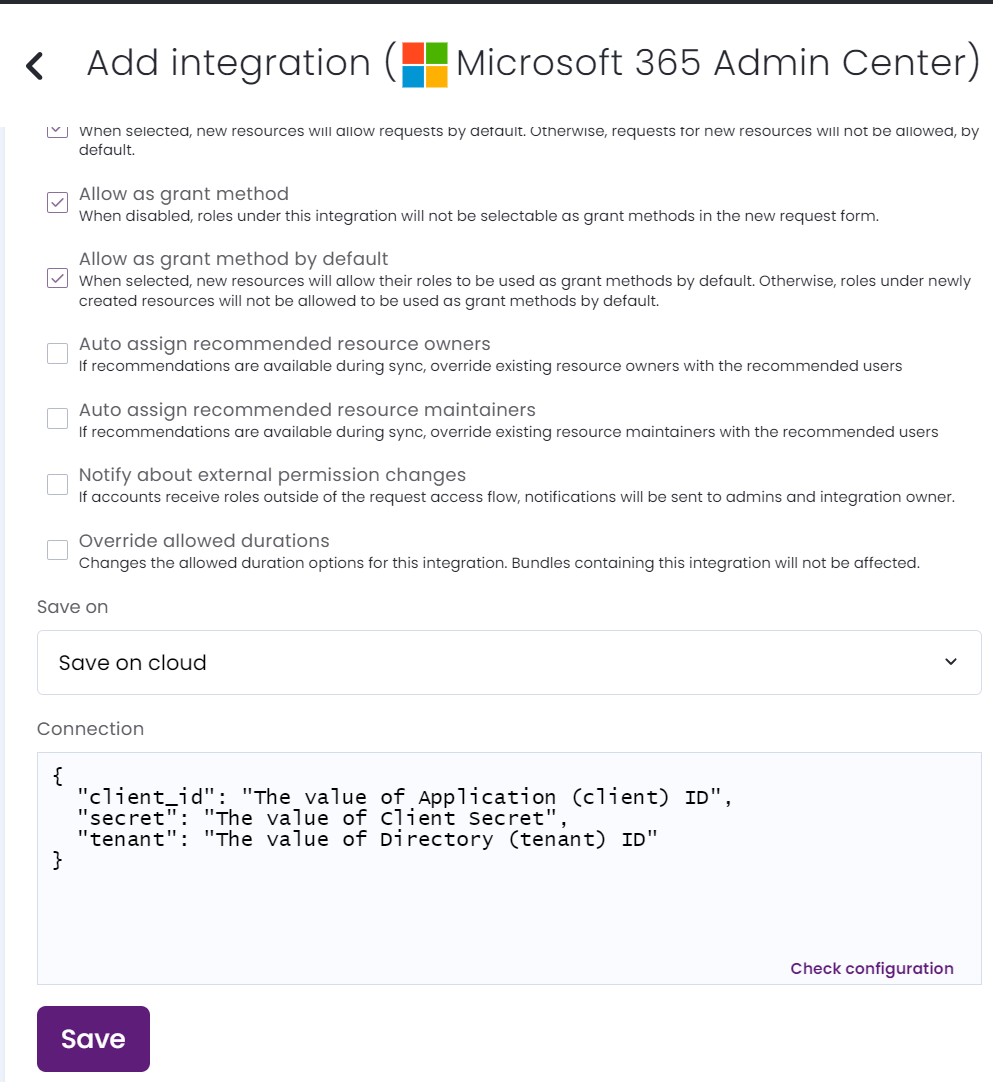
In the Connection JSON,
client_id,secret, andtenant, paste the values of the Client ID, Client Secret, and the Directory (tenant) ID from the previous stages.Example connection JSON{ "client_id": "The value of Application (client) ID", "secret": "The value of Client Secret", "tenant": "The value of Directory (tenant) ID" } -
Click Save.
Should you need to allowlist this integration, these are the IP addresses from which Entitle's service reaches the integration:
- Entitle EU (Cloud deployment)
- 34.243.199.171
- 54.216.133.226
- Entitle US (Pathfinder deployment)
- 52.45.229.219
- 54.88.235.213
- 3.224.15.134
- Entitle CA (Pathfinder deployment)
- 35.182.218.208
- 15.156.179.153
What's next?Make sure your setup is complete by testing your integration.
