Microsoft SQL Server | Entitle
What is Microsoft SQL Server?
Microsoft SQL Server (MS SQL) is a relational database management system (RDBMS). It is designed to help organizations store, retrieve, and manage data efficiently in a structured format.
How is this integration useful?
Integrating Microsoft SQL Server with Entitle automates database access control, ensuring users have the right permissions for queries, reporting, and management tasks. With this integration, Entitle can manage the following resource types in MS SQL:
- Server (multiple roles can be assigned) – all the roles in
server_principalsand custom roles created for the server:- sysadmin
- serveradmin
- securityadmin
- processadmin
- setupadmin
- bulkadmin
- diskadmin
- dbcreator
- Server custom roles
- Database (multiple roles can be assigned) – all the roles in
database_principalsand custom roles created for the database:- db_owner
- db_securityadmin
- db_accessadmin
- db_backupoperator
- db_ddladmin
- db_datawriter
- db_datareader
- db_denydatawriter
- db_denydatareader
- Database custom roles
Prerequisites
- Have SQL Server Management Studio (SSMS) installed.
To do so, select Install SSMS on the SQL Server 2019 Evaluation Edition page.
- Have MS SQL Server installed.
-
Entitle currently supports versions 2017 and 2019 only.
-
Entitle recommends using an on-premises version of MS SQL 2019 on EC2 Amazon and to download the instance on c3.large for installation.
-
The Security group should allow RDP connections (TCP port 3389) and TCP connections to the port your SQL server is listening on (the default is 1433).
-
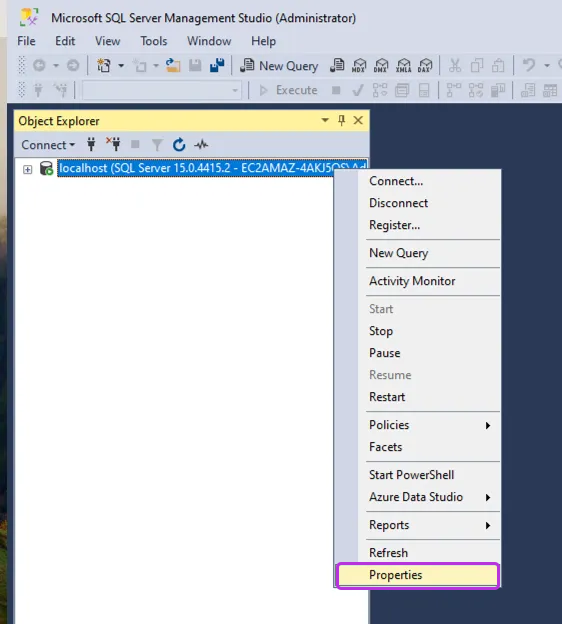
The configured server authentication must be SQL Server and Windows Authentication mode. SSMS can be used to modify it for a previously installed server:
-
In SSMS, navigate to Properties → Server properties.
-
Click Security. Under Server authentication, select SQL Server and Windows Authentication mode > OK.
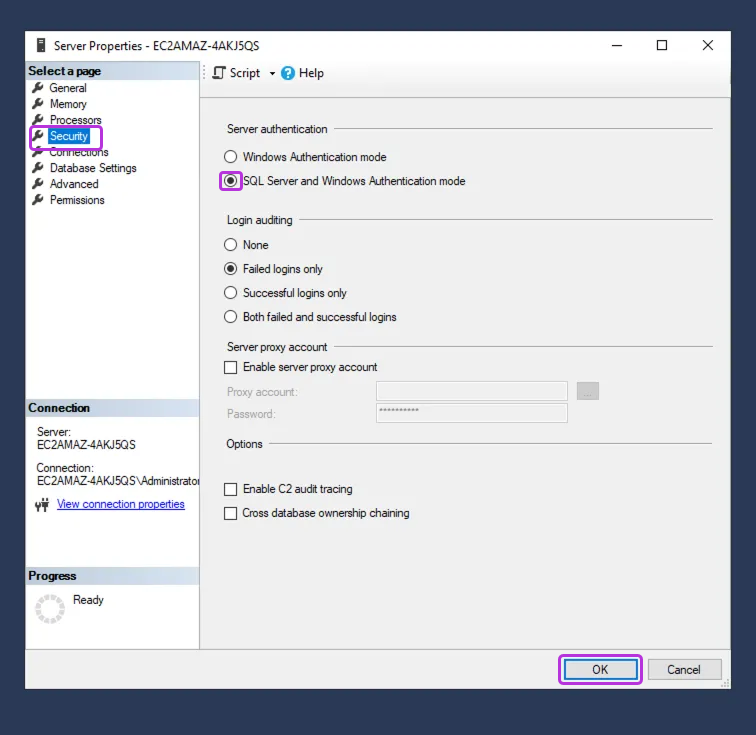
-
Restart the server.
-
-
- Must have an admin account in Entitle.
- Access to your MS SQL user, password, server, database, and version.
Important informationUser provisioning is not supported
- MS SQL does not support new users’ provisioning, it can only change permissions. The only supported actor types are the following:
- Database principle
- SQL user
- Server principle
- SQL login
- Windows login
- See the MS SQL account mapping section of this guide to map MS SQL users to Entitle.
Should you need to allowlist this integration, these are the IP addresses from which Entitle's service reaches the integration:
- Entitle EU (Cloud deployment)
- 34.243.199.171
- 54.216.133.226
- Entitle US (Pathfinder deployment)
- 52.45.229.219
- 54.88.235.213
- 3.224.15.134
- Entitle CA (Pathfinder deployment)
- 35.182.218.208
- 15.156.179.153
Create a new login for Entitle using SSMS
Entitle requires creating an admin account that is not a security administrator (
sa), as this type is exposed to risks.
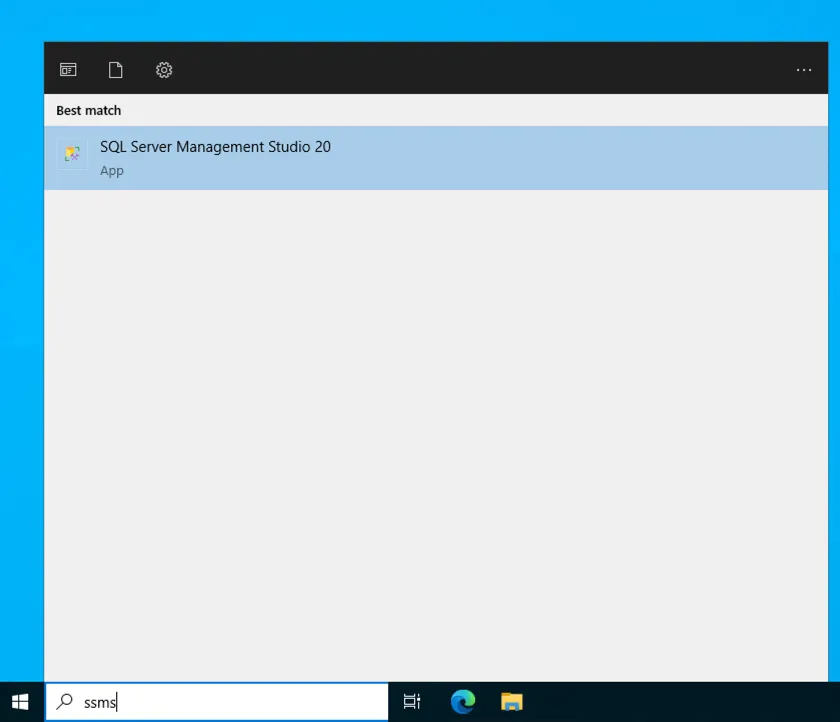
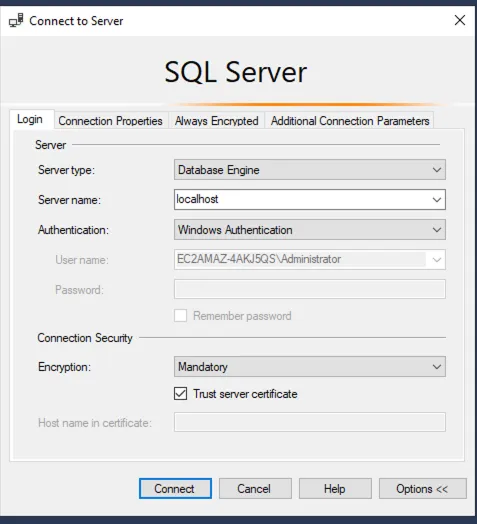
- Connect to your new server address. Open the SSMS program and log in as an admin user.
-
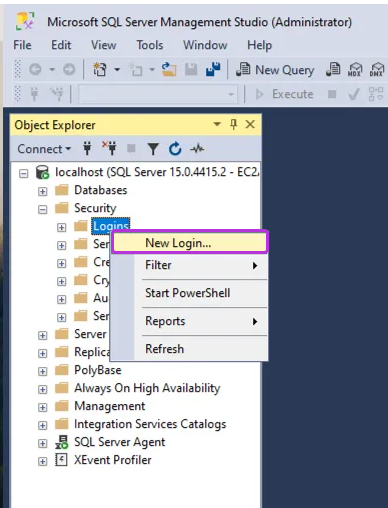
In SSMS, from the left navigation menu, expand the Security folder.
-
In the expanded Security folder, right-click the Logins sub-folder.
-
Click New Login.
-
Disable the
Enforce password expirationoption, and insert a password.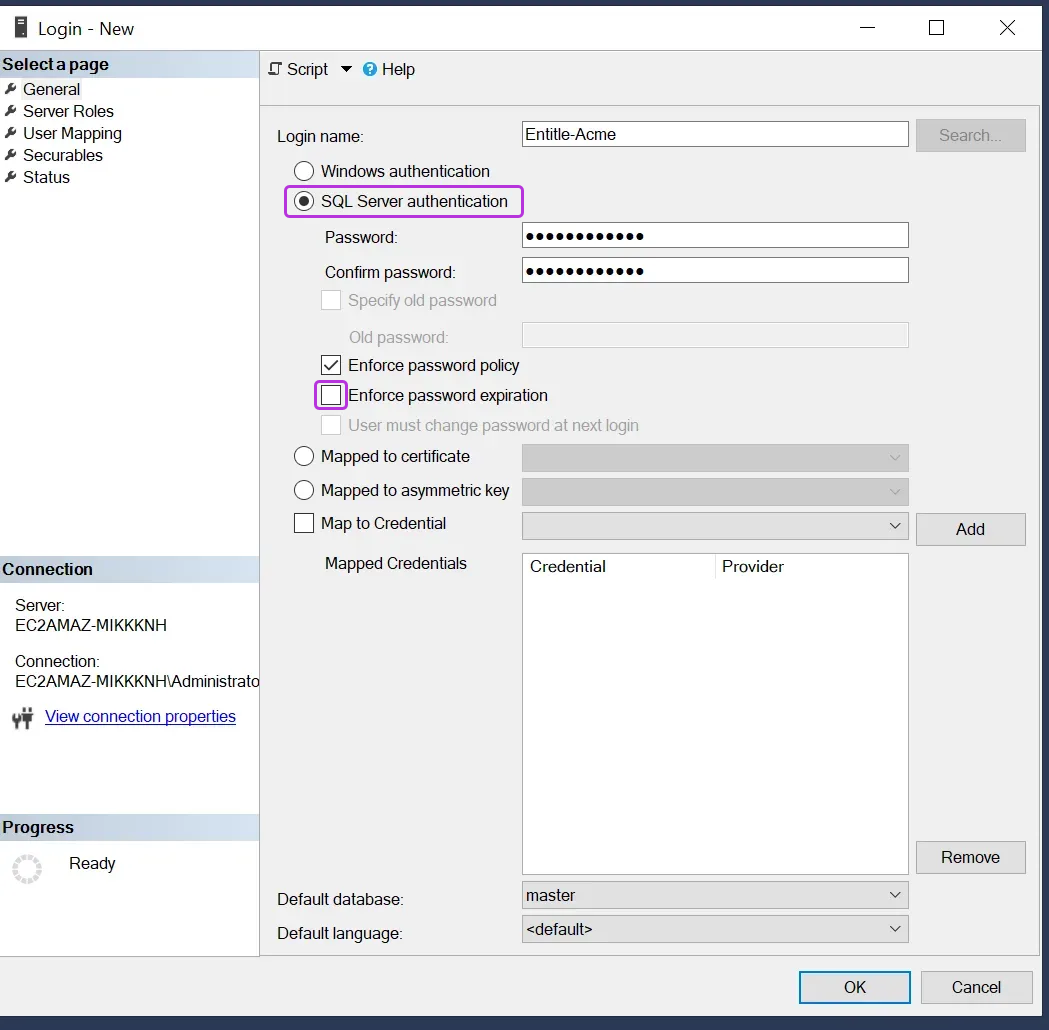
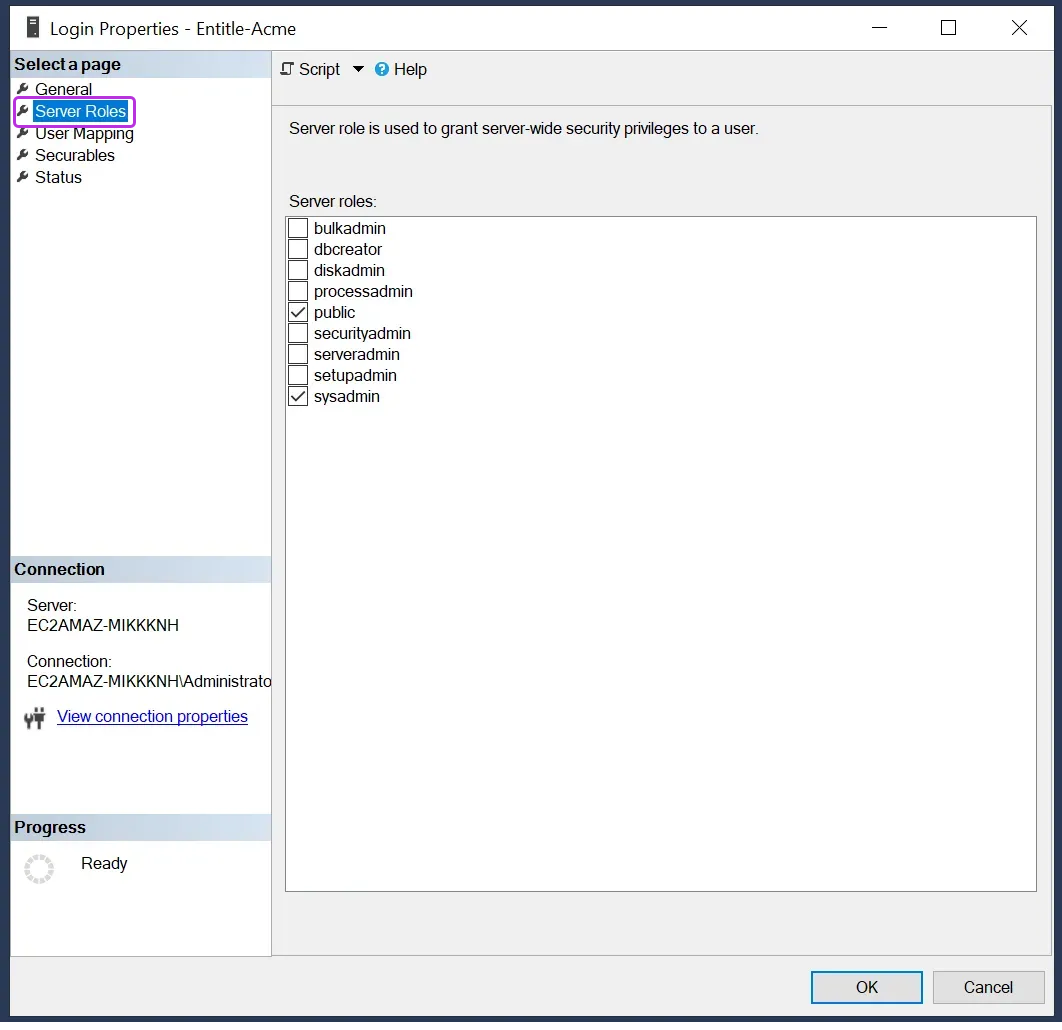
Add sysadmin role to your Entitle user
The Entitle user must have the
sysadminrole to manage fixed roles, including granting or revoking them from those users.If you need to grant access to a user without allowing sysadmin, see Least-privilege operating mode.
-
From the left navigation menu, go to the Server Roles tab.
-
To add a member to a fixed server role, you must be a member of that fixed server role or the
sysadminfixed server role. Click OK when done.
Least-privilege operating mode
Entitle supports a least-privilege operating mode for Microsoft SQL Server.
Due to limitations in SQL Server’s permission model, this mode still requires elevated server permissions, but does not require sysadmin.
When using least-privilege operating mode, the Entitle service account must be granted the following permissions:
- ALTER ANY LOGIN
- ALTER ANY SERVER ROLE
- CONNECT ANY DATABASE
- CONNECT SQL
- CONTROL SERVER
- VIEW ANY DATABASE
- VIEW ANY DEFINITION
- VIEW SERVER STATE
Custom roles requirement
Least-privilege operating mode requires the use of custom database roles:
- Custom roles must be created in the managed databases.
- Required permissions must be granted to those custom roles.
- Entitle assigns users to these custom roles as part of access provisioning.
In least-privilege operating mode, fixed server roles cannot be altered.
Verify your Firewall configuration
- It is recommended that you verify your credentials and Firewall configuration locally before creating the integration in Entitle.
See How to configure remote access and connect to a remote SQL Server instance with ApexSQL tools.
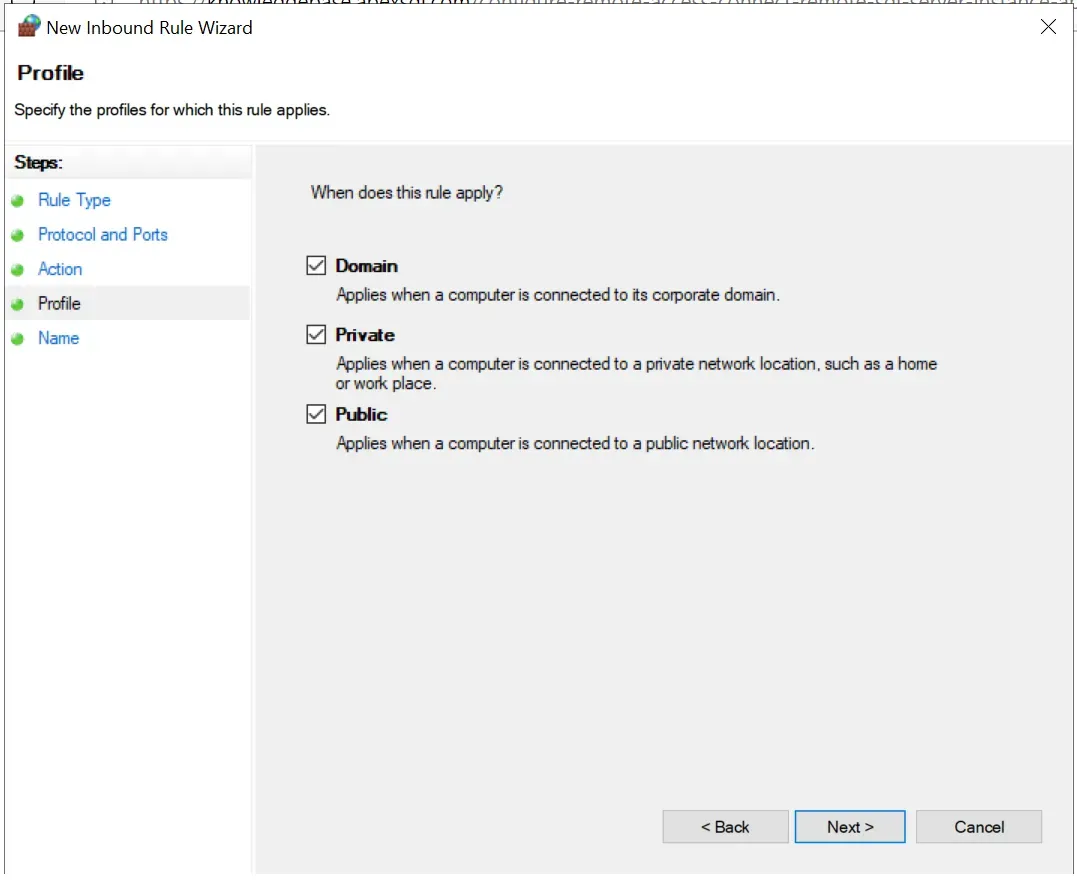
- In the Configure a Windows Firewall for Database Engine Access section of the abovementioned guide > step 5 (Profile window), make sure to tick all three checkboxes and not just Domain:
- Download SSMS to your computer and attempt to log in with your Entitle user credentials on your MS SQL Server. If successful, you have verified that the user has been successfully created and the network access is correctly configured.
Create the MS SQL integration in Entitle
- Log in to Entitle and go to the Integrations page.
- Click Add Integration.
- In the Application field, enter Microsoft SQL Server.
- If you want to be able to create ephemeral accounts, check Allow creating accounts. This does not allow you to create permanent accounts.
- In the Save on dropdown, select Cloud or your hosted agent.
- In the Connection field:
version:Insert the version of your server.user:Insert the user you created in MS SQL for Entitle.password:Insert the password of the user you created in MS SQL for Entitle.server:Insert your MS SQL server. It can be either the fully qualified domain name or the IP address.database:Insert the names of your selected database.
Example connection JSON{ "version": "2019" or "2017", "user": "<YOUR_ENTITLE_MS_SQL_USER>", "password": "<YOUR_MS_SQL_PASSWORD>", "server": "<YOUR_MS_SQL_SERVER>", "database": "<YOUR_MS_SQL_DATABASE>" }
- Click Save.
The Entitle integration with MS SQL saves
MS SQL account mapping
-
For end-users to be able to submit new access requests to MS SQL through Entitle, an admin must manually map the MS SQL Server accounts to their specific Entitle users’ email addresses:
- Log in to Entitle and go to the Org Settings screen.
- Scroll down to the System integrations section.
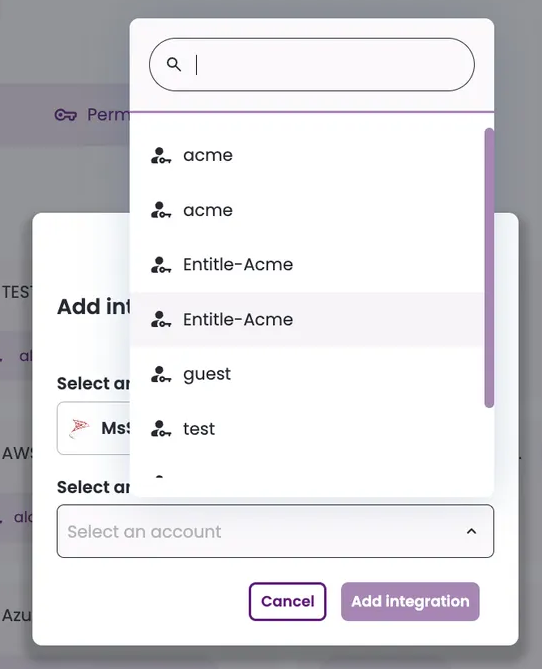
- Click + Add.
- Select Microsoft SQL and choose the accounts you wish to associate with the integration.
- Click Add Integration.
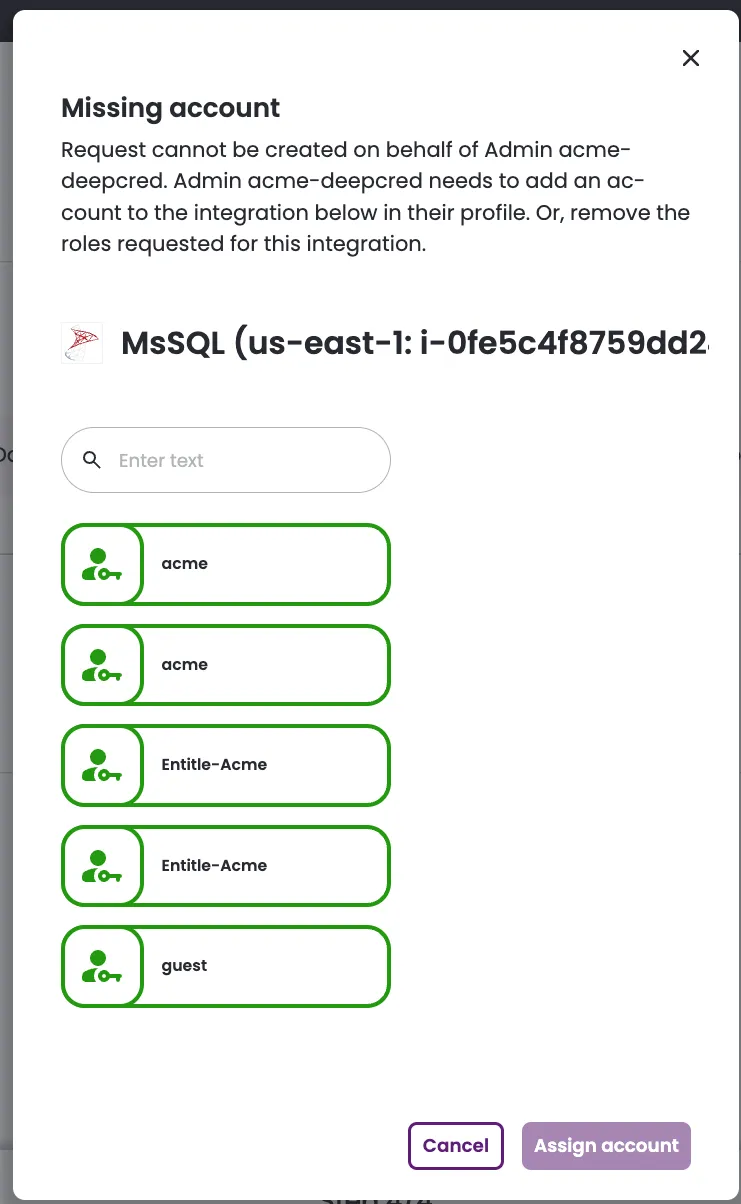
If MS SQL Server accounts are not mapped, an error occurs when attempting to request access.
Integration troubleshooting
Integration sync time varies based on the number of resources, roles, and entitlements in the third-party system.
- In Entitle, navigate to Integrations.
- Confirm the date/time of the Last sync on the integration card. This indicates the last time Entitle pulled all resources, roles, and entitlements from the third-party system.
- Select the integration and check the Last sync indicator next to Resources. This indicates the last time Entitle pulled the resources from the third-party system.
- Expand Audit logs to review integration activity and errors.
Create an ephemeral account
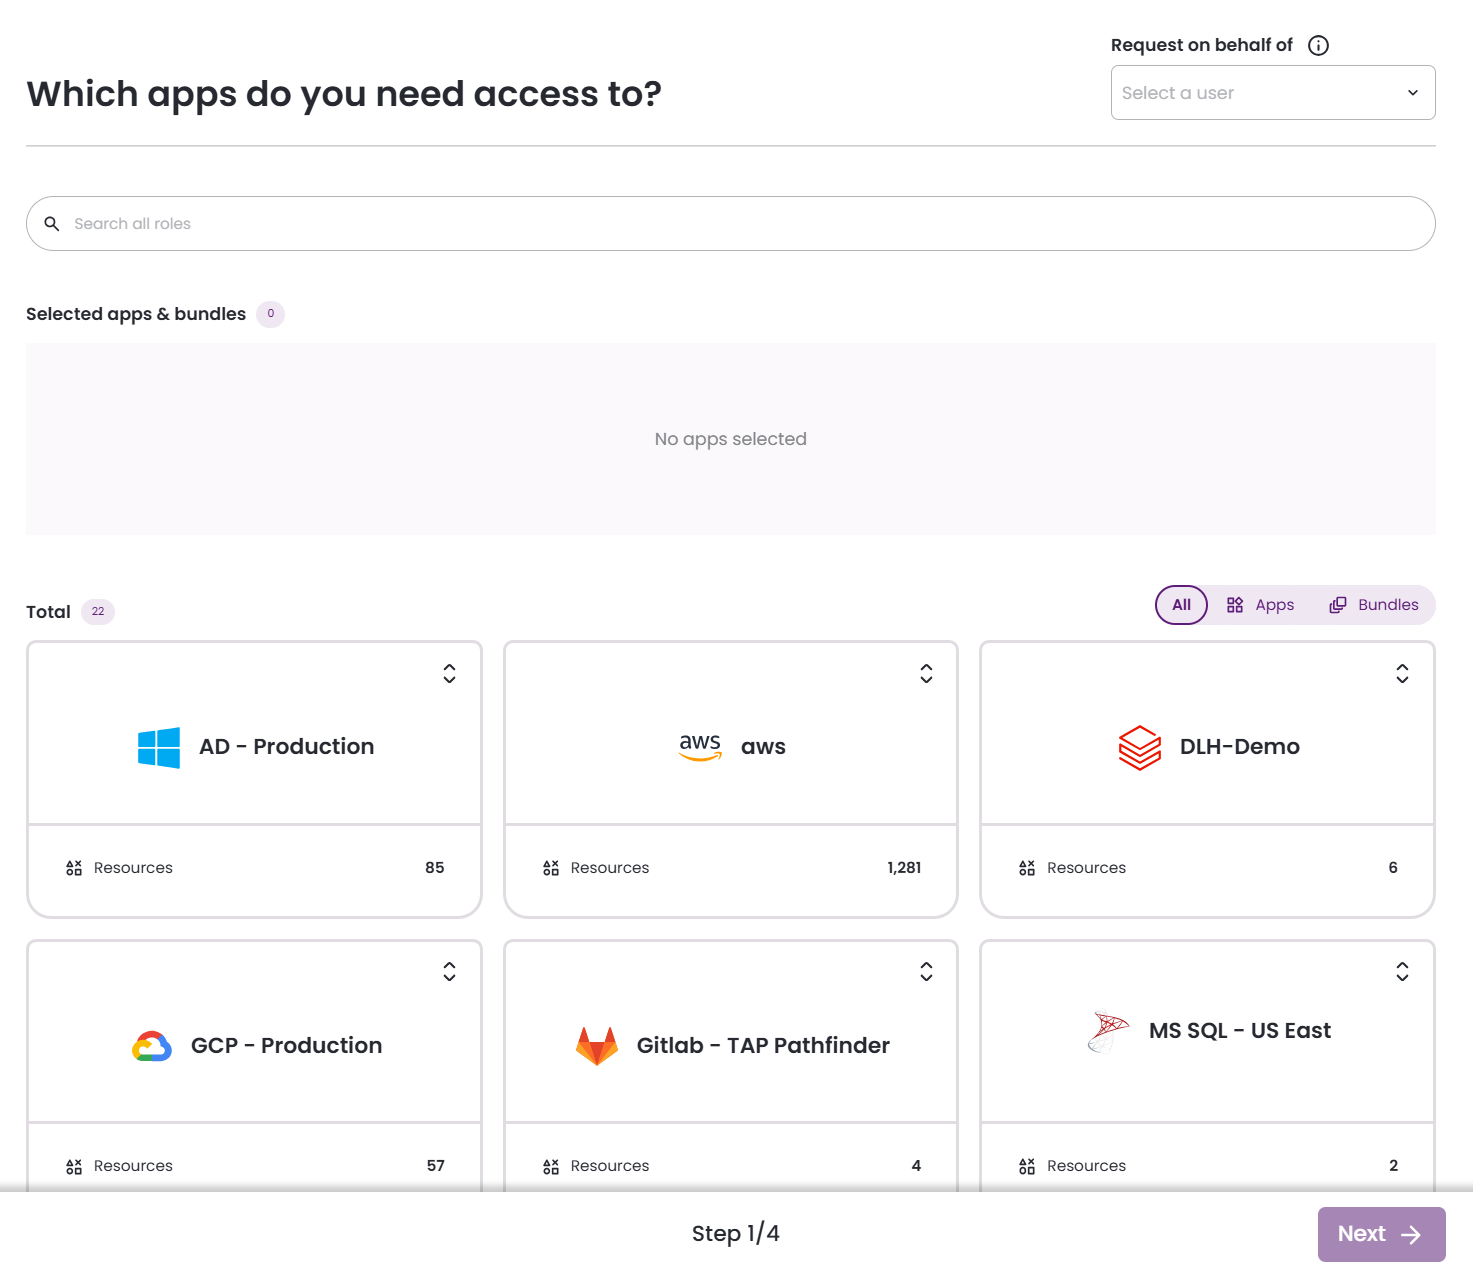
- In Entitle, go to the Requests page and click New request.

- Using the dropdown at the top right, you can make the request for yourself or on behalf of another user.
- Click on your Microsoft SQL Server application. Choose the resources and the roles you would like to request access to. Then click Next.
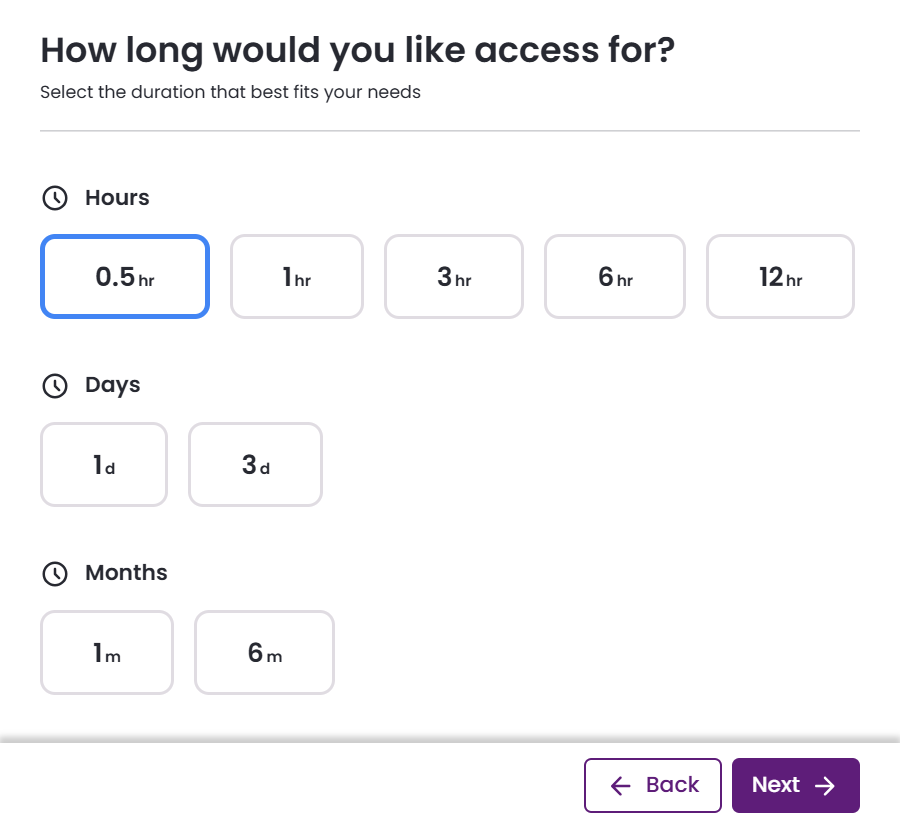
- Set the duration for the ephemeral account and click Next.
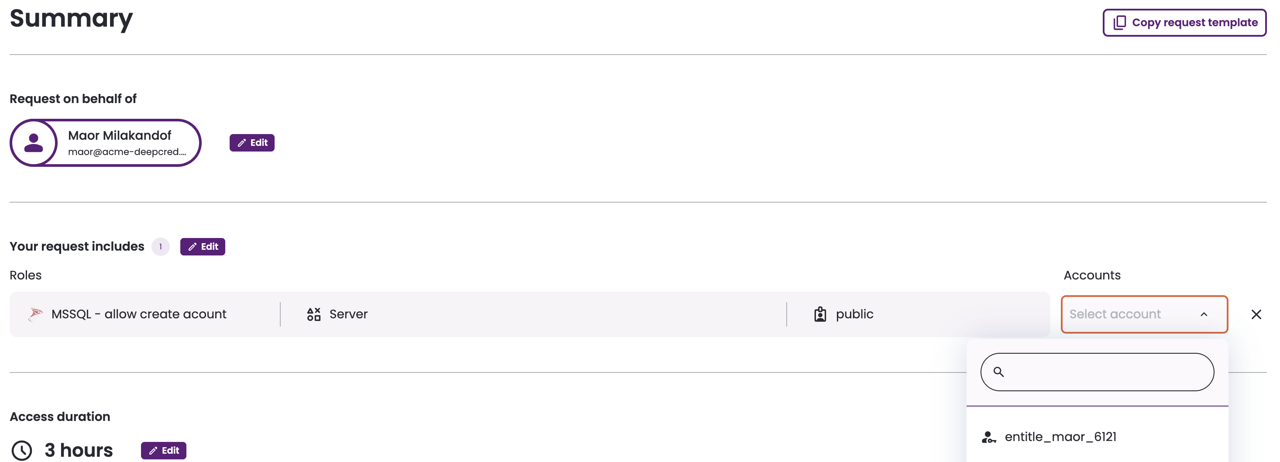
- Select an account to associate with your request. You are not requesting access to the actual user account; instead, Entitle creates an ephemeral account with the same permissions. This temporary account is prefixed with entitle so that any actions you perform are easy to identify, ensuring security and auditability by isolating your activity from the original account.
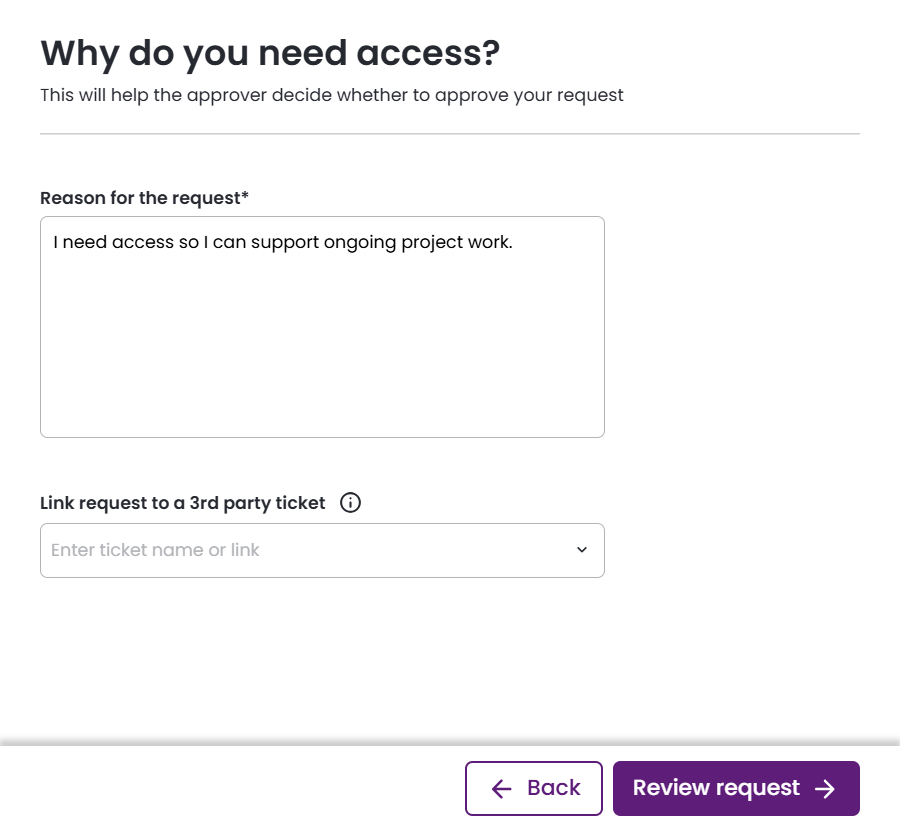
- Provide a reason for your request. If a third-party ticketing system is integrated with your Entitle instance, you may link to a ticket. Click Review Request.
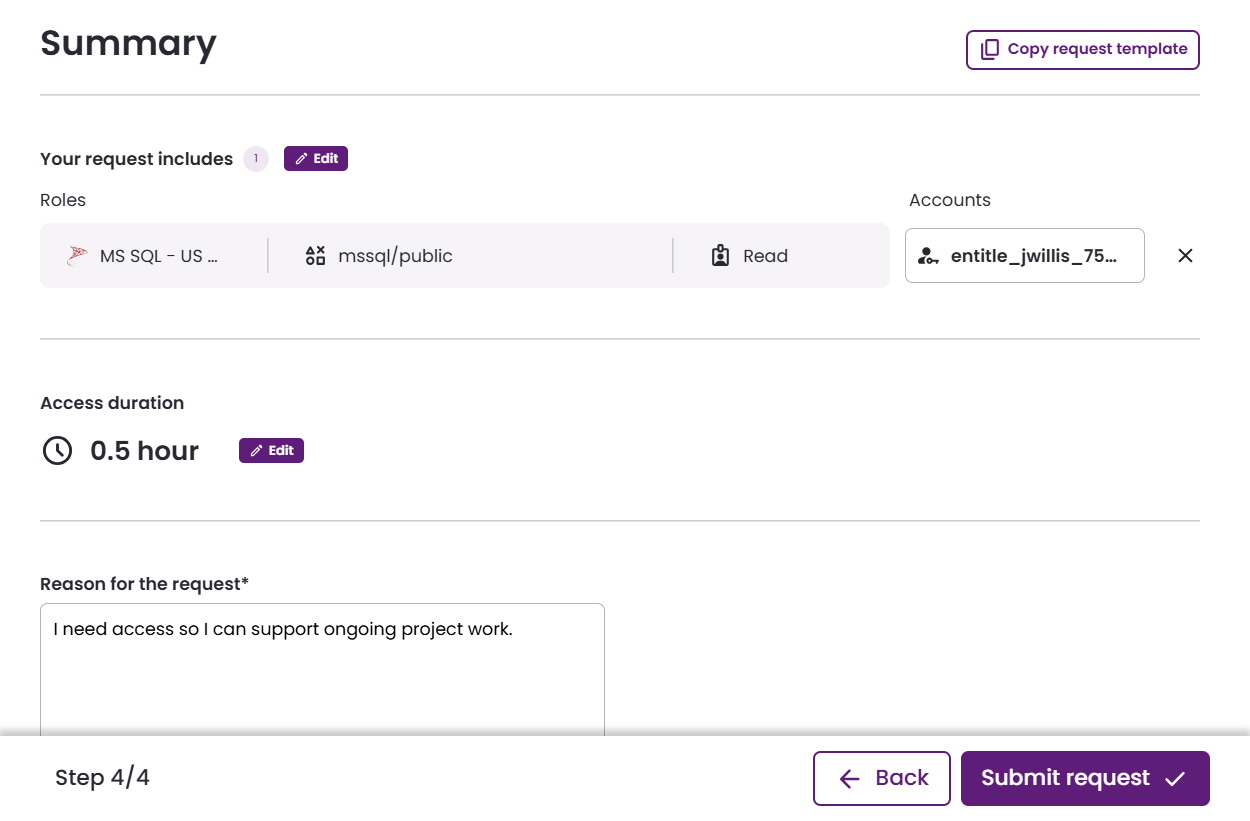
- Review your request’s details and adjust if needed. Click Submit request.
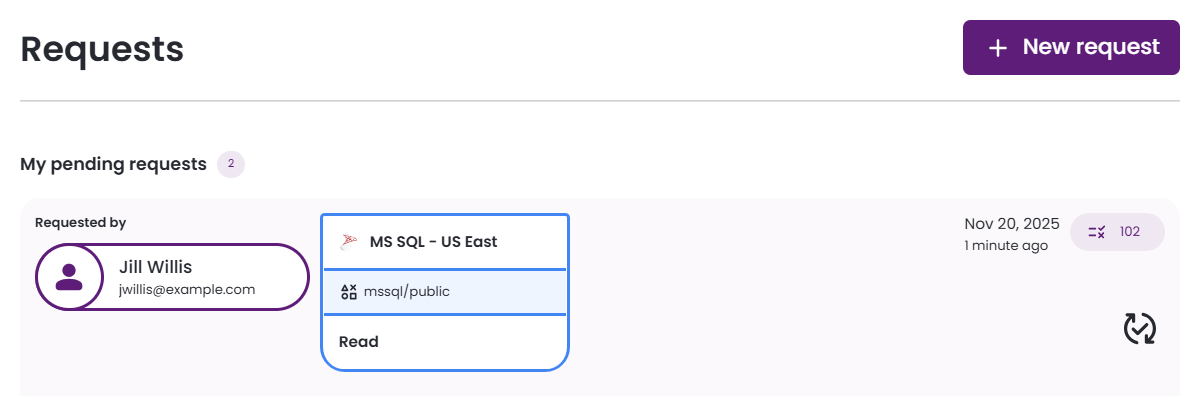
- Your request is submitted and is added to the My pending requests section.
- Once approved, you are granted access to the specific role.

- Use the ephemeral account to do the needed work. Your actions are logged as entitle_[account_name].
- When the duration expires, the ephemeral account is deleted and cannot be used again. A new ephemeral account must be created if further temporary access is required.
