Bundles | Entitle Pathfinder
Overview
Bundles in Entitle are sets of entitlements that users can request and approve in a single action, as defined by the Admin in a policy. Each entitlement grants a user access to a resource, which can be as specific as a MongoDB table. For example, a Bundle created for a new R&D employee might include access permissions to various R&D-related cloud resources, databases, and applications.
Bundles are one of the key abstraction layers in Entitle, alongside Virtual Applications. They function as cross-application super-roles, simplifying the process of granting and managing user access to various organizational resources. By eliminating the need for individual permission requests, Bundles streamline access management.
This page will provide you with step-by-step instructions on how to use Bundles in Entitle.
End-user experience
Users can request permissions for all available Bundles through the Bundles screen. This process mirrors requesting permission for any other resource managed by Entitle.
For more detailed instructions on this process, refer to Create a new request in the Entitle Web App user guide.
View and manage your Bundles
- Sign in to app.beyondtrust.io with your credentials. The BeyondTrust Pathfinder Home displays.
- At the top right of the page, select your site from the drop-down.
- Select the Entitle tile from your list of available applications.
- From the top left menu, select Bundles.
The Bundles page has several main functionalities:
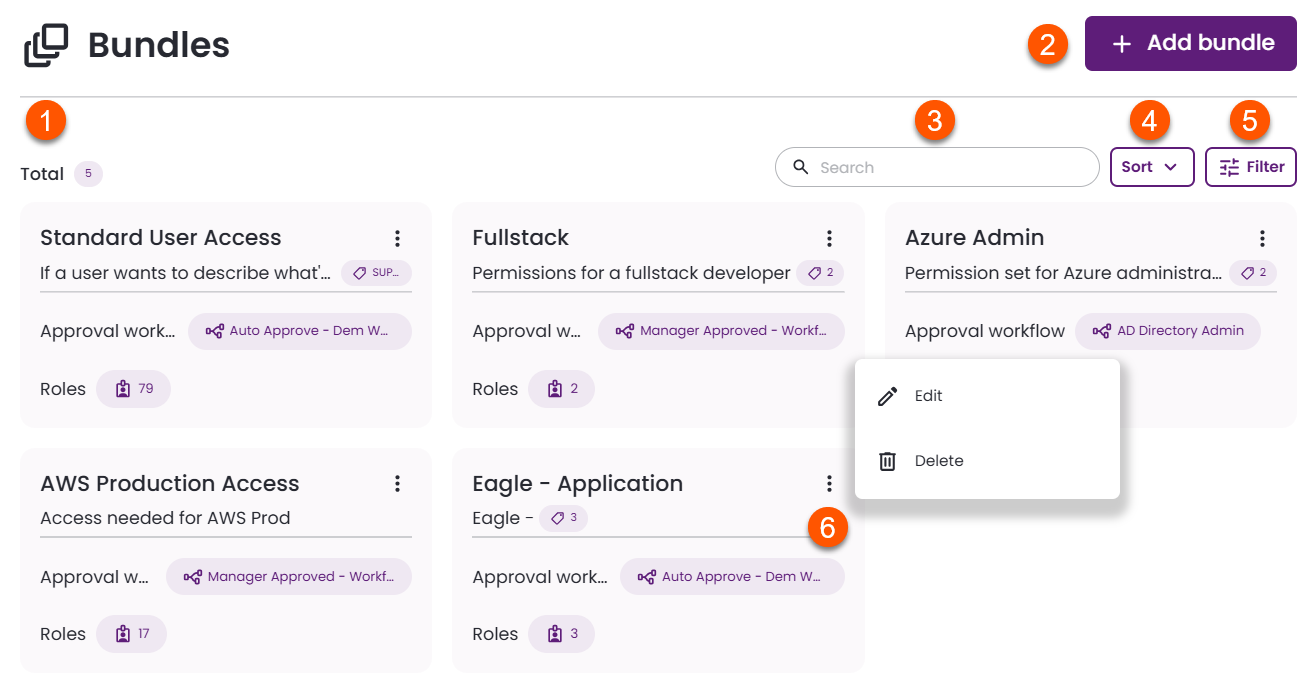
- View and manage bundles: The Bundles page displays all Entitle bundles in your organization, sorted by default from most recently added to least recent. Each bundle card includes:
- Bundle name
- Description, which provides additional information for users requesting access
- Tags, used to group and organize bundles based on your business needs (hover to view details)
- Approval workflow which is applied when a user requests access to the bundle (hover to view details)
- Assigned roles which are included in the bundle (hover to view details)
- Add bundle button: Create a new bundle.
- Search bar: Search for a specific bundle from the list.
- Sort by any available option.
- Filter by any available options.
- Edit/delete bundles: Click the vertical ellipses to open the menu.
- Click the Edit button to modify the bundle's properties.
- Click the Delete button to remove the bundle.
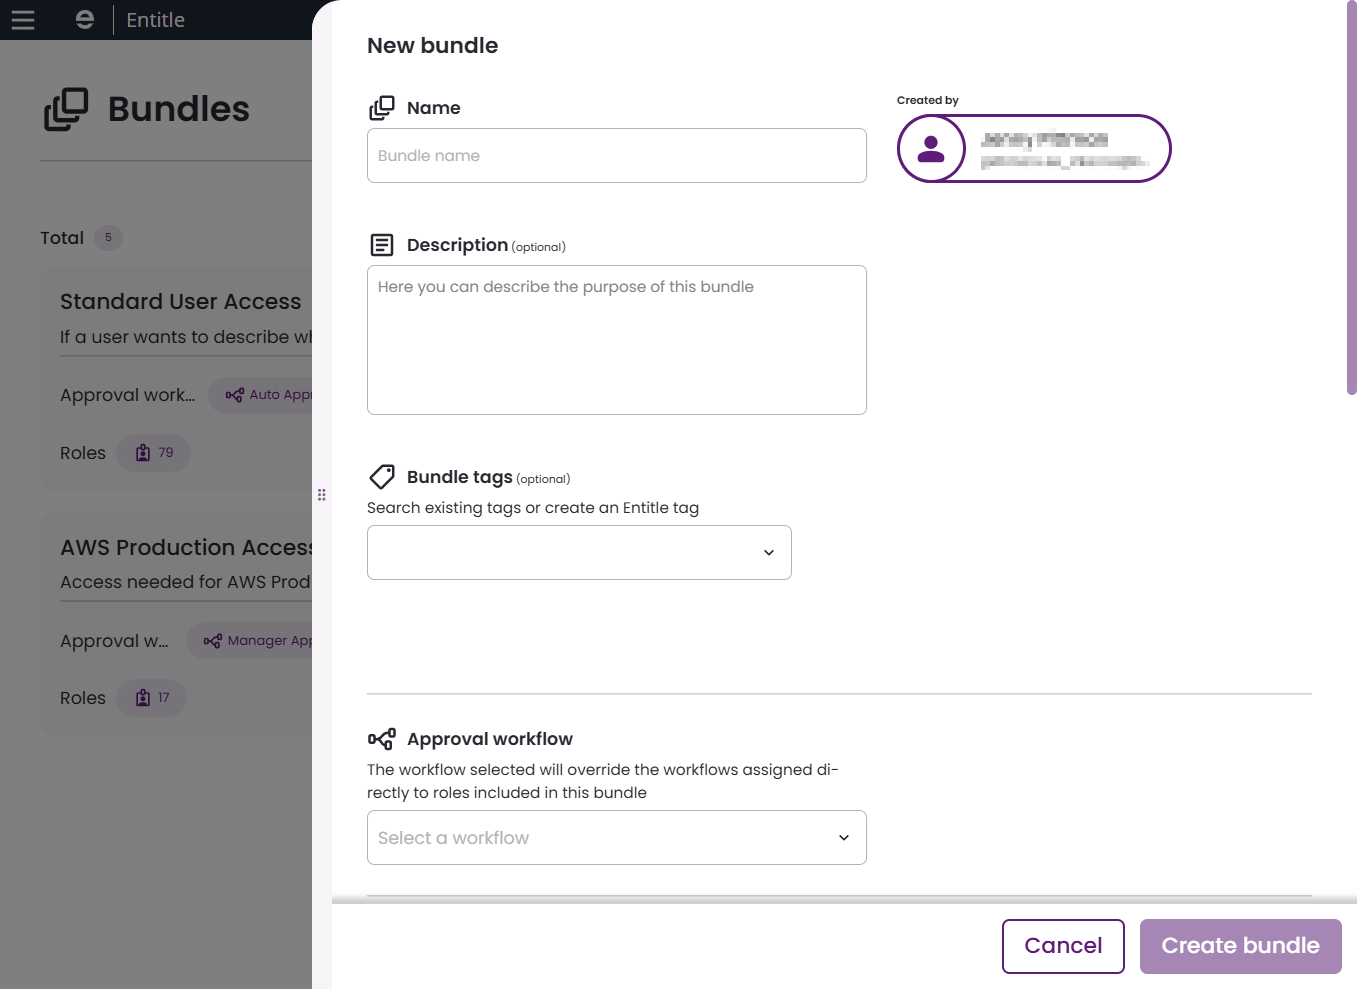
Create a new bundle
-
On the Bundles page, click Add bundle.
-
Complete the fields in the New bundle flyout:
- Name: The bundle name. Users see this name when requesting access.
- Description: Additional information about the bundle. For example: "Permissions bundle for junior accountants" or "Factory floor worker permissions bundle."
- Bundle tags: Searchable metadata used to organize bundles. For example: "accounting", "ATL_Marketing", or "Production_Line_14".
- Approval workflow: Select the workflow that will be used when a user requests access to this bundle.
-
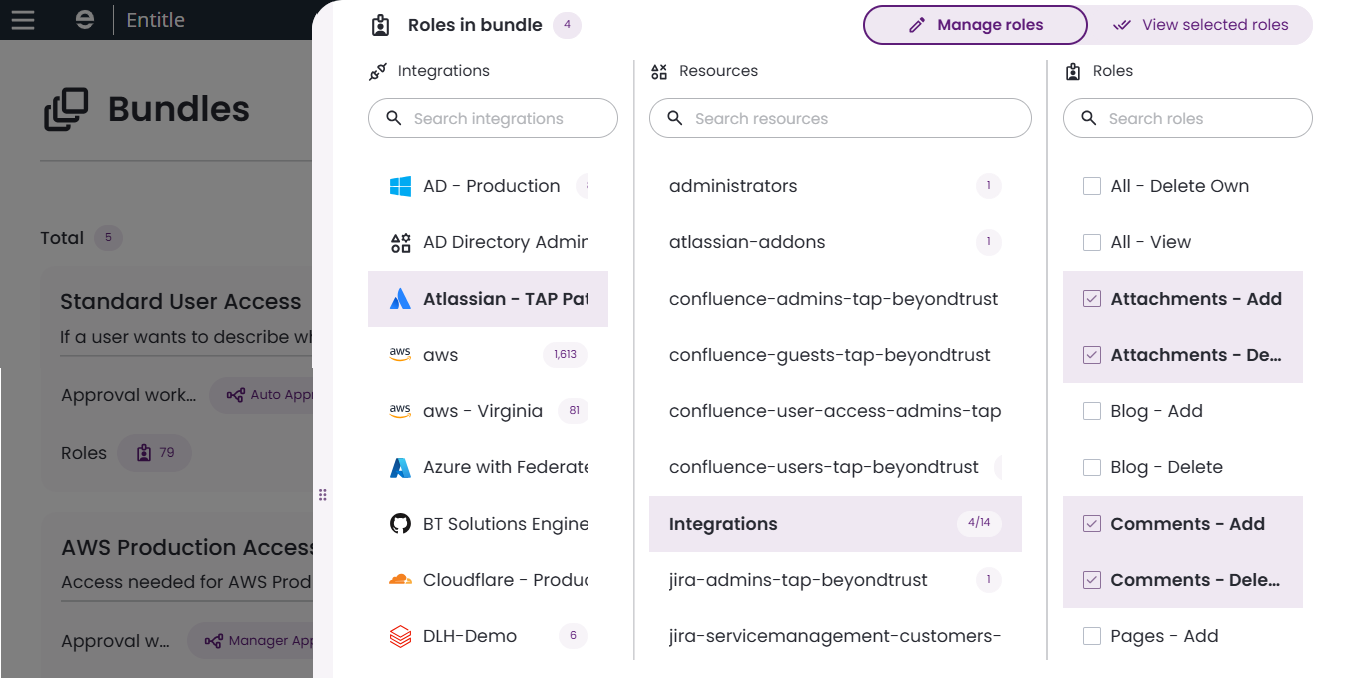
Roles in bundle
-
Manage roles: Select an integration, resource, and role. After selecting roles from one integration, you can select a different integration and continue adding roles without losing your previous selections.
-
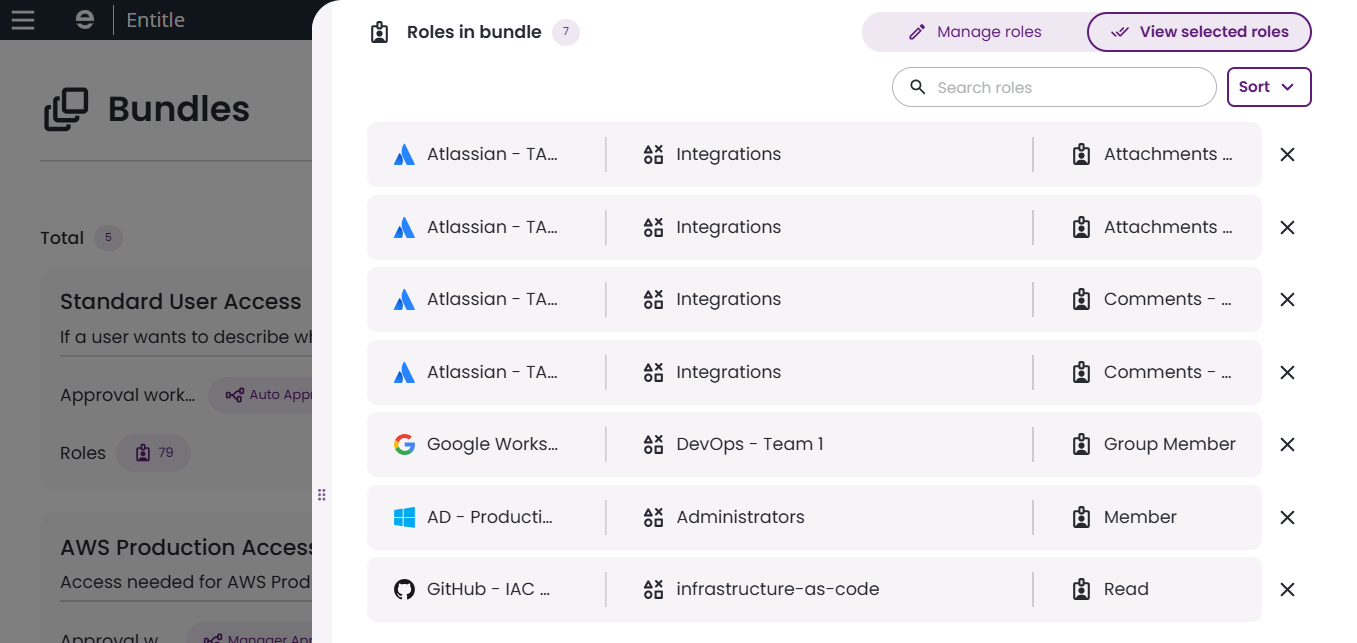
View selected roles: Review the roles you have added to the bundle. Click the X next to a role to remove it.
-
-
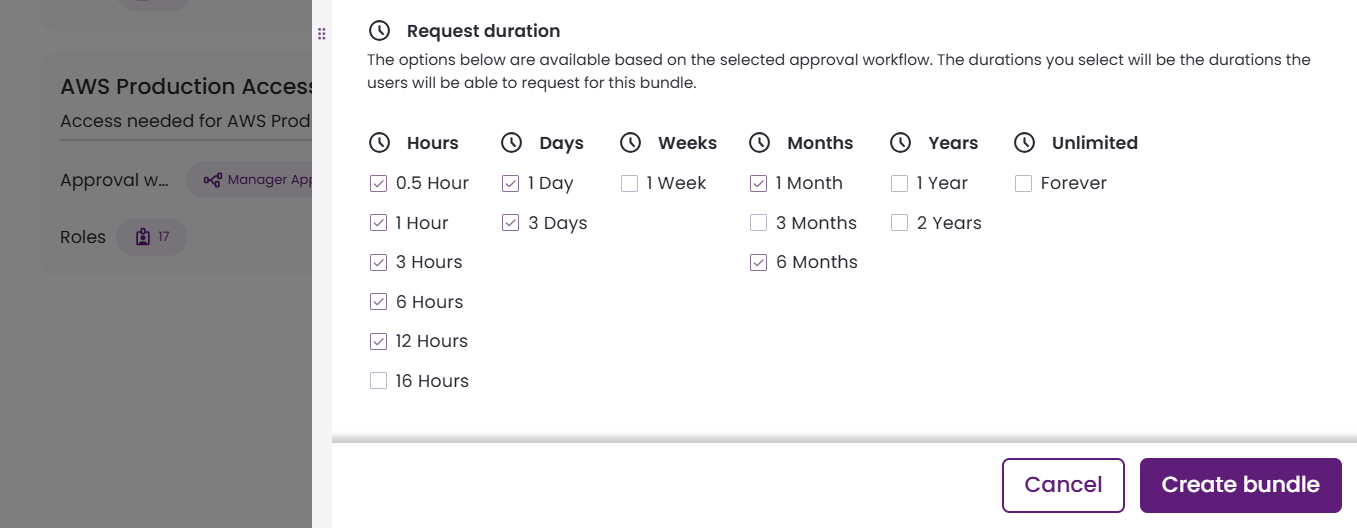
Override allowed durations: Select this option to override the organization’s default request durations for this bundle. The selected durations appear as options when users request access.
-
Click Create bundle. The new bundle appears as a card on the Bundles page.
Updated 3 months ago
