GitHub App integration (recommended) | Entitle
General guidelines
Using the GitHub App to integrate Entitle with GitHub has three main advantages:
- It is considered the most secure way to authenticate with GitHub.
- The application has its own identity, and the identity is not bound to any user.
- Entitle can get the users’ email only when you use SSO user federation + GitHub App.
To integrate your GitHub in Entitle, you will need to extract three items:
- Installation ID
- App ID
- Private Key (from a
.pemfile)
Set up GitHub App to work with Entitle
Stage 1: Create GitHub App
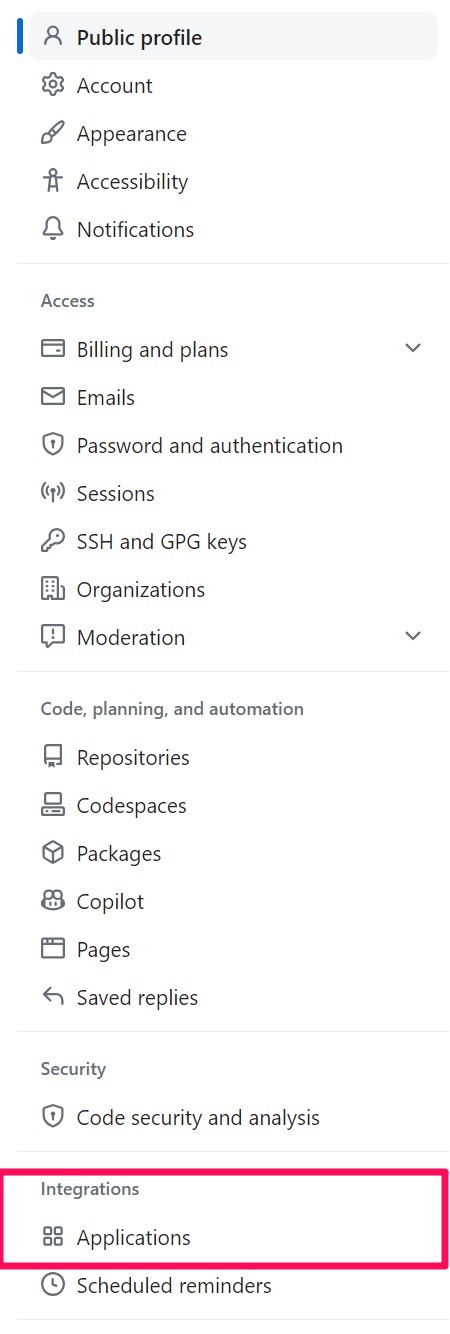
- Log into GitHub with an Admin account, and click on Settings in the left-side bar.

- Under the Integrations tab at the end of the bar, click on Applications, and then choose GitHub Apps from the three integration options available.
- On this page, you will be able to see all your GitHub app integrations. To create a new one, click on New GitHub App in the top-right corner.

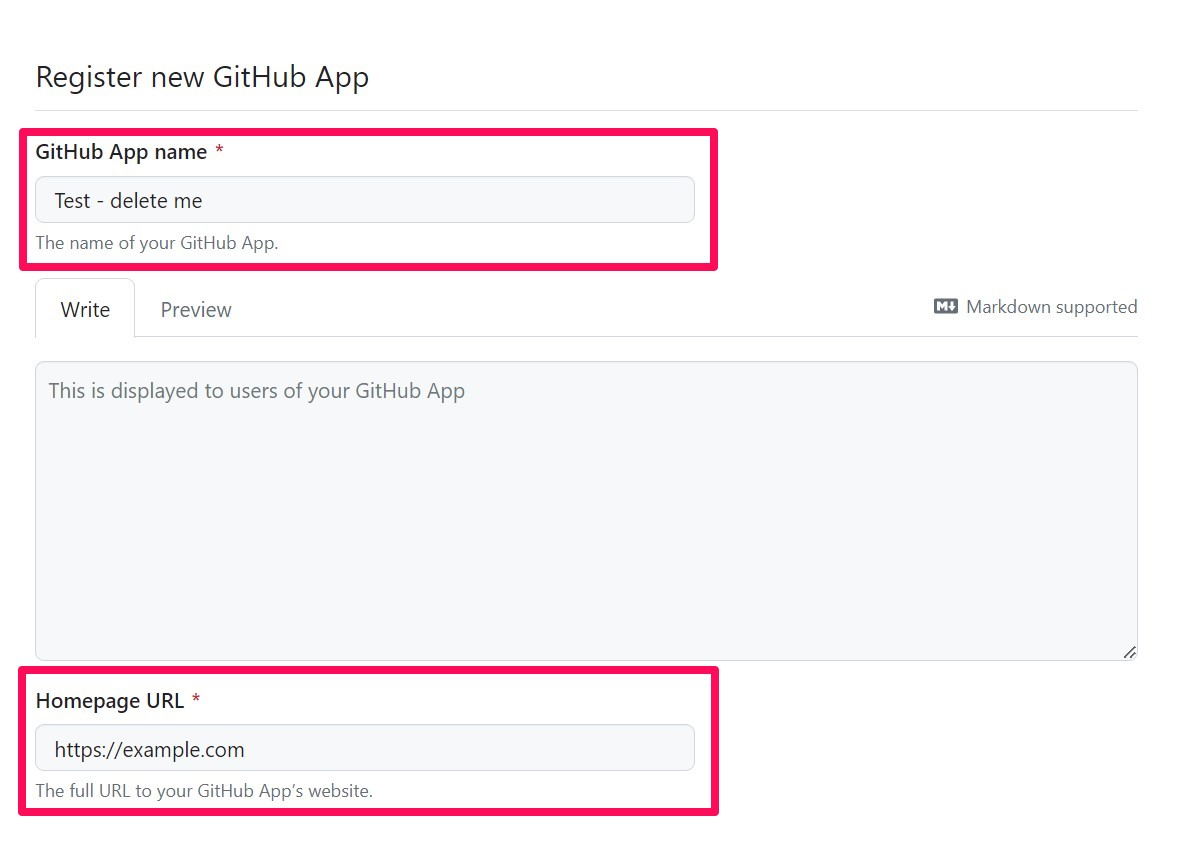
- In the new page which opens up, you will need to fill in the following required fields:
- Your GitHub App name.
- Your GitHub Homepage URL.
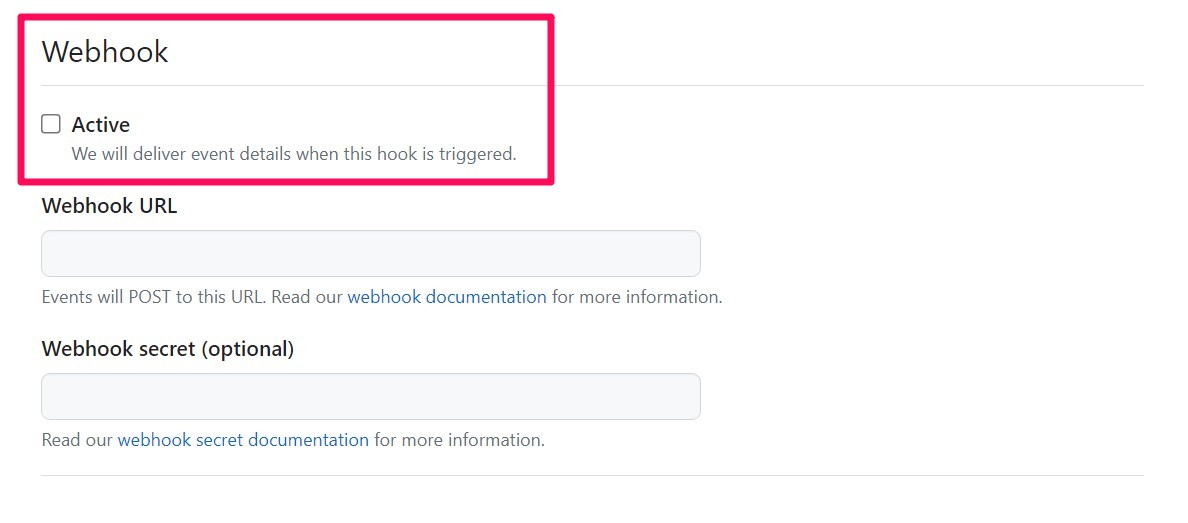
- Scroll down further on the page to the section called Webhook. The only action required from you here is to disable the Active button for Webhook Support (make sure it is not checked).
-
Under the Permissions section right afterward, you will need to choose specific scopes in the Repository permissions and the Organization permissions.
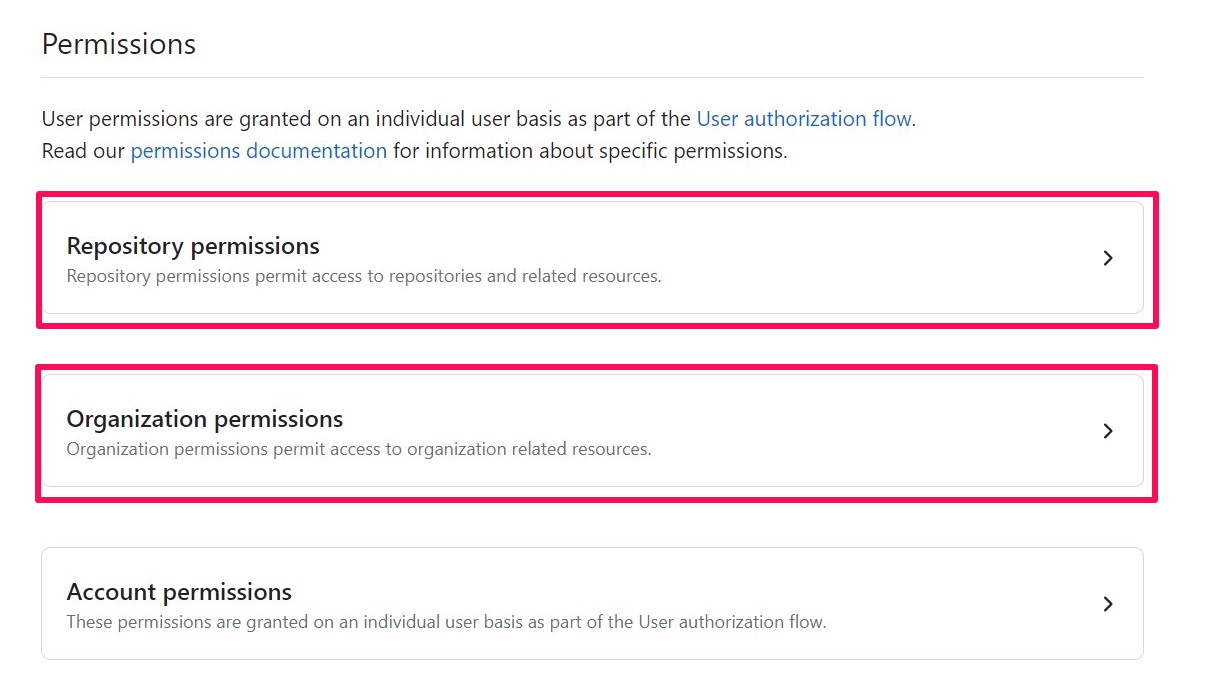
- In the Repository permissions section, choose the following scopes:
- Administration: Read and write (In order to handle repo collaborators) - Metadata: Read-only (Mandatory) - In the Organization permissions section, choose the following scopes:
- Members: Read and write (In order to handle organization and teams members)
- Custom organization roles: Read
- Administrations: Read
- In the Repository permissions section, choose the following scopes:
-
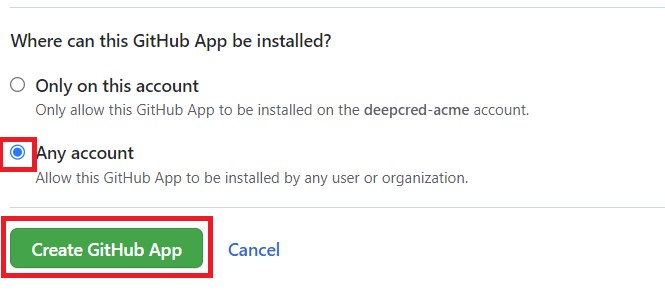
At the bottom of the page under Where can this GitHub App be installed, choose Any account and then click on Create GitHub App.
This is required because Entitle needs to be installed on the Organization’s account and not on the User that created it.
Stage 2: Generate a private key
- Now that you have created your new GitHub App, you will return to the original GitHub Apps page. At the bottom of this page under the Private Keys section, click on the Generate a private key button.
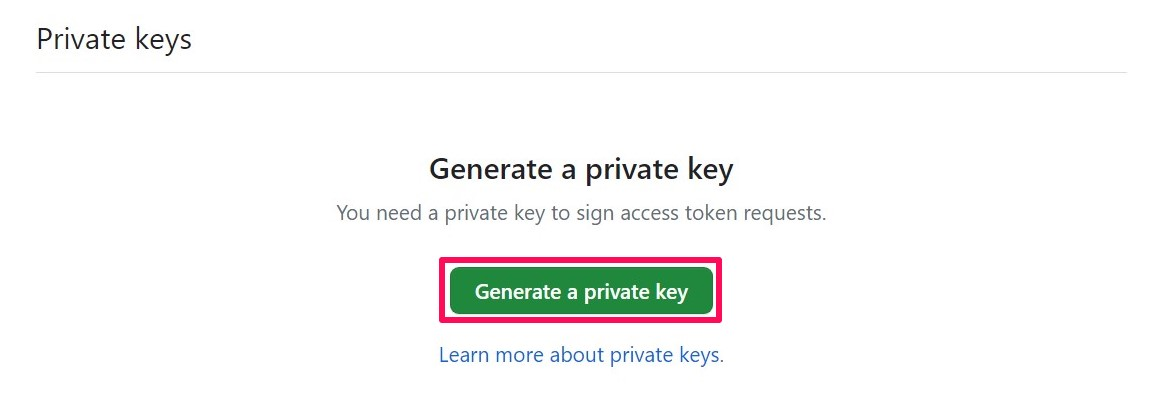
- One clicked, a
.pemfile will be downloaded to your downloads folder, keep hold of it as you will need it for later.
Stage 3: Extract your App ID
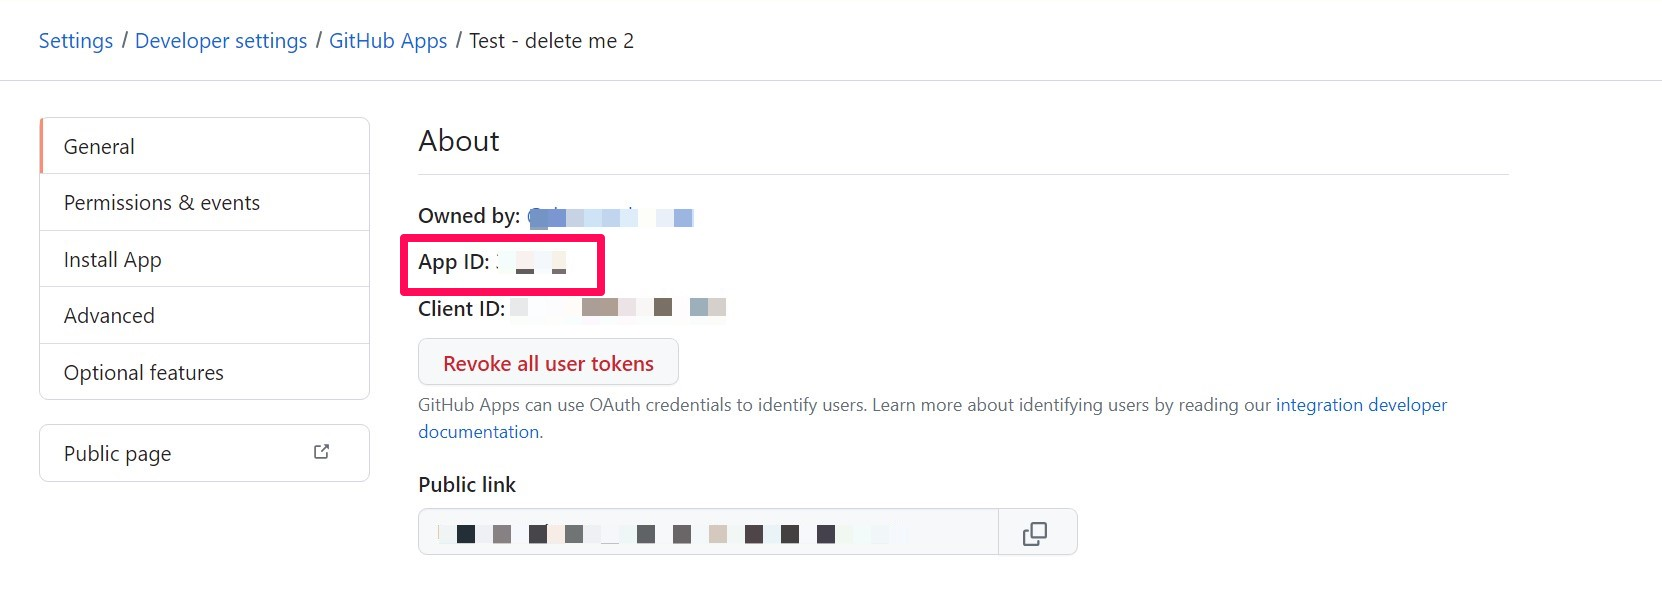
Return to the top the original GitHub Apps page, and click on the new GitHub App you just created in stage 1. Under the About section, copy your App ID and keep hold of it as you will need it for later.
Stage 4: Install your GitHub App
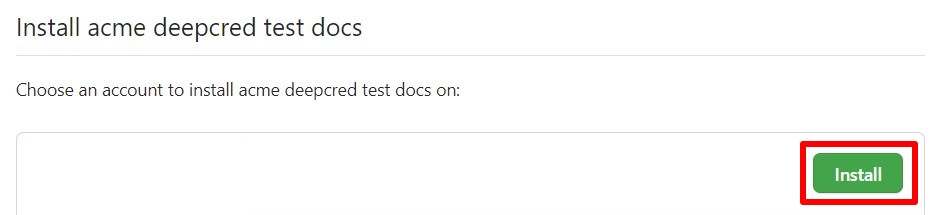
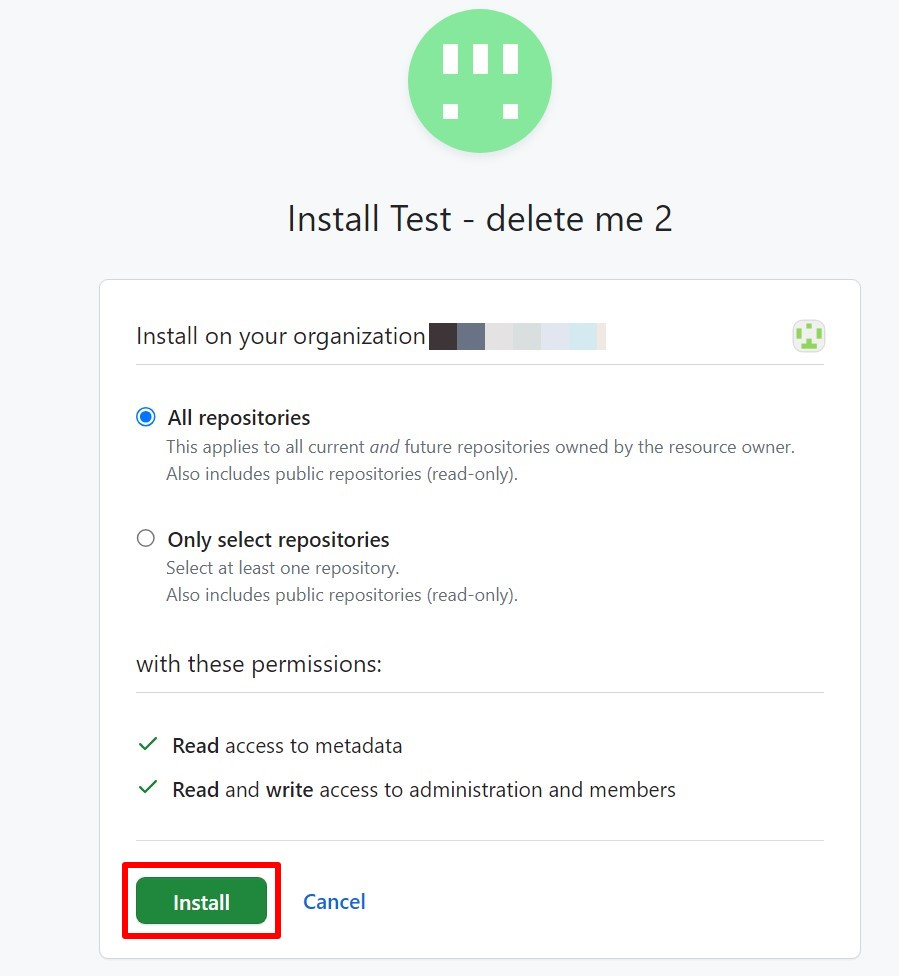
- Then, in the left-sidebar, click on the Install App tab, pick the organization you want to install the app on and click Install.
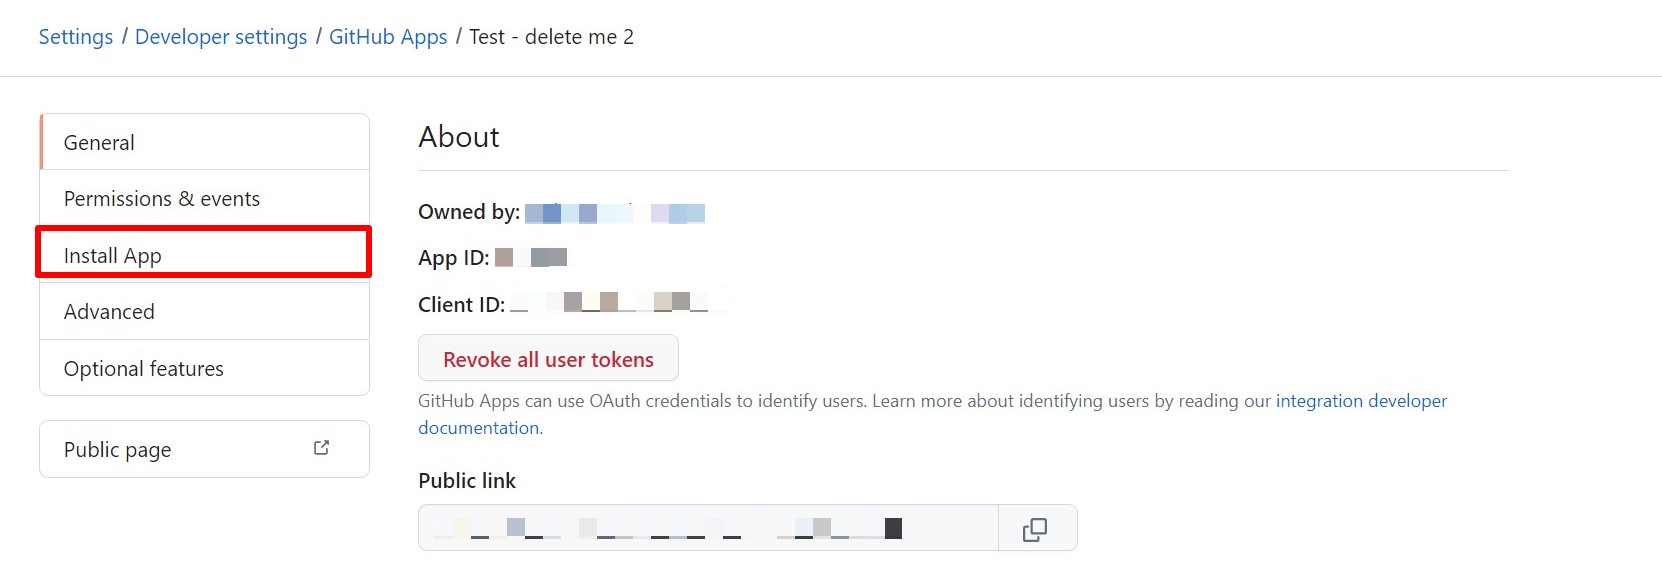
- Then, in the pop-up window make sure the All repositories button is chosen, and finally, click Install.
Stage 5: Extract your Installation ID
- Once you installed your GitHub App, you will see a confirmation message at the top of the page you have been redirected to.

- At the top of this page, extract Installation ID from the URL of this page and keep hold if it for later.

Creating the integration in Entitle
- Log in to Entitle and go to the Integrations page.
- After clicking the Add Integration button, type GitHub in the Application field.
- Don’t forget to set the Save on field with your configuration, i.e., your own hosted agent or Entitle’s cloud.
- Also, make sure that the Connection field is set to GitHub App.
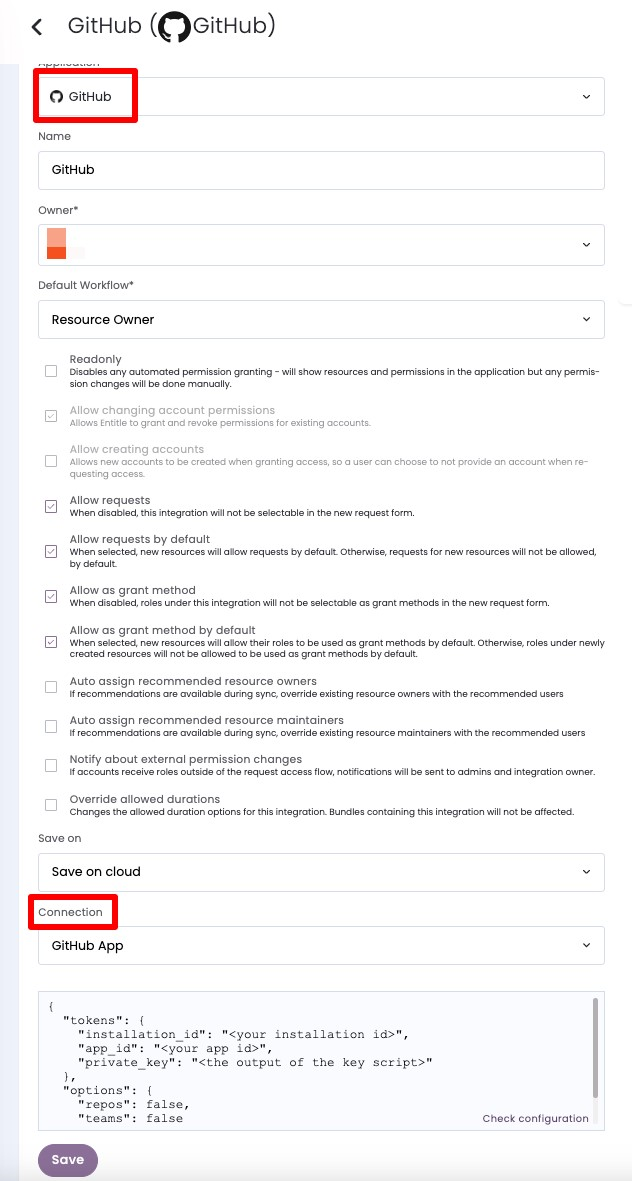
-
In the connection JSON
installation_idfield, paste the values from stage 5. -
In the connection JSON
app_idfield, paste the values from stage 3. -
To add the
private_keyto GitHub’s configuration in Entitle, copy the following script to a file namedprint_key.sh.
sed  -e ':a' -e 'N' -e '$!ba' -e 's/\n/\\n/g' "$1" > entitle_github_key.pem
echo "Please copy the following key to your configuration: (it will be available in './entitle_github_key.pem' too)"
cat entitle_github_key.pem
Run
./print_key.sh <private_key.pem>where<private_key.pem>is the name of the.pemfile from stage 2. Alternatively, replace"$1"with the name of the.pemfile from stage 2 and run the lines above directly.
Now, you can paste the printed key and put it in the connection JSONprivate_keyfield. -
In the
optionsfield, add your chosen resources mentioned in the Overview section here.The option to specify
organization_nameaside from Repositories and teams will not affect the GitHub App.Example connection JSON{ "tokens": { "installation_id": "<your installation id>", "app_id": "<your app id>", "private_key": "<the output of the key script>" }, "options": { "repos": false, "teams": false } } -
Click Save.
Should you need to allowlist this integration, these are the IP addresses from which Entitle's service reaches the integration:
- Entitle EU (Cloud deployment)
- 34.243.199.171
- 54.216.133.226
- Entitle US (Pathfinder deployment)
- 52.45.229.219
- 54.88.235.213
- 3.224.15.134
- Entitle CA (Pathfinder deployment)
- 35.182.218.208
- 15.156.179.153
What's next?Make sure your setup is complete by testing your integration.
Updated 3 months ago
