Oracle Cloud Infrastructure | Entitle
What is Oracle Cloud Infrastructure (OCI)?
Oracle Cloud Infrastructure (OCI) is a cloud computing platform that provides a wide range of services, including computing, storage, networking, and identity management. OCI is designed for running enterprise workloads securely and efficiently, offering scalability, high availability, and compliance capabilities.
How is this integration useful?
Integrating OCI with Entitle automates user access management within OCI groups, ensuring precise provisioning and revocation of permissions. It removes excessive or risky access when high-privilege or anomalous activity is detected. It streamlines access requests, enforces least privilege, and enhances security and compliance visibility across OCI environments. This supports Just-In-Time (JIT) access enforcement and guided remediation workflows, ensuring least privilege across cloud and SaaS environments.
Prerequisites
- Have an OCI user that is part of the administrator group within a specific domain to be able to perform administrator actions in the same domain.
- If you have an existing service account you wish to use for Entitle, skip the Create a service account step.
- However, the service account used/created for Entitle is not required to be part of the administrator group.
- The service account used/created for Entitle must be part of a group where its users can add/remove users from other groups.
- You must have an Admin account in Entitle.
Creating this integration requires the following:
- Create an OCI group
- Create a policy for the group
- Create a new service account
- Add the service account to a group
- Create an API key and a configuration file
The following sections detail the steps needed to accomplish the above.
Should you need to allowlist this integration, these are the IP addresses from which Entitle's service reaches the integration:
- Entitle EU (Cloud deployment)
- 34.243.199.171
- 54.216.133.226
- Entitle US (Pathfinder deployment)
- 52.45.229.219
- 54.88.235.213
- 3.224.15.134
- Entitle CA (Pathfinder deployment)
- 35.182.218.208
- 15.156.179.153
Create a group
-
Log in to the OCI Console with a user who is part of the administrator group.
-
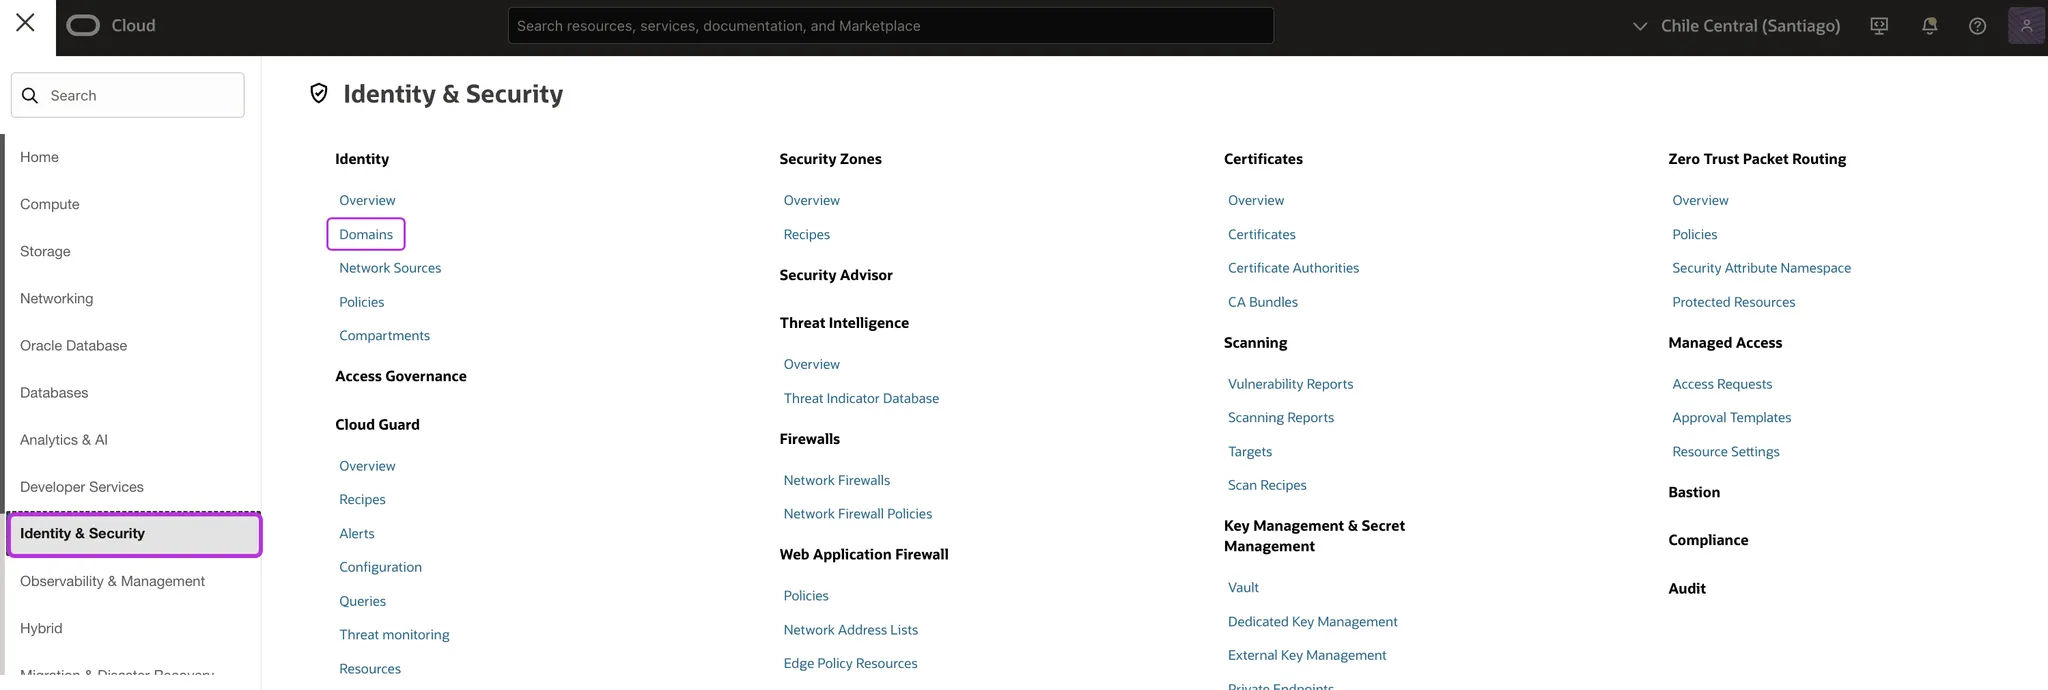
Navigate to Identity & Security > Domains.
-
Select your domain from the list.

-
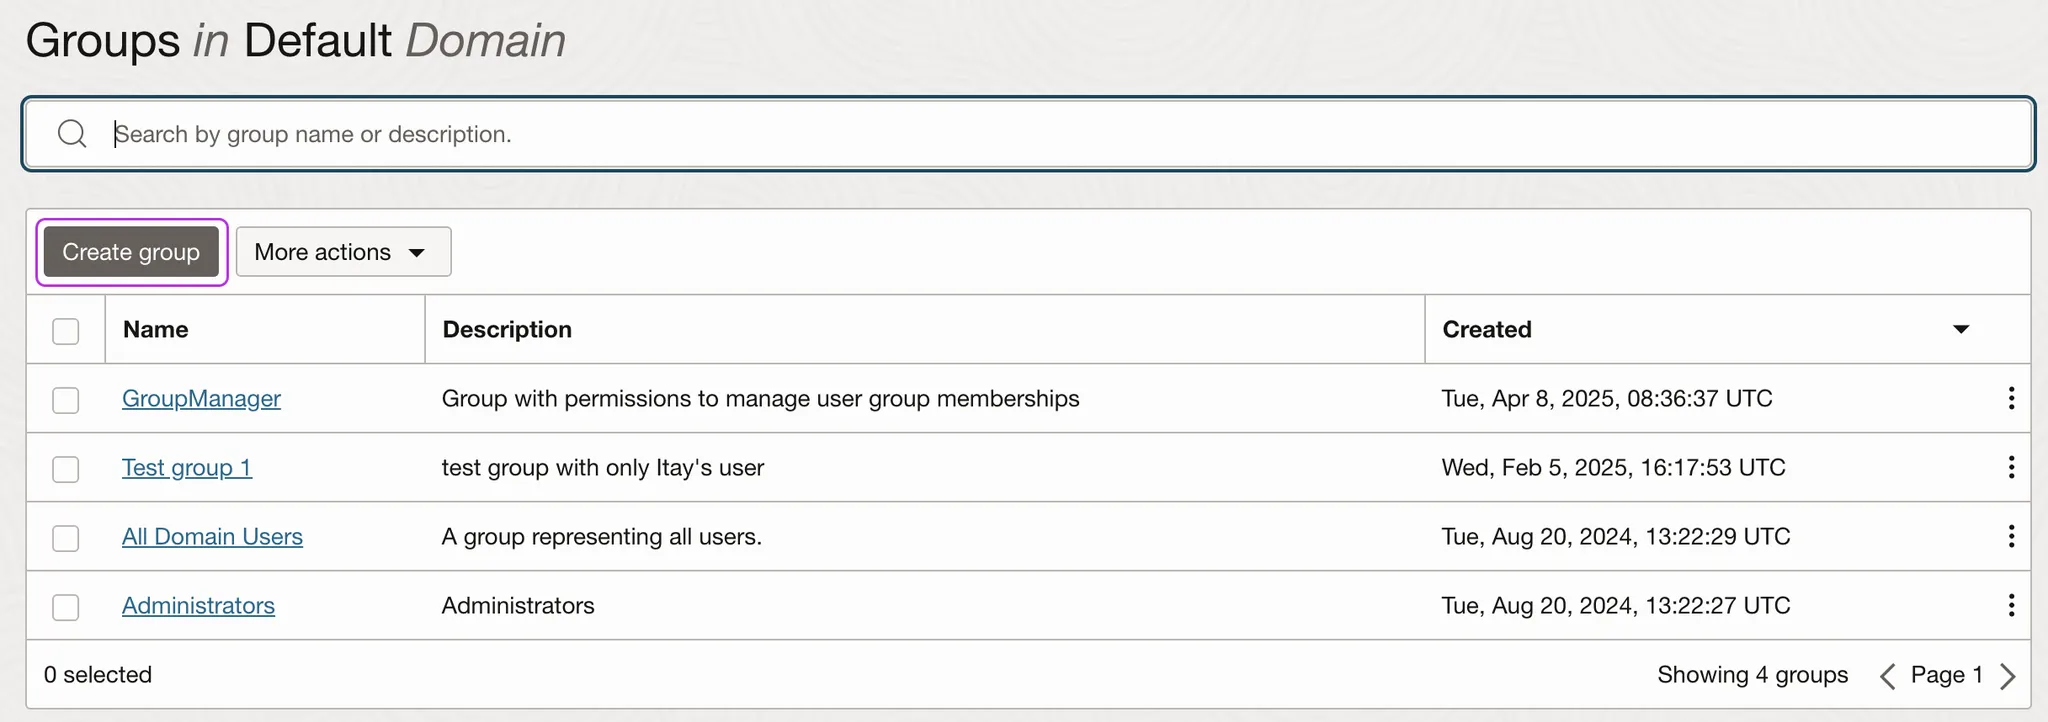
Click the Groups tab on the left-side menu.
-
Click Create group.
If a service group already exists, there's no need to create a new one or to set up a policy as explained in the next step.
-
Add a name and description for the group.
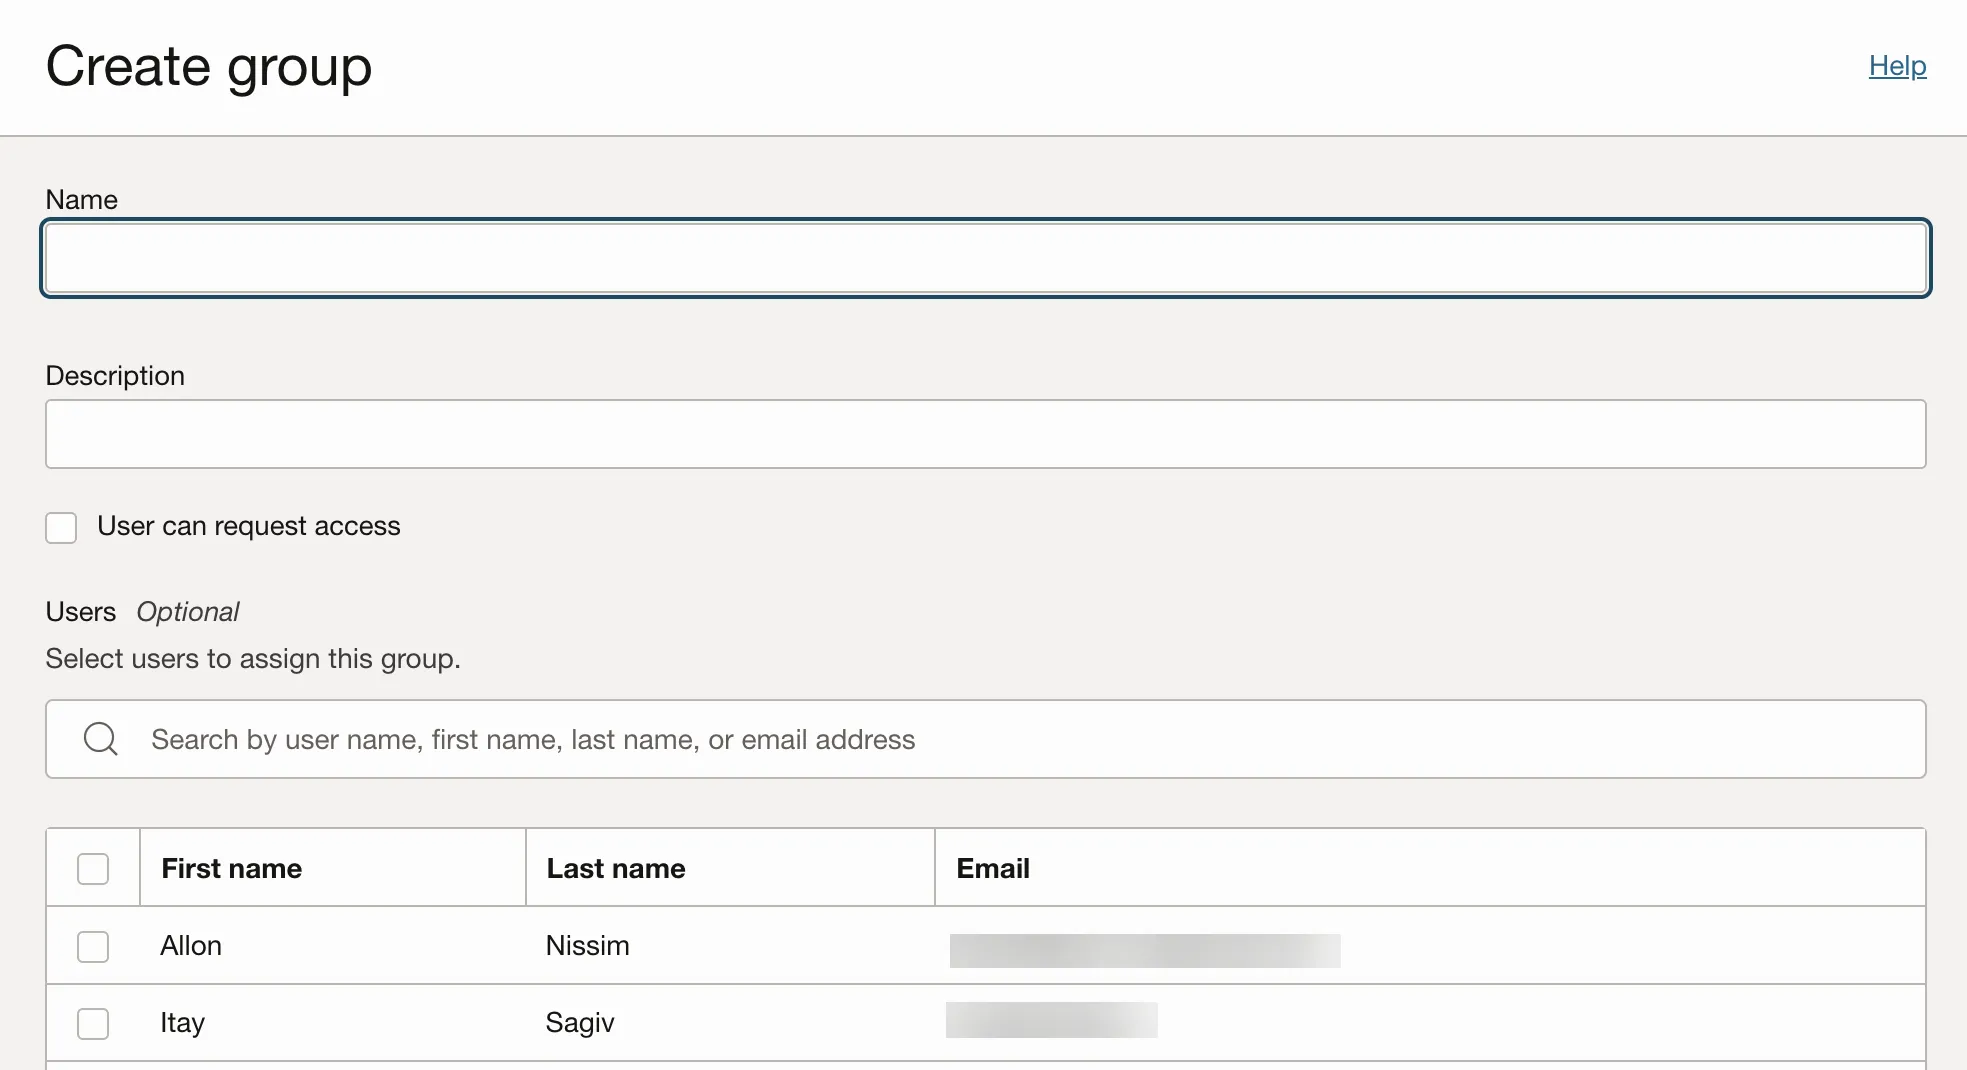
If you have an existing service account, you can add it to the newly created group at this stage:
- Search the service account name.
- Once found, check the box next to it to add it to the group.
-
Click Create.
Create a policy for the group
-
Navigate to Identity & Security > Policies.
-
Click Create policy.

-
Fill in the following details:
-
Add a name and description for the policy.
-
Choose a compartment for the policy.
-
Under Policy builder, enable the Show manual editor option.
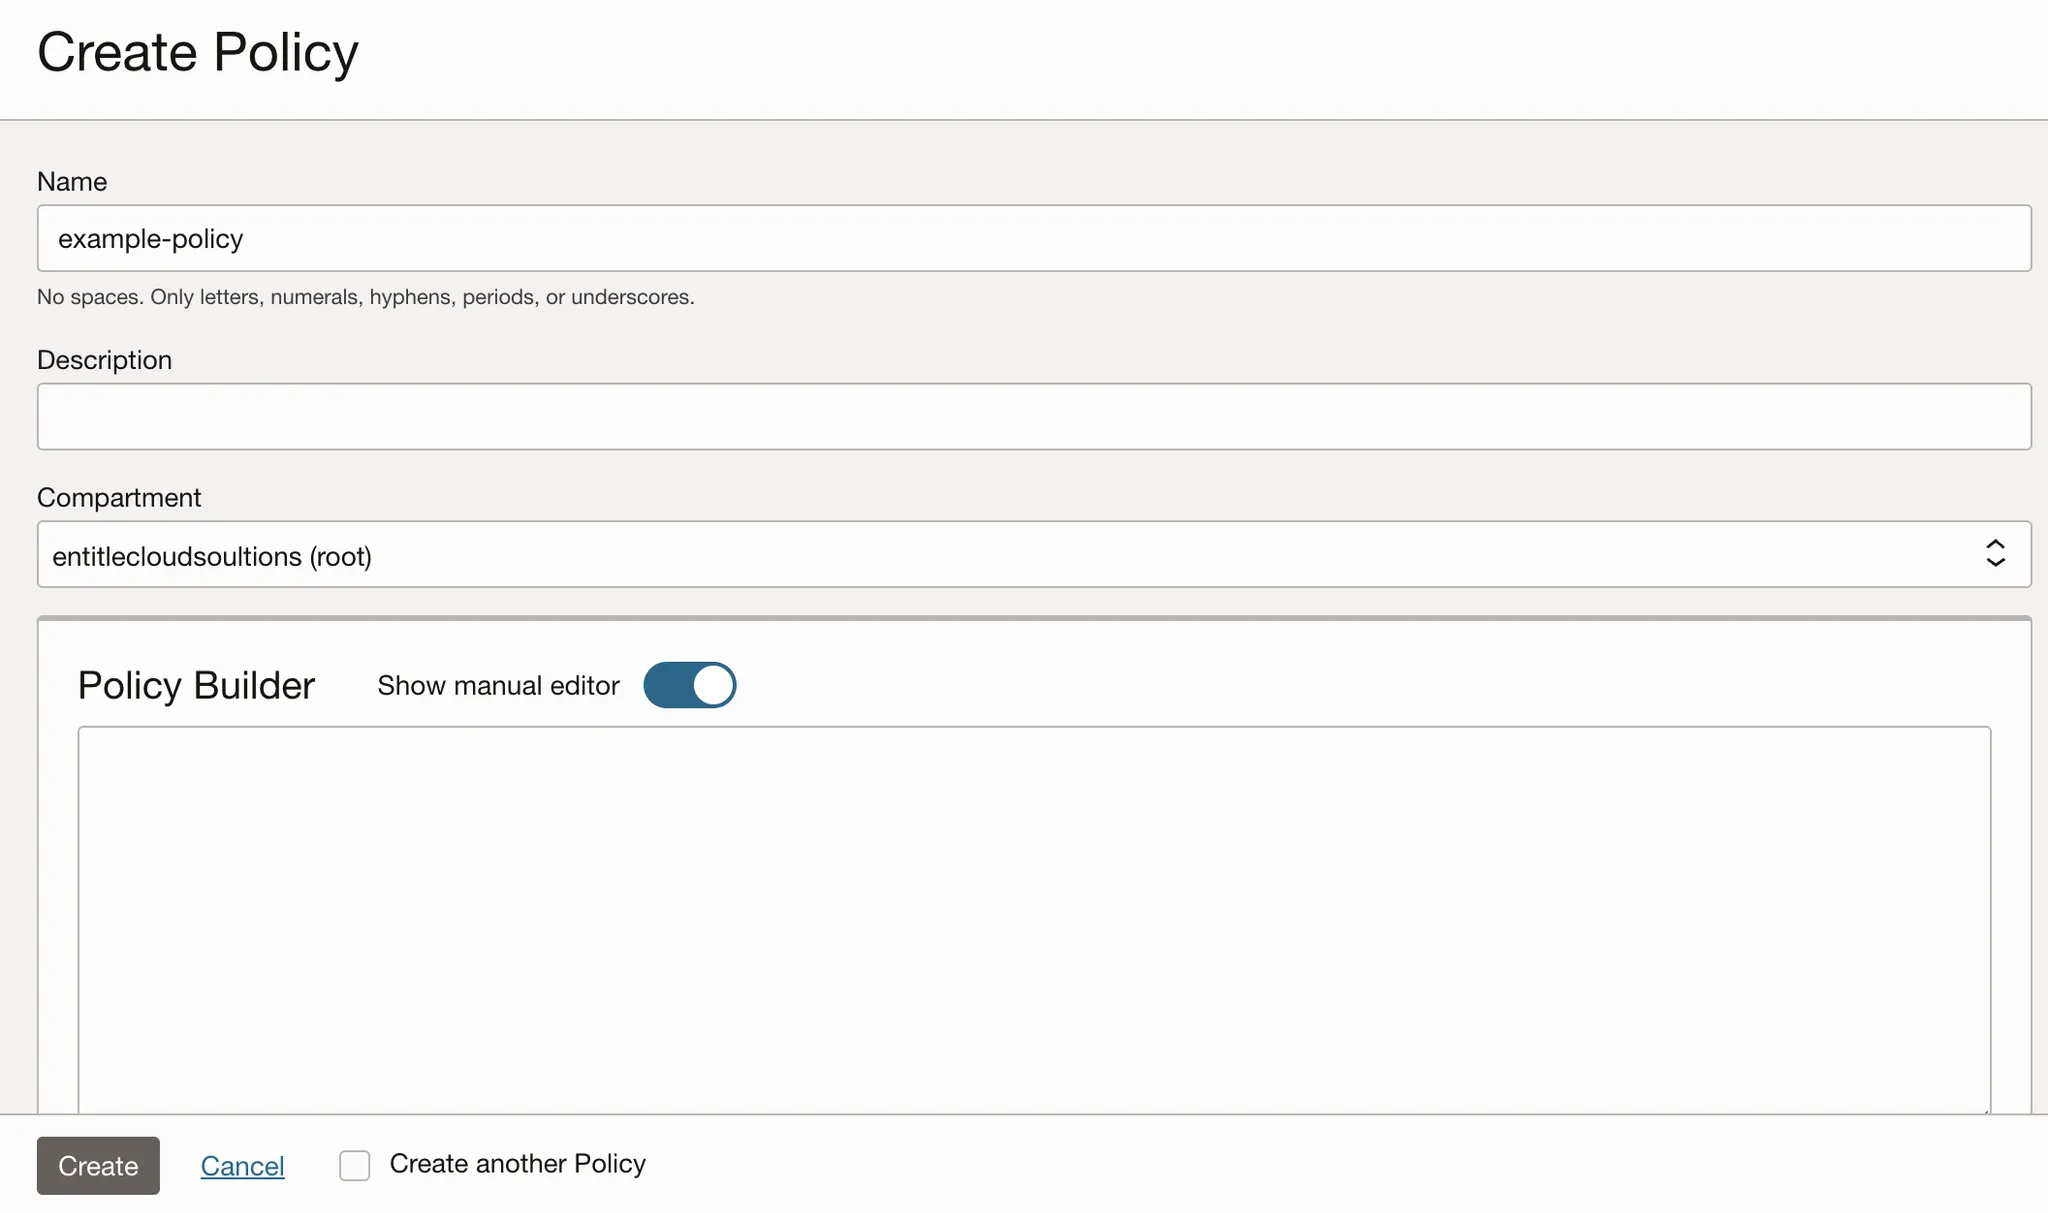
Then, insert the following text and replace the Domain_name and Group_name values with your own:
Allow group '<Domain_name>'/'<Group_name>' to inspect users in tenancy Allow group '<Domain_name>'/'<Group_name>' to inspect groups in tenancy Allow group '<Domain_name>'/'<Group_name>' to use users in tenancy Allow group '<Domain_name>'/'<Group_name>' to use groups in tenancy- Policy #1 would allow Entitle to view the users in the tenancy.
- Policy #2 would allow Entitle to view the groups in the tenancy.
- Policies #3 and #4 would allow Entitle to grant and revoke users’ access to groups.
-
-
Click Create.
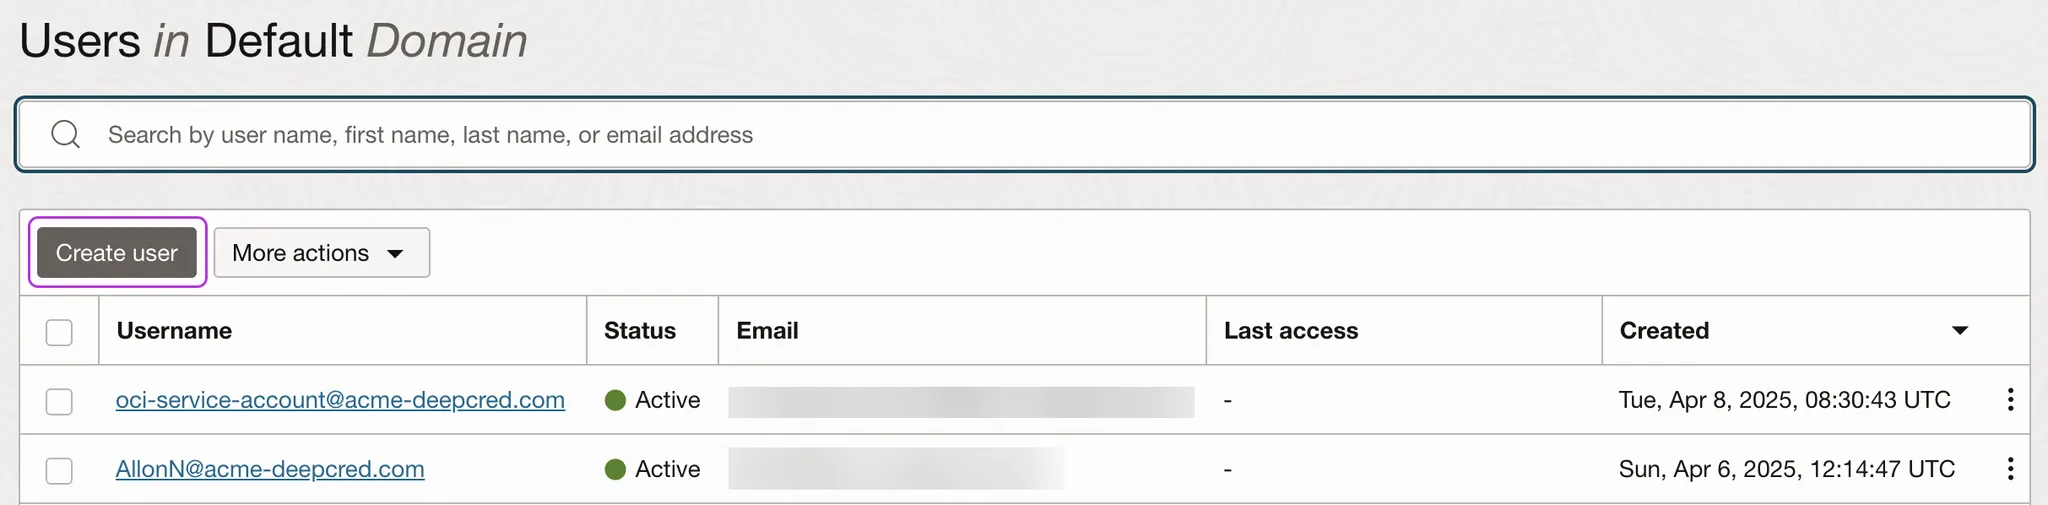
Create a new service account
-
Navigate to Identity & Security > Domains.
-
Select your domain from the list.
-
Click the Users tab on the left-side menu.
-
Click Create user.
-
Fill in the following details:
-
First name (optional).
-
Last name.
-
Username / Email.
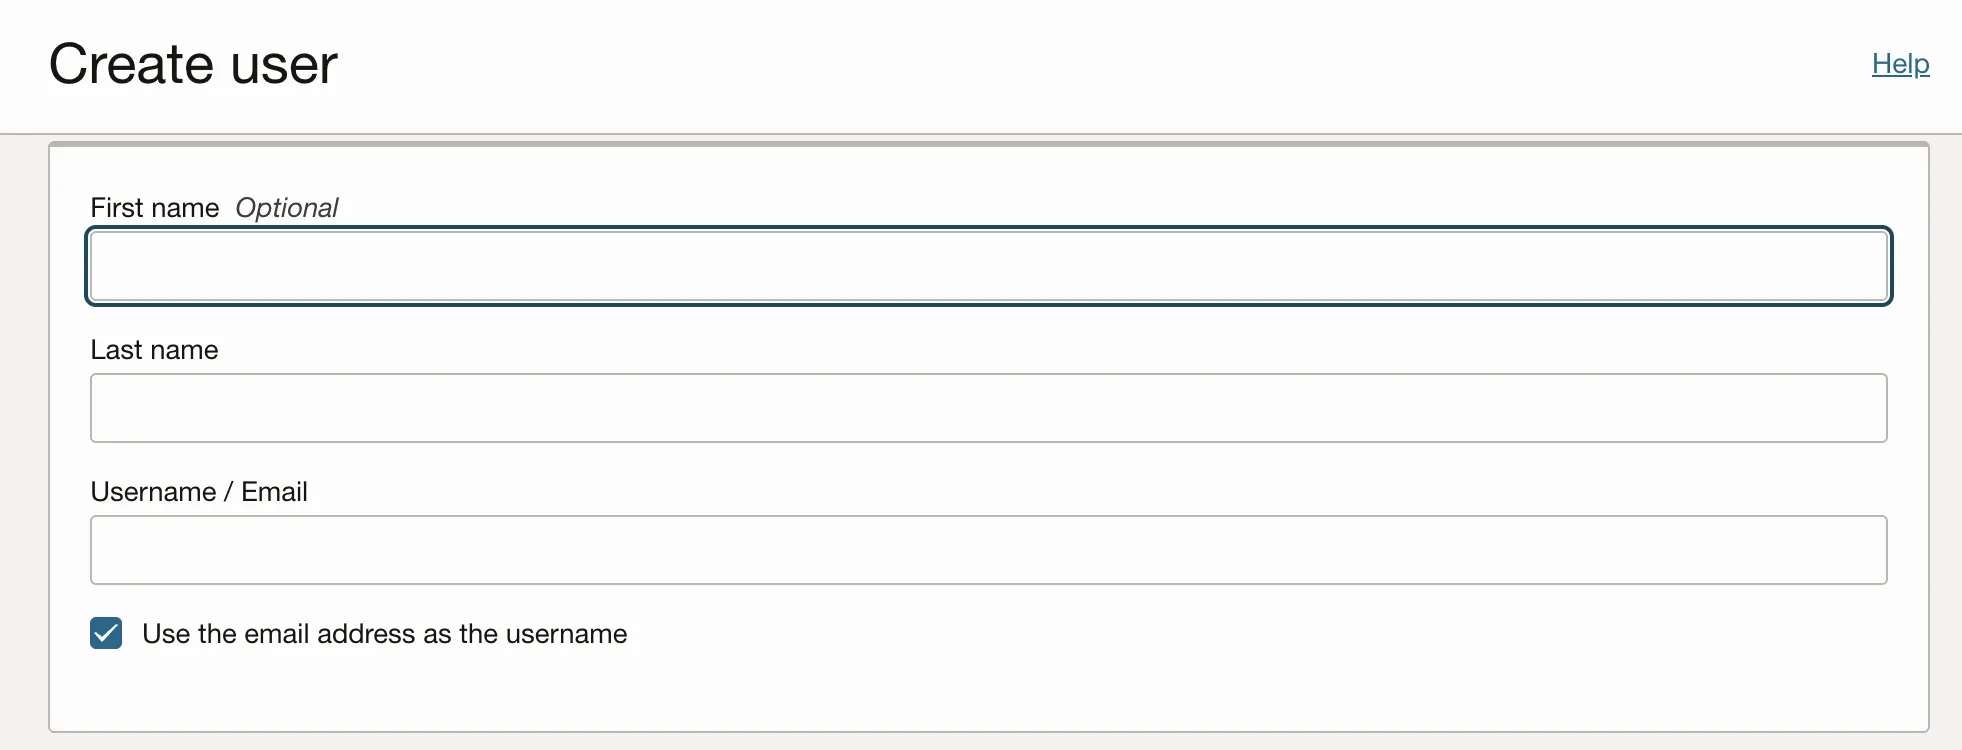
Oracle Cloud Infrastructure requires a valid email address during the user creation process to send an activation email. This email facilitates the setup of a new password and enables Multi-Factor Authentication (MFA).
-
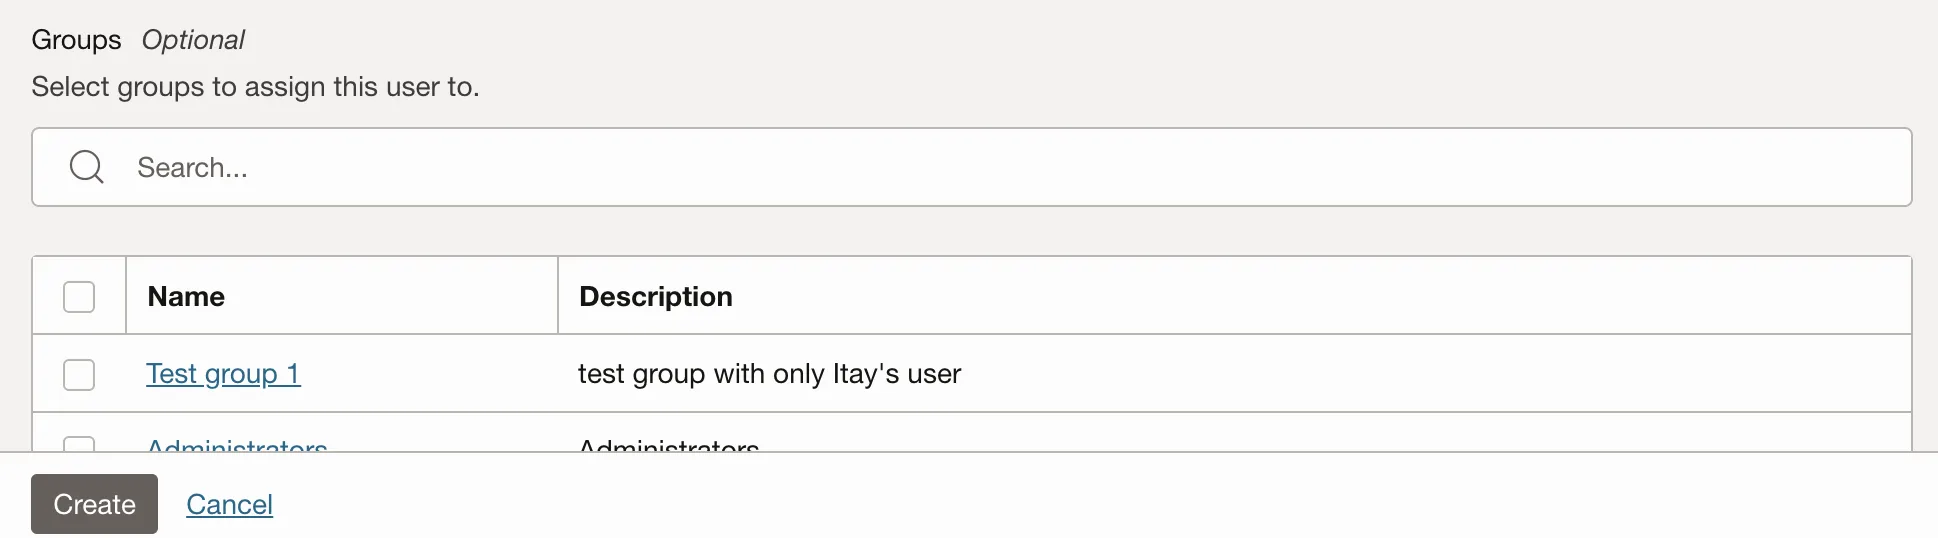
Add the service account to a group
-
In the Create user screen, scroll down to the Groups section.
-
Search the group you created in the Create a group step.
-
Check the box next to the group to add your new service account to it.
-
Click Create.
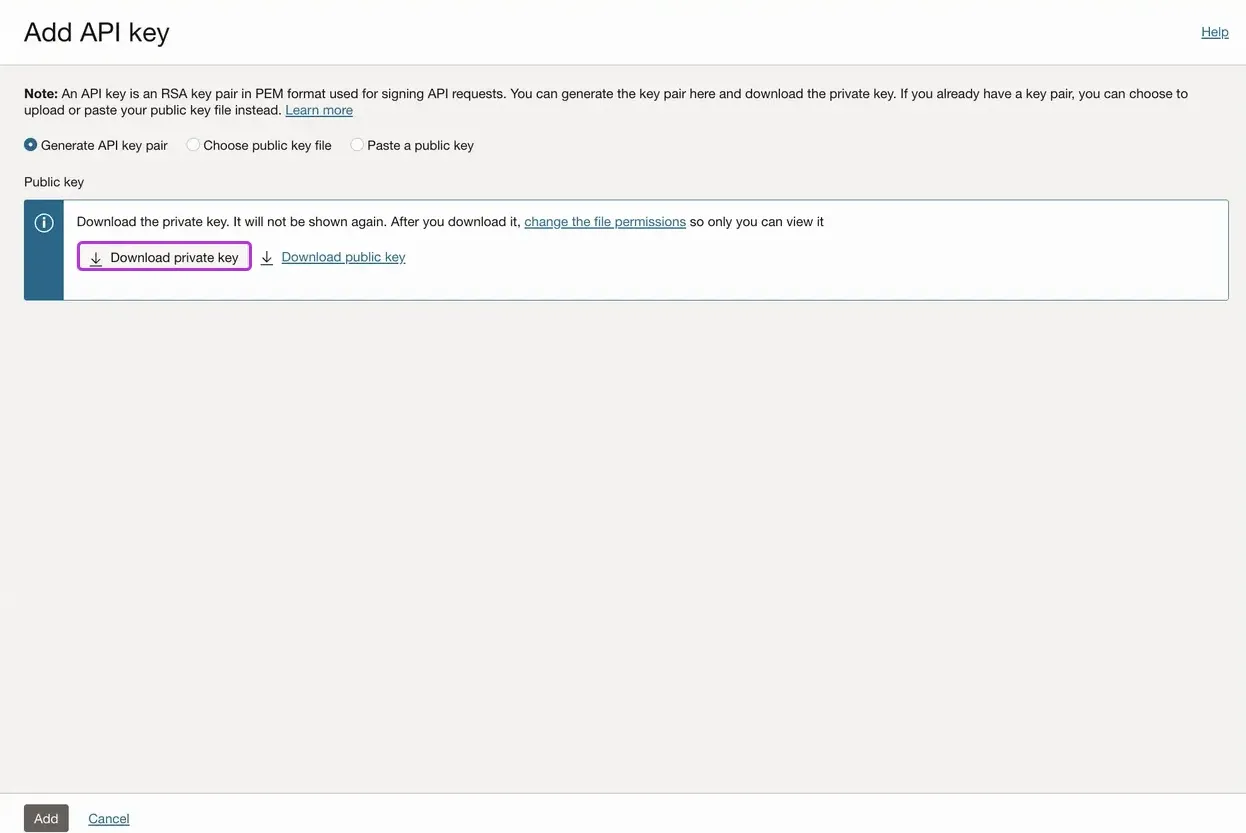
Create an API key and configuration file
-
Return to your new service account’s User information page.
-
Under Resources on the left-side menu, click the API keys tab.
If you have an existing API key pair that you wish to use for the integration with Entitle, proceed to step 5 in this section.
-
Select the Generate API key pair option and click Download private key.
-
Copy the private key for the configuration later on.
-
Run the appropriate command below (for Linux or Windows) to convert your private key into a single-line string with escaped newline characters. This is required because JSON strings do not support literal newline characters; they must be replaced with the ASCII character
\n.For Linux devices:
sed 's/$/\\n/' <key_path> | tr -d '\n'If the
sedcommand fails to replace the newlines with\n, you must do it manually before implementing it in the Entitle configuration.For Windows devices:
(Get-Content private.key) -join '\n' -
Click the Add button at the bottom of the screen to display the Configuration file preview screen.
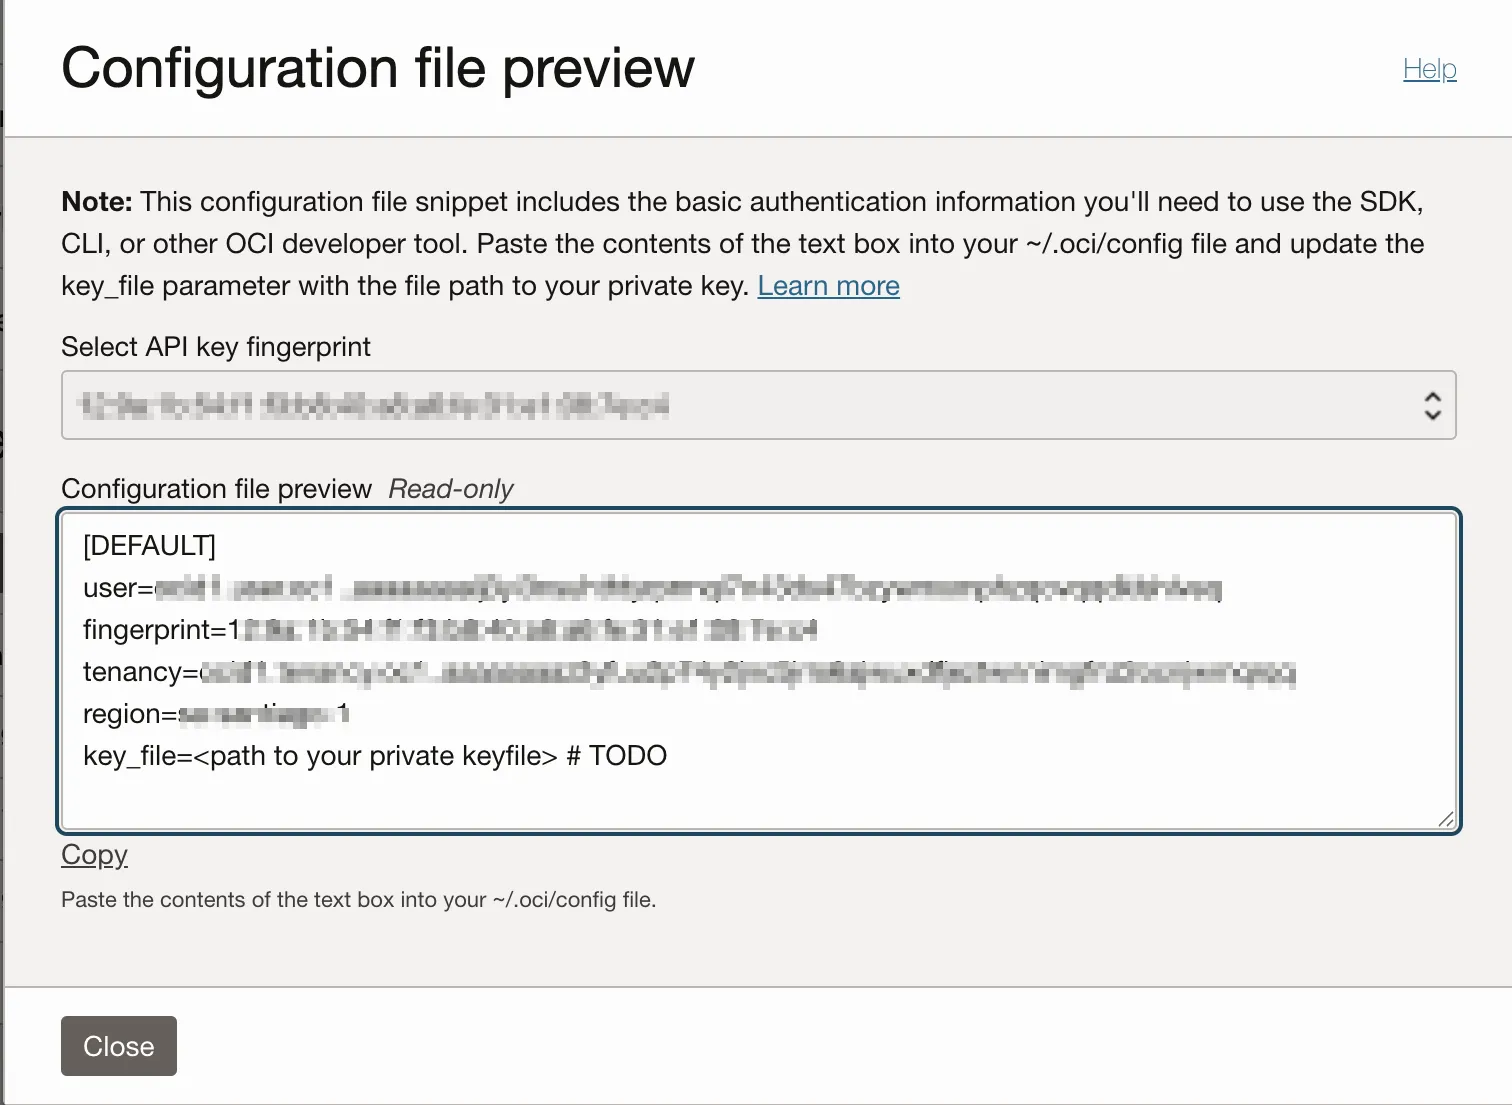
-
The Configuration file preview screen contains the required fields for the configuration of Entitle with OCI:
user- user OCID.fingerprint- the API key’s fingerprint.tenancy- tenancy OCID.region- the region the user is in.
The
key_filevalue should be ignored.
-
Click Close.
To return to the configuration file, click the vertical ellipses icon on the right side of the API key’s row > View configuration file.

Create the OCI integration in Entitle
-
Log in to Entitle and go to the Integrations page.
-
Click Add Integration.
-
In the Application field, enter Oracle Cloud Infrastructure (OCI).
-
In the Save on dropdown, select Entitle cloud or your hosted agent.

-
In the Connection field:
user: Insert your user OCID value you copied from the User information page.tenancy: Insert the tenancy OCID value you copied from the Compartments page.fingerprint: Insert the key’s fingerprint value you copied from the API keys page.region: Insert your OCI region (identifier).key_content: Insert the private key content.
Remember to replace the newlines with \n if the sed command fails to do so automatically.
Example connection JSON{ "user": "<YOUR_USER_OCID>", "tenancy": "<YOUR_TENANCY_OCID>", "fingerprint": "<YOUR_KEY_FINGERPRINT>", "region": "<YOUR_REGION>", "key_content": "<YOUR_PRIVATE_KEY>" }
- Click Save.
What's next?Make sure your setup is complete by testing your integration.
Updated 3 months ago
