Azure | Entitle
Overview
Azure is a comprehensive cloud computing platform provided by Microsoft that offers a wide range of services and tools for building, deploying, and managing applications and infrastructure, including virtual machines, databases, analytics, and AI services.
Entitle manages the following resource types in the Azure Cloud Platform:
- Admin Roles
- Groups
In the Azure portal, you can see some groups whose membership and group details you cannot manage in the portal:
- Groups synced from on-premises Active Directory can be managed only in the on-premises Active Directory.
- Other group types, such as distribution lists and mail-enabled security groups, can be managed only in the Exchange or Microsoft 365 admin centers. You must sign in to these centers to manage these groups.
- Azure dynamic groups, whose membership is automatically managed by Azure based on attribute-based rules, are not supported for access management in Entitle. Microsoft’s API does not allow modification of dynamic group membership. Only static (assigned) groups can be managed through Entitle.
- Groups
- SSO Apps
- All of Azure’s Subscription resources, such as:
- Compute resources: Virtual Machines, Virtual Machine Scale Sets, Azure Kubernetes Service (AKS), Azure Container Instances (ACI), and Azure Functions
- Networking resources - Virtual Networks, Load Balancers, Application Gateways, Azure DNS, Traffic Manager, ExpressRoute, and VPN Gateway
- Storage resources: Blob storage, File storage, Queue storage, Table storage, Disk storage, and Archive storage
- Database resources: Azure SQL Database, Azure Cosmos DB, Azure Database for MySQL, Azure Database for PostgreSQL, Azure Database Migration Service, and Azure Cache for Redis
- Web resources: App Service, API Management, Azure SignalR Service, Azure Notification Hubs, and Content Delivery Network
- Security resources: Azure Security Center, Azure Active Directory, Azure Key Vault, Azure Information Protection, and Azure Firewall
- Analytics and AI resources: Azure Stream Analytics, Azure Data Factory, Azure DataBricks, Azure HDInsight, Azure Machine Learning, and Azure Cognitive Services
- Management resources: Azure Monitor, Azure Log Analytics, Azure Automation, Azure Resource Manager, and Azure Advisor
General guidelines
To integrate your Azure in Entitle, you must create an Azure application and a role for Entitle.
How does it work?
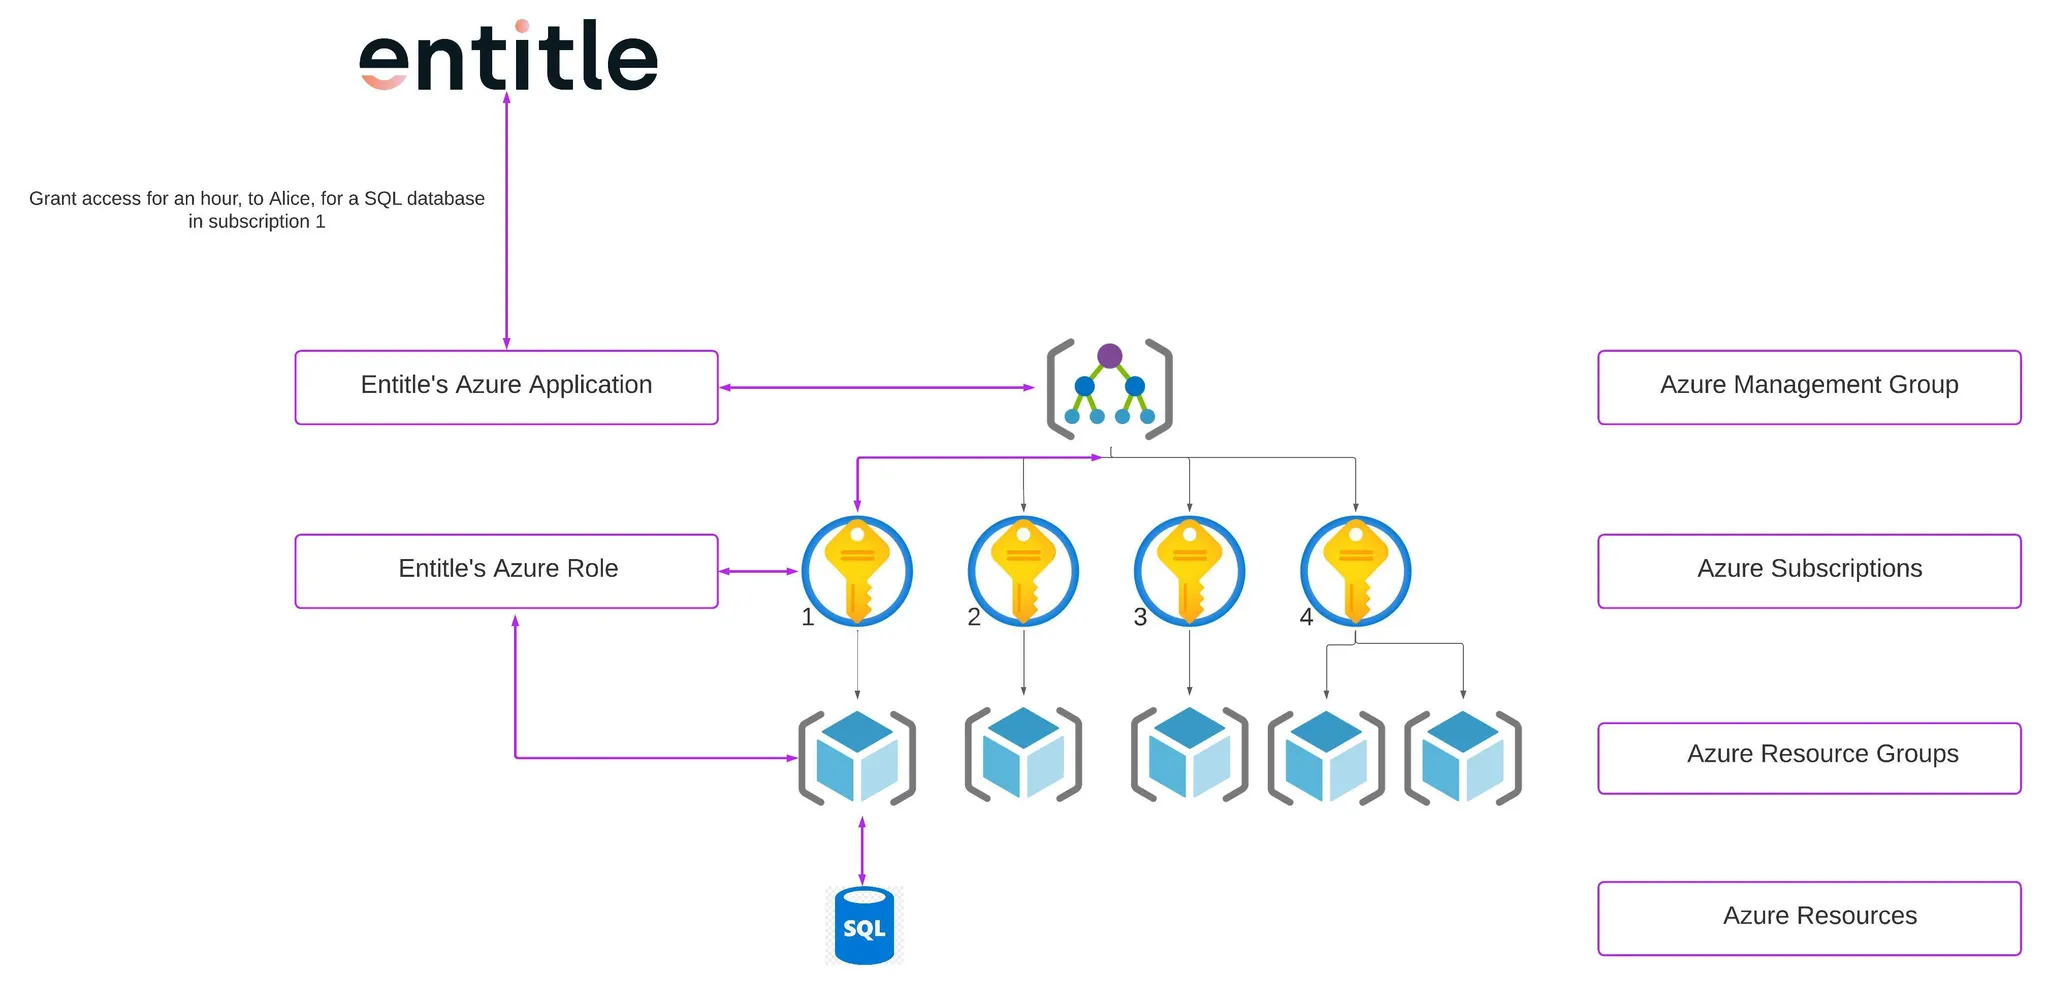
- Entitle connects to the management group of your organization.
- From the management group, Entitle communicates with the roles configured in the subscription you chose to connect Entitle to.
- Within the subscriptions, Entitle uses the Entitle role to retrieve and manage the resources.
- When permissions are granted, the employee who requested them gets temporary access assigned to their user.
- In the diagram above, Alice received an hour of access to an SQL database in subscription 1.
- When permissions are revoked, the employee's permission will be removed from their user’s permissions.
Entitle’s application required permissions
Required
Directory.ReadWrite.Allis required to read the directory resources, update users, and assign applications/licenses – as all of these actions are doable via Entitle.Group.ReadWrite.Allis required to manage groups through Entitle's app.TeamMember.ReadWrite.Allis required to add/remove members from teams by Entitle as an application. Also allows changing a team member's role (for example from owner to non-owner).User.ReadWrite.Allis required to get managers' information by Entitle and populate it to workflows, UAR campaigns, etc.
Optional – Admin Roles Management
- If you wish to manage admin roles with Entitle, the following permission is required:
RoleManagement.ReadWrite.Directory
Set up Azure to work with Entitle
Stage 1: Create an application
-
Go to the Microsoft Azure portal.
-
Click on Microsoft Entra ID.

-
Click on the App registrations tab in the left-side menu.

-
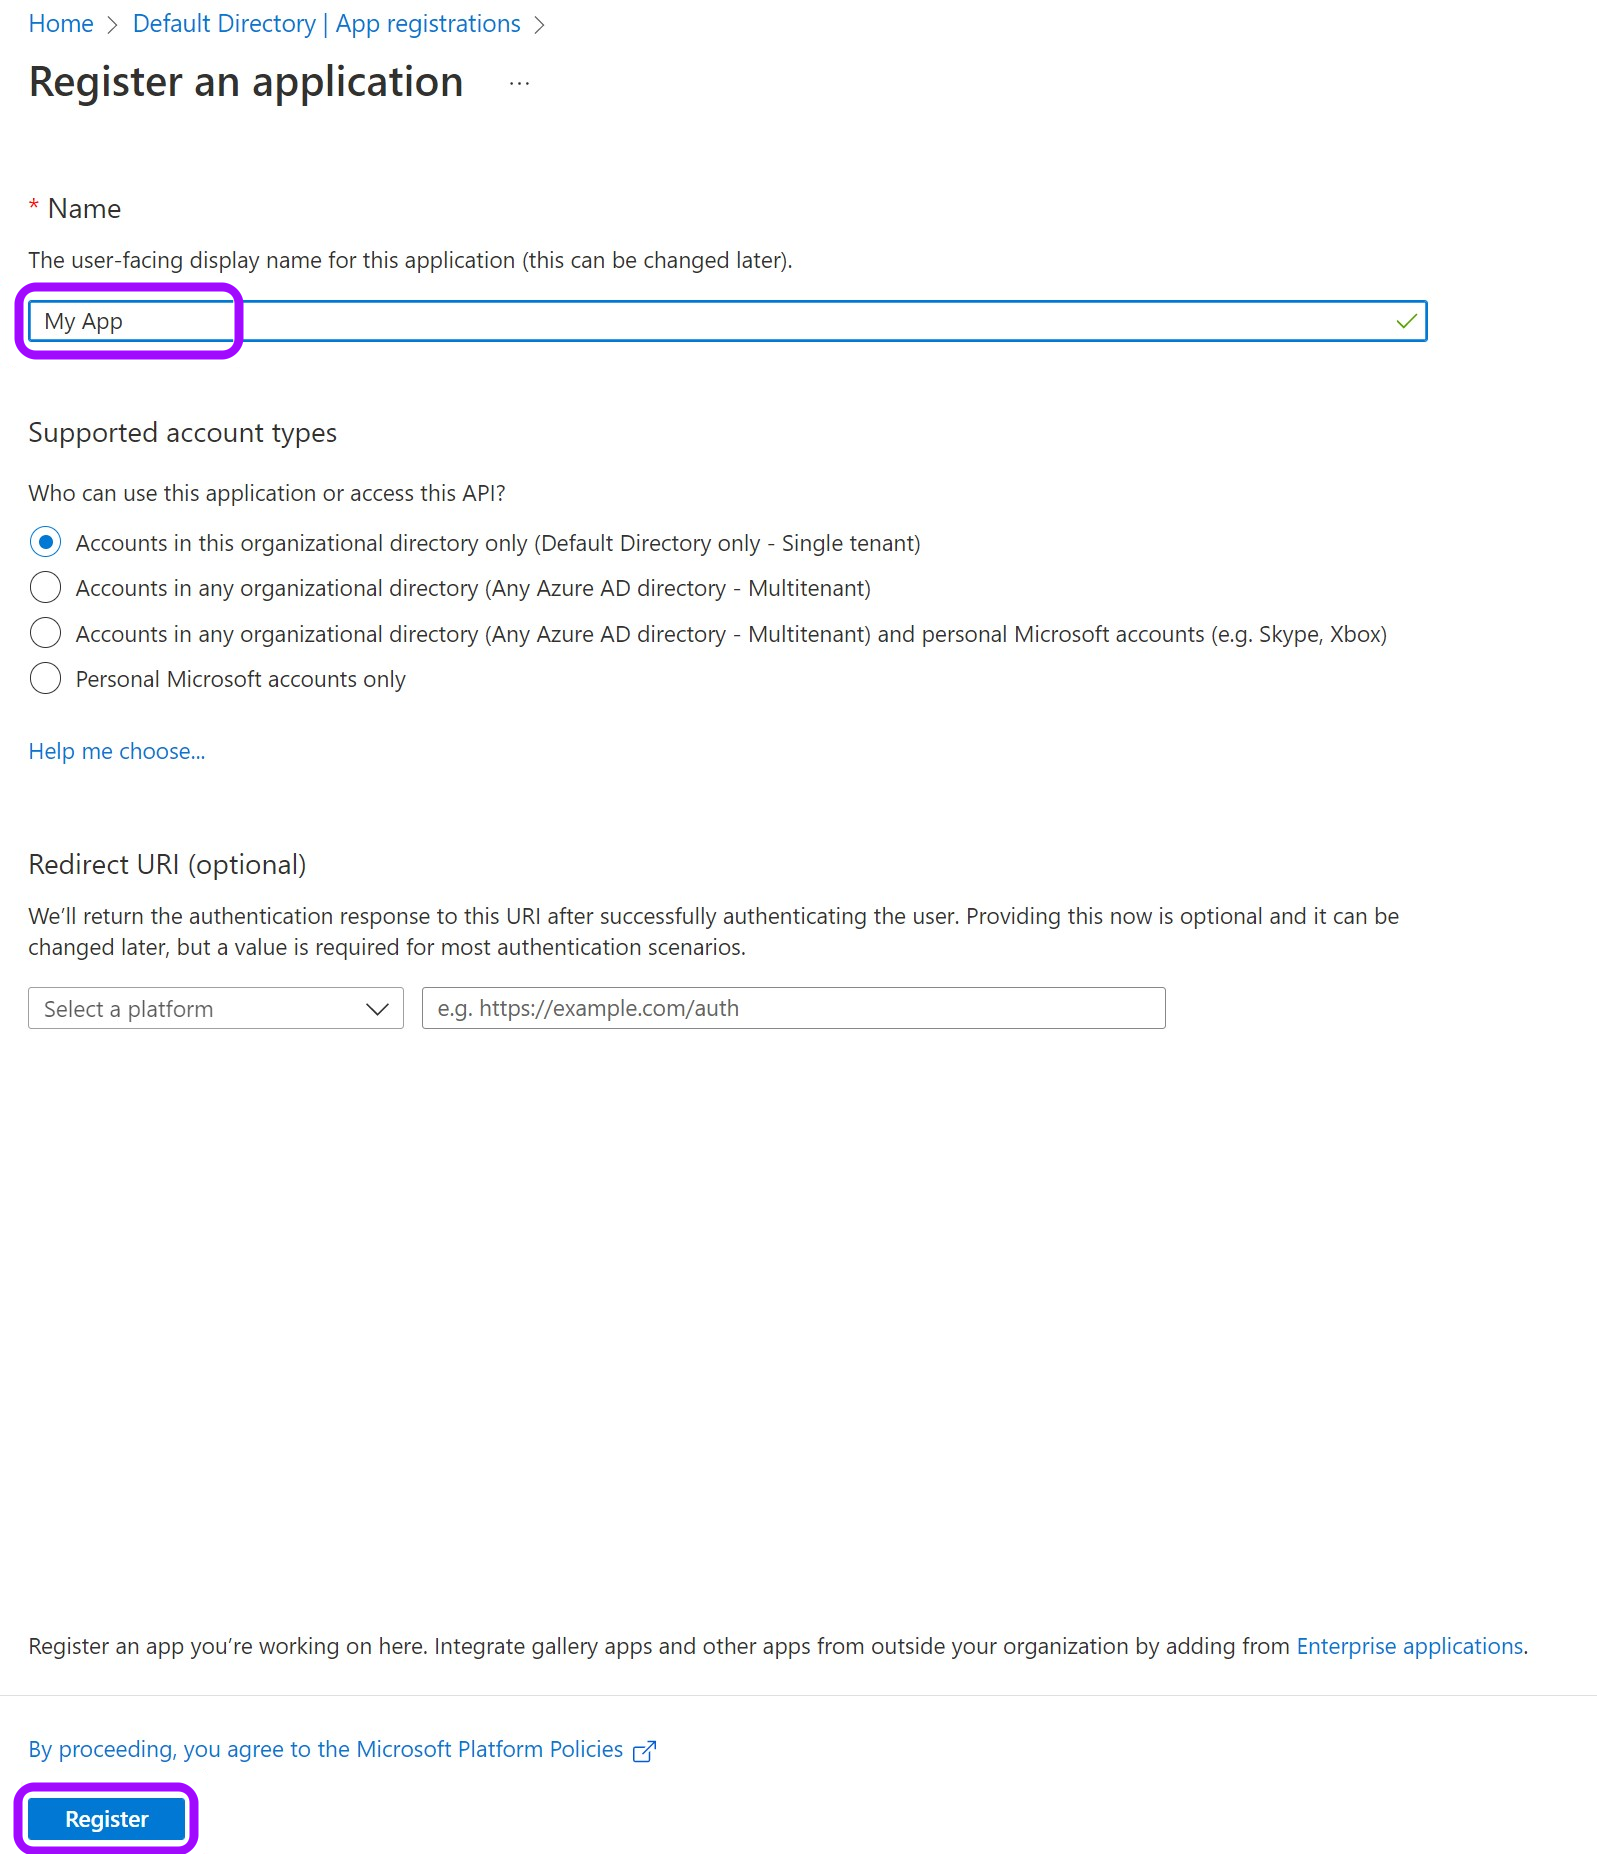
Then, click on New registration.

-
Give your app a Name and leave the rest as is. Then, click on Register.
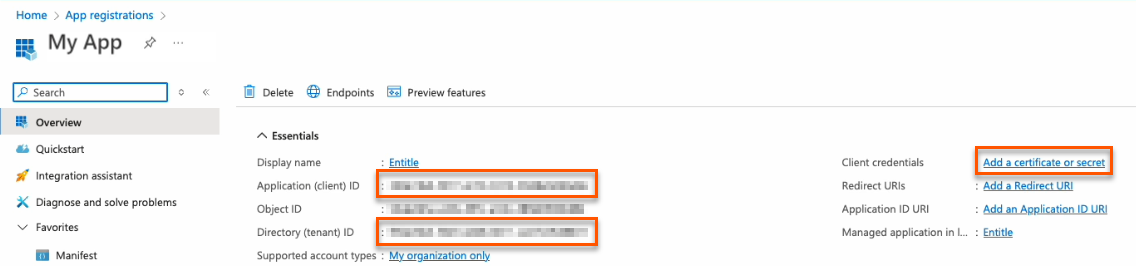
- Keep your Application (client) ID and Directory (tenant) ID for later. Then, click on Add a certificate or secret on the right side.
Choose your authentication methodYou should now choose whether to create a client secret or federated credentials.
- Client secret: The simplest option. Create a secret through the Azure portal user interface. This method works for most cases and takes only a few minutes to set up.
- Federated credentials: A more advanced option that uses Azure identity federation to avoid long-lived secrets and strengthen your security posture.
- Support OIDC-based federation for Azure applications.
- Work alongside existing client-secret methods without affecting current setups.
- Enable access to common Azure resources through role assignments.
- Prevent cross-tenant access by isolating each customer's service principal.
- Automatically remove temporary onboarding credentials after setup.
Federated credentials are supported only for integrations saved on Entitle's Cloud or on an on-premises agent hosted in Amazon Elastic Kubernetes Service (EKS).
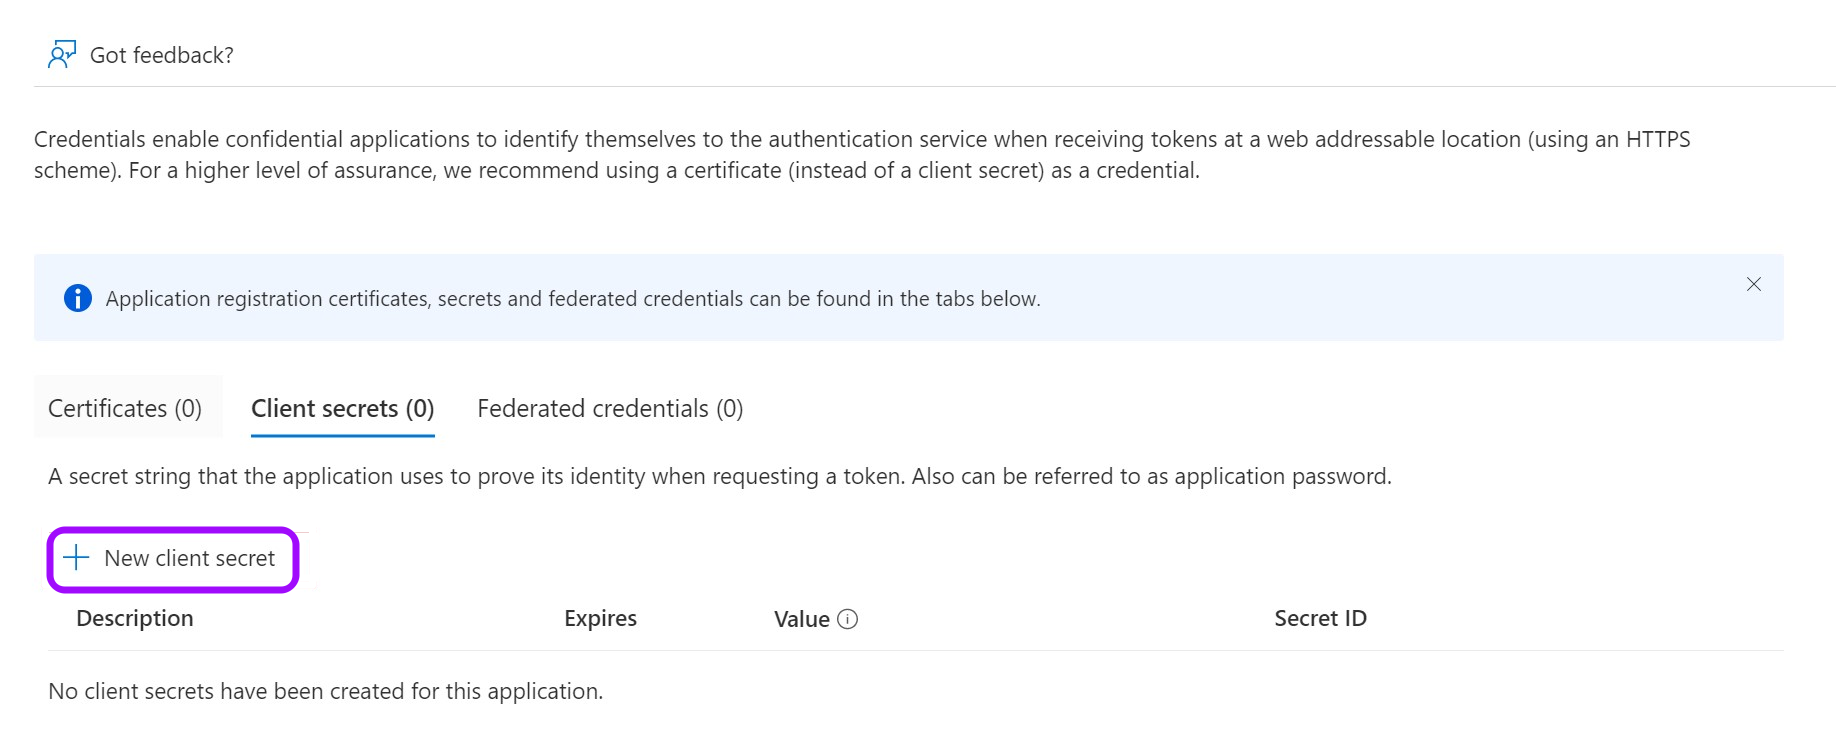
Create a client secret
7. Click on New client secret.
-
In the pop-up window, choose a Description that you will remember and an expiration time and click Add.
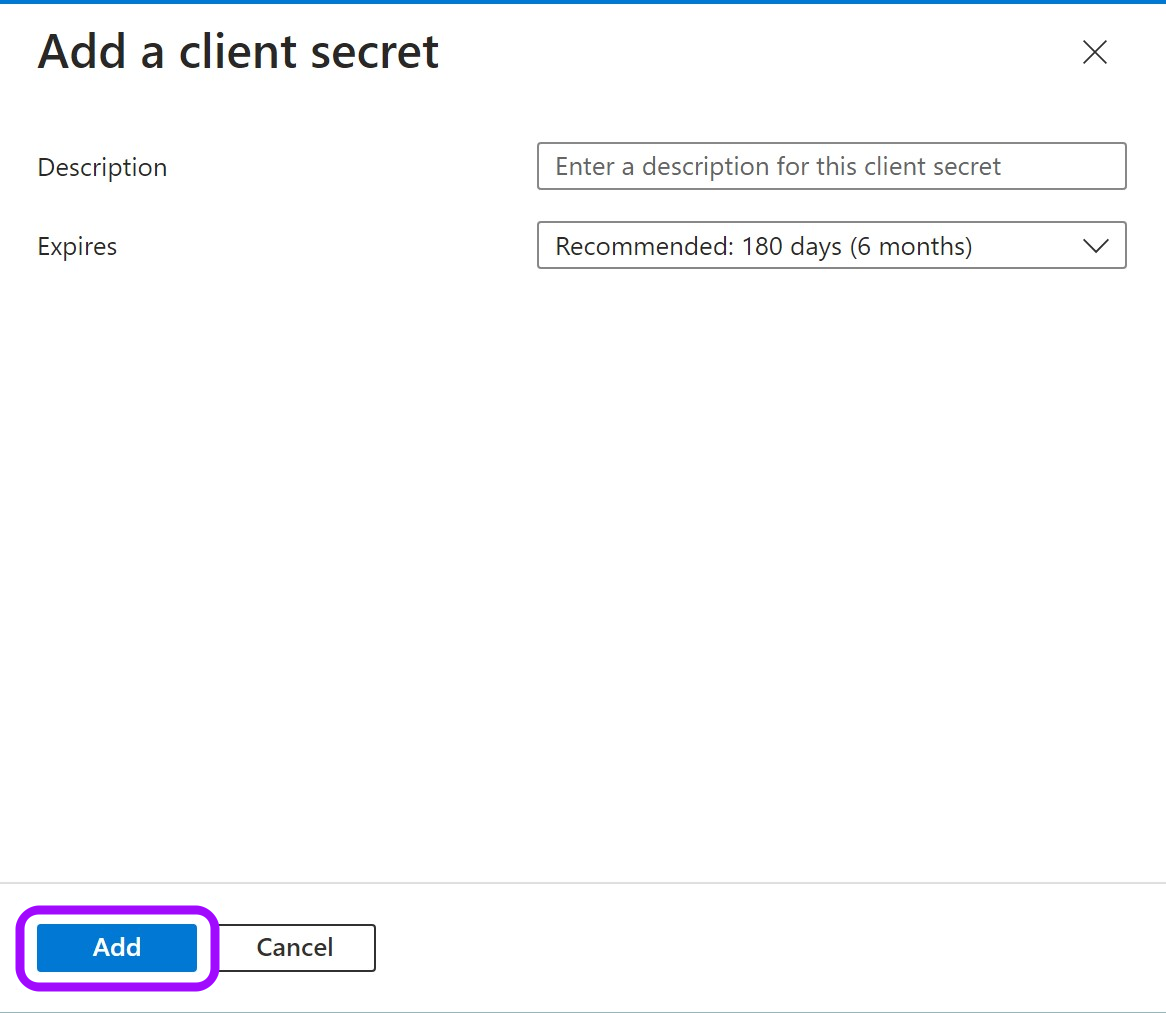
-
Click on the Copy icon to copy your new Client Secret Value and keep it for later.

Create federated credentials for an ephemeral account
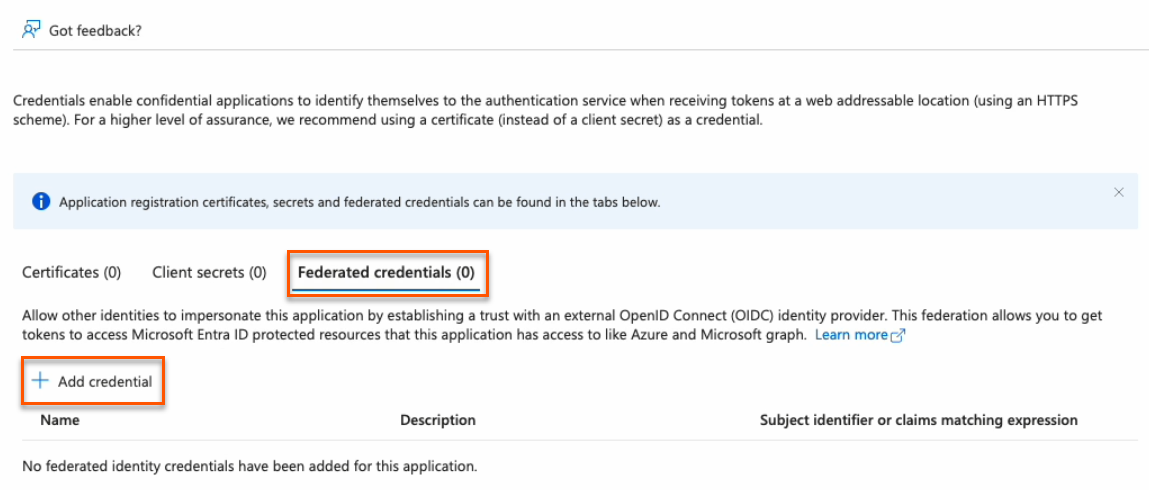
7. Click on the Federated credentials tab, then click Add credential.
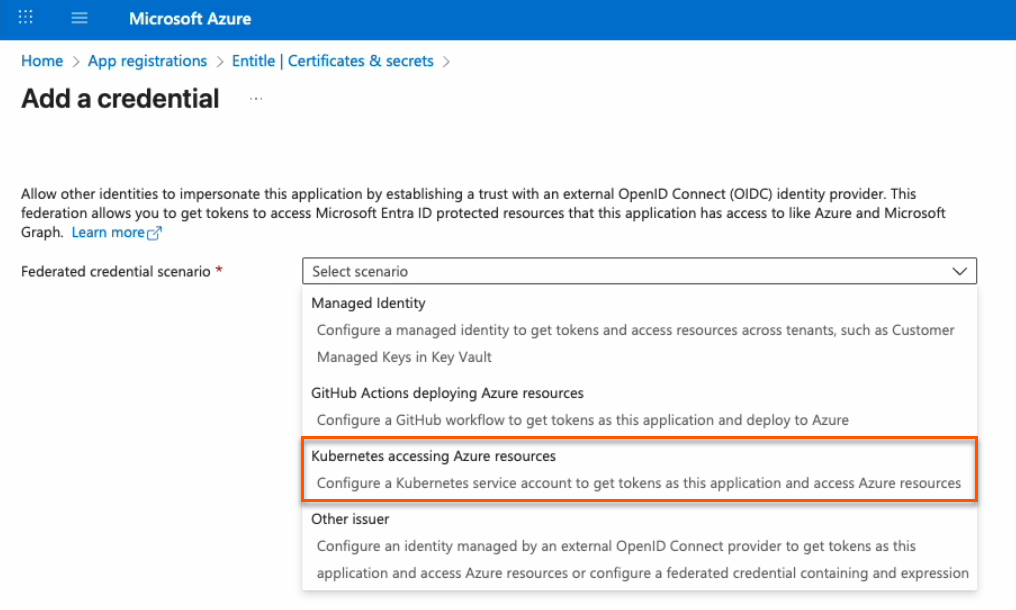
- In the Federated credential scenario dropdown, select Kubernetes accessing Azure resources.
-
On the Add a credential page, fill out the fields as needed.
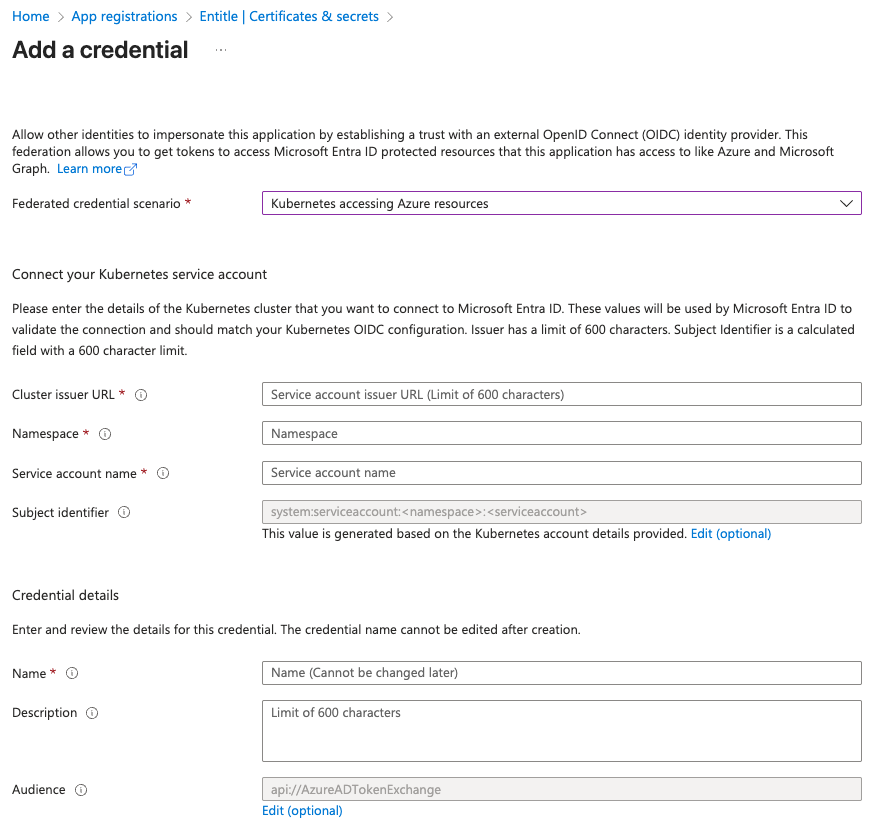
- Cluster issuer URL:
- If you're using Entitle Europe:
https://oidc.eks.eu-west-1.amazonaws.com/id/7104B0E9ED58DCD19AE0DC0EC7D46D5D - If you're using Entitle USA:
https://oidc.eks.us-east-1.amazonaws.com/id/E1F031C91539B03EE726ED530E719F4C - If you're using Entitle Canada:
https://oidc.eks.ca-central-1.amazonaws.com/id/7A1DB459F431A4AFAE24BC244ACE88BB - If you're using an EKS hosted agent on your AWS account, run this command on your cluster and use its output:
aws eks describe-cluster --name <CUSTOMER_CLUSTER_NAME> --query "cluster.identity.oidc.issuer" --output text --region <CUSTOMER_CLUSTER_REGION>
- If you're using Entitle Europe:
- Namespace: Enter entitle.
- Service account name:
- When using a Cloud agent, enter ichilov.
- When using an EKS hosted agent on your AWS account, use entitle-agent-sa.
- Subject identifier: This is automatically generated and should not be edited.
- Name: Enter a name to help identify this credential.
- Description: You may enter a description to help identify the purpose of this credential.
- Audience: Click the Edit link, then enter
sts.amazonaws.com.
- Cluster issuer URL:
-
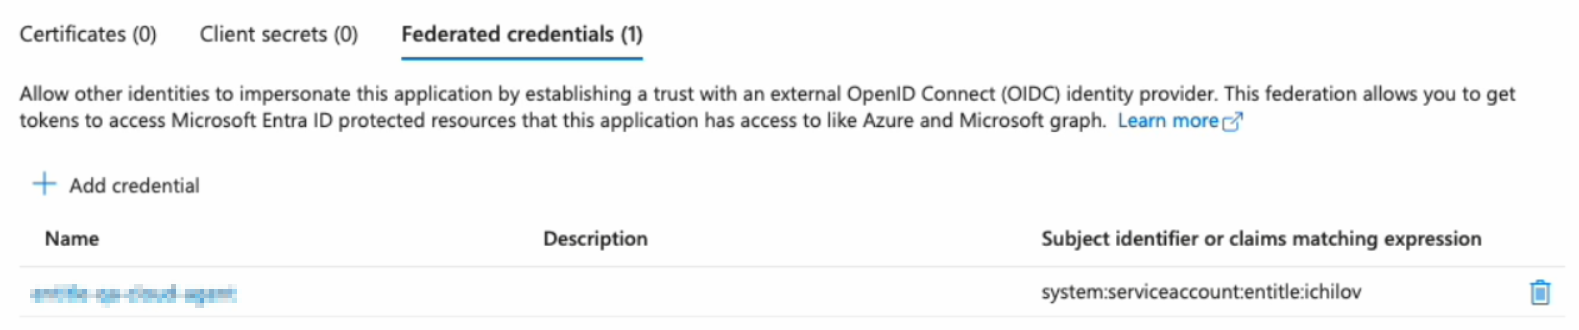
Click Add. Your federated credential now appears on the Certificates & secrets page.
You must now create a temporary secret for onboarding. This secret is short-lived and will be removed automatically after setup.
You can create it either through the Azure portal (easier, but with a minimum lifetime of one day) or using PowerShell commands (slightly more complex, but more secure with a lifetime of two hours or less).
PowerShell method (recommended)
> 🚧 Important information
Using this method deletes all previously issued client secrets for this app registration. Any other integrations or scripts that rely on those secrets will stop working.
This is an intentional security measure. If an unauthorized user were to learn your app ID and tenant ID, they could attempt to create their own integration and misuse your Azure resources.
Entitle uses your new secret only during the first authentication with your Azure tenant and does not store it in the rest of your configuration. The secret is automatically deleted after your setup is complete.
- Go to the Overview page from the left navigation.
- Under Essentials, copy the Application (client) ID to your clipboard.

- Go to Certificates & secrets from the left navigation.
- Click the Cloud Shell icon in the top right bar.

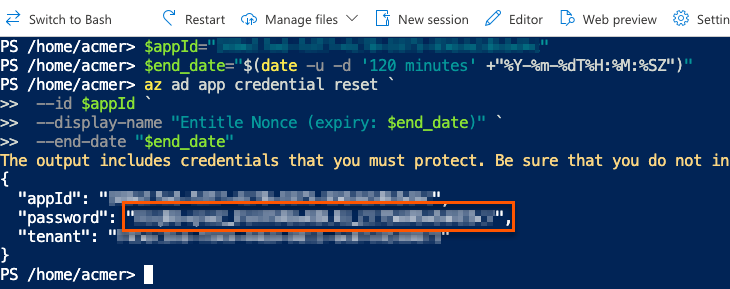
- Run this command, first replacing
<APP_ID>with the Application (client) ID you just copied.
$appId="<APP_ID>"
$end_date="$(date -u -d '120 minutes' +"%Y-%m-%dT%H:%M:%SZ")"
az ad app credential reset `
--id $appId `
--display-name "Entitle Nonce (expiry: $end_date)" `
--end-date "$end_date"- The output gives you the app ID, password, and tenant. The password is your new nonce value. Safely store it for later use.
Azure portal method
11. Click on New client secret.
- In the pop-up window, choose a Description that you will remember and an Expires duration and click Add. The duration should be as short as possible.
- Click on the Copy icon to copy your new Client Secret Value and keep it for later.

Stage 2: Assign permissions to Graph API
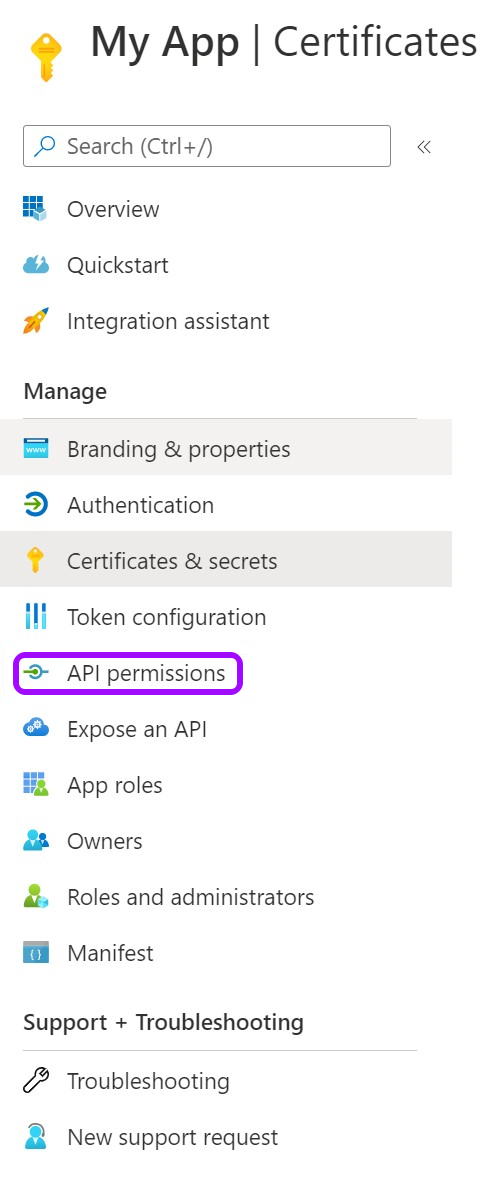
- Go to API permissions.
- Remove the existing default permission by clicking on the ellipses … on the right, then click Remove permission > Yes, remove.

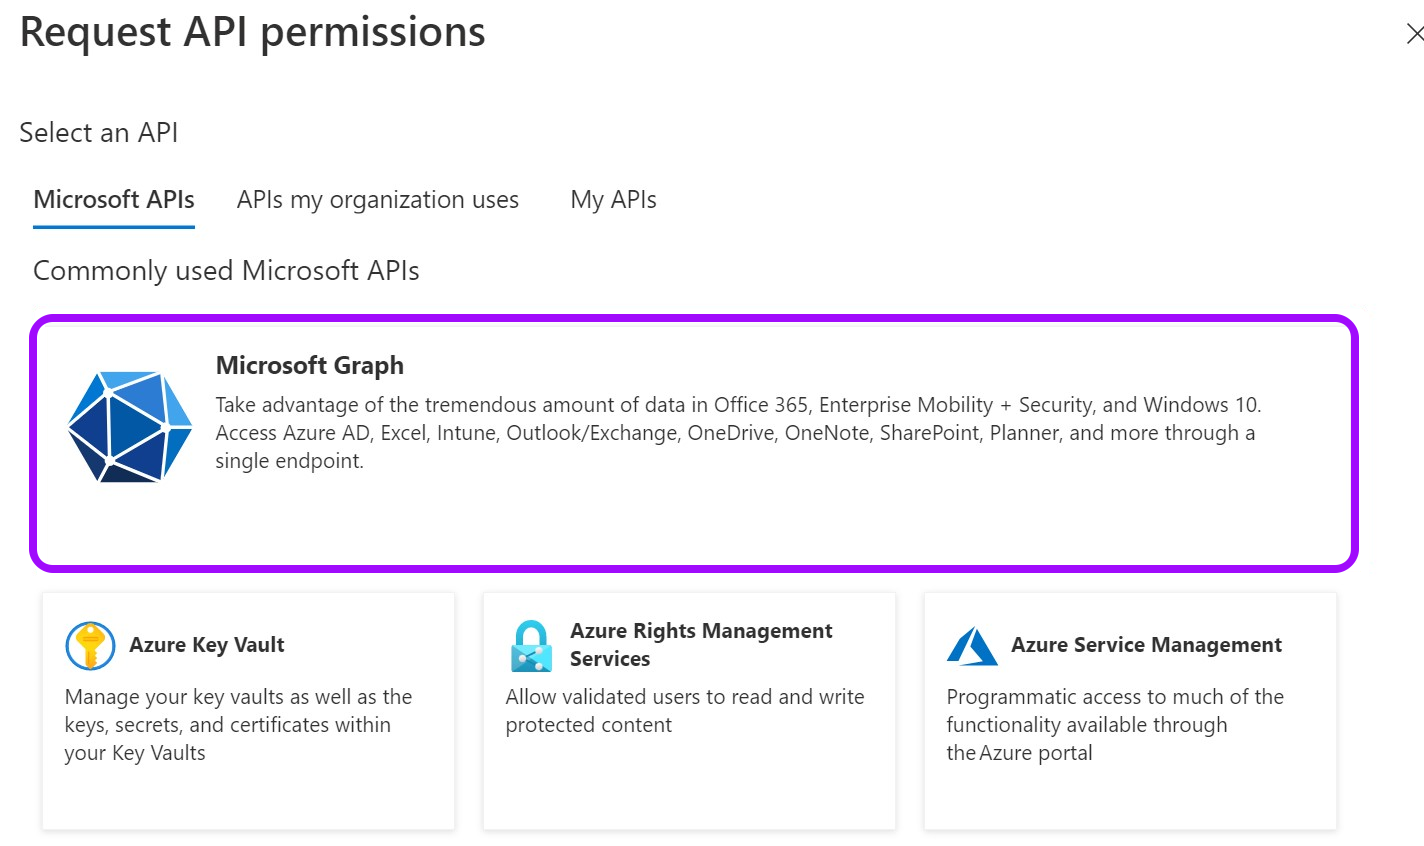
- Now, click Add a Permission.

- From the Request API permissions pane, click Microsoft Graph.
- Select Application permissions.
-
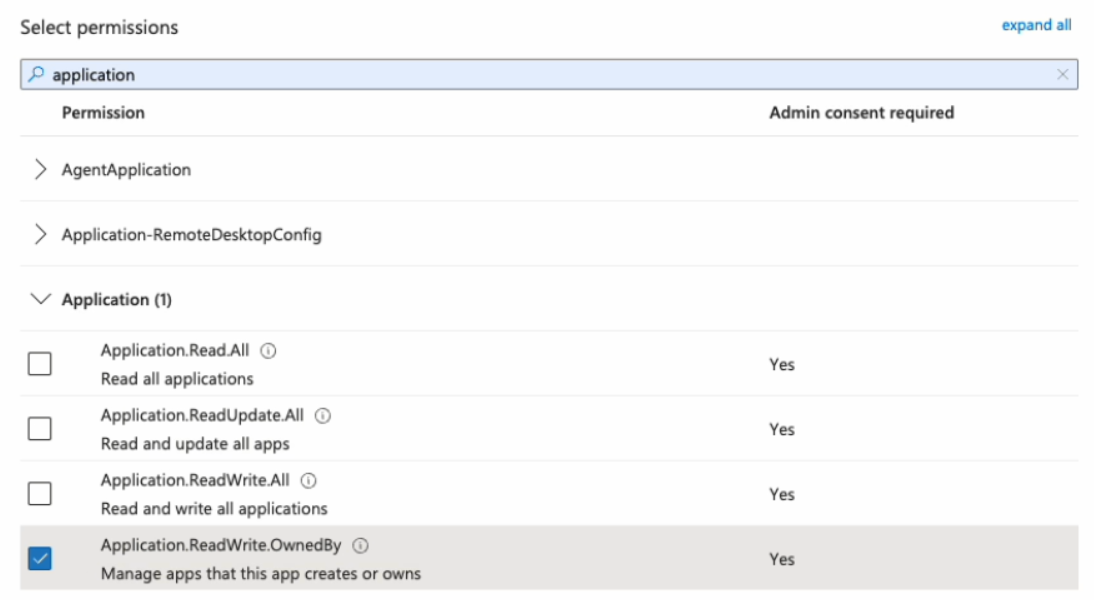
Using the search bar that appears, find and select the following permissions:
- Directory.ReadWrite.All
- Group.ReadWrite.All
- TeamMember.ReadWriteNonOwnerRole.All
- User.ReadWrite.All
- RoleManagement.ReadWrite.Directory (optional)
RoleManagement.ReadWrite.Directory allows you to manage admin roles within Entitle.
- Application.ReadWrite.OwnedBy (for federated credentials)
- Application.Read.All (for federated credentials)
Application.ReadWrite.OwnedBy applies only to federated credential scenarios. It allows Entitle to delete the temporary onboarding secret immediately after setup is complete for the highest security.
If this permission is disallowed, the secret remains available until its configured expiration.
Application.Read.All is required to validate configuration details during setup.
For more about the required permissions, see Entitle’s application required permissions .
-
When you are done selecting the permissions, click Add permissions at the bottom of the screen.
-
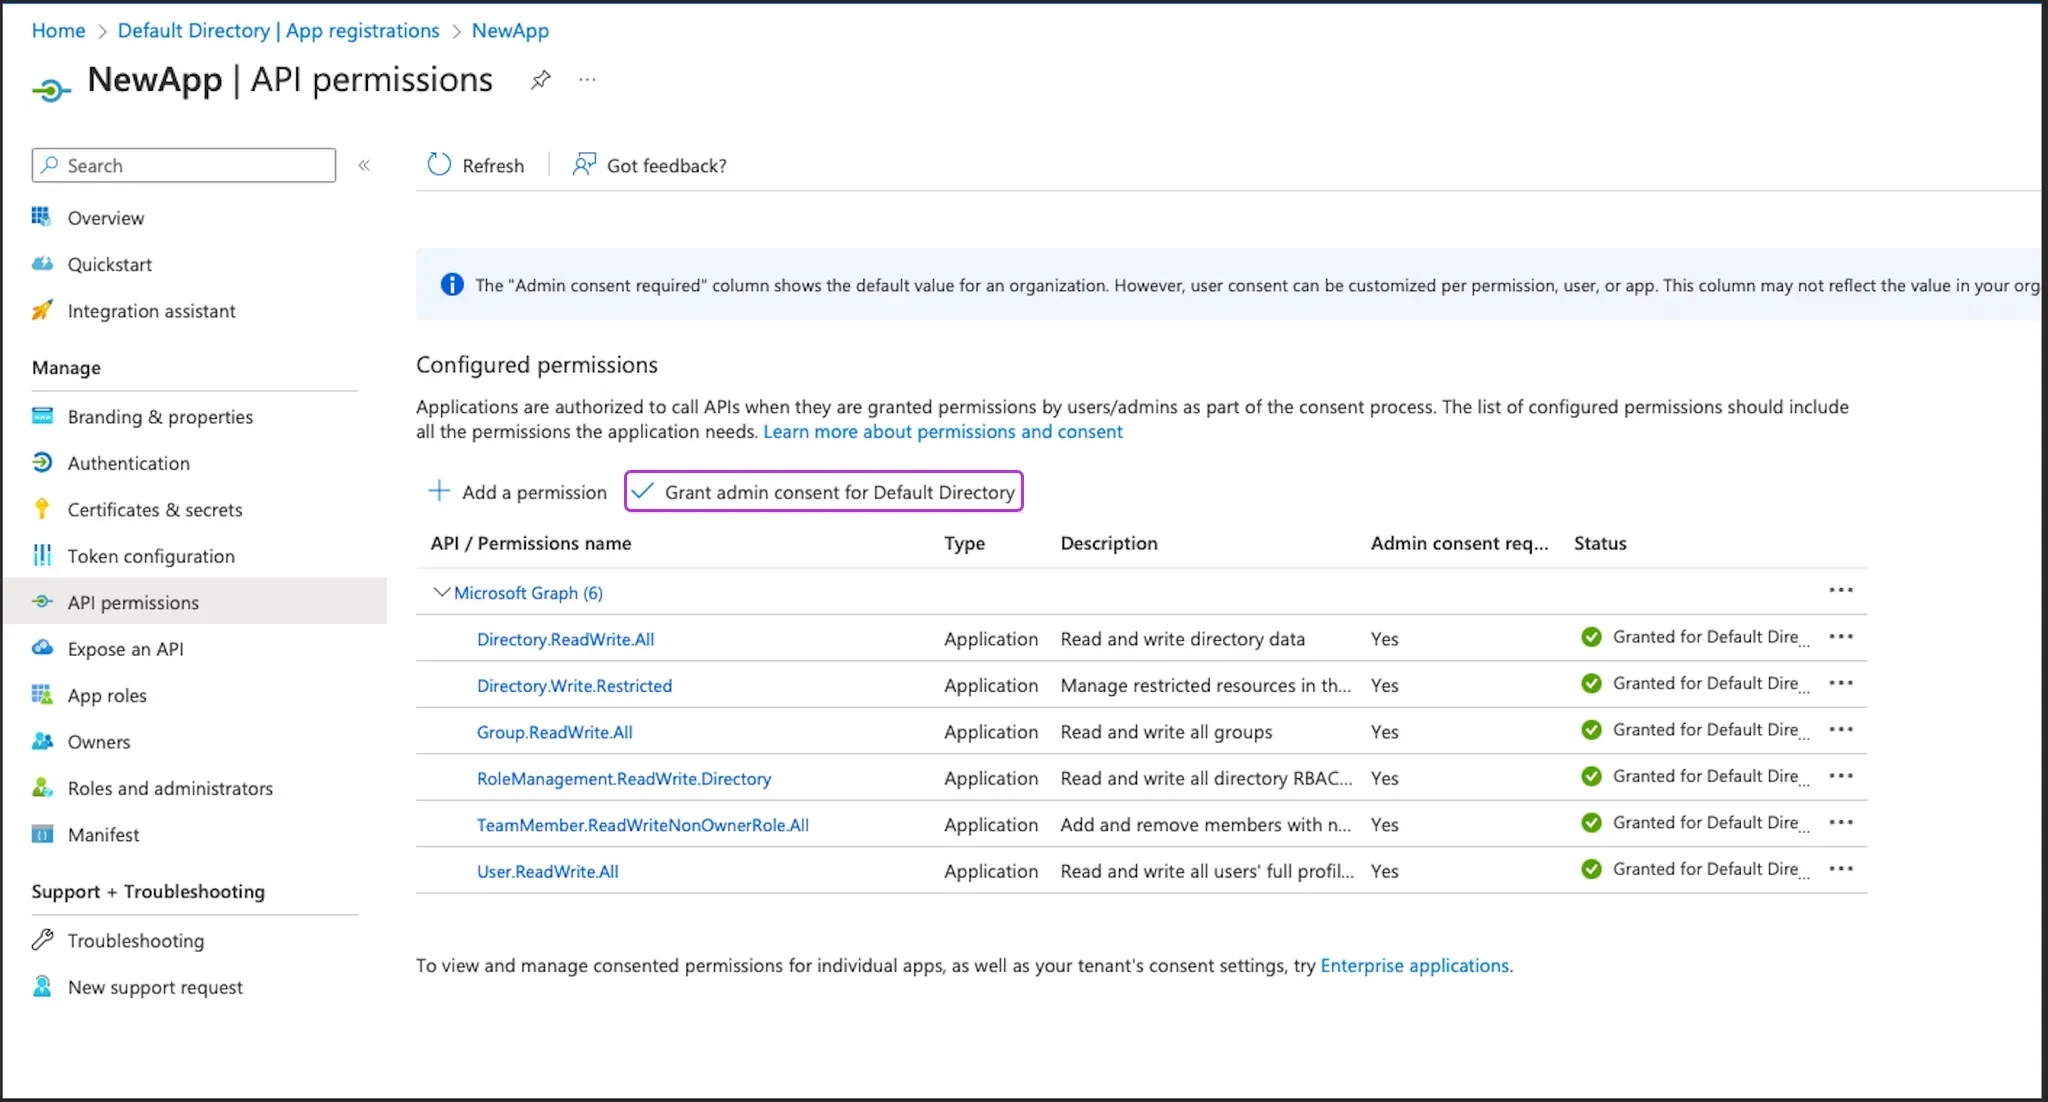
You will now see the added permissions in the table under Configured permissions.
-
Click on Grant admin consent for Default Directory > Yes.
- If you are using a client secret, you can continue with Stage 3: Assign Permissions via new role. If you are using federated credentials with the Application.ReadWrite.OwnedBy permission, continue below.
For federated credentials
> ✅
The optional steps below are for additional security. When the integration setup is complete, Entitle immediately deletes the one-time secret created for the initial authentication to your Azure tenant.
If you choose not to run this command, the one-time secret remains active until it expires.
- Click the Cloud Shell icon in the top right bar.

- Run this command, first replacing
<APP_ID>with your Application (client) ID.
$appId=<APP_ID>
$appServicePrincipalId=$(az ad sp list --filter "appId eq '$appId'" --query "[0].id" -o tsv)
az ad app owner add --id $appId --owner-object-id $appServicePrincipalId
Stage 3: Assign Permissions via new role
- Sign in to the Microsoft Azure portal.
- Plan the scope you want Entitle to manage. The scope of the Azure roles and role assignments determines which Azure management groups and subscriptions Entitle can manage.
- Roles and role assignments created on the Access control (IAM) page of a management group apply to that management group and all child management groups and subscriptions in its hierarchy.
- Roles and role assignments created on the Access control (IAM) page of a subscription apply only to that subscription.
Based on your required scope, create roles and role assignments for Entitle from the Access control (IAM) page of each relevant subscription and/or management group.
The following steps should be executed from each IAM page
-
Click Roles → Add → Add custom role.

-
Enter
entitle-roleunder Custom role name. -
For baseline permissions, choose Start from scratch.

-
Go to the JSON tab and click Edit in the top-right corner.
-
In the Actions list of the custom role, add permissions for the resources you want Entitle to manage using this role.
The permissions you include determine which Azure resources Entitle can discover, manage, and assign access to. Make sure the role includes actions for every resource type that falls within your planned scope.Required permissions (default Azure integration)By default, Entitle uses its dedicated Azure role to discover and manage these resource types. Include these actions in the custom role.
SSO applications
"Microsoft.Authorization/roleAssignments/read",
"Microsoft.Authorization/roleAssignments/write",
"Microsoft.Authorization/roleAssignments/delete"
Management groups
"Microsoft.Authorization/roleAssignments/read",
"Microsoft.Authorization/roleAssignments/write",
"Microsoft.Authorization/roleAssignments/delete"
"Microsoft.Management/managementGroups/read",
"Microsoft.Management/managementGroups/subscriptions/read"
Subscriptions
"Microsoft.Authorization/roleAssignments/read",
"Microsoft.Authorization/roleAssignments/write",
"Microsoft.Authorization/roleAssignments/delete"
"Microsoft.Resources/subscriptions/providers/read"
Resource groups
"Microsoft.Authorization/roleAssignments/read", "Microsoft.Authorization/roleAssignments/write", "Microsoft.Authorization/roleAssignments/delete" "Microsoft.Resources/subscriptions/providers/read", "Microsoft.Resources/subscriptions/resourceGroups/read", "Microsoft.Resources/subscriptions/resourceGroups/deployments/read"Optional permissions (Resources)Add the following actions only if you plan to enable Resources later in this setup. If you do not enable esources, do not include these actions.
Resources
"Microsoft.Authorization/roleAssignments/read",
"Microsoft.Authorization/roleAssignments/write",
"Microsoft.Authorization/roleAssignments/delete"
"Microsoft.Resources/subscriptions/providers/read",
"Microsoft.Resources/subscriptions/resourceGroups/read",
"Microsoft.Resources/subscriptions/resourceGroups/deployments/read",
"Microsoft.Resources/subscriptions/resourceGroups/resources/read"
The SSO applications, management groups, subscriptions, and resource groups permissions are required for the default Azure integration configuration. Resources is optional. If you enable Resources later in this setup, you must also add the Resources actions listed here, or Entitle cannot manage resources at the resource level.
-
Click Save at the top right corner, and then Review + create in the left bottom corner.
-
Click Create at the bottom left corner, and then click OK on the message that appears at the top stating that the role was created.
-
Go back to the Access Control (IAM) page and click the Role Assignments tab.
-
Click Add > Add role assignment:
.png")
- Under the role tab, choose entitle-role.
- Under the Members tab, click Select Members. Then, search by name, and select the application created in Stage 1.
- Click Select at the bottom of the side tab.
- Click Review + Assign.
Create the integration in Entitle
- Log in to Entitle and go to the Integrations page.
- Click the Add Integration button, then type Azure in the Application field.
Follow the steps for your chosen authentication method: client secret or federated credentials.
Client secret
3. Start the integration setup following the instructions in Set up a new integration.
4. From the Connection dropdown, select Client secret.
5. In the JSON, paste the values of the information generated earlier.

-
client_id: Your Application (client) ID, found on the Overview page.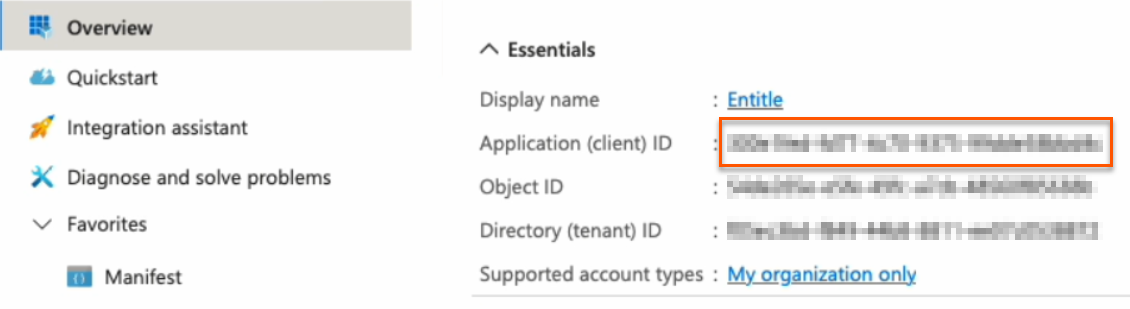
-
secret: Your Client secret, found on the Certificates & secrets page.
-
subscription_id: Your Subscription ID, found on the Subscriptions page.
If you wish to manage multiple subscriptions, enter
"subscription_id": "ALL". Entitle will fetch the resources in the configured subscriptions. -
tenant: Your Directory (tenant) ID, found on the Overview page.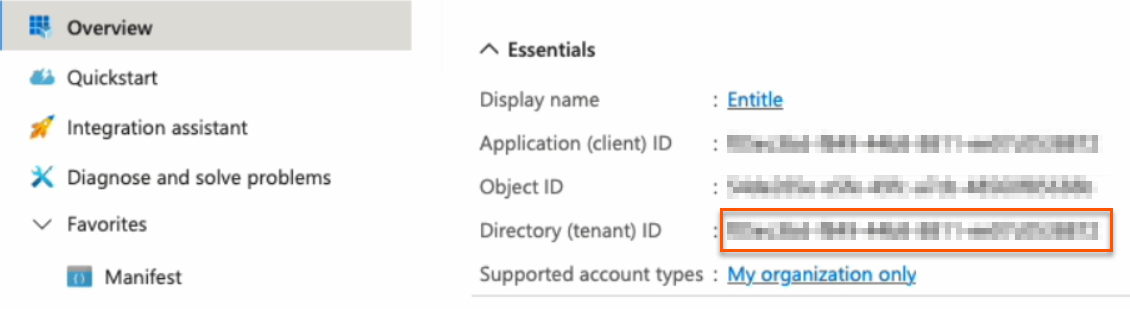
-
If you wish to manage specific resource types in Entitle, add the relevant resource types to the
"resource_types"field under"options".-
"sso_apps"– SSO Apps -
"admin"– Admin -
"groups"– Groups -
"management_groups"– Management groups -
"subscriptions"– Subscriptions -
"resource_groups"– Resource groups -
"resources"– Resources (optional, requires additional Azure role permissions)A non-existent
"options"field means that Entitle will manage the default list of resource types presented in the Overview section of this guide.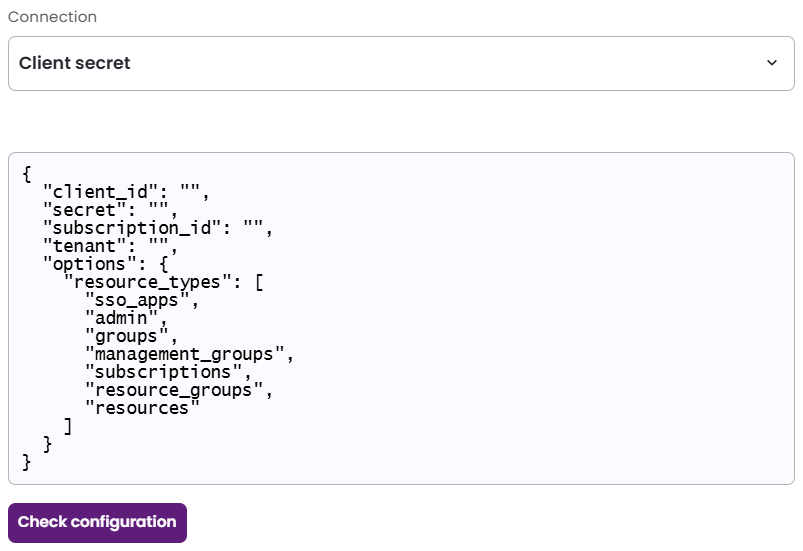
-
Federated credentials
3. Start the integration setup following the instructions in Set up a new integration.
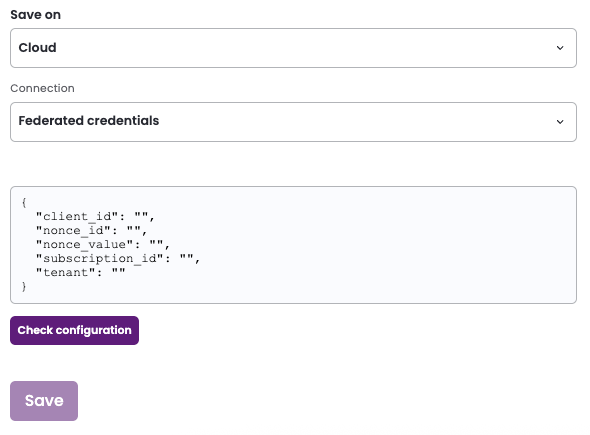
4. Save on: Choose whether you would like this integration to be saved on your own hosted agent or in Entitle’s cloud.
Important informationFederated credentials work only for integrations that are saved on Entitle's Cloud or on an on-premises agent that is hosted in Amazon Elastic Kubernetes Service (EKS).
-
From the Connection dropdown, select Federated credentials.
-
In the JSON, paste the values of the information generated earlier.
-
nonce_id: Your Secret ID, found on the Certificates & Secrets page. Refresh your browser to see the secret ID.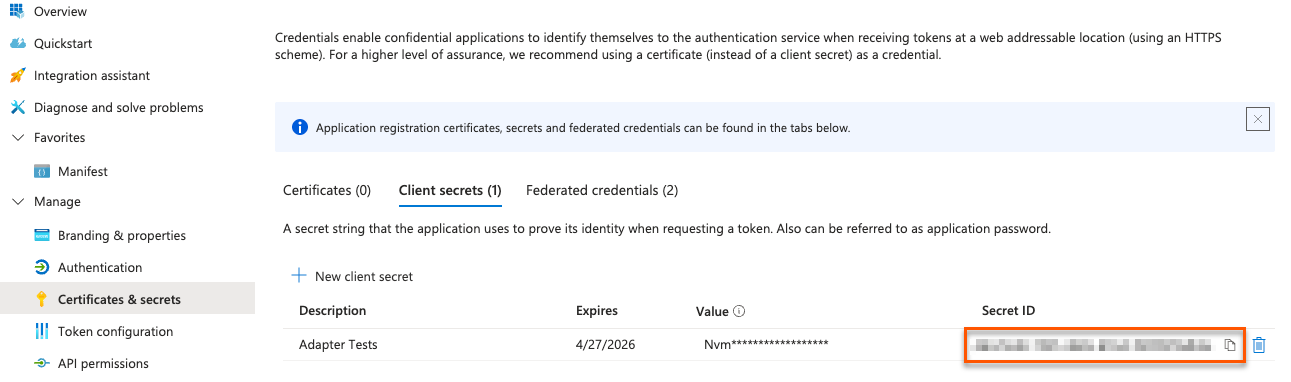
-
nonce_value: Your Nonce value, found in your Cloud Shell instance.
-
subscription_id: Your Subscription ID, found on the Subscriptions page.
If you wish to manage multiple subscriptions, enter
"subscription_id": "ALL". Entitle will fetch the resources in the configured subscriptions. -
tenant: Your Directory (tenant) ID, found on the Overview page.
-
-
If you wish to manage specific resource types in Entitle, add the relevant resource types to the
"resource_types"field under"options".-
"sso_apps"– SSO Apps -
"admin"– Admin -
"groups"– Groups -
"management_groups"– Management groups -
"subscriptions"– Subscriptions -
"resource_groups"– Resource groups -
"resources"– Resources (optional, requires additional Azure role permissions)A non-existent
"options"field means that Entitle will manage the default list of resource types presented in the Overview section of this guide.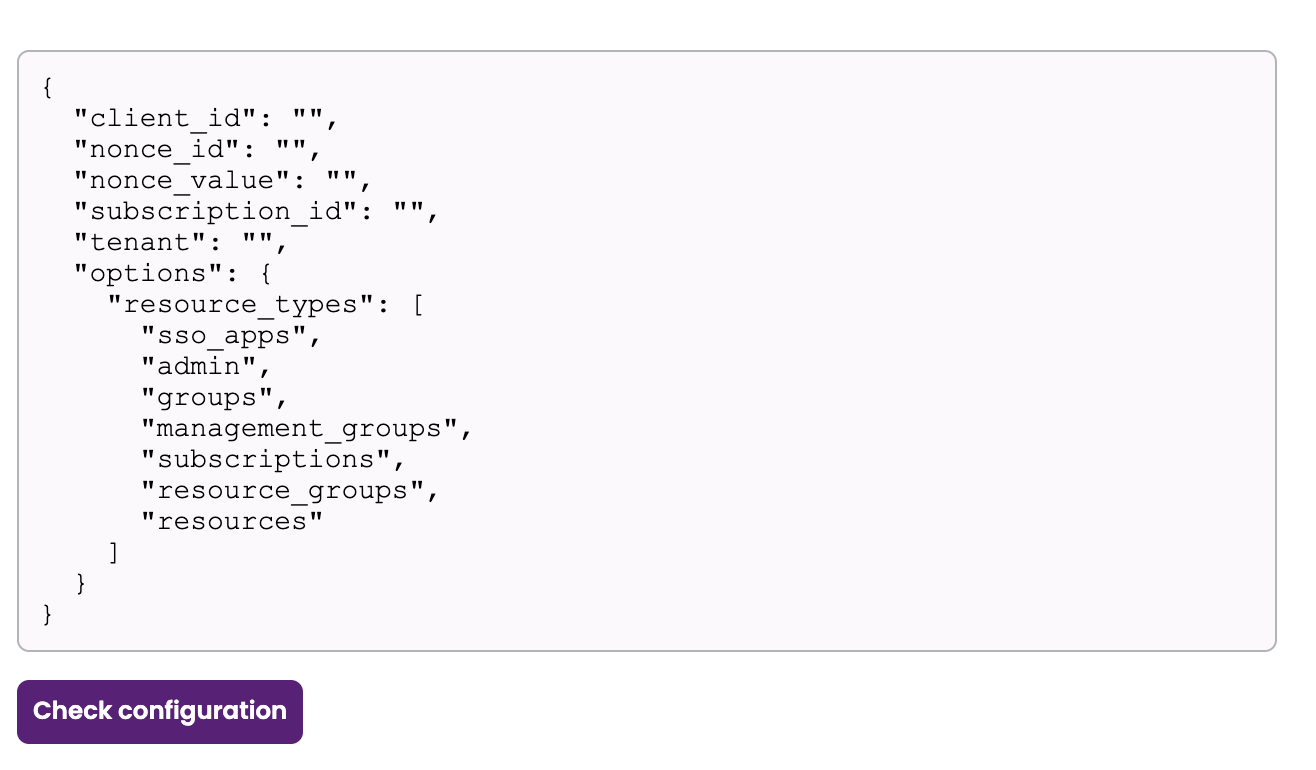
-
Resources hierarchy and conditions
- The following Azure resource types are part of the hierarchical structure:
Management Groups → Subscriptions → Resource Groups → Resources.- The following Azure resource types are not part of the hierarchical structure:
- SSO Apps
- Admin roles
- Groups
- Automatic hierarchy expansion
When a lower-level resource type is included in theresource_typeslist, Entitle automatically retrieves the parent resources required to complete the Azure hierarchy. The configuration must include either"management_groups"or"subscriptions"in the"resource_types"list.
For example:
- If
"subscriptions"and"resources"are included, Entitle fetches:
Subscriptions, resource groups, and resources.- If
"management_groups"and"resources"are included, Entitle fetches:
Management groups, subscriptions, resource groups, and resources.- If
"management_groups"and"resource_groups"are included, Entitle fetches:
Management groups, subscriptions, and resource groups.- Optional: Manage individual Azure resources
To manage specific Azure resources, add"resources"to the list of resource types.
When enabling"resources":
- The configuration must include either
"management_groups"or"subscriptions"in the"resource_types"list.- The custom Azure role must also include the optional Resources permission described in Create the integration in Entitle.
Resource discovery depends on the selected parent resource types:- If only
"management_groups"is included, only management groups are fetched.- If both
"management_groups"and"subscriptions"are included, both management groups and subscriptions are fetched.
Example connection JSON with "options" field{ "client_id": "<YOUR-CLIENT-ID>", "secret": "<YOUR-CLIENT-SECRET>", "subscription_id": "<YOUR-SUBSCRIPTION-ID>", "tenant": "<YOUR-TENANT-ID>", "options": { "resource_types": [ "sso_apps", "admin", "groups", "management_groups", "subscriptions", "resource_groups", "resources" ] } }
- Click Save.
Should you need to allowlist this integration, these are the IP addresses from which Entitle's service reaches the integration:
- Entitle EU (Cloud deployment)
- 34.243.199.171
- 54.216.133.226
- Entitle US (Pathfinder deployment)
- 52.45.229.219
- 54.88.235.213
- 3.224.15.134
- Entitle CA (Pathfinder deployment)
- 35.182.218.208
- 15.156.179.153
What's next?Make sure your setup is complete by testing your integration.
Updated 11 days ago
