Entitle on Pathfinder | Entitle End Users
Sign in to Pathfinder
- Sign in to Pathfinder with your credentials.
- Click the Entitle tile to log in.
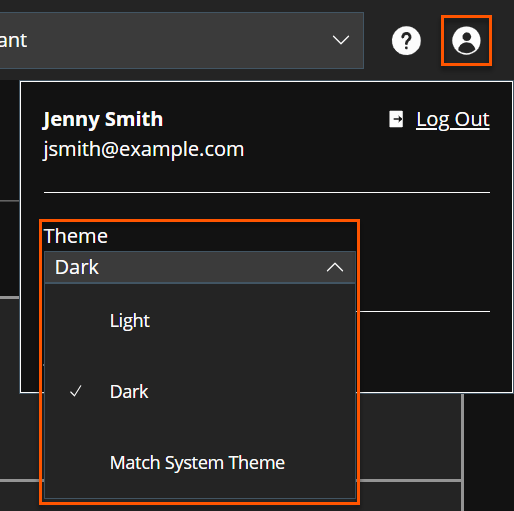
How to change your color theme
- Click on the User Profile icon in the upper right corner.
- From the Theme dropdown, select Light, Dark, or Match System Theme.
My settings
- Click My settings on the left-side navigation menu.
-
This screen has two main functionalities:
- Manage integration accounts: This allows you to view which integrations you have an account in, and to perform changes if necessary.
- Manage Personal Access Tokens: This allows you to manage and gather your personal access tokens. Click the Add button to add a new token, or Revoke to remove a specific token from the list.
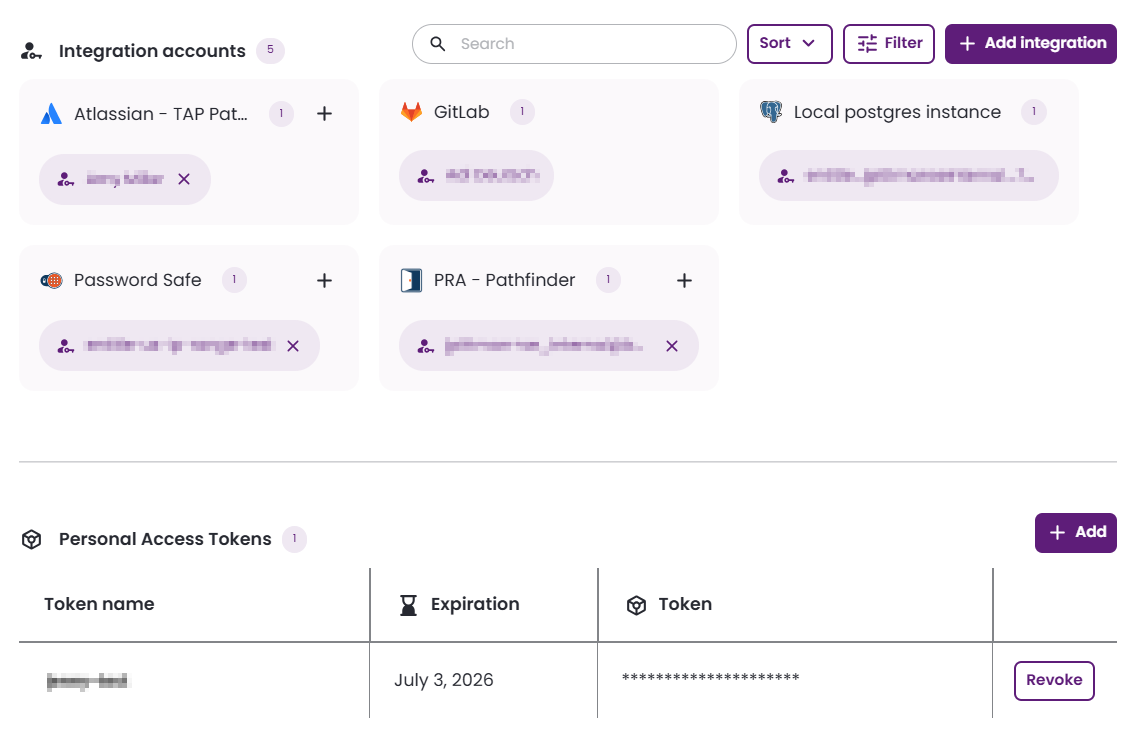
Manage integration accounts
There are three methods to help you find and manage your integration accounts.
- Search: Enter text to find an integration account by integration name or account name.
- Sort: Order integration accounts by integration name or account name.
- Filter: Narrow the list of integration accounts by integration or account.
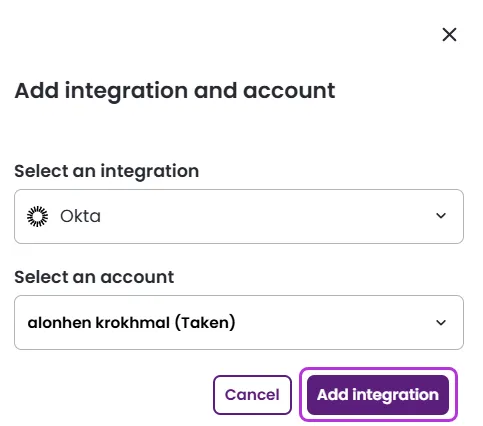
Add a new integration
-
Under Integration accounts, click Add integration.
-
Select an integration from the list and an account you wish to associate with it. You can select multiple accounts if needed. Click Add integration to save.
-
The new integration and its associated accounts now appear as a new tile under the Integration accounts section.
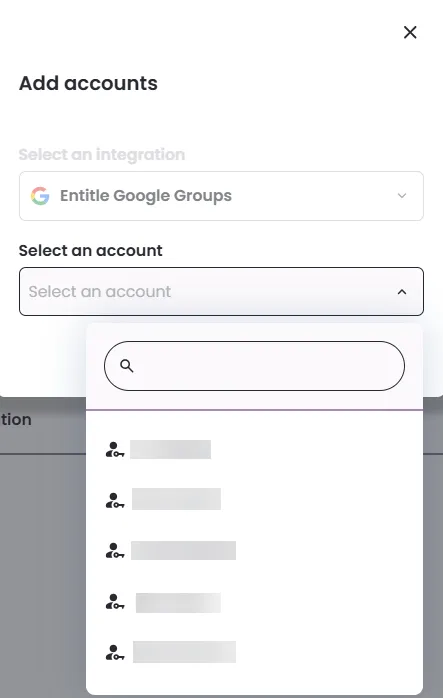
Account association to integrations
Setting your account as self-service is possible if supported by your organization.
-
Under the Integration accounts section, locate the integration you wish to associate accounts with.
-
Click the "+" icon.

-
Select the accounts you wish to associate in the Add accounts pop-up screen. You can add multiple accounts as needed.
-
Click Add accounts.
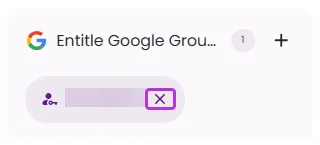
Remove account association from integrations
-
Under the Integration accounts section, click the x icon next to the account you wish to de-associate from the specific integration.
-
In the pop-up, click Remove account.
If you remove the only account associated with an integration, the integration itself will be removed.
Overview
Once you log in to Entitle, you will be able to do the following:
- Request just-in-time access to applications if needed.
- Respond to colleagues’ access requests awaiting your approval (in case you are defined as an approver in your organization).
- Track your previous access requests in Entitle.
- See the permissions you have for your organization’s applications.
- See all the access requests you have ever requested and perform additional actions.
Create a new request
This section allows you to create new access requests. These can be created for yourself, or you can create them on someone’s behalf.
Stage 1: Choose a desired role for access
- Click on the top-right button New Request.

- In the new window, locate the integration you want to request access to. You can search by role, application, or bundle name. Use the tabs to view All, only Apps, or only Bundles.
- Choose an integration, then a resource within that integration, and finally a role. Some integrations allow you to select multiple roles. You may repeat this process for multiple resources and integrations.
- Your selected apps and bundles appear at the top of the page. You can remove an item from the request by clicking the X.
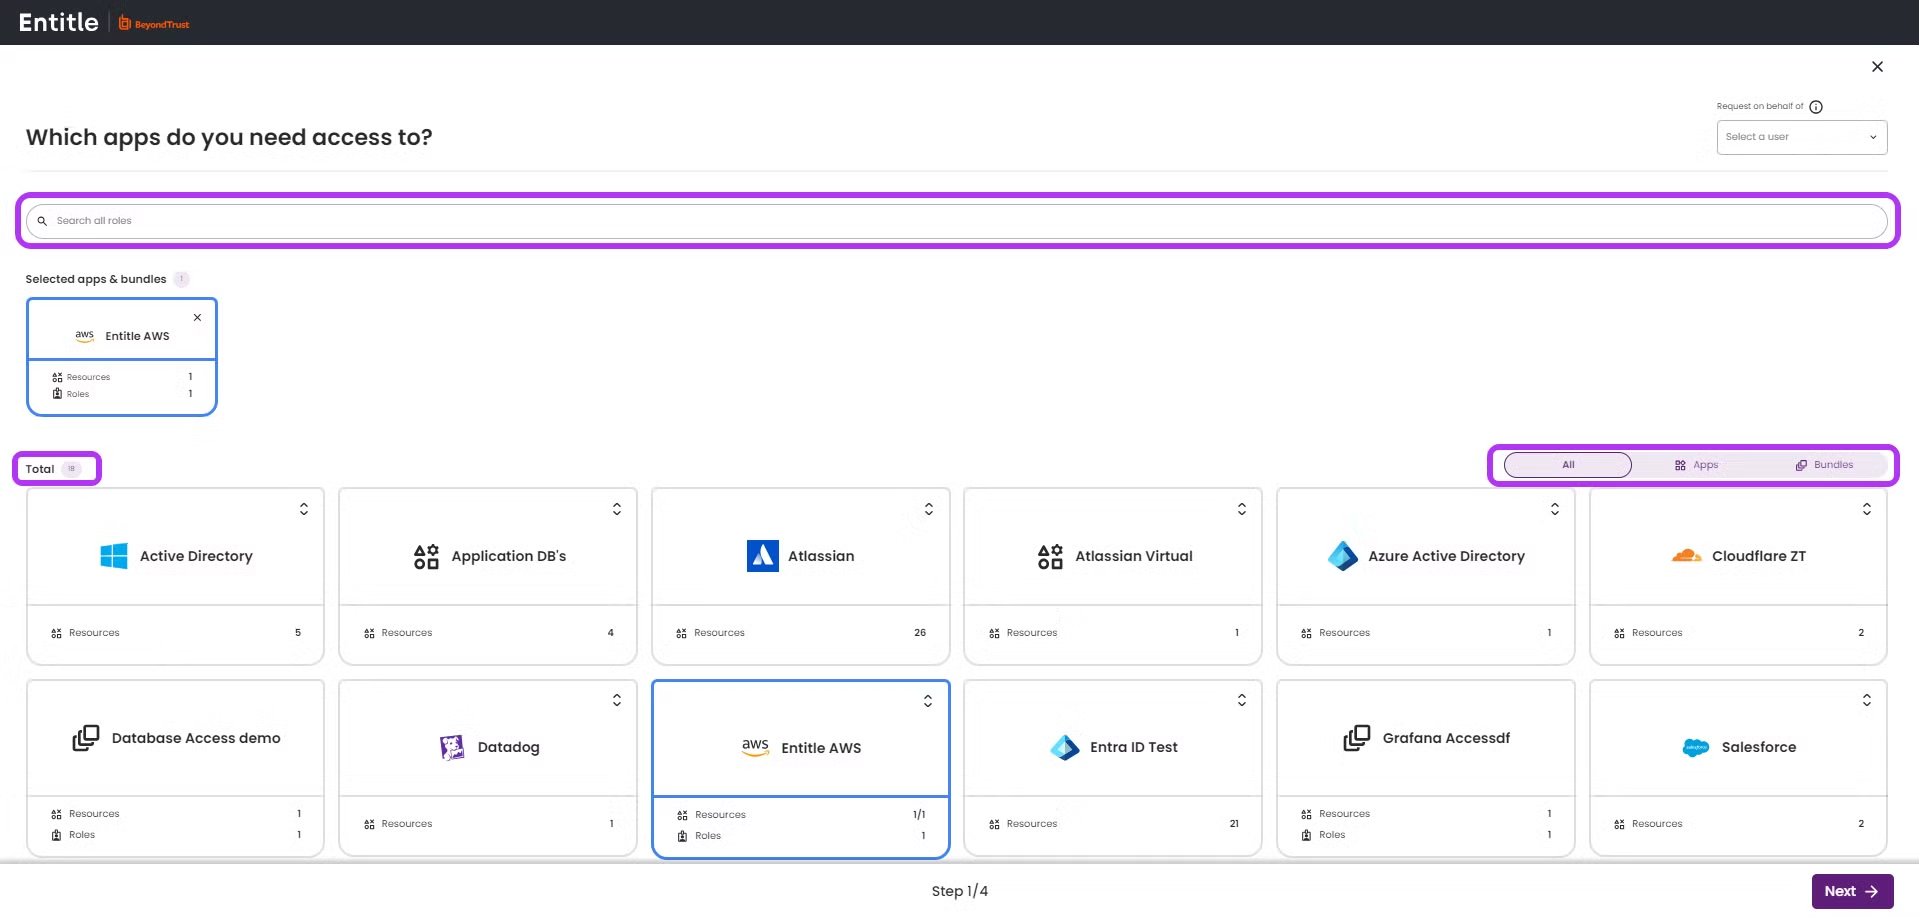
- Once you’re done, click Next in the bottom-right corner.
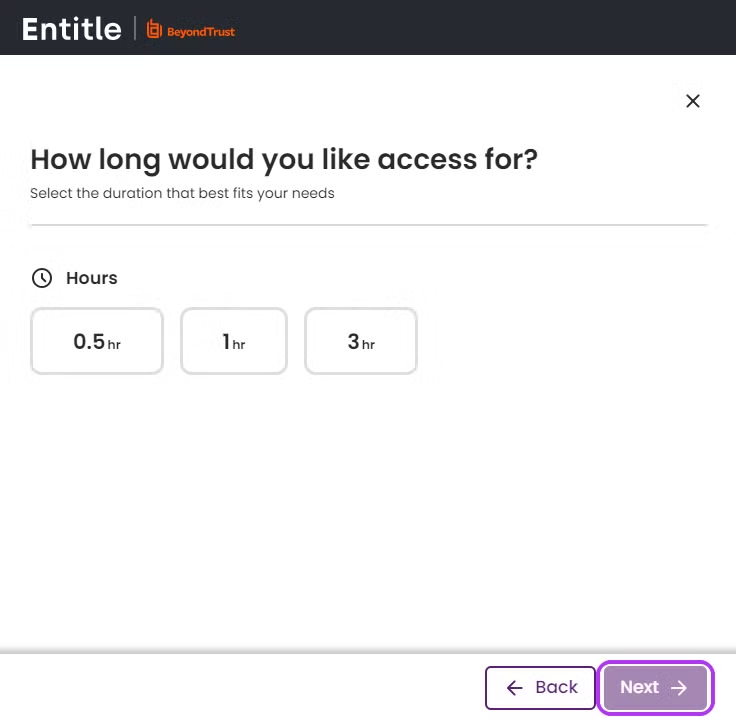
Stage 2: Choose your desired access duration
- Click on your desired duration. In case you wish the duration to be unlimited, choose Forever.
Duration options are defined by your organization's Entitle admins, so the available durations may vary.
- Click Next to continue.
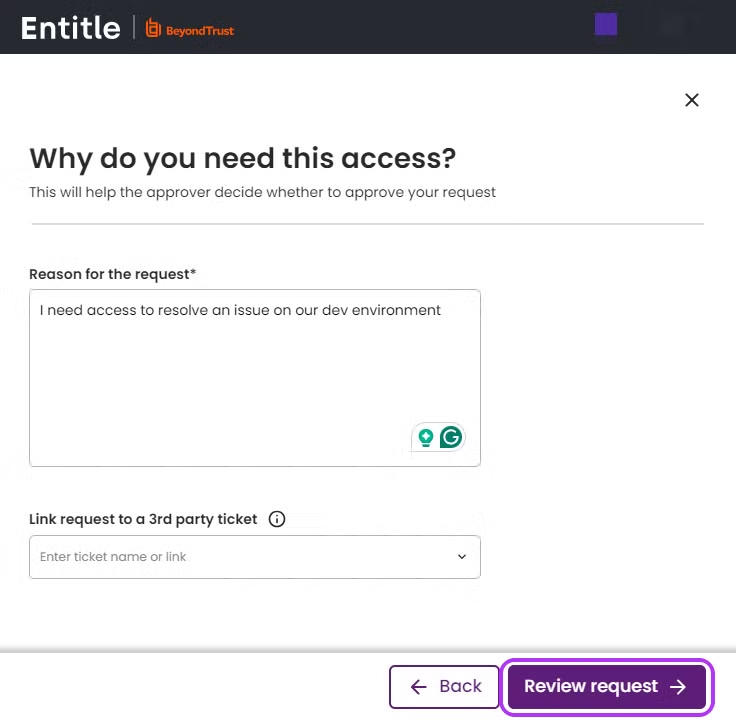
Stage 3: Reason for the request
-
Under Reason for the request, briefly explain the reason for your request.
-
Optional step: In case the Entitle admins in your organization have linked your ticketing system to Entitle, and you wish to link your request to an existing ticket (In Jira or Zendesk), search for it in the Link request to a 3rd party ticket search bar.
-
Once done, click the Review Request button in the bottom-right corner.
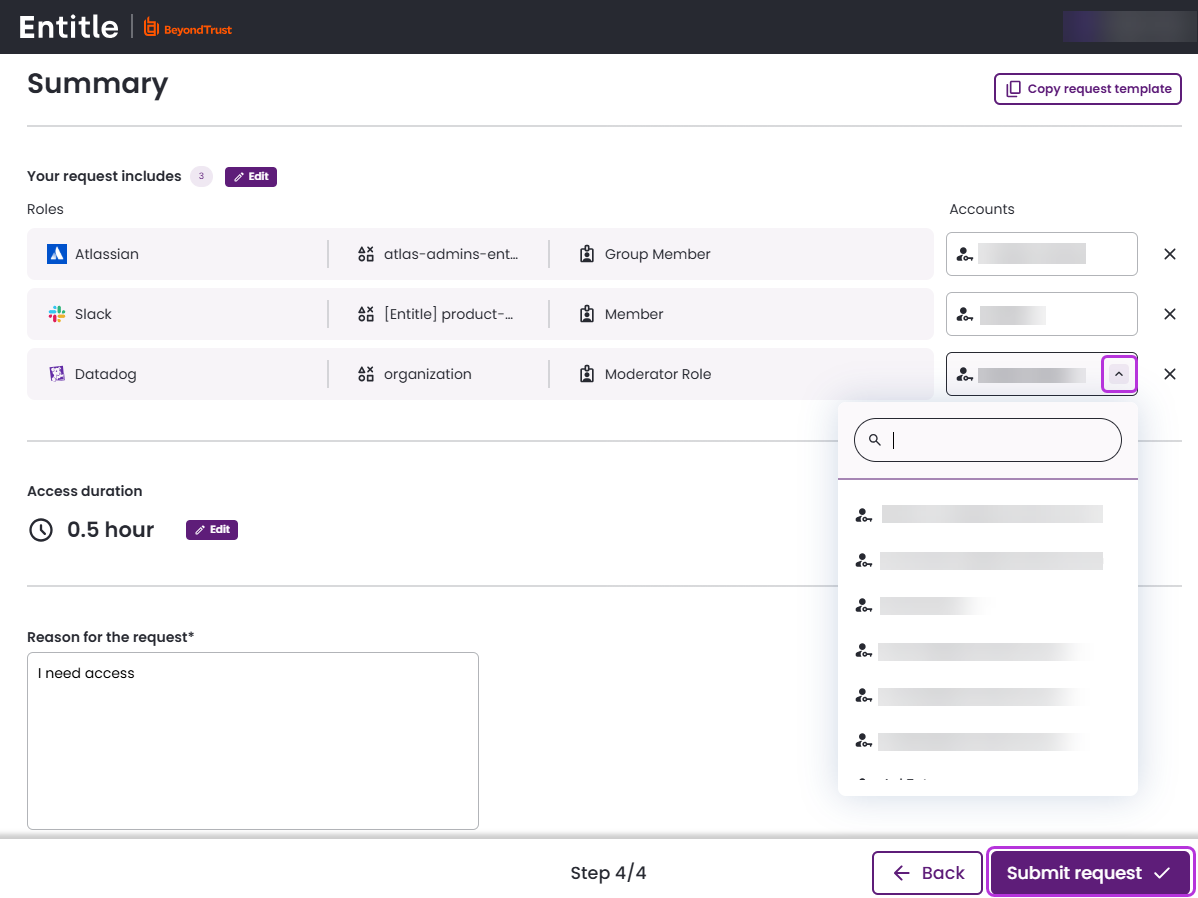
Stage 4: Review and submit your request
- You will now be able to review the different details of your request and make adjustments if needed. As part of that, you can see and edit the account for which you are requesting this request under the Accounts column.
- Once done, click Submit Request in the bottom-right corner.
- Your request is now submitted and will be added to the My Pending Requests section.
Awaiting your approval requests – for Approvers
If you are defined as an approver in your organization, you will see a list of the existing requests waiting for your approval at the top of the home page. There you will find the details of the submitted request (duration, reason, and date) and can choose whether to Approve or Deny it.
By clicking anywhere on the specific request, you will be able to see its current status and further details on the request in the activity pane.

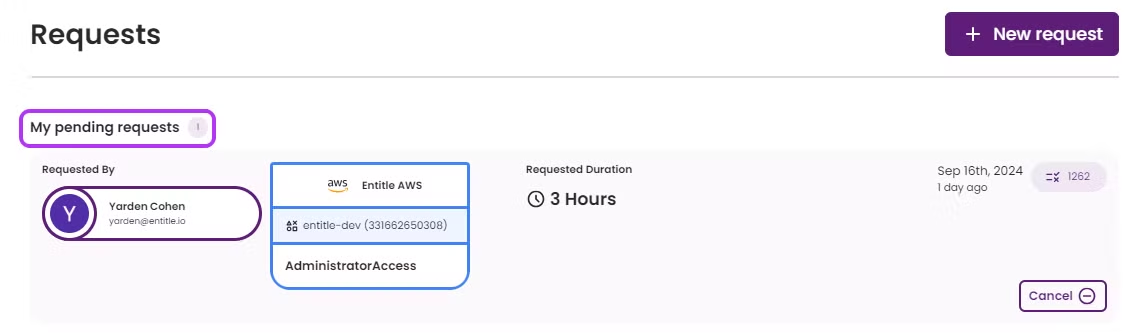
My pending requests
In this section, you will see your existing requests and their details, which were created by you or have been created by another user on your behalf.
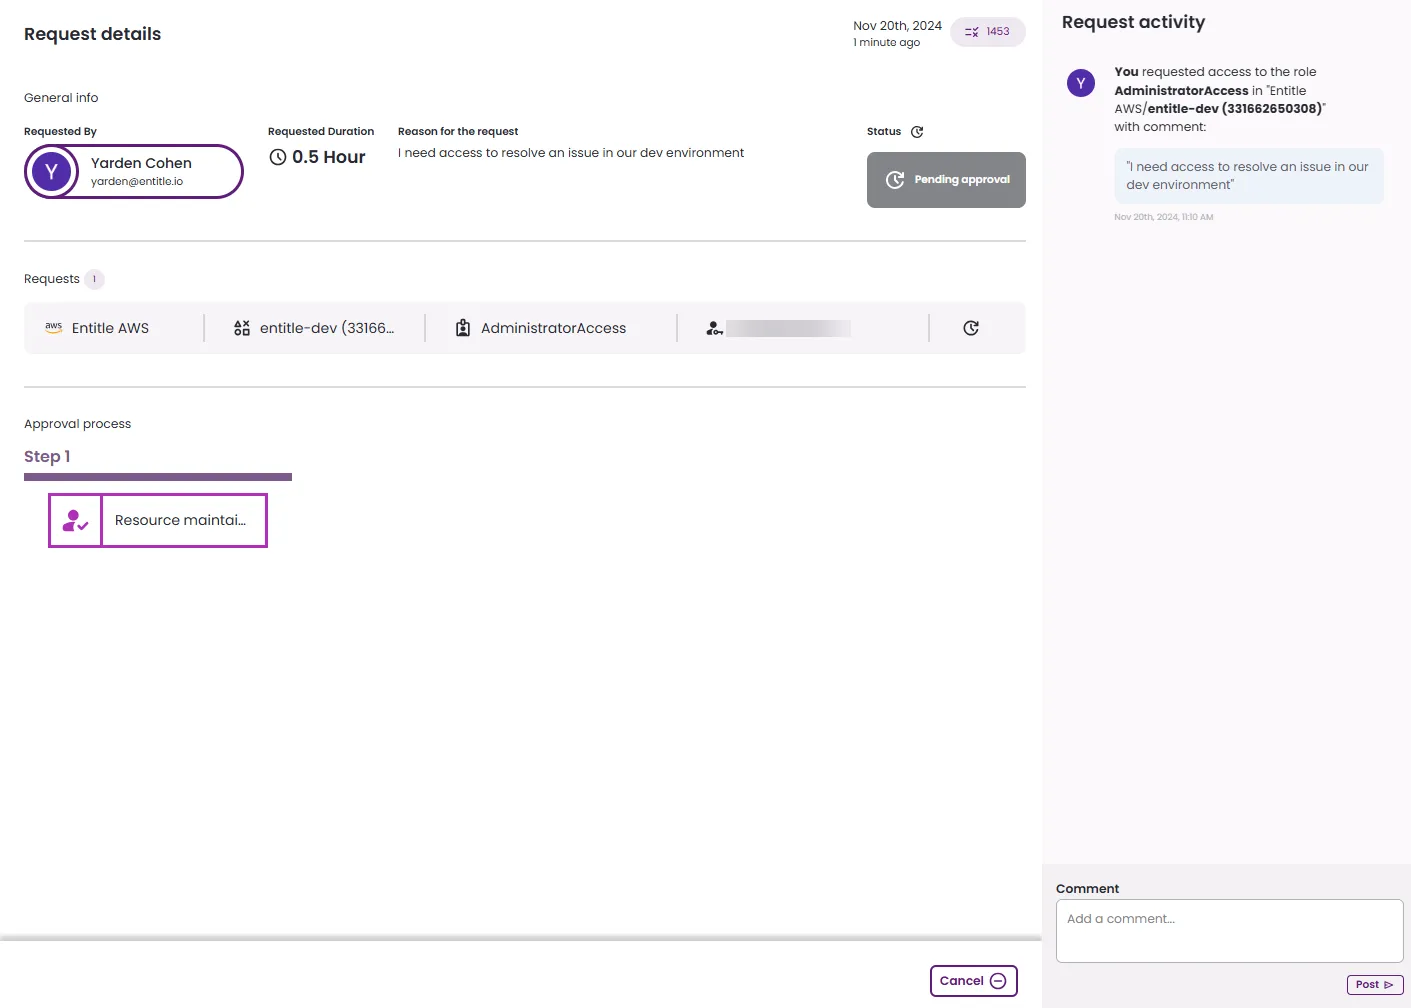
Viewing the Request Details
By clicking anywhere on the specific request, you will be able to see its current status in the activity pane on the right, as well as the request details and approval process.
Adding a comment
- It is possible to add a comment to an existing request at any time, through the Awaiting for Your Approval (if you’re an approver) or the My Pending Requests sections. Comments are a way of communication between requesting users and approvers.
- The comments will appear in the Activity Pane, and employees involved in the access requests (approvers and requesters) will also receive a Slack/Teams notification upon posting the comment.
My permissions
In this section, you will be able to see all your granted permissions.
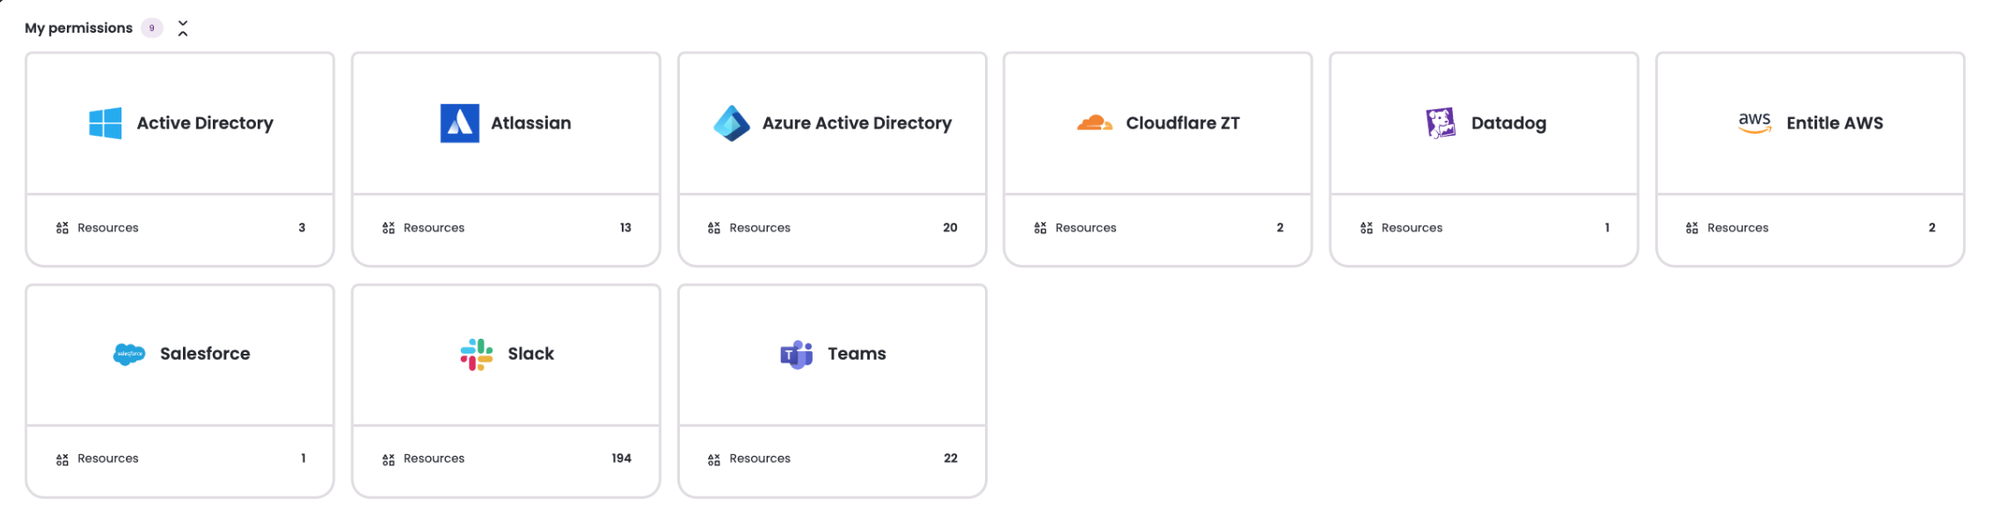
Click any of the application tiles to see a table displaying all of the permissions. Users who were granted access to Entitle will have the corresponding data for their request.
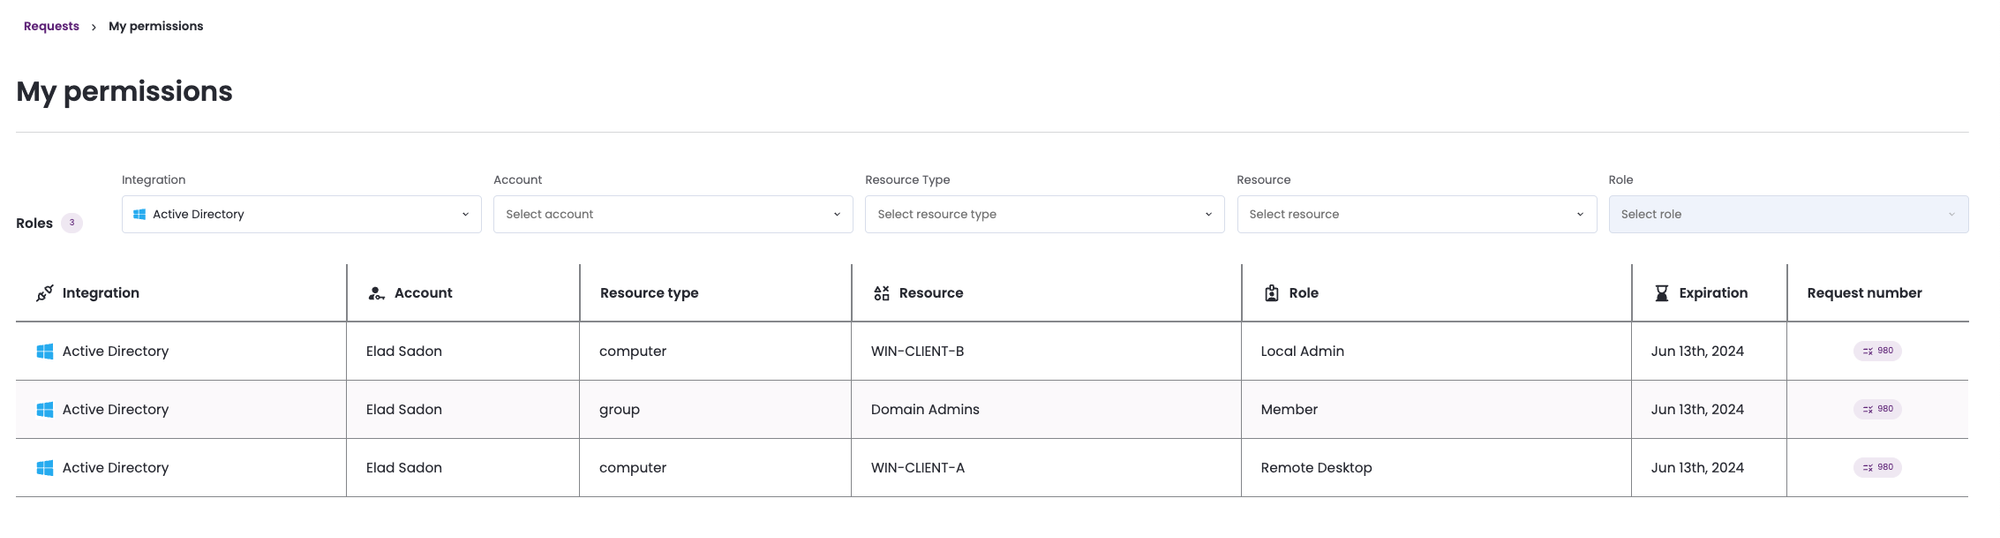
In the drop-down menus above the table, you will be able to look for specific permissions in various ways; by looking at a specific integration (application), an account, a Resource Type (groups or roles), and by choosing Entitle in the Resource tab you will also be able to choose specific roles and see which permissions they have.
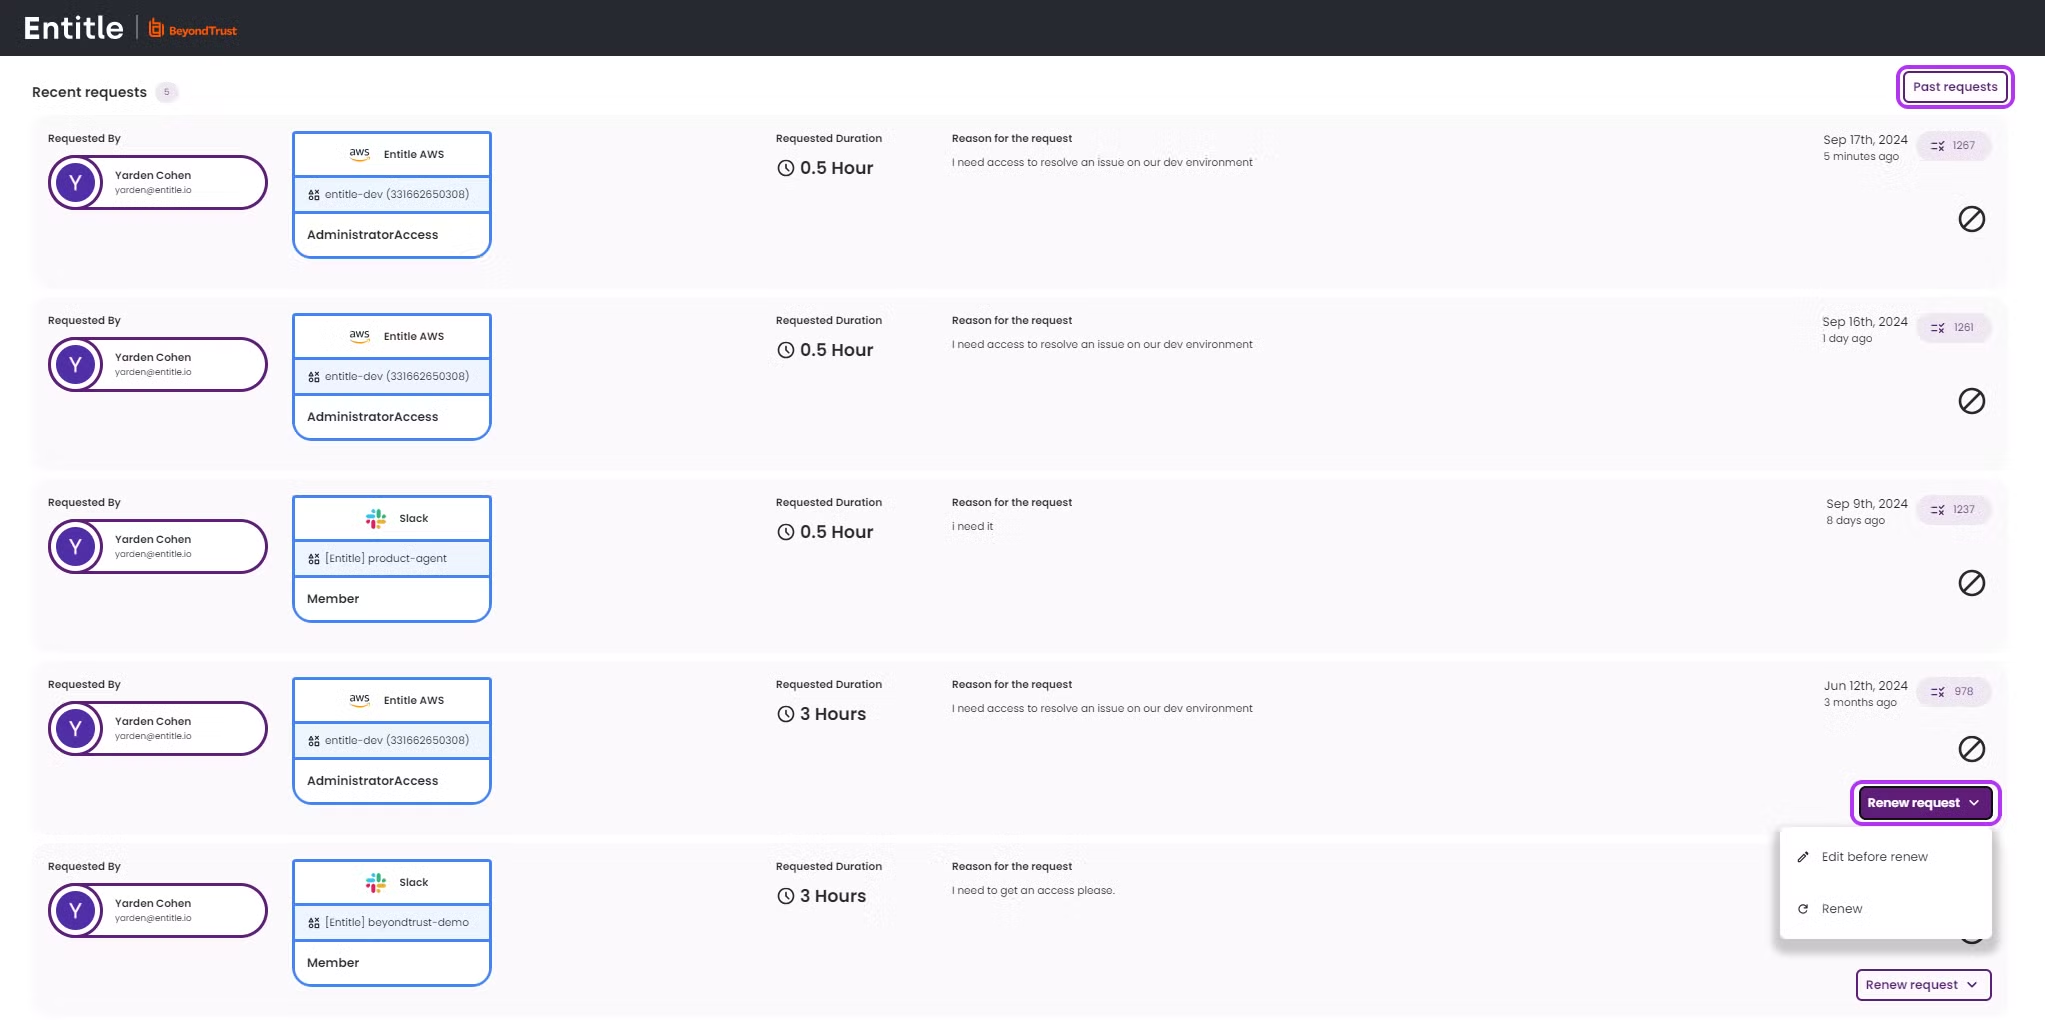
Recent requests
In this section, you will be able to:
- View your five most recently submitted requests.
- View and manage your past requests - Click the Past requests button on the right side, to see them all.
-
Renew/Edit request permissions:
- Click the Renew request button if the duration of the granted permission expires or is about to expire. It does not require the need to fill out an entire request.
- Click the Edit before renew option in case any changes need to be made to the request’s components.
- Once done, the request will be added as a new request to the My Pending Requests list with the same attributes as the previous one.
-
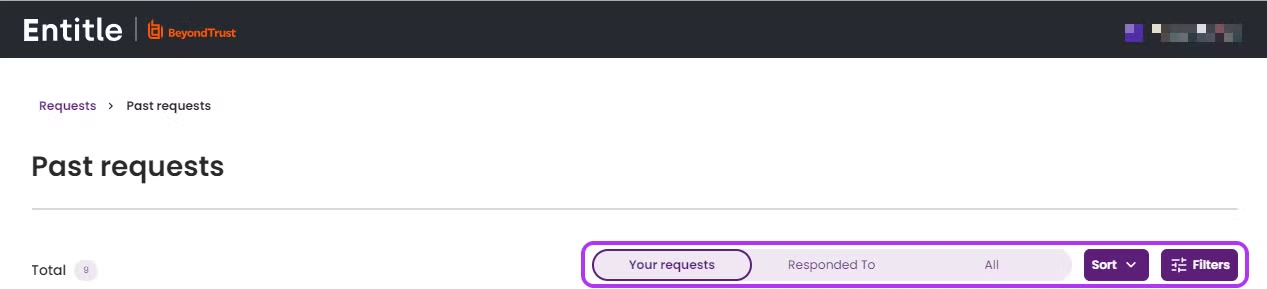
Sort or Filter requests:
-
Click the Past requests button. You can use the Requests bar, Sort, and Filters buttons to manage your requests.
-
Requests bar - choose your preferred view: Your requests/Responded to (if you are an Admin)/All requests.
-
Sort - Use this button to sort your requests according to the request number, duration, status, and the employee for whom the access request was created.
-
Filters - In the following pop-up window, choose any or all of the available filter options:
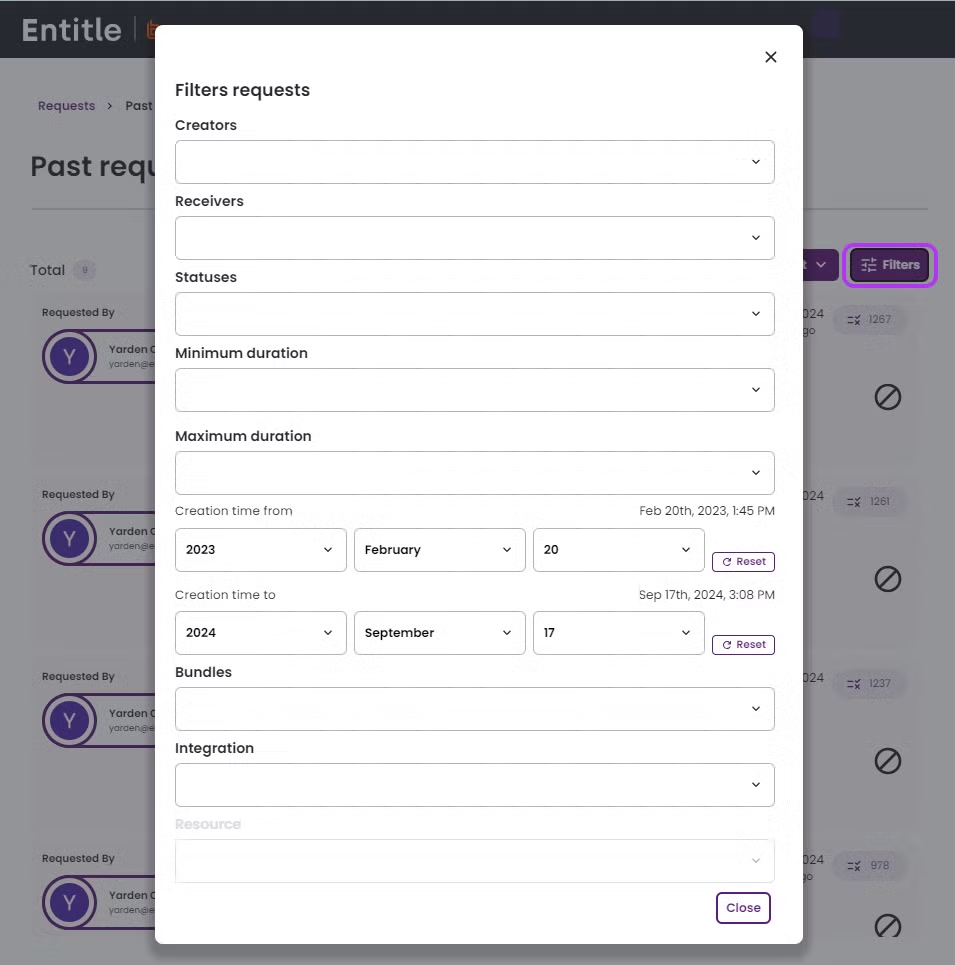
- Creators – click the field to select the employee who created the request. Repeat to add additional creators.
- Receivers – click the field to select the employee for whom the request was created. Repeat to add additional receivers.
- Statuses – click the field to select one of the possible statuses.
- Minimum duration – click the field to select requests that are longer than your selected duration.
- Maximum duration – to select requests that are shorter than the duration you have selected.
- Creation time from – click the fields to select the beginning of the creation time range.
- Creation time to – click the fields to select the end of the creation time range.
- Bundles – click the fields to select a bundle. When using this filter only requests that include this bundle will appear. Repeat to add additional bundles.
- Integration – click the field to select the desired integration.
- Resource – Click the field to select the desired integration resource.
- Role – click the field to select the desired role of an integration resource. Repeat to add additional roles.
-
