Org settings | Entitle
Overview
Entitle’s Org settings screen in Entitle contains all of your organizational settings, broken into different sections. It has several tabs containing key functionalities for admins:
- General:
- View and manage your organization's admins in Entitle
- Set a default timezone for your organization's users
- Integrations:
- View and manage your organization's integrations
- View and manage your IdP's SAML configurations
- Turn email notifications on or off
- Tokens: View and manage tokens
- JIT requests: Manage settings for JIT access requests
- Access review: Manage settings for access reviews
- Audit logs: View and manage audit log webhooks
General
View and manage your organization's admins in Entitle
This section explains how to view and manage your organization's admins (delete or add new ones).
- Log in to Entitle.
-
From the top left menu, select Org settings.
-
Locate the Entitle admins section.
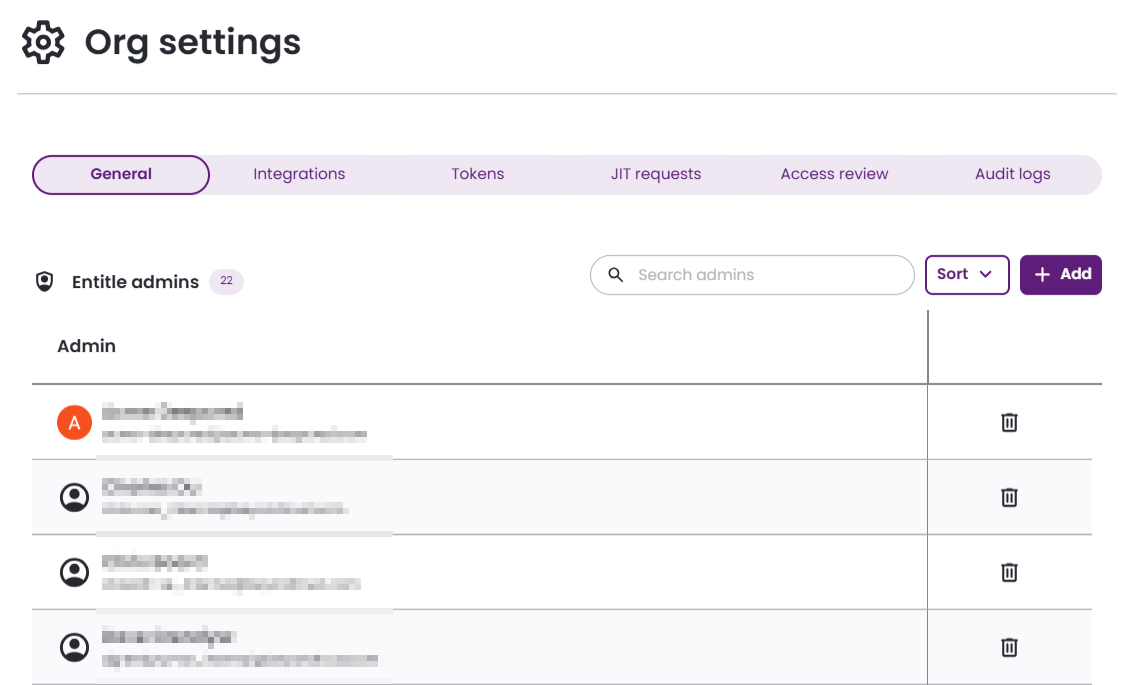
- Search: Find admins by first name, last name, and email address.
- Sort: Arrange admins by full name in an ascending or a descending order.
- Add: In the new row that appears, select an existing user to assign admin rights in Entitle.
- Delete admin: Click the trash icon to remove a admin rights from that user.
An admin user cannot remove their own user accounts.
Set a default timezone
- This section allows you to set the timezone in which Entitle will record the time of the events in the system.
- Locate the Timezone section and select your preference from the list. Note: The default timezone is America - New York (GMT-04:00).
Integrations
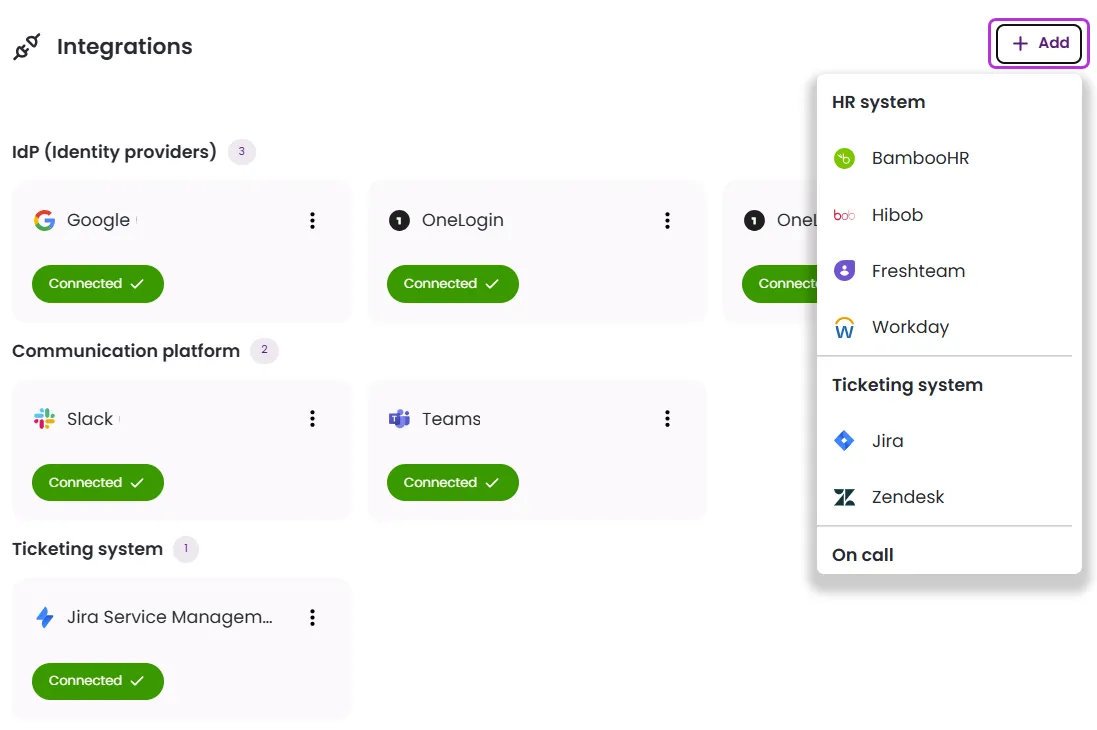
This section allows you to view and manage your connected integrations and connect new ones that exist within your organization.
Types of integrations
- Communication platform (Slack, Teams, etc.): This will enable employees to create new access requests, respond to access requests for which they are approvers, and receive notifications of requests made through your messaging app. You can also add multiple Slack/Teams connections for the same system.
- HR system (BambooHR, etc.): This will allow you to populate the direct manager for your organization, and allow more complex Approval workflows.
- Ticketing system (Jira, Zendesk): This will allow employees to link existing tickets from your ticketing system to access requests.
- On-call (Opsgenie, PagerDuty): This enables effective incident resolution, real-time alerts, and on-call scheduling to help organizations manage digital operations efficiently. Entitle currently supports only these two on-call applications.
- IdP (Identity providers such as Google, Okta, etc.): Configuring an identity provider allows you to sync all your directory users, groups, and managers into Entitle and use your organization entities across all relevant functionalities, such as Approval workflows and Birthright policies. If no IdP is configured in Entitle, users from your company domain are added to Entitle the first time they log in. These users authenticate through your company’s IdP, but their accounts are not synchronized with or removed from Entitle automatically.
Below you will find a list of the supported IdPs and references to their directory connection guides:
Add a new integration
-
Click Add and select the integration you wish to add.
The integrations presented in the list have yet to be connected.
-
Fill in the required fields for the specific integration to complete the integration process. The newly created integration displays under the Integrations section.
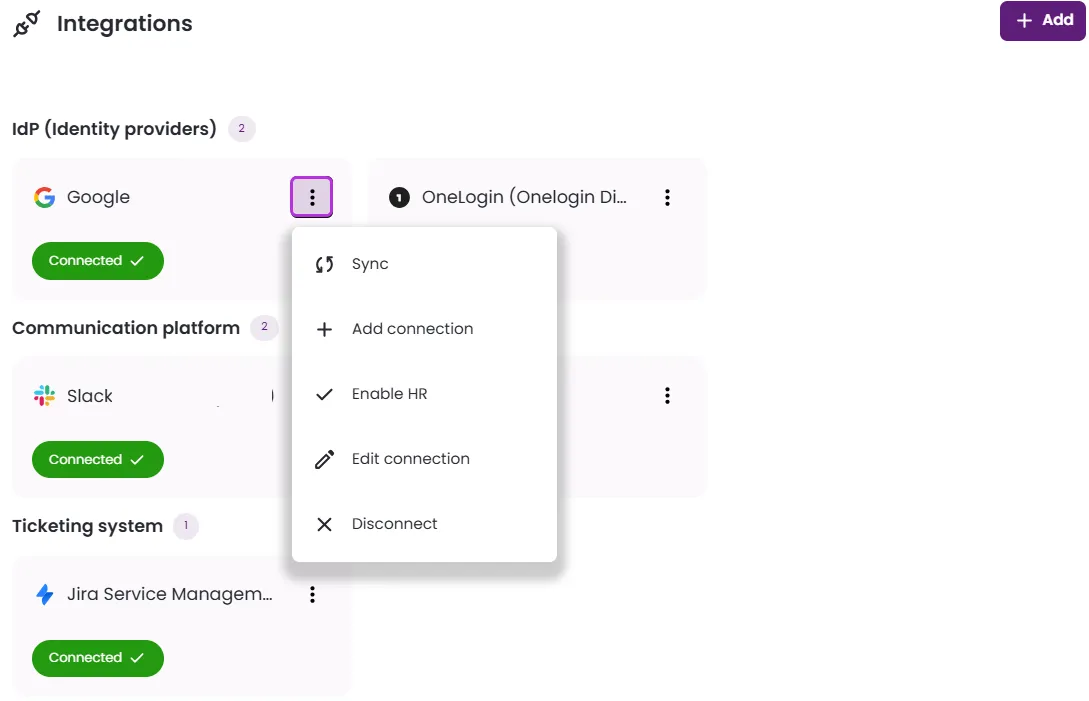
Edit an integration
-
Locate the specific integration you wish to edit.
-
Click the horizontal ellipses (…) icon to open the dropdown menu.
The editing options vary between the different integration categories (e.g., the menu is different in the Communication platform category and the IdP category).
-
Options for all integrations besides IdPs:
- Add connection
- Disconnect
-
Options for IdPs:
-
Sync
-
Add connection
-
Enable HR
-
Edit connection: If the current setup needs to be updated i.e., there's an expired IdP token, you can edit the connection and provide a renewed token to the existing connection.
-
Disconnect
-
-
-
Select an option from the appropriate menu to complete the editing process.
Important informationTo use Slack channel approvals and notifications, existing Slack integrations must refresh permissions.
Go to Org settings > Integrations. On the existing Slack tile, click the vertical ellipses and select Add connection.
Configure the new Slack connection, selecting the same Slack workspace that you used before. This process updates the Entitle app permissions in Slack.
Do not uninstall the Entitle app from your Slack workspace. Uninstalling the app removes the Entitle bot from all Slack channels. If the app is uninstalled and then reinstalled, the bot must be manually re-invited to each channel where approvals should appear.
Disconnect an integration
- Locate the integration you wish to disconnect.
- Click the horizontal ellipses (…) icon and select Disconnect from the dropdown menu.
- In the pop-up window, click Disconnect to complete the action.
View and manage IdPs SAML configurations
This section allows you to view your organization’s SAML connections, which enable employees to log into Entitle, and manage them (delete/add new ones) all in one place.
- This use case is not applicable when Entitle operates as part of Pathfinder, as all authentication is handled through Pathfinder authentication. See Entitle on Pathfinder for more details.
- Currently, SAML login is natively defined in Google and Microsoft. You can add Okta in this section by following the Okta SAML integration guide.
-
Locate the IdP SAML configuration section.
-
Click Add to add a new IdP SAML configuration. Insert the SAML configuration in the new row under the XML metadata URL column.

-
Click the trash icon in the appropriate row to remove an IdP SAML configuration.
Enable email notifications
Locate the Email notifications section and enable the toggle. Note that it is disabled by default.
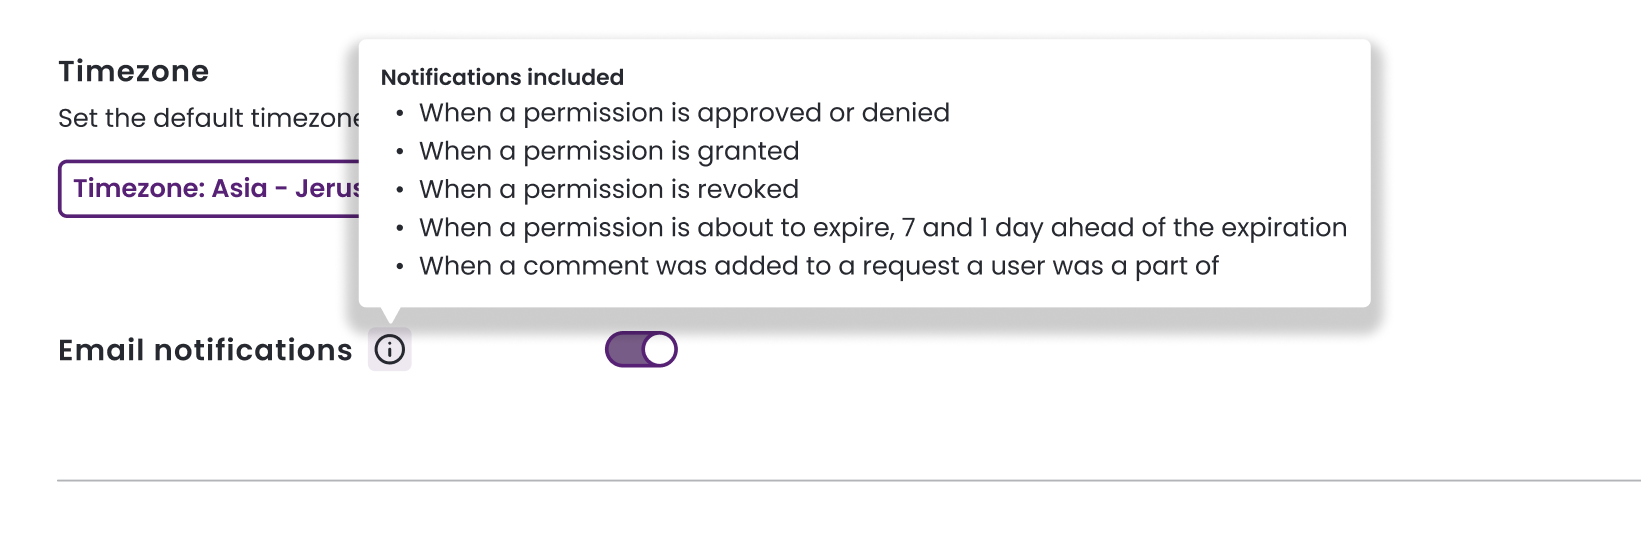
- User email addresses must be valid and correctly mapped from your identity provider (IdP) for email notifications to function correctly.
- For more details on email notifications in Entitle, see Email notifications.
Tokens
This section will explain how to:
- View and manage your API tokens to automate the Entitle administration easily.
For additional information regarding Entitle’s API, see Entitle’s API guide.
- View and manage your Agent tokens, allowing you to keep track of the Entitle agents that you have created for your organization.
- Entitle agent is the local agent that communicates directly with all the managed applications and is hosted by the customers.
- To set up Entitle’s agent in your chosen Kubernetes cluster, see the Entitle agent documentation.
Add a new token
- In the Tokens section, click Add to create a new Agent token or API token.
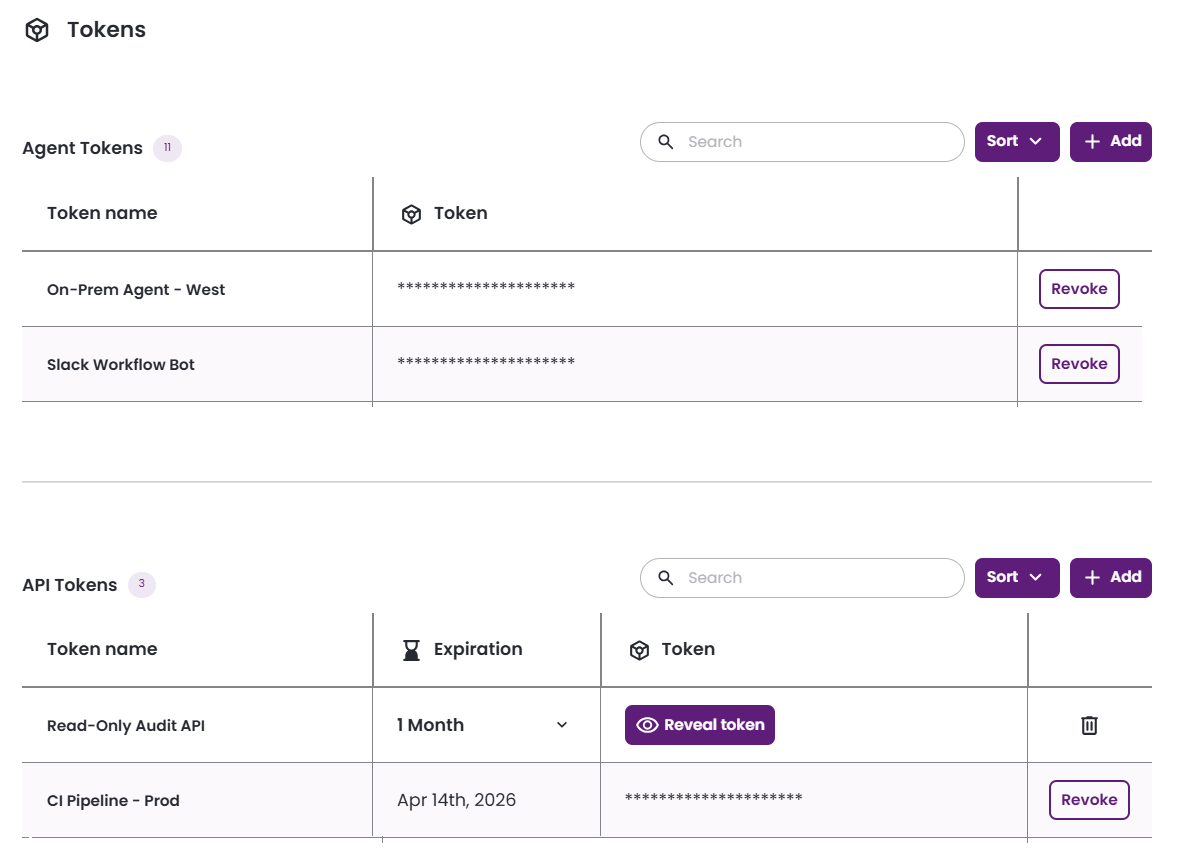
-
In the new row that appears, insert a Token name to identify its use.
Then Token name must be between 2-250 characters long.
-
For an API token, also select an Expiration from the dropdown.
-
Click Reveal token to view and copy the string.
You can also perform these actions:
- Search by token name.
- Sort tokens by name or expiration.
- Click the Delete token trash icon to cancel creation of a new token.
- Click Revoke > Revoke token to remove an existing token from the list.
JIT requests
This section explains how to:
- Set the access duration default for users requesting access
- Set up pending request reminders for approvers
- Set up request forwarding (i.e., forward requests from one user to another)
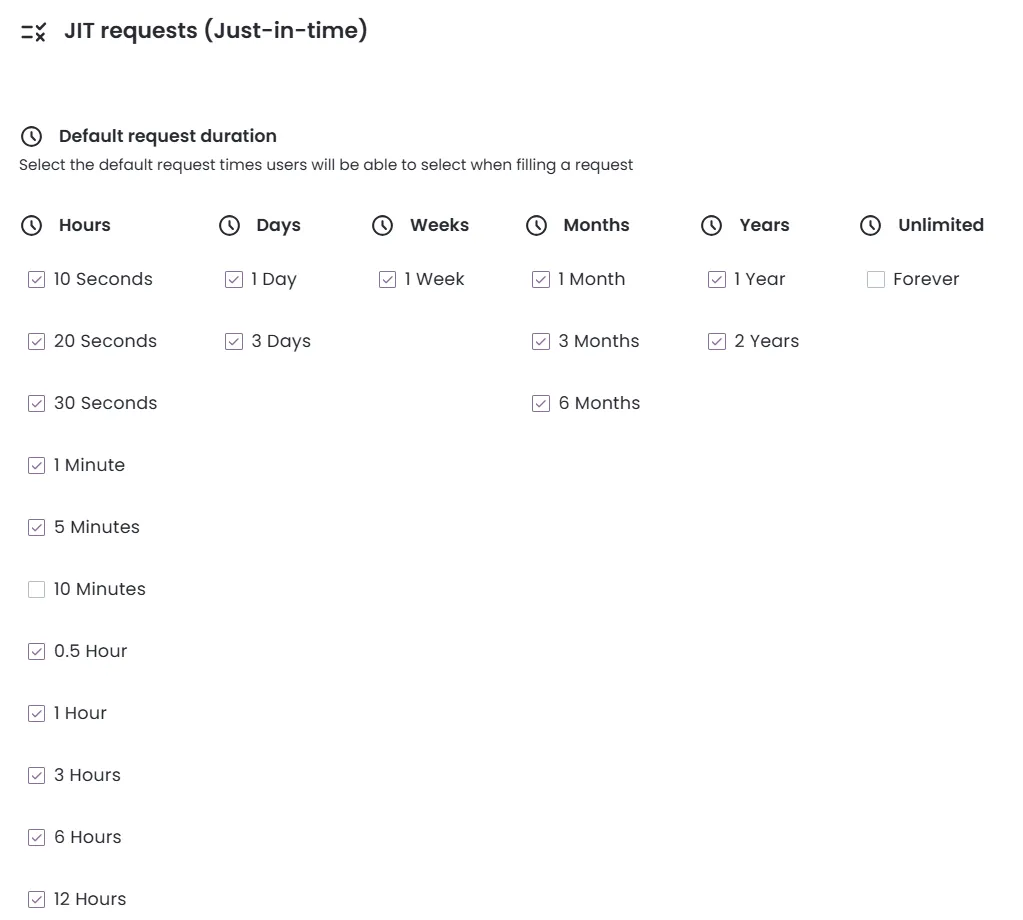
Set the access duration default
-
Locate the JIT requests section.
-
Under Request duration default, select the durations for which an employee can request an ‘Entitlement’.
The defaults are pre-selected, and you can change them according to your preferences. Make sure to select at least one duration option.
Set up pending request reminders
This section enables the creation of reminders for pending requests, for specific days and times. The approvers will receive a Slack or Teams message on access requests that they have yet to respond to.
-
Locate the Pending request reminder section.
-
Select your reminder preferences in terms of days of the week as well as the specific time of day.

Set up request forwarding
This section allows you to view and set up request forwarding from one employee (Forward from) to another (Forward to).
This means that all the requests that should be approved by the original employee will instead be redirected and require the new approver
-
Locate Forward request approvals.
-
Click Add to add a new forward. Select a user to Forward from, and a user to Forward to.
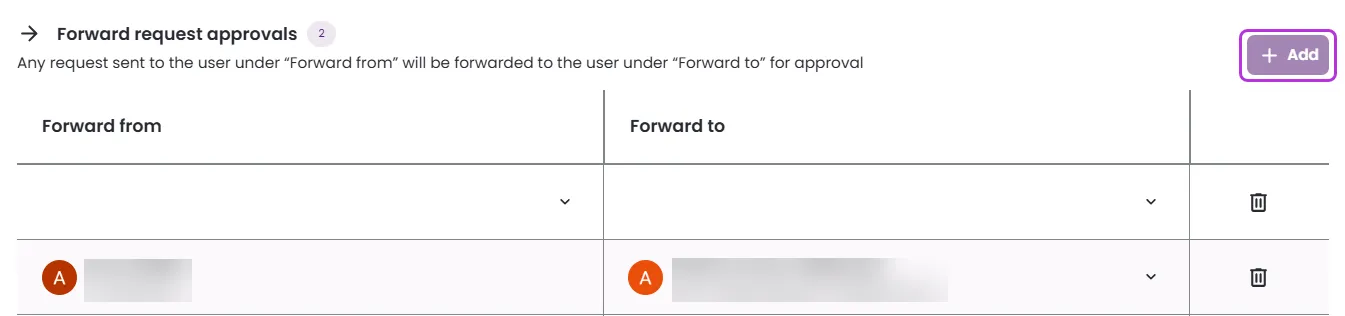
-
Click the trash icon to remove a forward from the list. Click Delete forward to complete the action.
Access review
This section allows you to perform the following actions:
- Set access review reminders for reviewers
- Set access review forwarding (i.e., forward access review from one reviewer to another)
- Immediately revoke access to a role to which access was denied during an access review
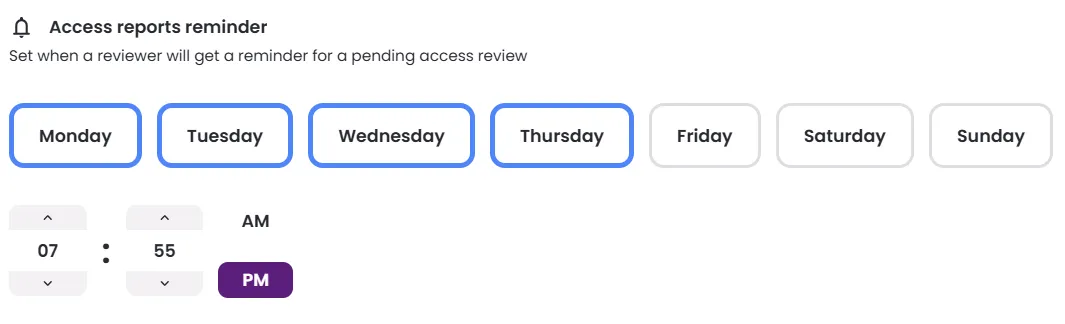
Set access review reminders
This section enables the creation of reminders for Access reports, for specific days and times. The approvers will receive a Slack or Teams message on access reviews that they have yet to respond to.
-
Locate the Access review section.
-
Under Access review reminder, select your reminder preferences in terms of days of the week as well as the specific time of day.
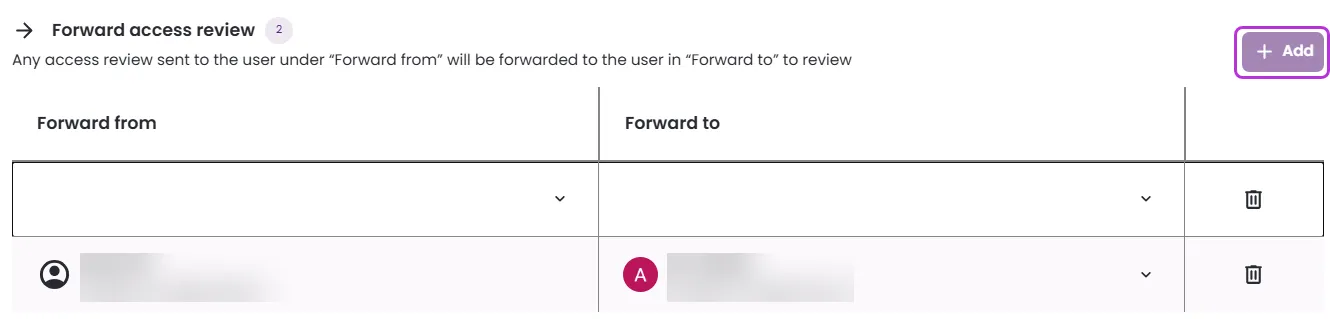
Forward access reviews
This section allows you to set up Access Review forwarding from one employee (Forward from) to another (Forward to).
This means that all the access reports that are assigned to the original employee will instead be redirected, and require the new approver’s review.
-
Locate the Forward access review section.
-
Click Add to add a new forward. Select a user to Forward from, and a user to Forward to.
-
Click the trash icon to remove a forward from the list. Click Delete forward to complete the action.
Immediate revoke
- Locate the Immediate revoke checkbox.
- When enabled, this section allows you to immediately revoke access to a role to which permission was denied during an access review.
The Immediate revoke option is disabled by default.

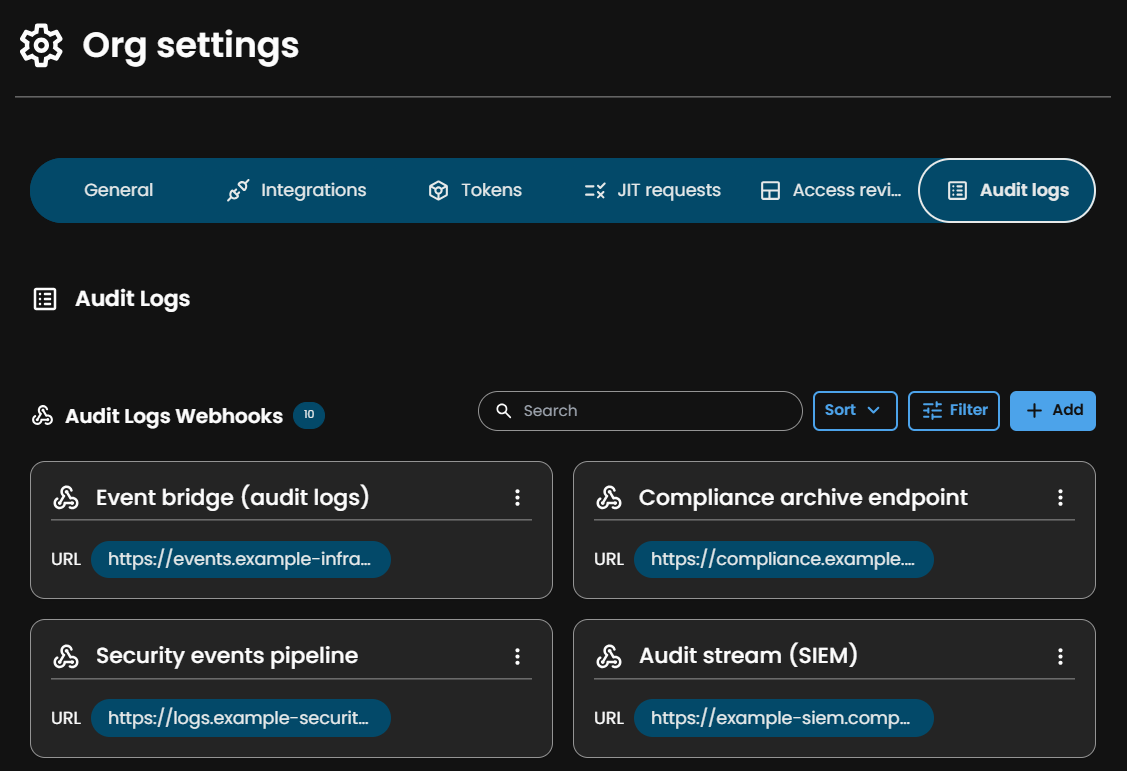
Audit logs
Stream Entitle audit logs to a SIEM, security investigation platform, or any other automation tool by using webhooks. This section allows you to view, manage, and create new audit logs streaming webhooks.
For more information, see Audit logs streaming.
-
Go to the Audit logs tab.
-
View existing audit log webhooks.
- Search by webhook name or URL.
- Sort by webhook name or created date.
- Filter by webhook name, URL, or usage.
-
To create a new audit log webhook, click Add and proceed with the Audit log streaming guide.
-
To edit an existing webhook, click the vertical ellipses, then Edit.
-
To delete a webhook, click the vertical ellipses, then Delete.
Updated 9 days ago
