Snowflake | Entitle
What is Snowflake?
Snowflake is a cloud-based data warehousing platform that enables organizations to store, manage, and analyze large datasets with high scalability and performance. It supports efficient querying and reporting to drive data-driven decisions.
How is this integration useful?
Integrating Snowflake with Entitle streamlines access management by automating role and permission assignments within Snowflake. It ensures granular control over data access, improving security and compliance while simplifying user management. With this integration, Entitle can manage the following resource types in Snowflake:
- Roles
- Databases
- Schemas
- Tables
- Warehouses
Entitle supports two different role types when managing access to resources:
- Snowflake verbs (default) - users can request a ‘Snowflake Verb’ as a ‘role’ on Entitle. For example, USAGE on a warehouse, SELECT on a table, etc.
- Simplified roles - can be turned on via a flag in the integration configuration. If simplified roles are enabled, users will be able to choose between ‘read’, ‘write’, and ‘admin’ privileges to the selected resource on Entitle, and all the ‘Snowflake verbs’ related to the chosen role will be granted.
See step 6 in the Create the Snowflake integration in Entitle section for more information.
Prerequisites
- Have a Linux/macOS machine with OpenSSL installed. It is recommended to use OpenSSL, which comes pre-installed on Linux and macOS machines
- Have a service account in Snowflake with a Security Admin role (
accountadmin). - You must have an Admin account in Entitle.
- Have access to your Snowflake username, account ID, warehouse name, and a private key.
Entitle supports user provisioning in Snowflake. This feature can be activated by checking the Allow creating accounts checkbox on the integration setup page.
When enabled, if an employee with no Snowflake account requests access to a Snowflake resource using Entitle, a new and temporary account with the requested permissions will be created and sent to the employee.
Should you need to allowlist this integration, these are the IP addresses from which Entitle's service reaches the integration:
- Entitle EU (Cloud deployment)
- 34.243.199.171
- 54.216.133.226
- Entitle US (Pathfinder deployment)
- 52.45.229.219
- 54.88.235.213
- 3.224.15.134
- Entitle CA (Pathfinder deployment)
- 35.182.218.208
- 15.156.179.153
Create a Snowflake ‘SECURITYADMIN’ user for Entitle
-
Log in to your Snowflake web interface.
-
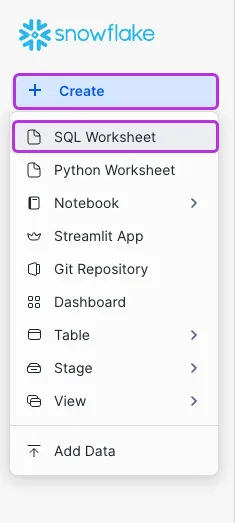
Click on Create > SQL Worksheet.

-
Choose a name for the user.
-
Run the following command in the worksheet to create the user:
CREATE USER <ENTITLE_USERNAME>You will see the following status update once done:
User <ENTITLE_USERNAME> successfully created. -
Run the following command in the worksheet to grant the user
SECURITYADMINaccess:GRANT ROLE SECURITYADMIN TO USER <ENTITLE_USERNAME>You will see the following status update once done:
Statement executed successfully.
Generate a public and private key pair
It is recommended to use OpenSSL, which comes pre-installed on Linux and macOS machines.
-
Execute the following script:
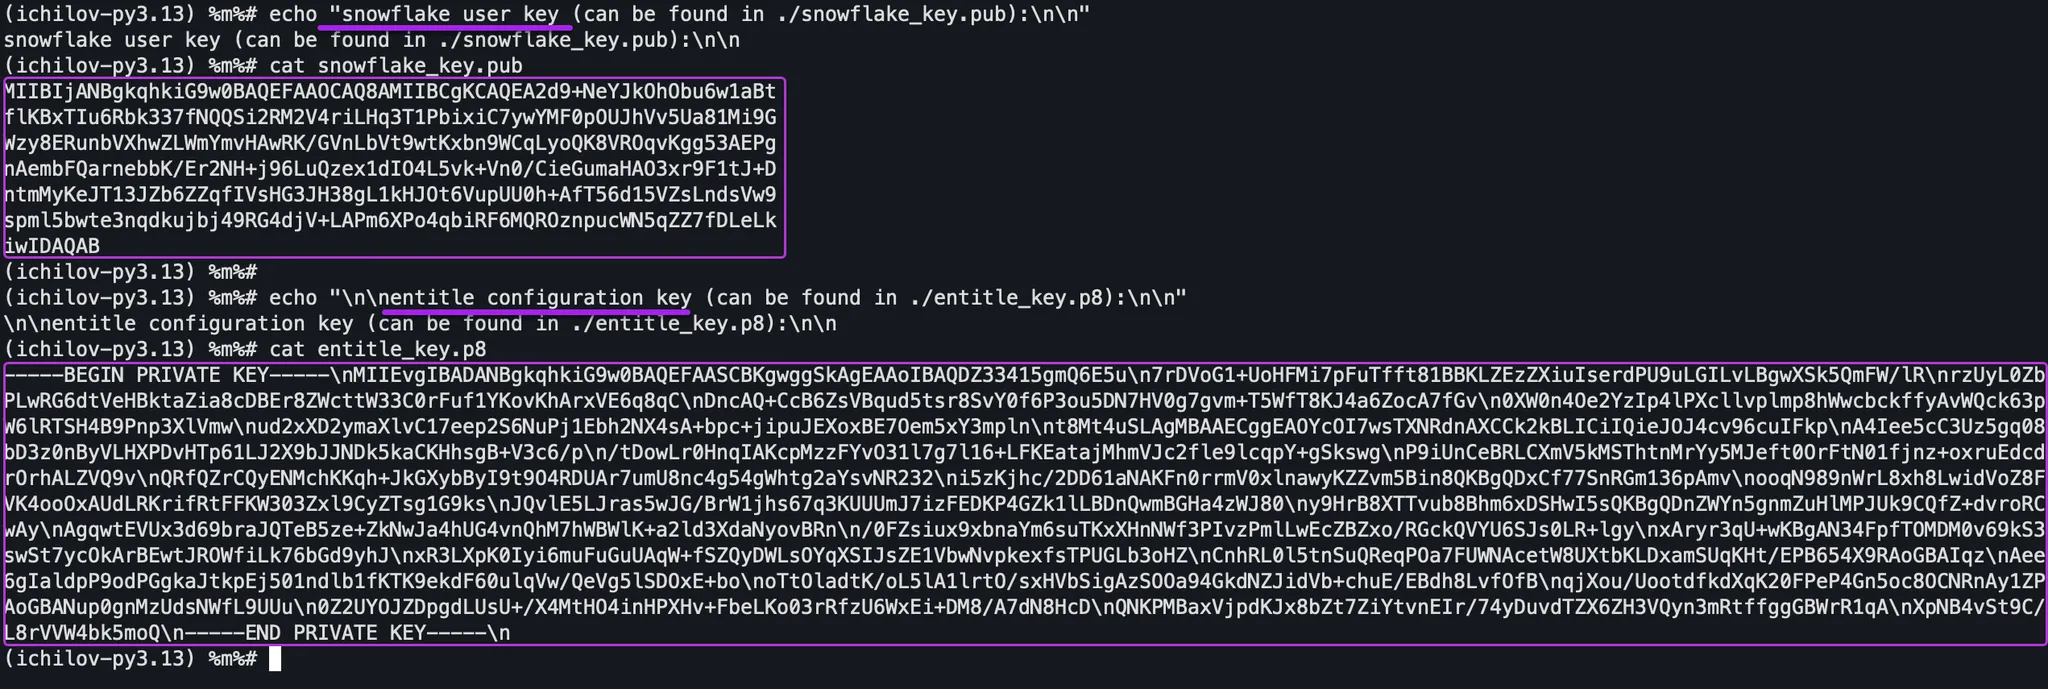
openssl genrsa 2048 | openssl pkcs8 -topk8 -inform PEM -out rsa_key.p8 -nocrypt openssl rsa -in rsa_key.p8 -pubout -out rsa_key.pub sed -e '2,$!d' -e '$d' rsa_key.pub > snowflake_key.pub echo "" >> rsa_key.p8 sed -e ':a' -e 'N' -e '$!ba' -e 's/\n/\\n/g' rsa_key.p8 > entitle_key.p8 rm rsa_key.pub rm rsa_key.p8 echo "snowflake user key (can be found in ./snowflake_key.pub):\n\n" cat snowflake_key.pub echo "\n\nentitle configuration key (can be found in ./entitle_key.p8):\n\n" cat entitle_key.p8 -
The output of the script will include two keys:
-
The Snowflake key will be a multi-line key, printed first.
-
The Entitle configuration key will be a ‘single line’ (might be wrapped by shell), and will begin with
——BEGIN PRIVATE KEY——.Script output example:
-
-
Copy the two keys separately and save them for the next steps in this guide.
If the
sedcommand fails to replace the newlines with\n, you must do it manually before implementing it in the Entitle configuration.
Configure the public key in Snowflake
Return to the worksheet and run the following command. Make sure to add the public key in the snowflake_key field:
ALTER USER <ENTITLE_USERNAME> SET rsa_public_key='<snowflake_key>'Grant warehouse permissions to the ‘SECURITYADMIN’ role
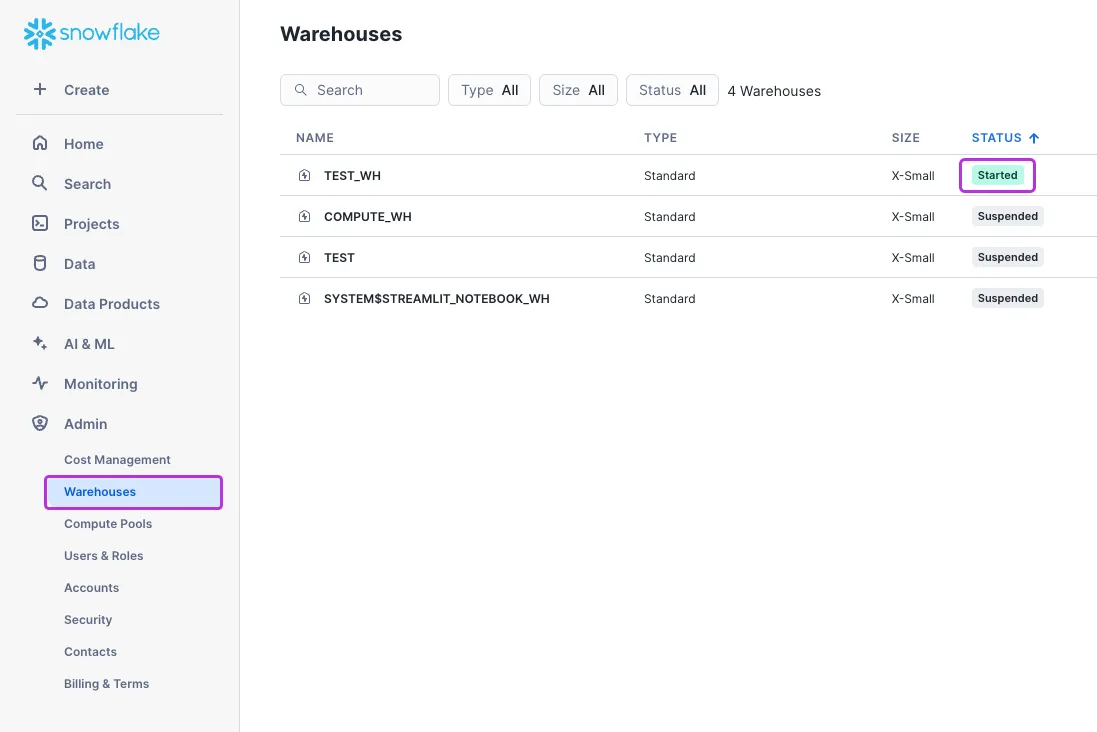
- On the left-side menu, click Admin > Warehouses.
- Select a warehouse. Make sure that it is not suspended, but marked as Started in the Status column.
-
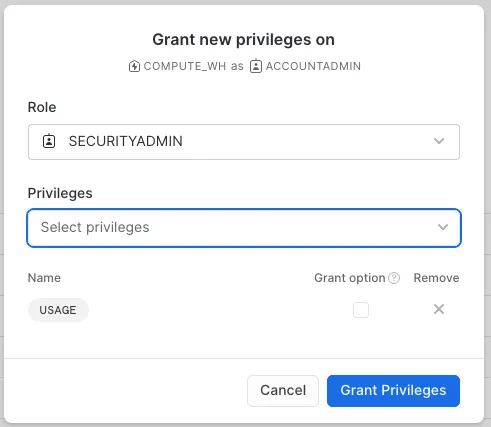
In the Privileges section of the warehouse’s page, click + Privilege on the top-right corner.
-
Choose the following:
-
SECURITYADMIN from the Role dropdown.
-
USAGE privilege from the Privileges dropdown.
-
-
Click Grant Privileges.
Obtain the Snowflake Account ID
-
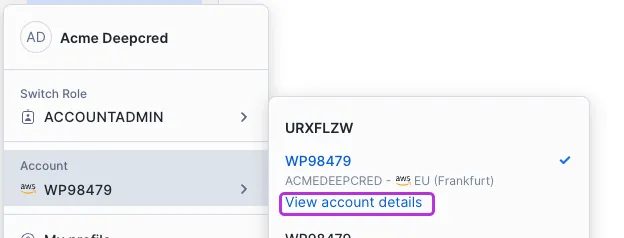
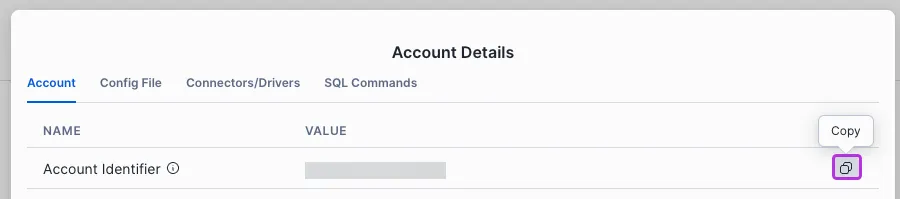
On the left-side menu in Snowflake under the Admin section, click Accounts > hover on your desired account and click View account details.
-
Under the Account tab, copy the Account identifier value for the configuration later on.
Manage pre-existing Snowflake users in Entitle
-
In Snowflake, click on Create > SQL Worksheet.
-
The pre-existing users need to have their
DEFAULT_SECONDARY_ROLESset to "ALL":Otherwise, the users will be able to access only resources associated with one role at a time. Therefore, it is recommended to set
DEFAULT_SECONDARY_ROLESto "ALL" to ensure access to multiple roles at once (e.g., three tables).-
To modify, run the following command in the worksheet:
ALTER USER <USER_NAME> SET DEFAULT_SECONDARY_ROLES = ("ALL") -
If you are not sure whether modification is needed, run the following command.
Then, check the value in theDEFAULT_SECONDARY_ROLEScolumn and make sure it is set to["ALL"].SHOW USERS
-
Bulk user modification
To modify users in bulk, execute the following script:
The following example runs on all available users. To ensure that only the users who require modification are shown, you must apply additional filters.
begin
    show users;
    let c1 cursor for
        select * from table(result_scan(last_query_id()));
    for r in c1 do
        if (r."default_secondary_roles" != ('ALL') and r."name" != 'SNOWFLAKE') then
            execute immediate
                'alter user "' || r."name" ||
                '" set default_secondary_roles = ("ALL")';
        end if;
    end for;
end;
Create the Snowflake integration in Entitle
-
Log in to Entitle and go to the Integrations page.
-
Click Add Integration.
-
In the Application field, enter Snowflake.
-
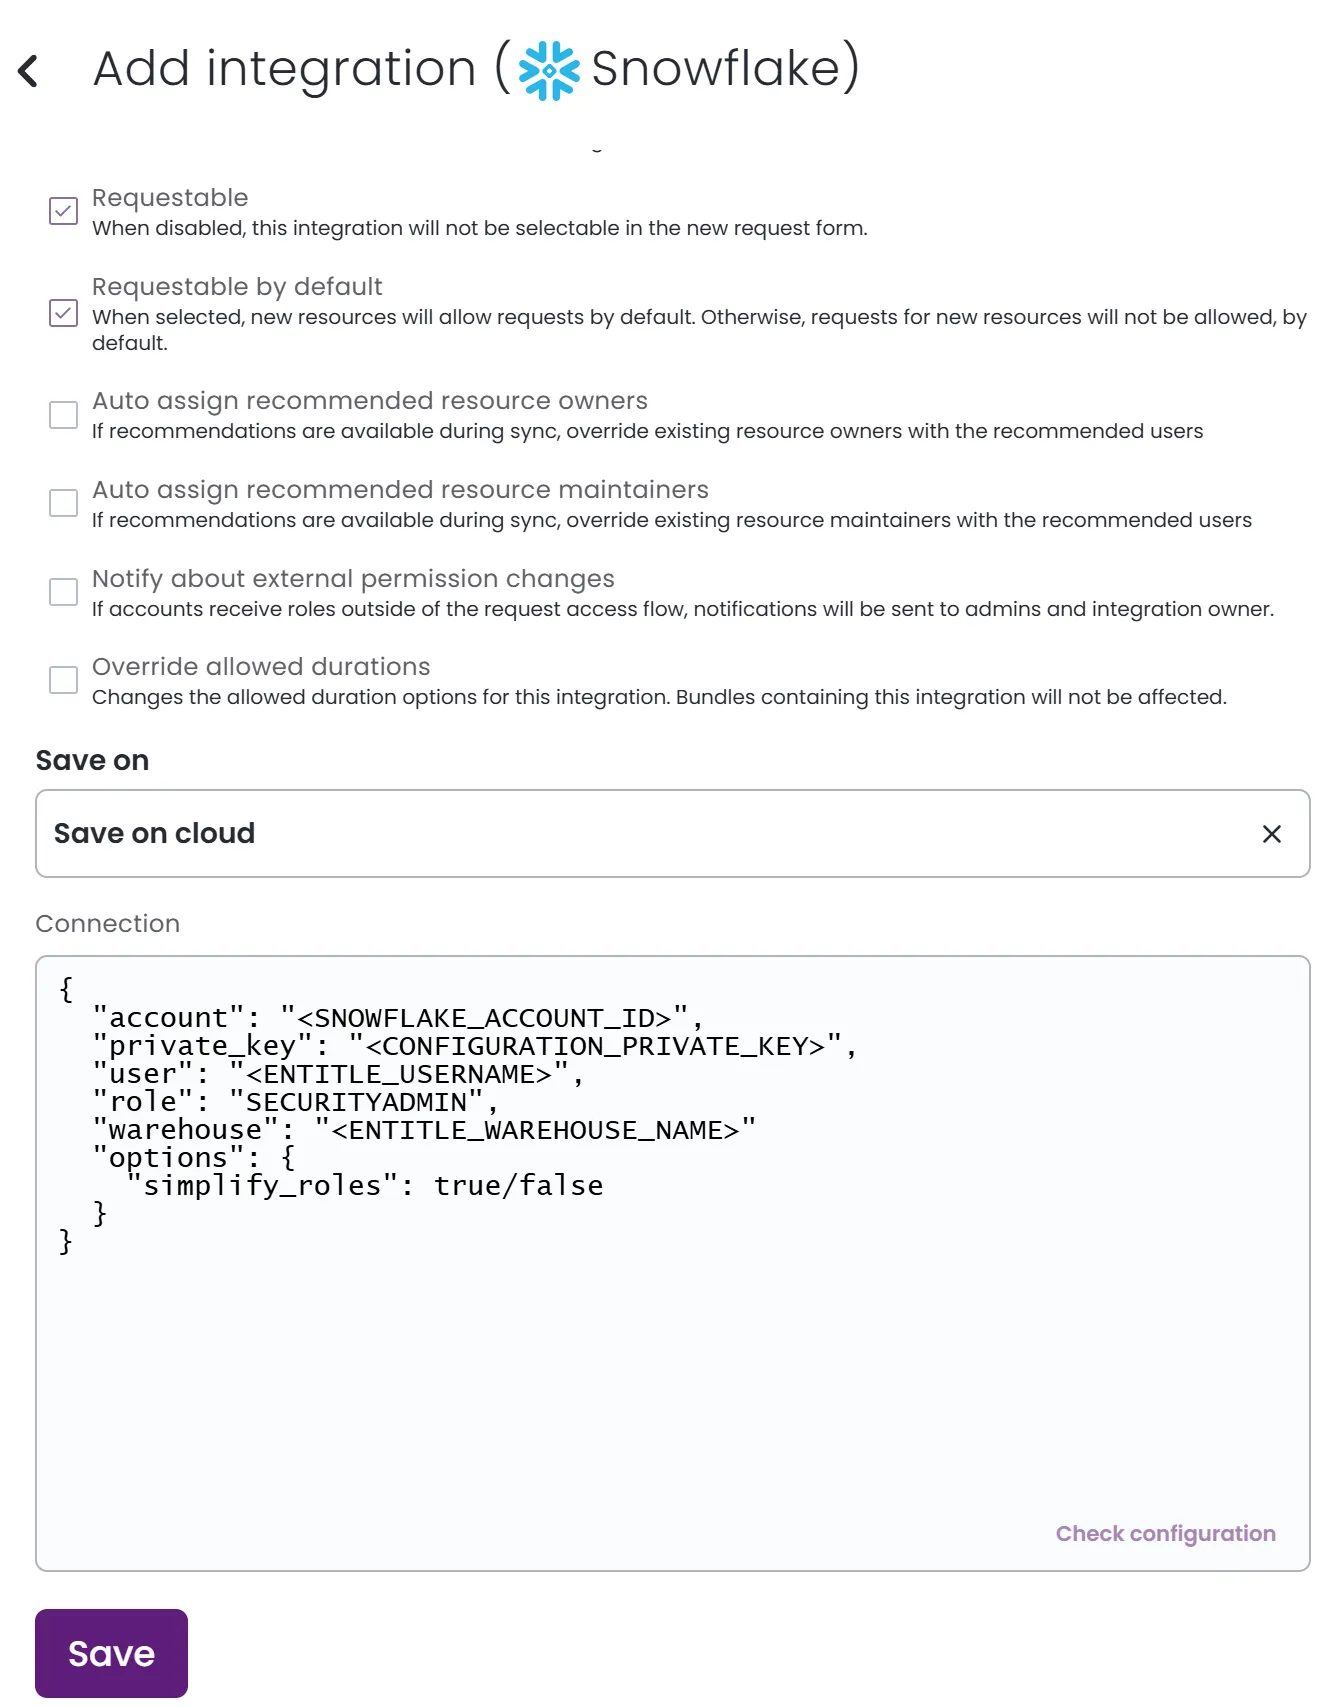
In the Save on dropdown, select Entitle cloud or your hosted agent.
-
In the Connection field:
-
account: Insert the Account ID from the Account details page. -
private_key: Insert the Entitle configuration key from the key pair you created.Remember to replace the newlines with
\nif thesedcommand fails to do so automatically. -
user: Insert the username of the user you created for Entitle. -
role: Will be set to SECURITYADMIN by default. -
warehouse: Insert the name of the warehouse to which you granted the ‘SECURITYADMIN’ role permissions.
Example Connection JSON{ "account": "<SNOWFLAKE_ACCOUNT_ID>", (the Account Identifier) "private_key": "<CONFIGURATION_PRIVATE_KEY>", (the Entitle configuration key) "user": "<ENTITLE_USERNAME>", "role": "SECURITYADMIN", "warehouse": "<ENTITLE_WAREHOUSE_NAME>" "options": { "simplify_roles": true/false } }The
simplify_rolesoption allows changing the available roles from the ‘standard’ snowflake actions (SELECT, DELETE, USAGE, etc.) to a simplified ‘read-write-admin’ model. -
-
Click Save.
The Entitle integration with Snowflake saves
What's next?Make sure your setup is complete by testing your integration.
Updated 3 months ago
