
Install Entitle agent with Azure for clusters running on AKS | Entitle
This guide covers agent installation using Azure, for clusters running on Azure Kubernetes Service (AKS). Before beginning, learn more about the agent in Entitle agent installation.
Before you Begin
We recommend getting to know these Azure concepts:
- Access and identity options for Azure Kubernetes Service (AKS) > Workload identity
- Deploy and configure Microsoft Entra Workload ID on an Azure Kubernetes Service (AKS) cluster
- Connect your Azure identity provider to the Azure Key Vault Secrets Store CSI Driver in Azure Kubernetes Service (AKS)
Prerequisites
- Outbound connections permitted per Entitle agent network access requirements.
- Helm v3
- kubectl
- GKE cluster
- gcloud CLI
Process
Generate an agent token
In Entitle, navigate to Org settings > Tokens. Click Add under Agent tokens . Reveal and copy the token for later use.
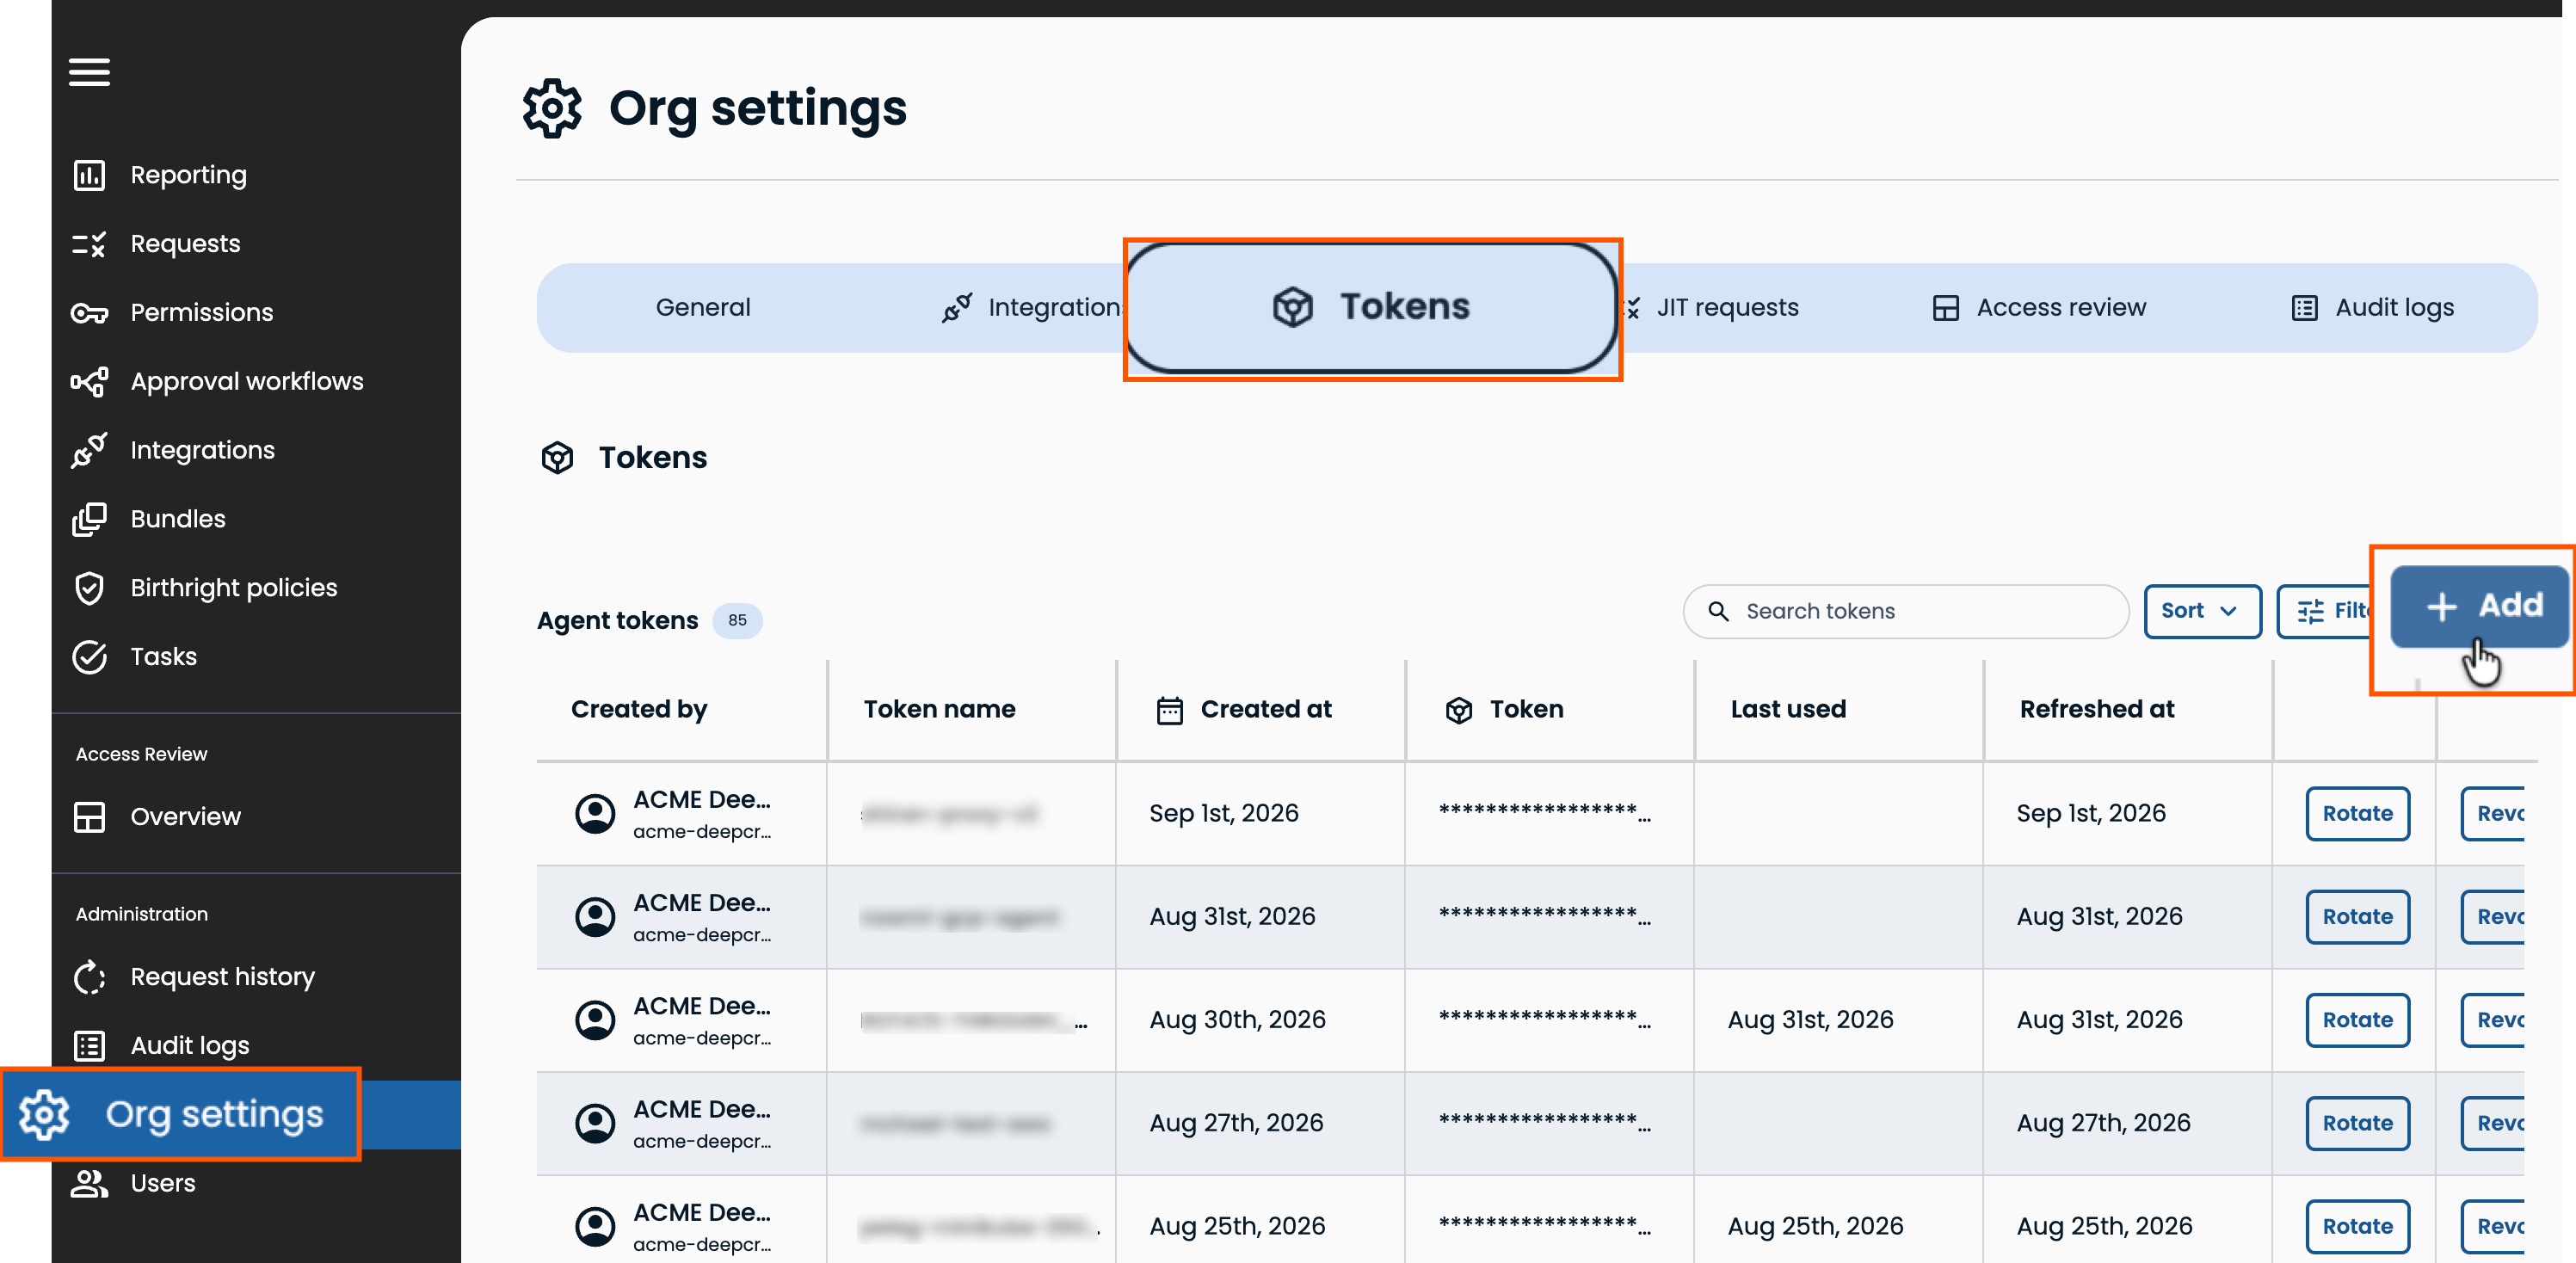
Each token is tied to a single agent, unless the agents are fully redundant. For redundancy architecture guidance, contact BeyondTrust.
Set environment variables
export CLUSTER_NAME=<YOUR_AKS_CLUSTER_NAME>
export RESOURCE_GROUP=<YOUR_AKS_RESOURCE_GROUP>
export SUBSCRIPTION_ID=<YOUR_AZURE_SUBSCRIPTION_ID>
export LOCATION=<YOUR_AKS_LOCATION>
export NAMESPACE="entitle"
export SERVICE_ACCOUNT_NAME="entitle-agent-sa"
export WORKLOAD_IDENTITY_NAME=<YOUR_WORKLOAD_IDENTITY_NAME>
export FEDERATED_IDENTITY_NAME=<YOUR_FEDERATED_IDENTITY_NAME>
export KEY_VAULT_NAME=<YOUR_KEY_VAULT_NAME>
export AAD_GROUP_OBJECT_ID=<YOUR_AAD_GROUP_OBJECT_ID>
Replace the following:
| Variable | Value |
|---|---|
CLUSTER_NAME | Found on the overview page for your cluster in the Azure portal. Navigate to Kubernetes services and select your cluster. |
RESOURCE_GROUP | Found on the overview page for your cluster in the Azure portal. Navigate to Kubernetes services and select your cluster. |
SUBSCRIPTION_ID | Found on the overview page for your cluster in the Azure portal. Navigate to Kubernetes services and select your cluster. |
LOCATION | Found on the overview page for your cluster in the Azure portal. Navigate to Kubernetes services and select your cluster. |
NAMESPACE | Your namespace. Changing from entitle is strongly discouraged. |
SERVICE_ACCOUNT_NAME | entitle-agent-saDo not change this value. |
WORKLOAD_IDENTITY_NAME | A name for the managed identity you will create. |
FEDERATED_IDENTITY_NAME | A name for the federated identity credential you will create. |
KEY_VAULT_NAME | Your Azure Key Vault name. |
AAD_GROUP_OBJECT_ID | Object ID of the Azure AD admin group for your cluster. |
Enable Workload Identity on your AKS cluster
If you don't have a managed identity created and assigned to your pod, perform the following steps to create and grant the necessary permissions to Key Vault.
Verify the Azure CLI is version 2.40.0 or later:
az --versionIf needed, upgrade with az upgrade.
Verify that AAD, OIDC, and Workload Identity are all enabled on your cluster. None of the
following should return False or null:
echo "$(az aks show -n ${CLUSTER_NAME} -g ${RESOURCE_GROUP} --query "oidcIssuerProfile.issuerUrl" -otsv)"
echo "$(az aks show -n ${CLUSTER_NAME} -g ${RESOURCE_GROUP} --query "securityProfile.workloadIdentity" -otsv)"
If any value is False or null, enable the missing features:
 aks update \
 --resource-group ${RESOURCE_GROUP} \
 --name ${CLUSTER_NAME} \
 --enable-aad \
 --aad-admin-group-object-ids ${AAD_GROUP_OBJECT_ID} \
 --enable-workload-identity \
 --enable-oidc-issuer
Create a managed identity
Use this command to create a managed identity:
az identity create \
 --name "${WORKLOAD_IDENTITY_NAME}" \
 --resource-group "${RESOURCE_GROUP}" \
 --location "${LOCATION}" \
 --subscription "${SUBSCRIPTION_ID}"
export USER_ASSIGNED_CLIENT_ID="$(az identity show \
 --resource-group "${RESOURCE_GROUP}" \
 --name "${WORKLOAD_IDENTITY_NAME}" \
 --query 'clientId' -otsv)"
export TENANT_ID=$(az aks show \
 --name ${CLUSTER_NAME} \
 --resource-group "${RESOURCE_GROUP}" \
 --query tenantId -o tsv)
Grant Key Vault access
Grant the managed identity access to Key Vault secrets. The correct command depends on your Key Vault authorization model.
When deploying the Entitle agent on AKS, you must grant the agent's managed identity access to Key Vault secrets. The correct command depends on your Key Vault authorization model.
-
Option 1: Vault access policies (default)
Run this command if your Key Vault uses access policies:az keyvault set-policy -n ${KEY_VAULT_NAME} \ --secret-permissions get set list delete \ --spn $USER_ASSIGNED_CLIENT_ID -
Option 2: RBAC authorization
Use this option if the previous command fails withCannot set policies to a vault with '--enable-rbac-authorization' specified.export KEY_VAULT_SCOPE="/subscriptions/${SUBSCRIPTION_ID}/resourceGroups/${RESOURCE_GROUP}/providers/Microsoft.KeyVault/vaults/${KEY_VAULT_NAME}" az role assignment create \ --role "Key Vault Secrets Officer" \ --assignee $USER_ASSIGNED_CLIENT_ID \ --scope ${KEY_VAULT_SCOPE} az role assignment list \ --assignee $USER_ASSIGNED_CLIENT_ID \ --scope ${KEY_VAULT_SCOPE} \ --query "[].{role:roleDefinitionName, scope:scope}" -o tableTo check which authorization model your vault uses, go to Key Vault > Settings > Access configuration in the Azure portal.
-
To get the OIDC Issuer URL and save it to an environmental variable, run the following command:
export AKS_OIDC_ISSUER="$(az aks show -n ${CLUSTER_NAME} -g ${RESOURCE_GROUP} --query "oidcIssuerProfile.issuerUrl" -otsv)"
echo "AKS_OIDC_ISSUER: ${AKS_OIDC_ISSUER}"- Set credentials for kubectl to connect to your AKS cluster:
az aks get-credentials -n ${CLUSTER_NAME} -g "${RESOURCE_GROUP}" --admin
--adminis optional, if you have a user with sufficient permissions, you can omit it
- Use the
az identity federated-credential createcommand to create the federated identity credential between the managed identity, the service account issuer, and the subject.
az identity federated-credential create --name ${FEDERATED_IDENTITY_NAME} --identity-name ${WORKLOAD_IDENTITY_NAME} --resource-group ${RESOURCE_GROUP} --issuer ${AKS_OIDC_ISSUER} --subject system:serviceaccount:${NAMESPACE}:${SERVICE_ACCOUNT_NAME}- Log in with kubelogin.
There are several ways to log in with kubelogin according to the documentation, but we recommend using the interactive login:
export KUBECONFIG=<PATH_TO_KUBECONFIG>
kubelogin convert-kubeconfig
kubectl get no- You will get the following message:
To sign in, use a web browser to open the page https://microsoft.com/devicelogin and enter the code ARJFDH6FU to authenticate.
Follow the instructions and log in with your Azure account. After that, you should see the nodes of your cluster.
Chart installation
- The
agent.tokenvalue was created as a part of the Prerequisites section above. - The
ORG_NAMEvalue within thedatadog.tagskey should be replaced with your company's name.
export TOKEN=<TOKEN_FROM_ENTITLES_ORG_SETTINGS>
export ORG_NAME=<YOUR ORGANIZATION NAME> -
If you wish to use Hashicorp vault, set kmsType to
hashicorp_vault:helm repo update entitle && \ helm upgrade --install entitle-agent entitle/entitle-agent \ --set platform.mode="azure" \ --set kmsType="azure_secret_manager" \ --set datadog.datadog.tags={company:${ORG_NAME}} \ --set datadog.datadog.kubelet.tlsVerify=false \ --set datadog.datadog.kubelet.host.valueFrom.fieldRef.fieldPath="spec.nodeName" \ --set datadog.datadog.kubelet.hostCAPath="/etc/kubernetes/certs/kubeletserver.crt" \ --set platform.azure.clientId=$USER_ASSIGNED_CLIENT_ID \ --set platform.azure.tenantId=${TENANT_ID} \ --set platform.azure.keyVaultName=${KEY_VAULT_NAME} \ --set agent.token="${TOKEN}" \ -n ${NAMESPACE} --create-namespace
Updated 24 days ago
