Rules | Entitle
Overview
Customers come across different challenges in handling all their resources and roles within their organization; Not only do they have a lot of available resources and roles, but it’s also hard for their employees to determine what they need to find, and some risky resources and roles should be handled differently.
Therefore, Rules in Entitle allow Entitle Admins to easily make changes for integrations’ resources and roles, based on criteria that can be defined both for existing & new ones.
Note: Rules will override any Owners and Maintainers that are inherited from the integration.
This page will provide you with step-by-step instructions on how to use Rules in Entitle.
What are Rules?
Rules allow you to perform the following actions:
- Apply workflows for resources and roles.
- Set owners for resources and roles.
- Make resources and roles requestable.
Rules can be applied to:
- Resources and roles that are selected from applications that were integrated with your Entitle tenant. Specifically, they can apply to:
- Integration resources
- Resources roles
Rules can be applied to either roles or resources. If you would like to apply changes to both roles and resources, it will require two different rules:
- When adding conditions, if you select Role name, the Will set these attributes options at the bottom are limited to role-related attributes.
- If you select only resource conditions, all Will set these attributes options remain available.
- Under Will set these attributes, choosing a resource attribute makes the role attributes unavailable, and choosing a role attribute makes the resource attributes unavailable.
- The Rules will affect either Existing & New Resources or Only New Resources:
- Existing & New Resources means that all the resources or roles that are satisfied by the Rule criteria will change as of today, with no regard to their priority. In addition, it will set any new resources or roles that will be added under the same conditions.
- Only new resources meaning only new resources or roles that are created in Entitle will be added with the same conditions (e.g., a new group that is created in Okta will be populated in Entitle as well, within a couple of minutes).
Rules operate through the following conditions:
Note that a couple of conditions can exist within a single Rule.
- Resource Type - Set a condition based on the resource grouping.
- Resource Name - Set a condition based on what characters the name of the resource contains or doesn't contain.
- Resource Tag - Set a condition based on the tags taken from the integration or that are applied through Entitle.
- Role Name - Set a condition based on what characters the name of the role contains or doesn't contain.
View and manage your Rules
-
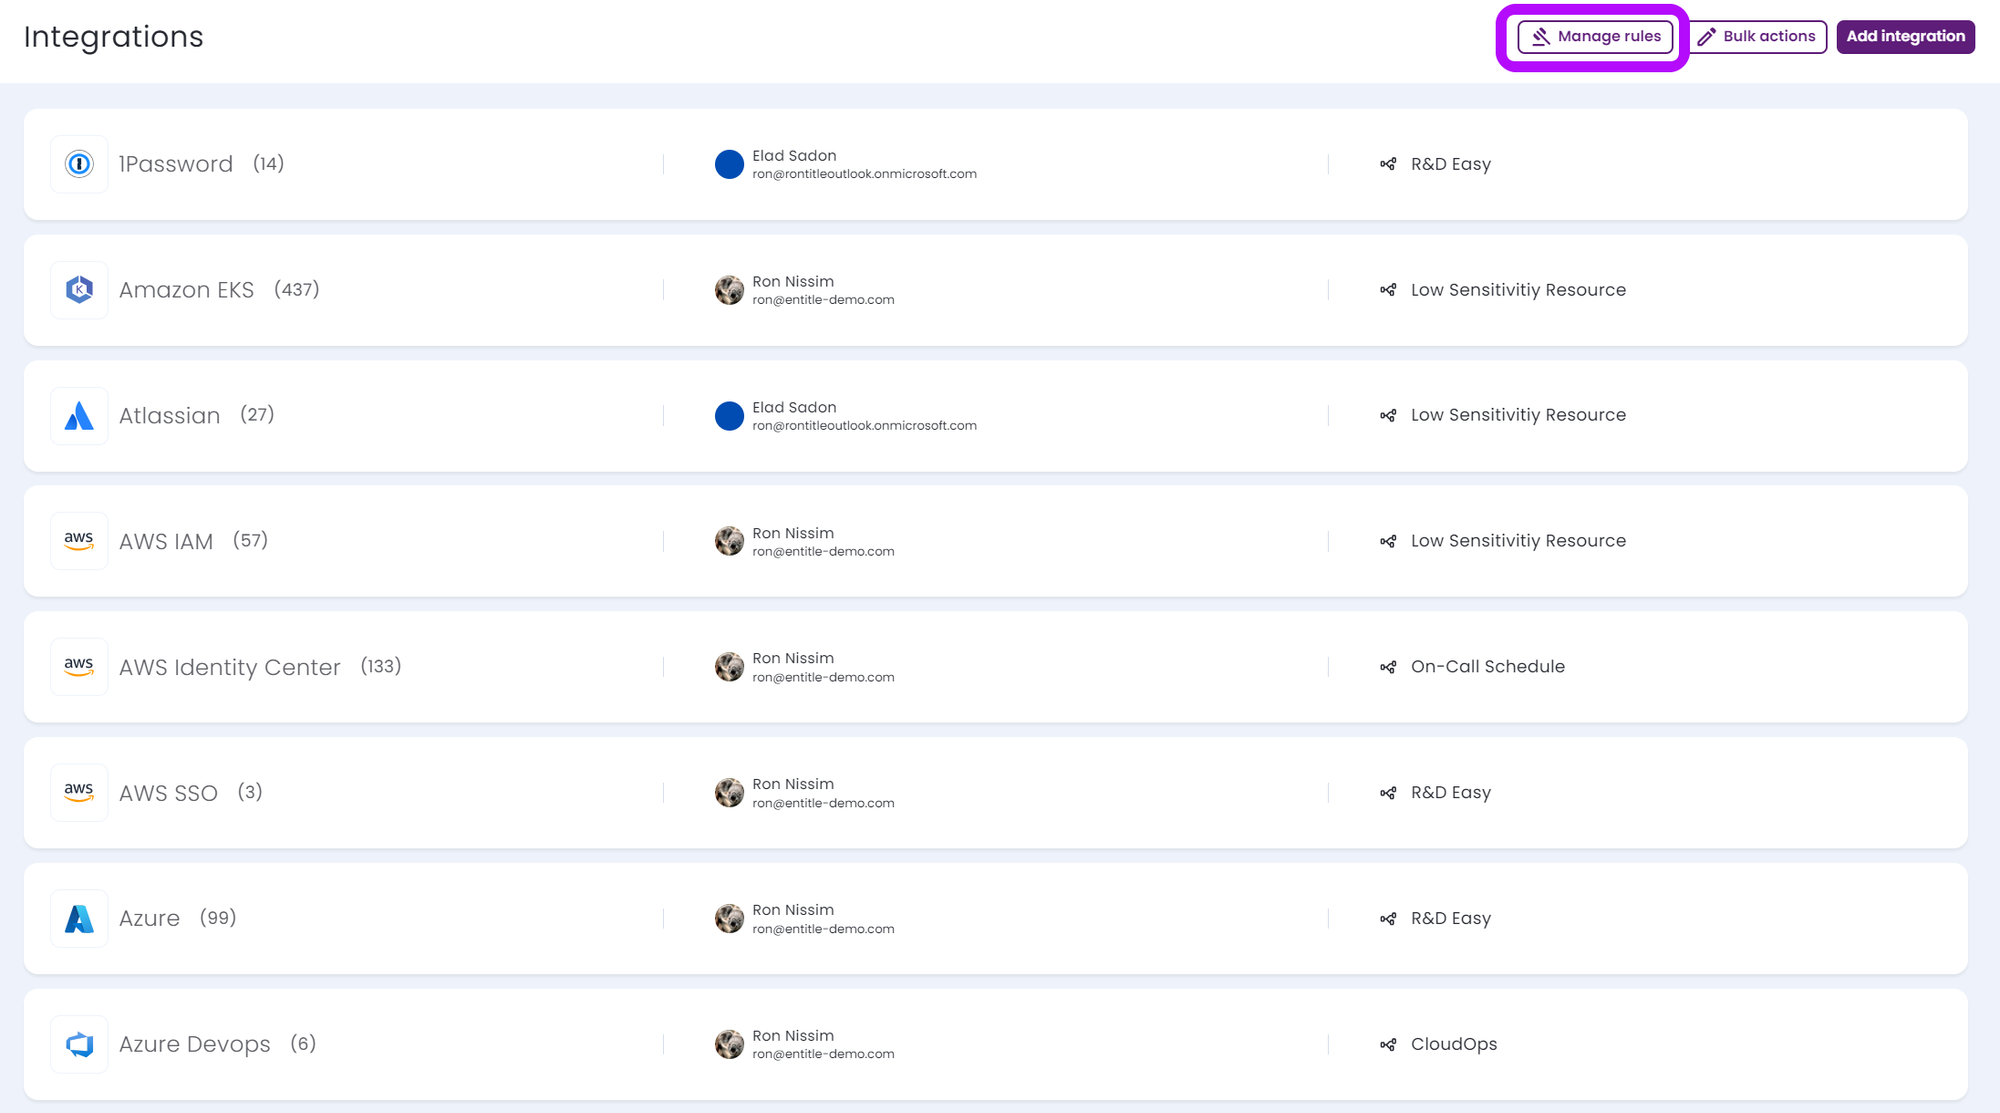
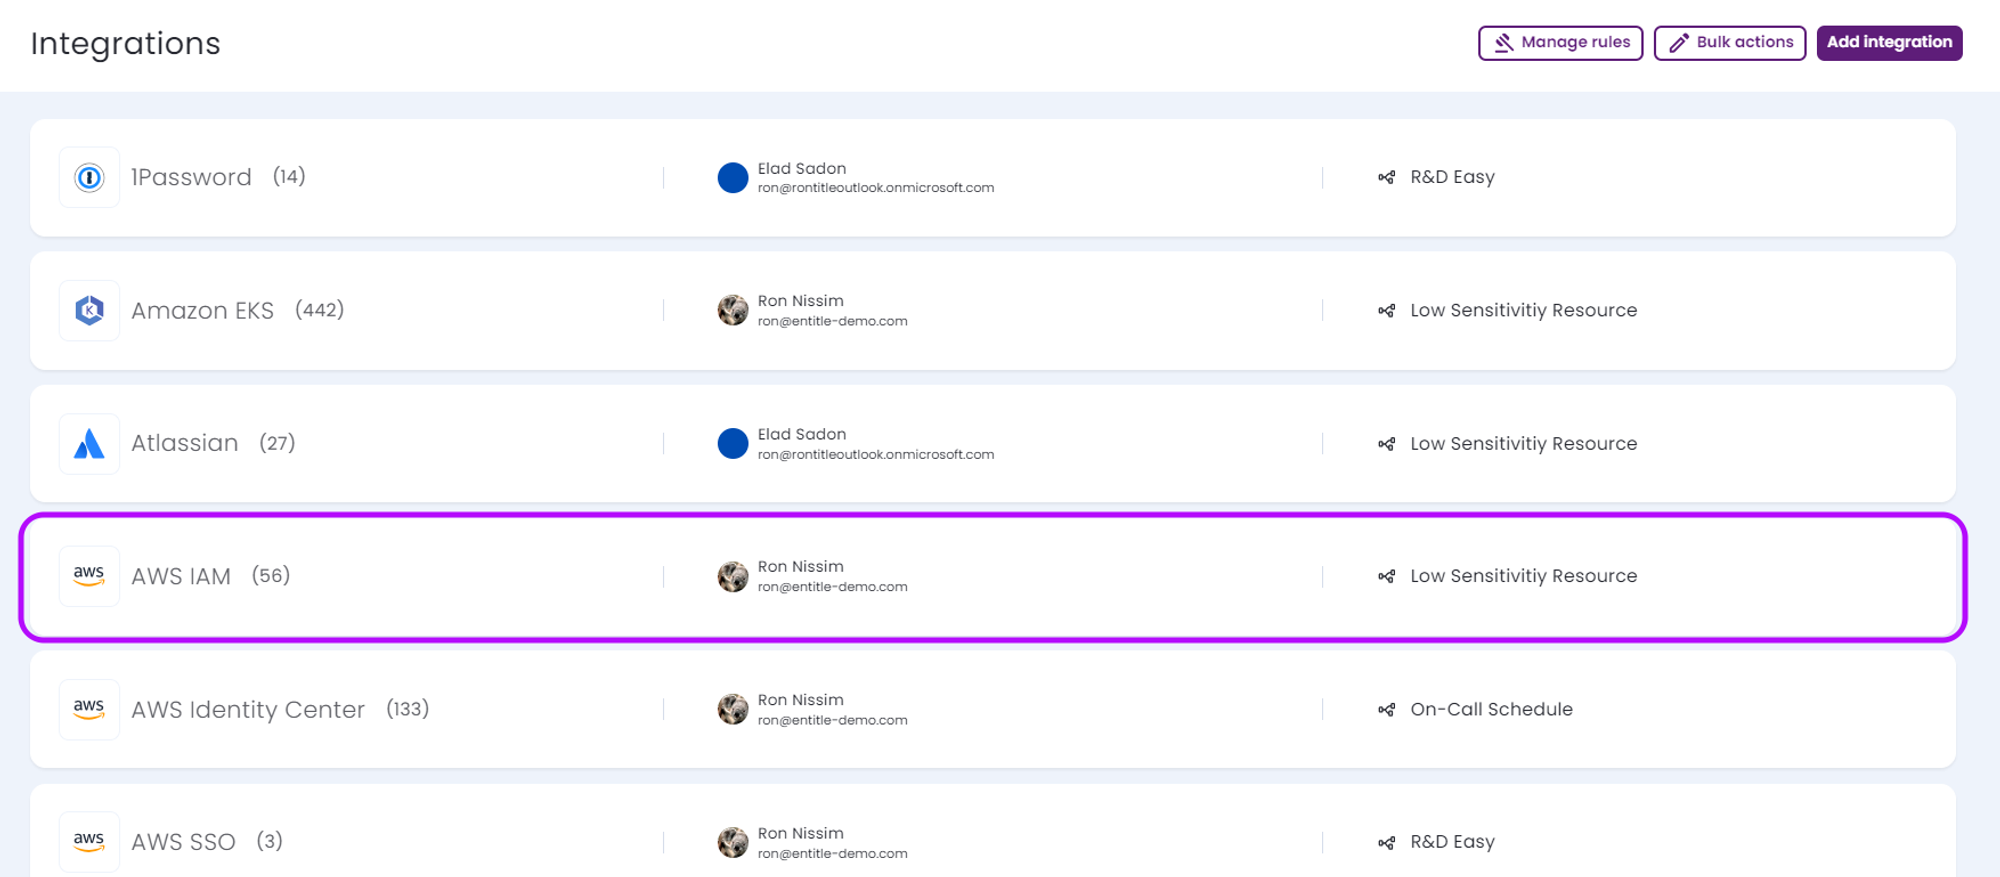
Log in to Entitle and navigate to the Integrations screen on the left-side menu.
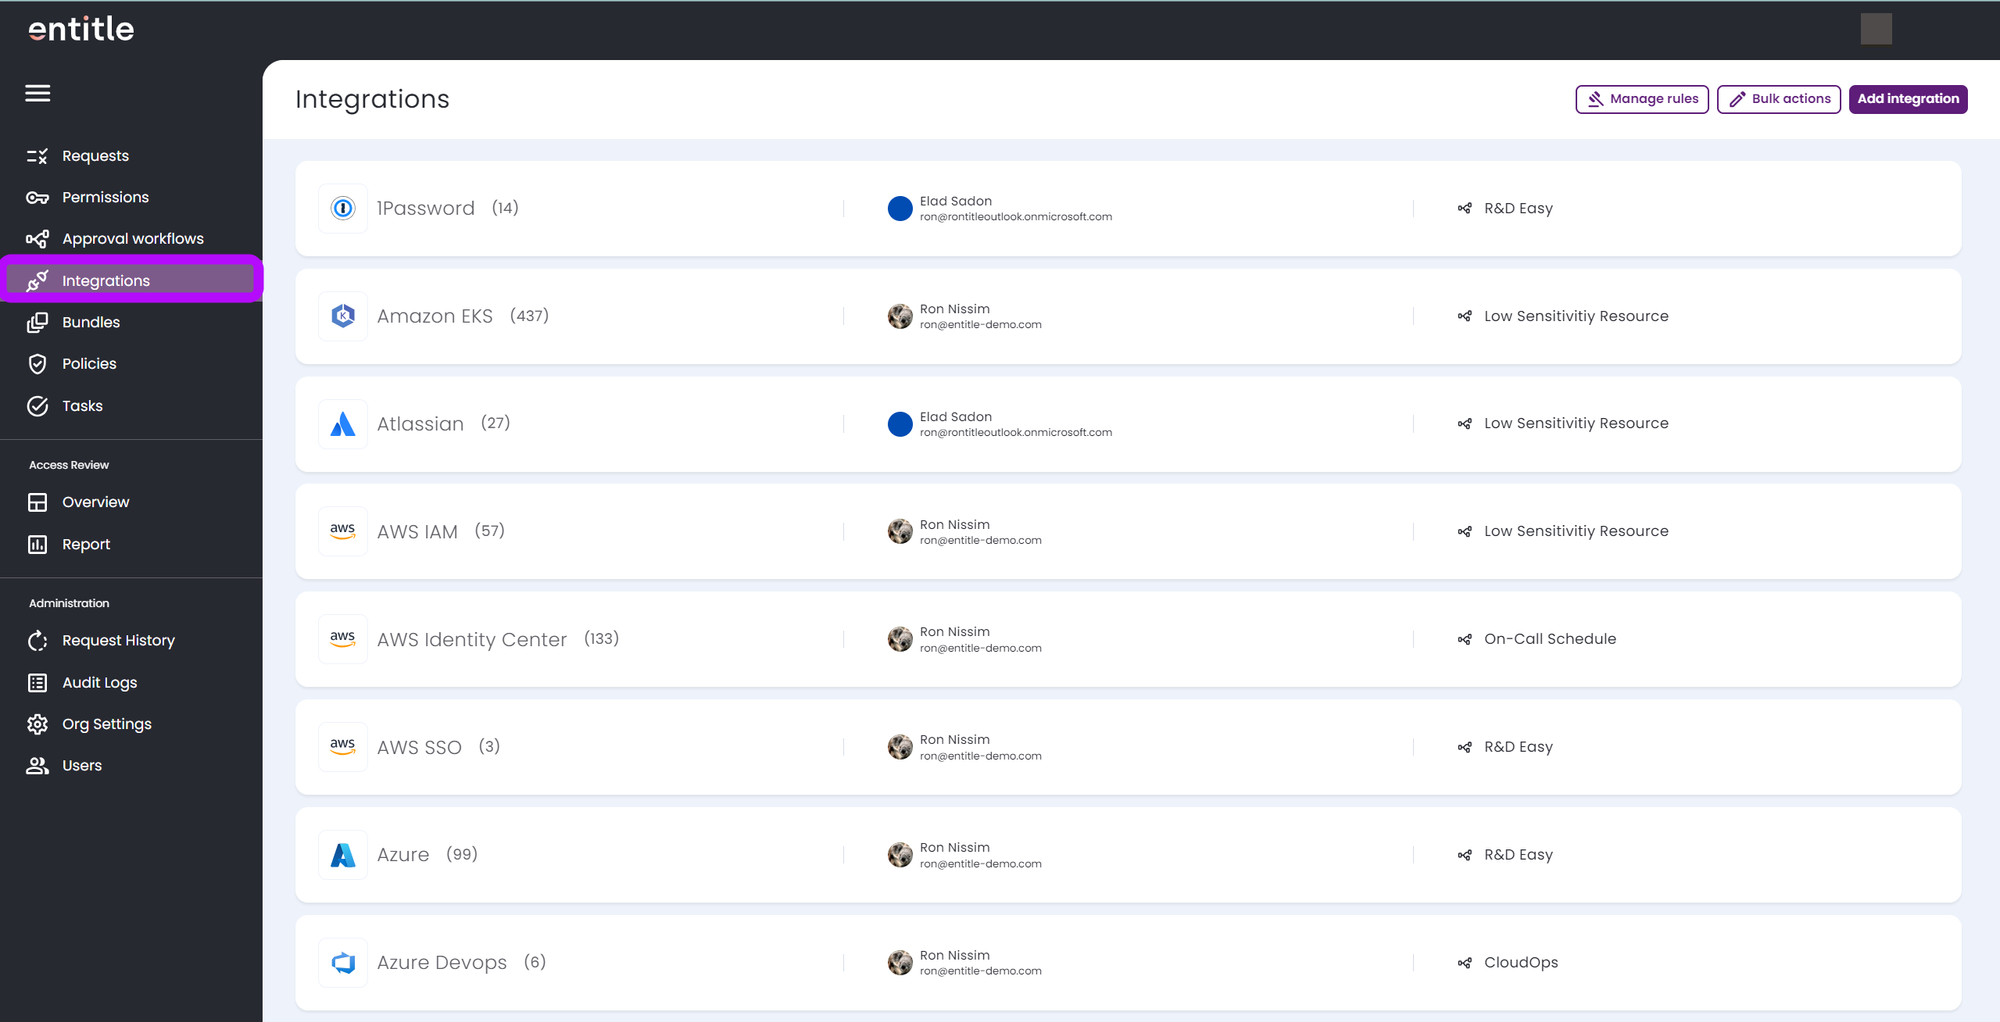
- At the top-right corner, click on the Manage Rules button. This is where you will be able to view and edit existing Rules, as well as set up new ones.

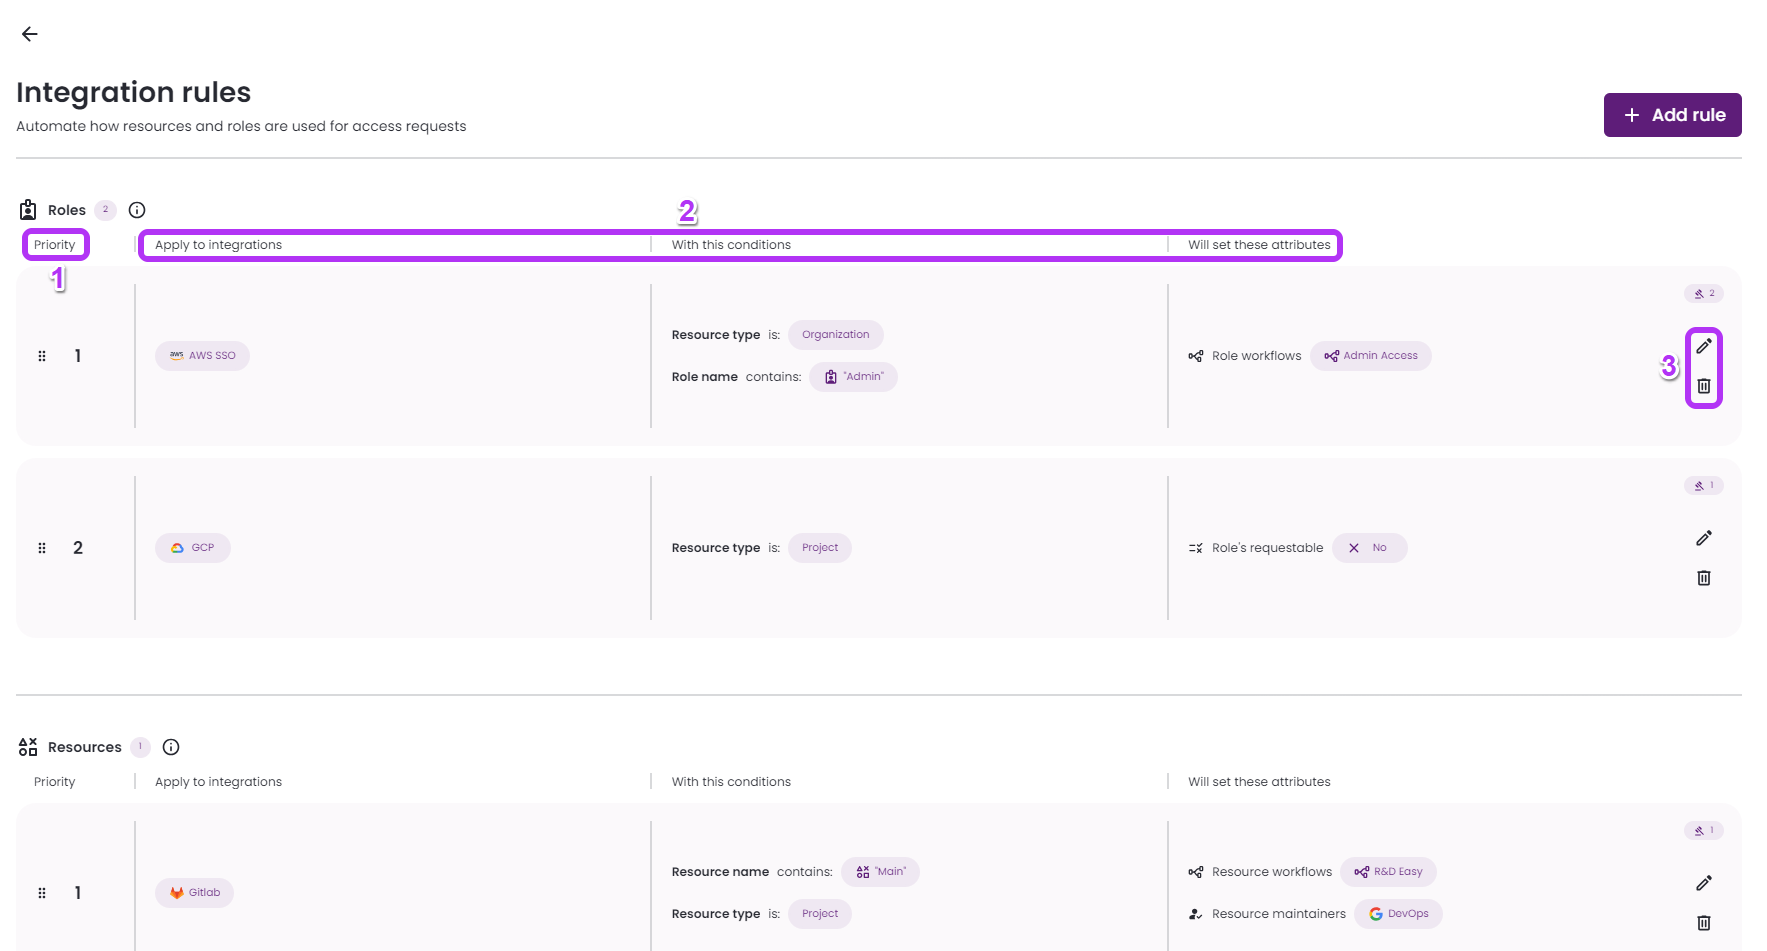
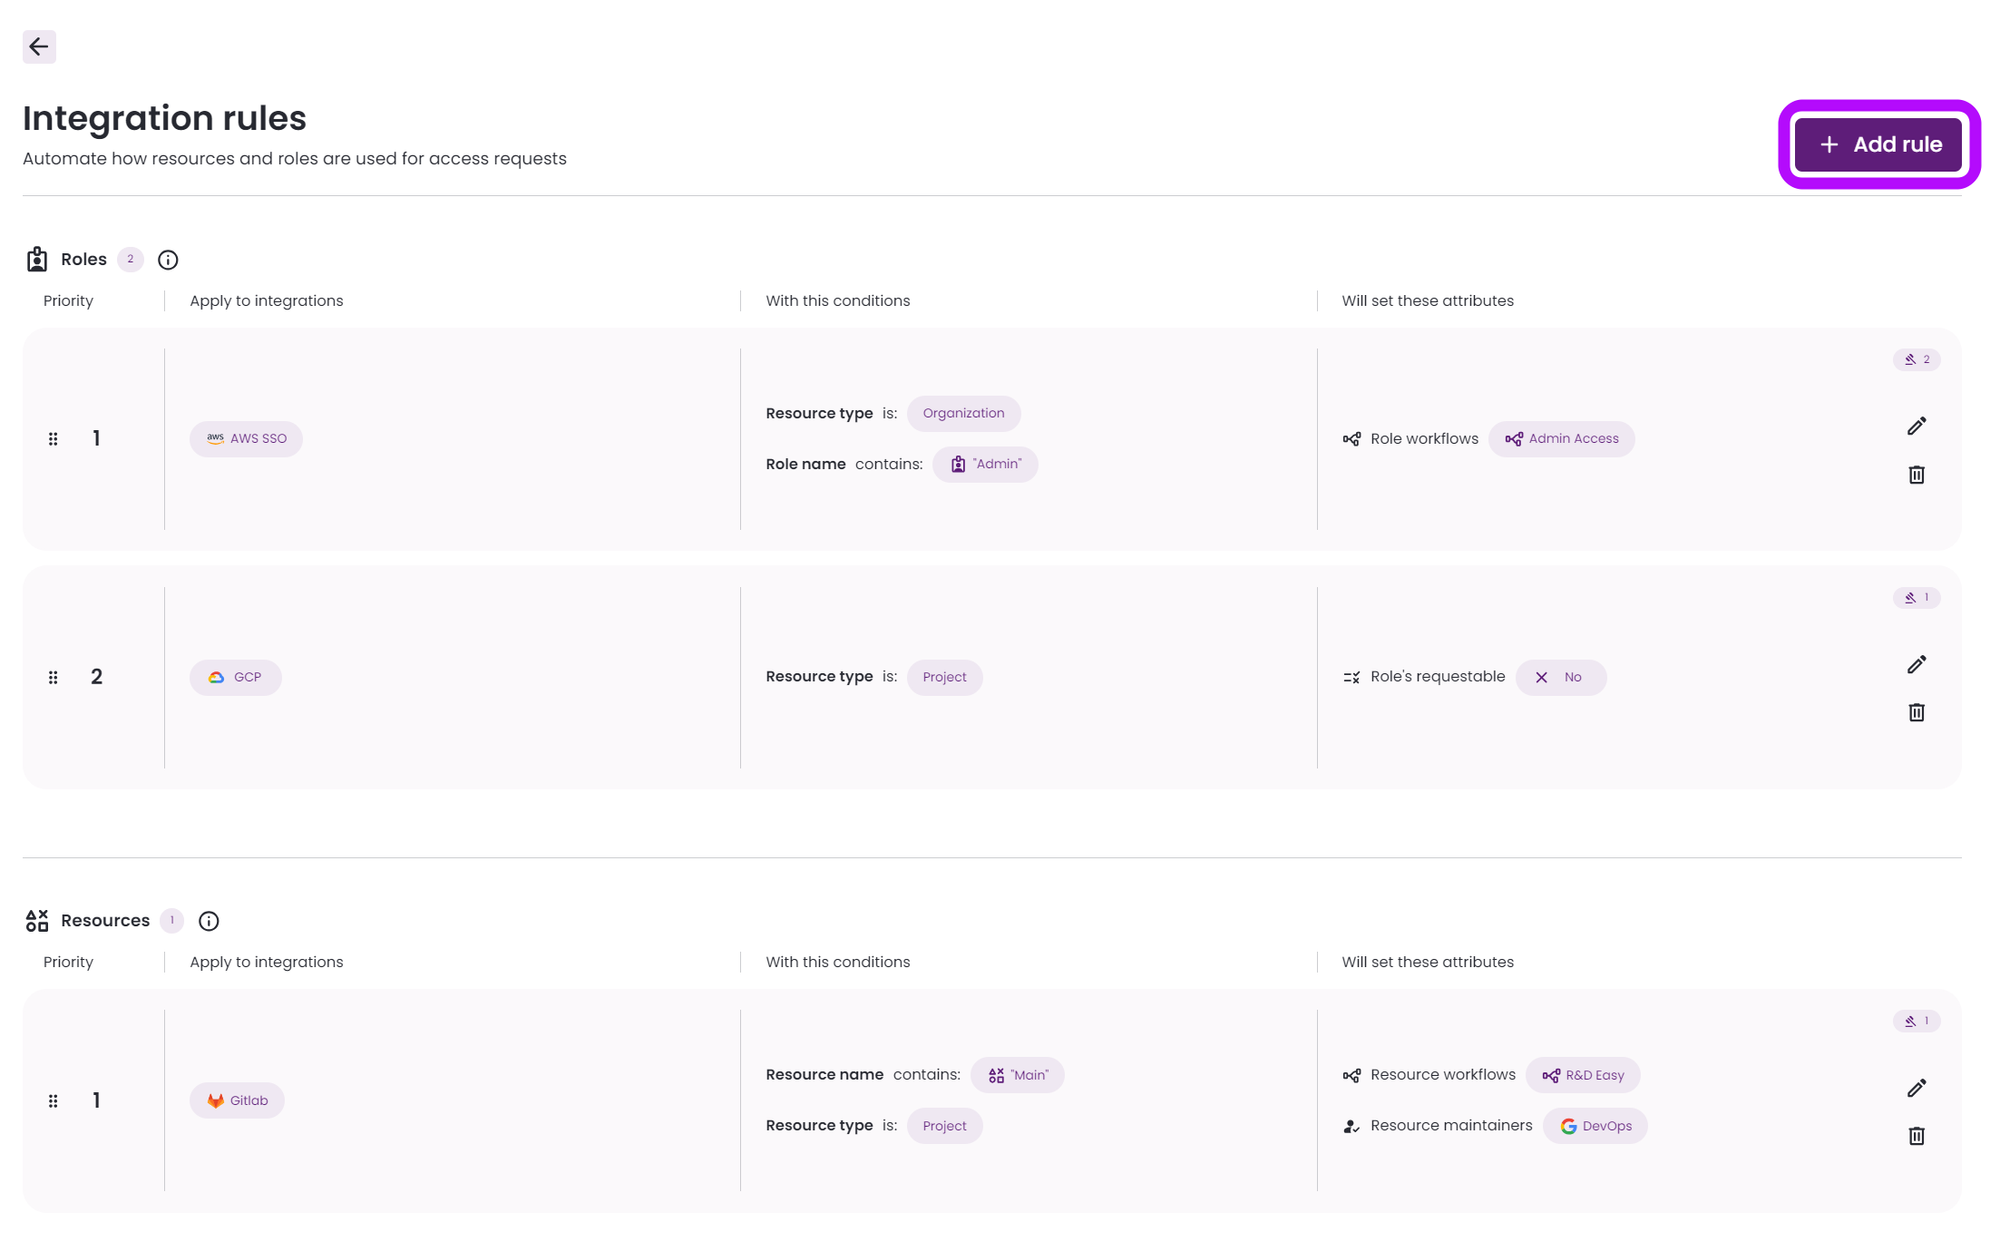
- The existing Rules are presented in a table setup and split into Rules that apply either to Roles or to Resources. Here is an explanation of the different columns (from left to right):
- Priority (Number 1) - You can choose which Rules are of higher or lower priority, by simply dragging your Rule of choice using the dots icon on the very left side of the relevant row.
- The next three columns represent the choices that you will make while setting up a new Rule, which will be explained later in this guide (Number 2):
- Apply to integrations column presents the integrations to which the Rule applies.
- With these conditions column presents the conditions chosen for the Rule.
- Will set these attributes column presents the attributes chosen for the resources or roles.
- Edit or delete Rules (Number 3): Click on the relevant icon on the far right side of the relevant row.
Set up a new Rule
-
Navigate to the Integrations screen on the left-side menu.
-
There are two different ways to set up a new Rule in Entitle:
-
Option 1: Click on the Manage Rules button at the top-right corner. Then, click the Add Rule button on the right to add a new Rule.
-
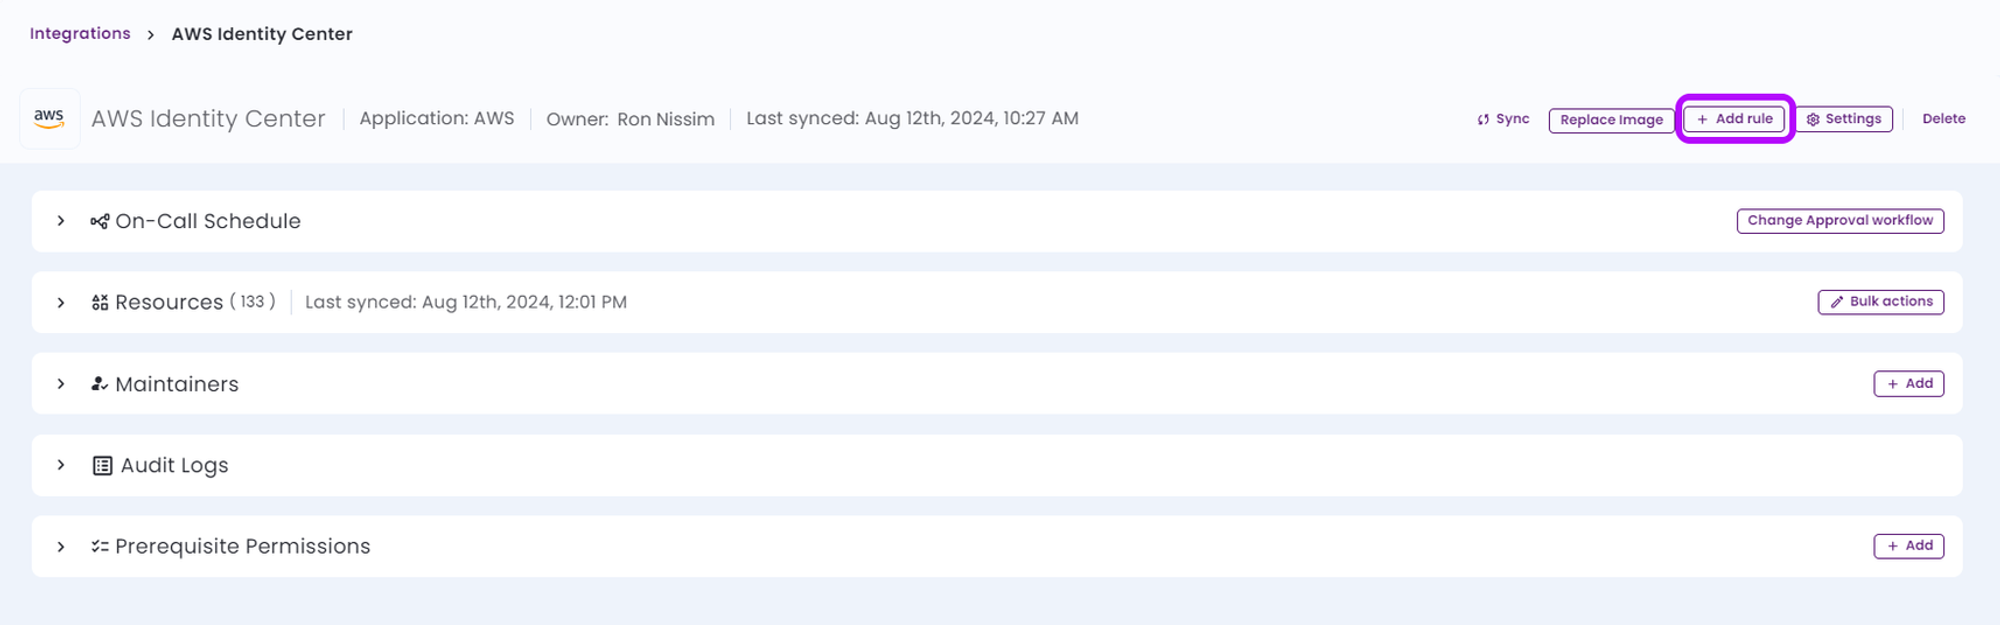
Option 2: Click on a specific integration from the Integrations main screen. Then, click the Add rule button in the top-right corner.
-
-
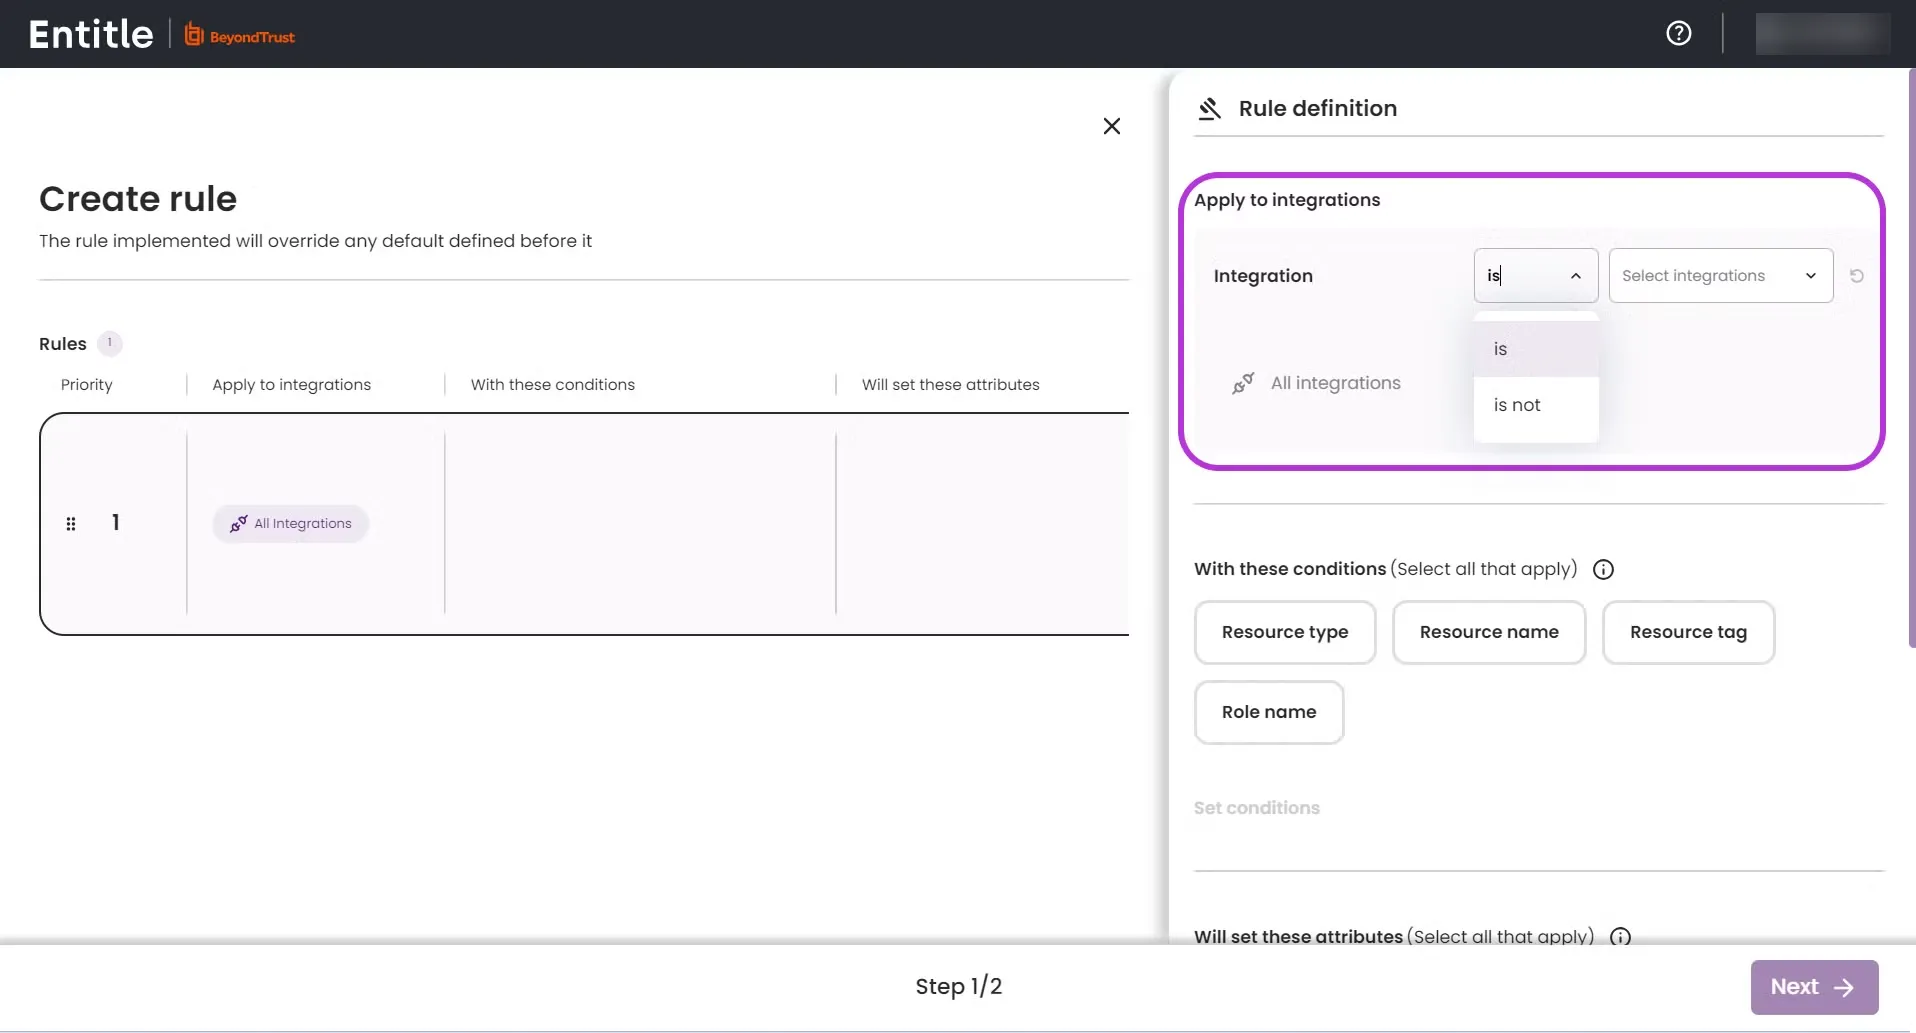
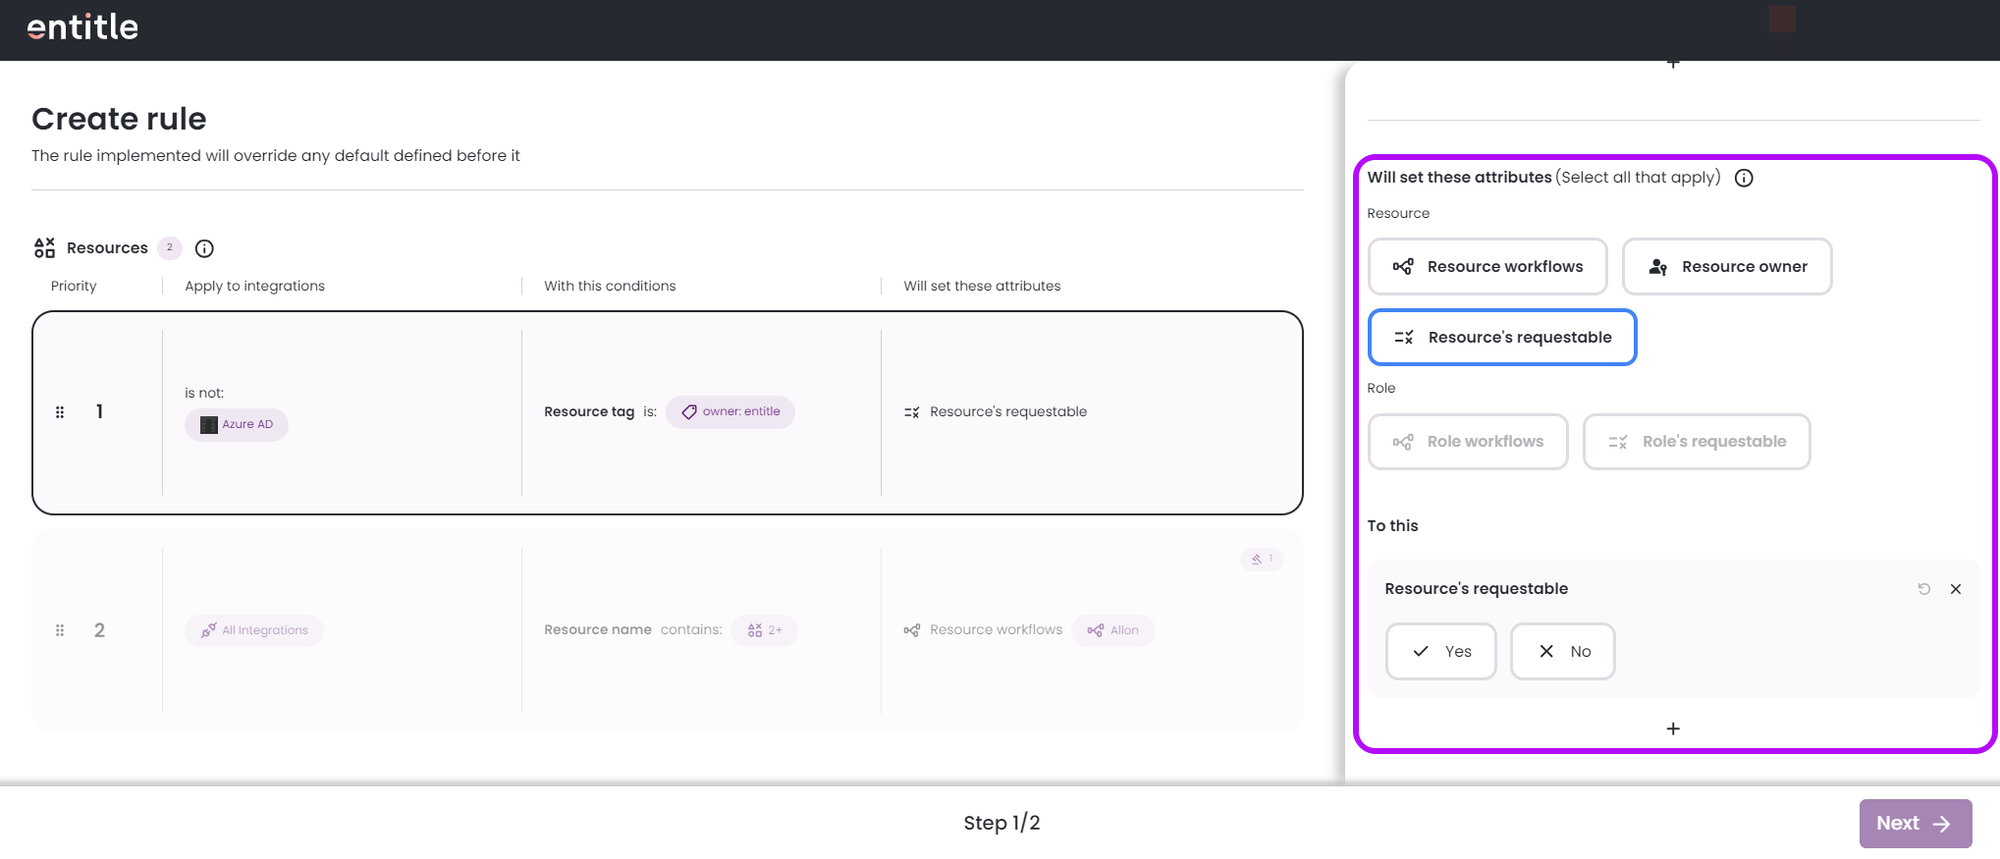
In the new Rule definition screen that appears on the right side, you will be able to define the Rule, its actions, and the criteria through which it will operate. There are three sections through which you will need to define your Rule:
-
Apply to - In the first criterion, select the integrations you wish to include or exclude for the Rule. Note that you can select as many integrations as you wish.
-
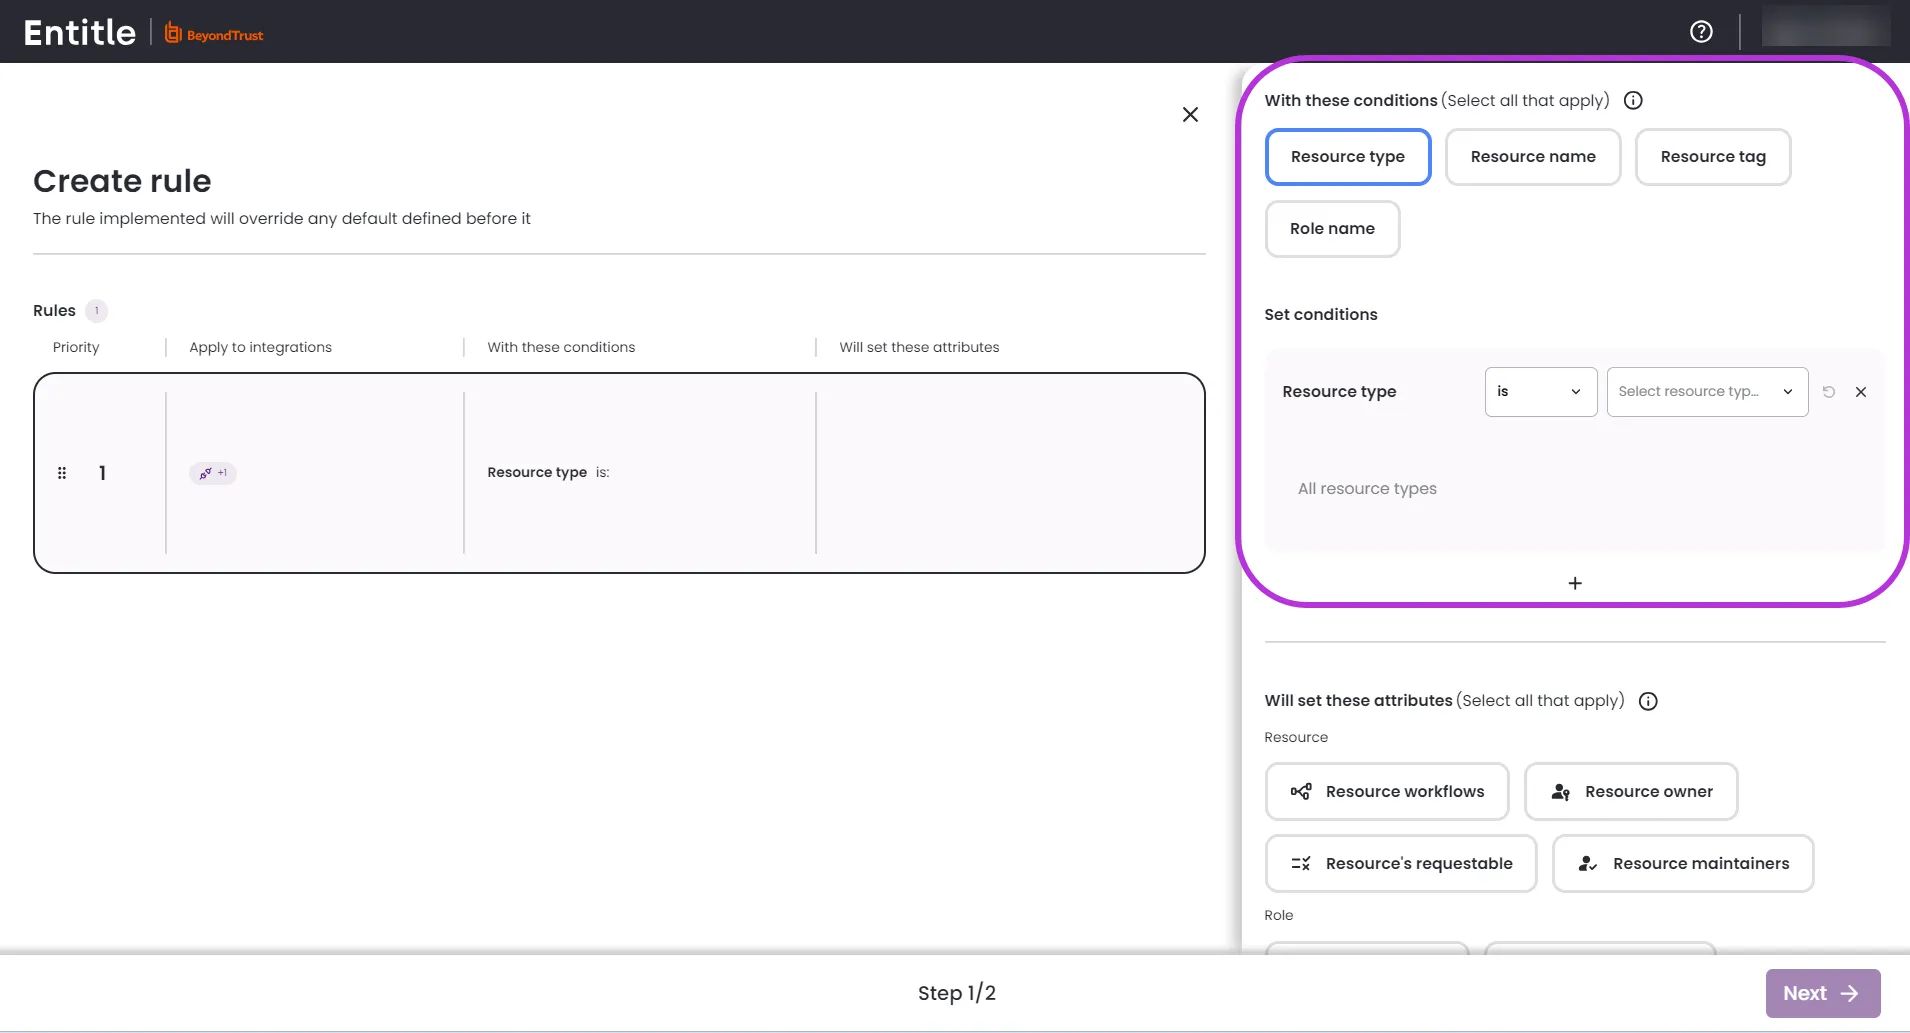
With these conditions - select any options from Resource type, Resource name, Resource tag, or Role name in the With these conditions section.
-
Set conditions - set the specific conditions for your selected choices. If you want to get rid of a selected choice, click on the X mark found on the right side of the condition.
Important information- If you specifically select any option from Resource name and/or Role name, click Enter once done, to properly set a condition on them.
- If you don’t add filters to any of your selected choices, it will apply changes to all of the choices of that type that exist.
-
Will set these attributes - once you define the conditions to which you define changes, in the third criterion, you will be able to define whether the Rule will set changes on the resource or role levels. In both options, you can select multiple choices.
-
On the Resource level, you can set the following attributes: Resource Workflows, Resource Owner, and whether the Resource is requestable.
-
On the Role level, you can set the following attributes: Role Workflows and whether the Role is requestable.
-
-
-
Once you’re done defining your Rule and its different conditions, click the Next button on the bottom-right corner.
-
You will need to decide whether to apply the Rule to Existing & New resources or Only new resources. In case you wish to go back to the previous step and redefine your Rule’s criteria, simply click the Back button.

-
Once done, click on the Apply to button in the bottom right corner, and a couple of minutes later the Rule will be applied. From now on, every new computer that will be added to the Active Directory will undergo this Rule.
-
Once you return to the main Manage Rules screen, you will be able to delete or edit the Rule you have just created, as well as existing ones.
Viewing changes
It might take up to a couple of minutes for the changes to be applied. In case you’re not seeing any changes, refresh your browser.
