Connect your applications and services to Entitle with Integrations | Entitle
In Entitle, a connection to an application whose access Entitle manages is called an Integration. Multiple Integrations can be created for the same application, each with its own configuration, owner, and access policies.
For example, an organization using GitHub might set up two separate Integrations: one for their engineering repositories, configured with a strict multi-step approval workflow and owned by the Security team, and another for their marketing team's repositories, with a simpler single-approver workflow owned by the Marketing manager. Both connect to the same GitHub application, but each Integration governs access independently.
When an integration is set up, Entitle automatically discovers and syncs existing resources, roles, accounts, and permissions into its database.
Entitle performs a full sync (resources, roles, accounts, and permissions) from an integration once a day. Resources and roles are also synced every hour.
Prerequisites
- An Entitle admin user.
- Follow the instructions in the relevant guide under Integrations to connect the required application or service to Entitle.
- Create an approval workflow to serve as the default workflow for the integration.
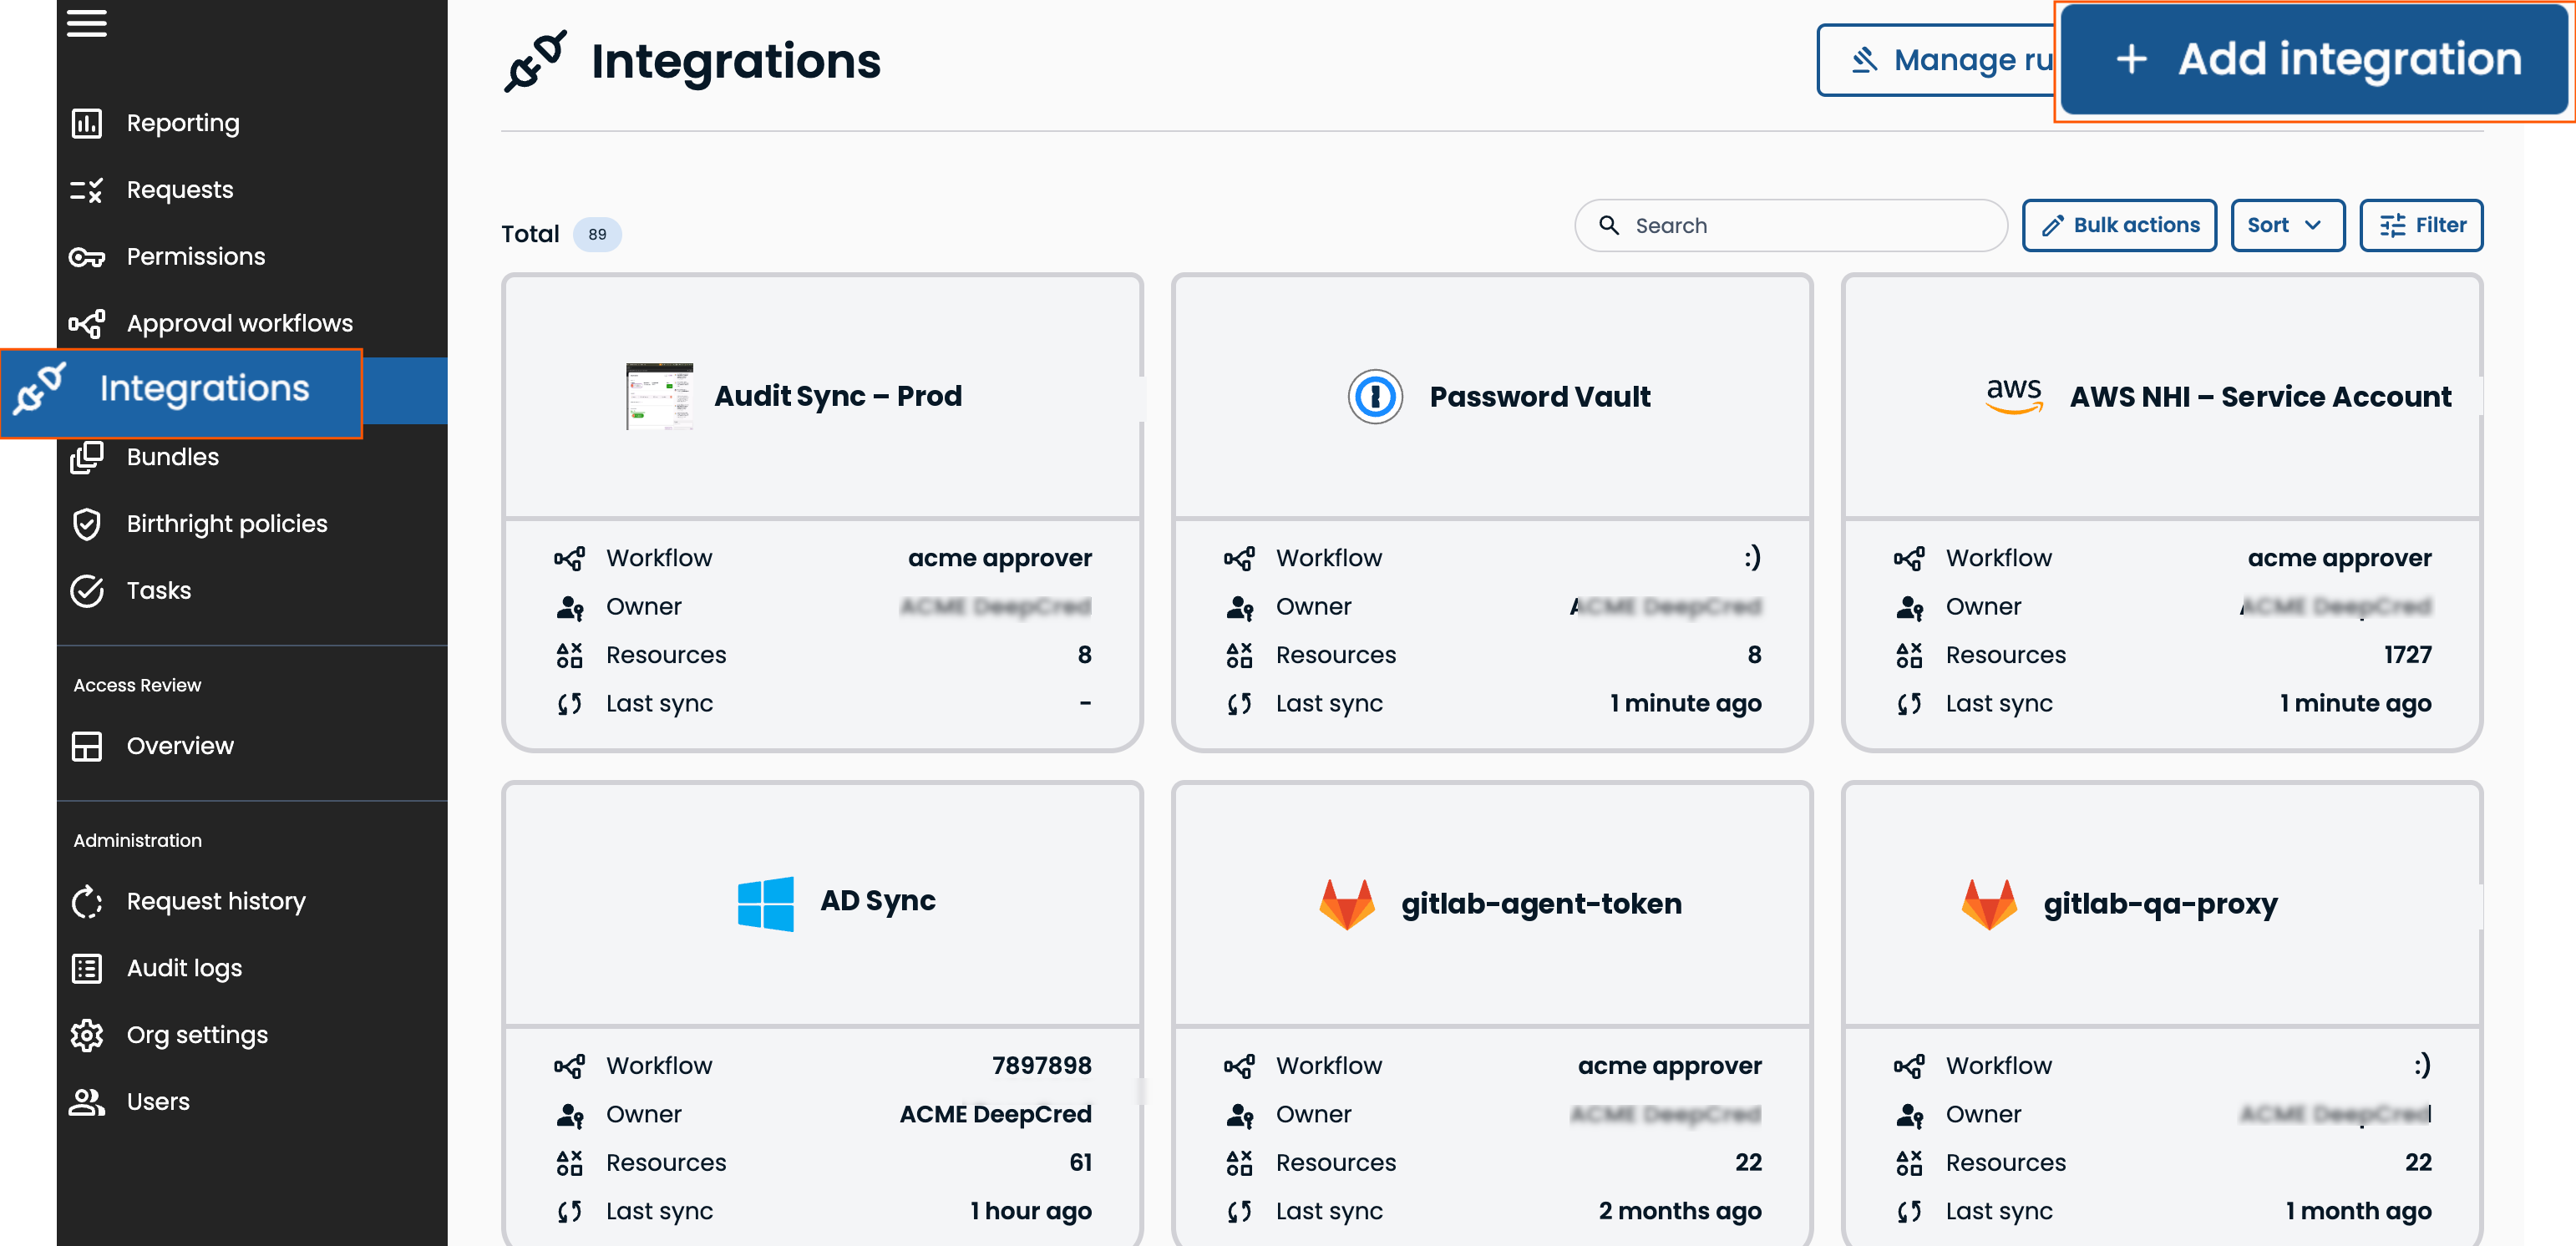
Add an integration
-
In Entitle, navigate to Integrations, then click Add integration.
-
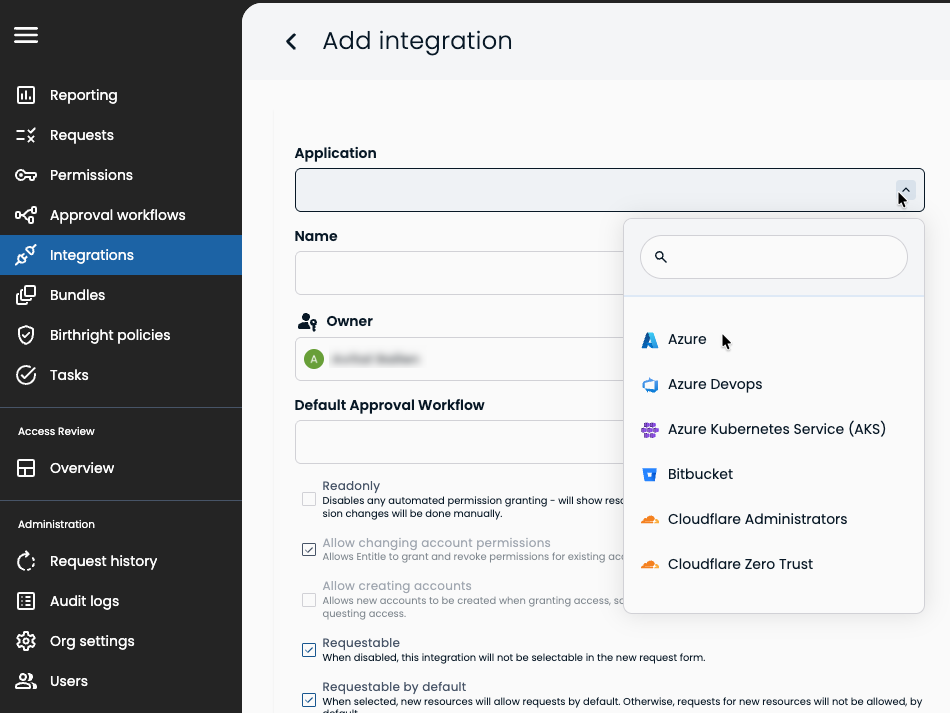
Select the application or service you want to integrate. If it doesn't appear in the list, follow the relevant guide under Integrations to connect it to Entitle.
-
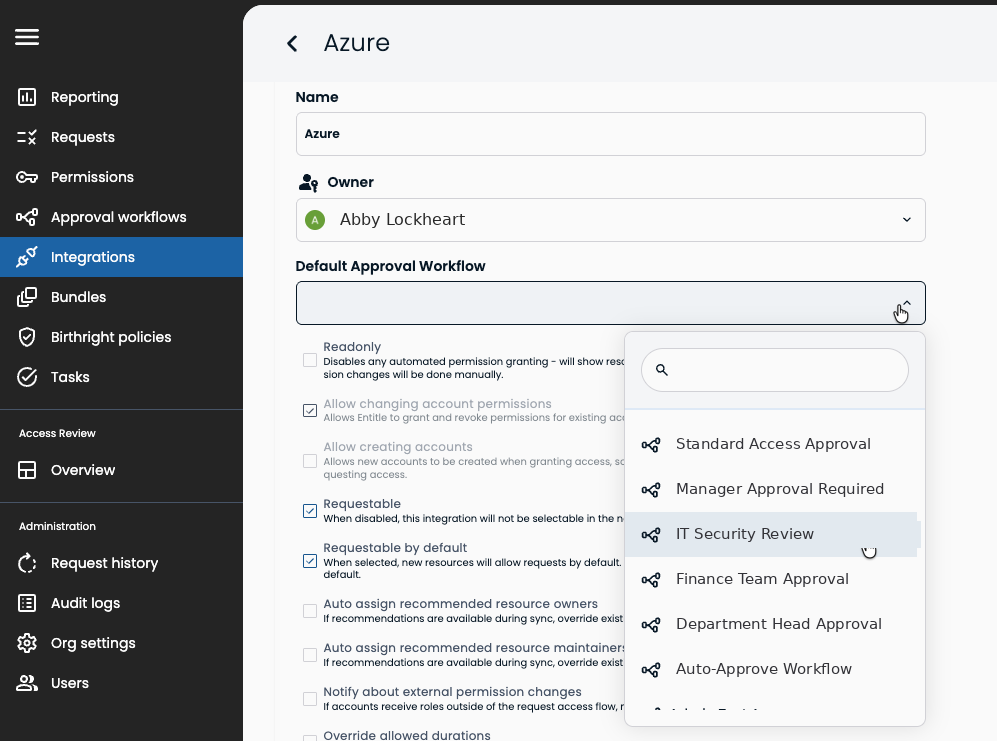
Enter the integration details:
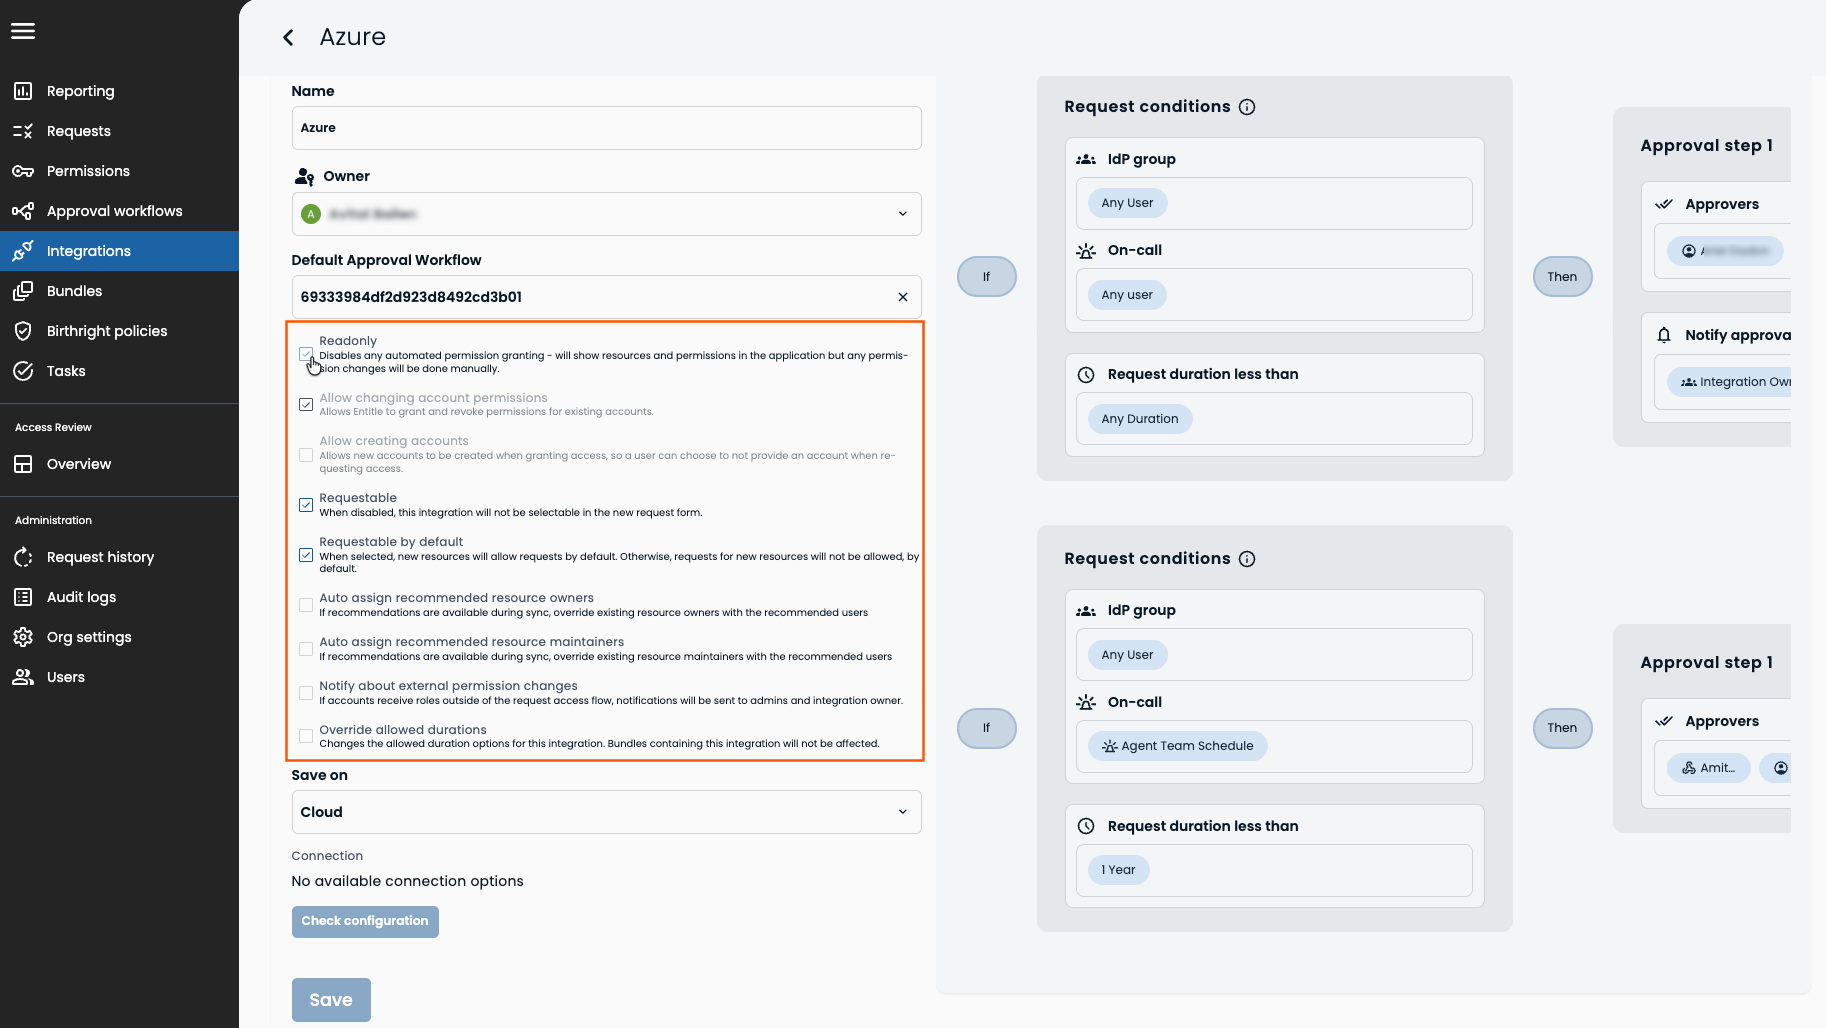
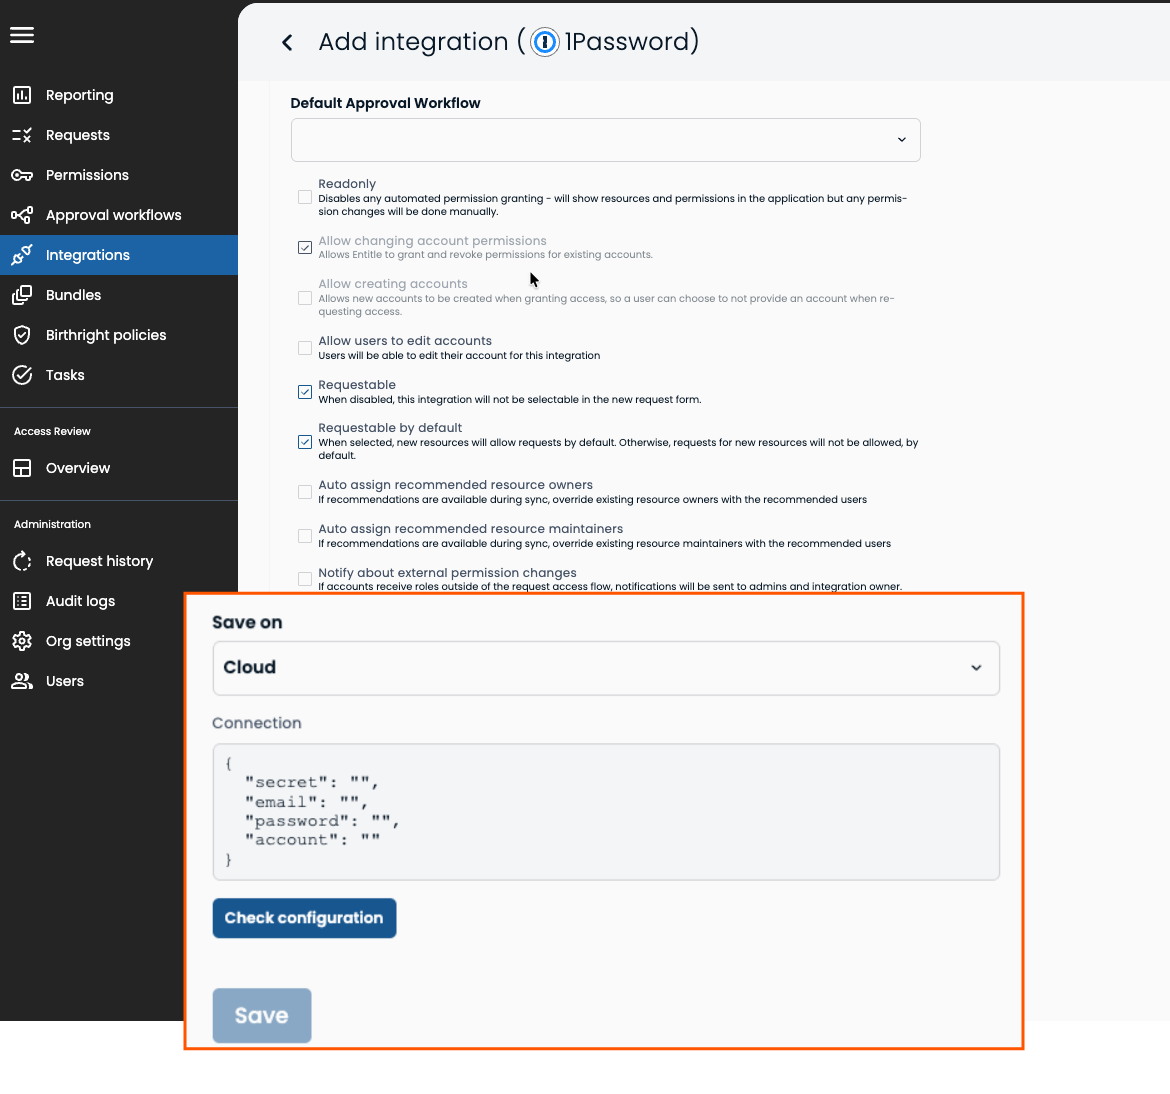
Field Description Name Enter a display name for the integration. Owner Select the Entitle user who is responsible for managing this integration. Default Approval Workflow Select the approval workflow that applies to access requests for this integration, if no other workflows apply.
-
Select integration behavior options:
Option Behavior Readonly Select to disable any automated permission granting - will show resources and permissions in the application but any permission changes will be done manually. Allow changing account permissions Select to allow Entitle to grant and revoke permissions. When deselected, Entitle can track but not modify permissions. Allow creating accounts Allows new accounts to be created when granting access, so a user can choose to not provide an account when requesting access. Allow users to edit accounts Users will be able to edit their account for this integration. Requestable Select to allow end-users to request access for resources in this integration. When deselected, this integration is not available under New request. Requestable by default When selected, new resources will allow requests by default. Otherwise, requests for new resources will not be allowed, by default. Auto assign recommended resource owners If recommendations are available during sync, override existing resource owners with the recommended users Auto assign recommended resource maintainers If recommendations are available during sync, override existing resource maintainers with the recommended users Notify about external permission changes If accounts receive roles outside of the request access flow, notifications will be sent to admins and integration owner. Override allowed durations Changes the allowed duration options for this integration. Bundles containing this integration will not be affected.
-
Select the location to save the integration connection settings under Save on. Under Connection, populate the JSON configuration. Click Check configuration to test the integration. Click Save.
Update an integration
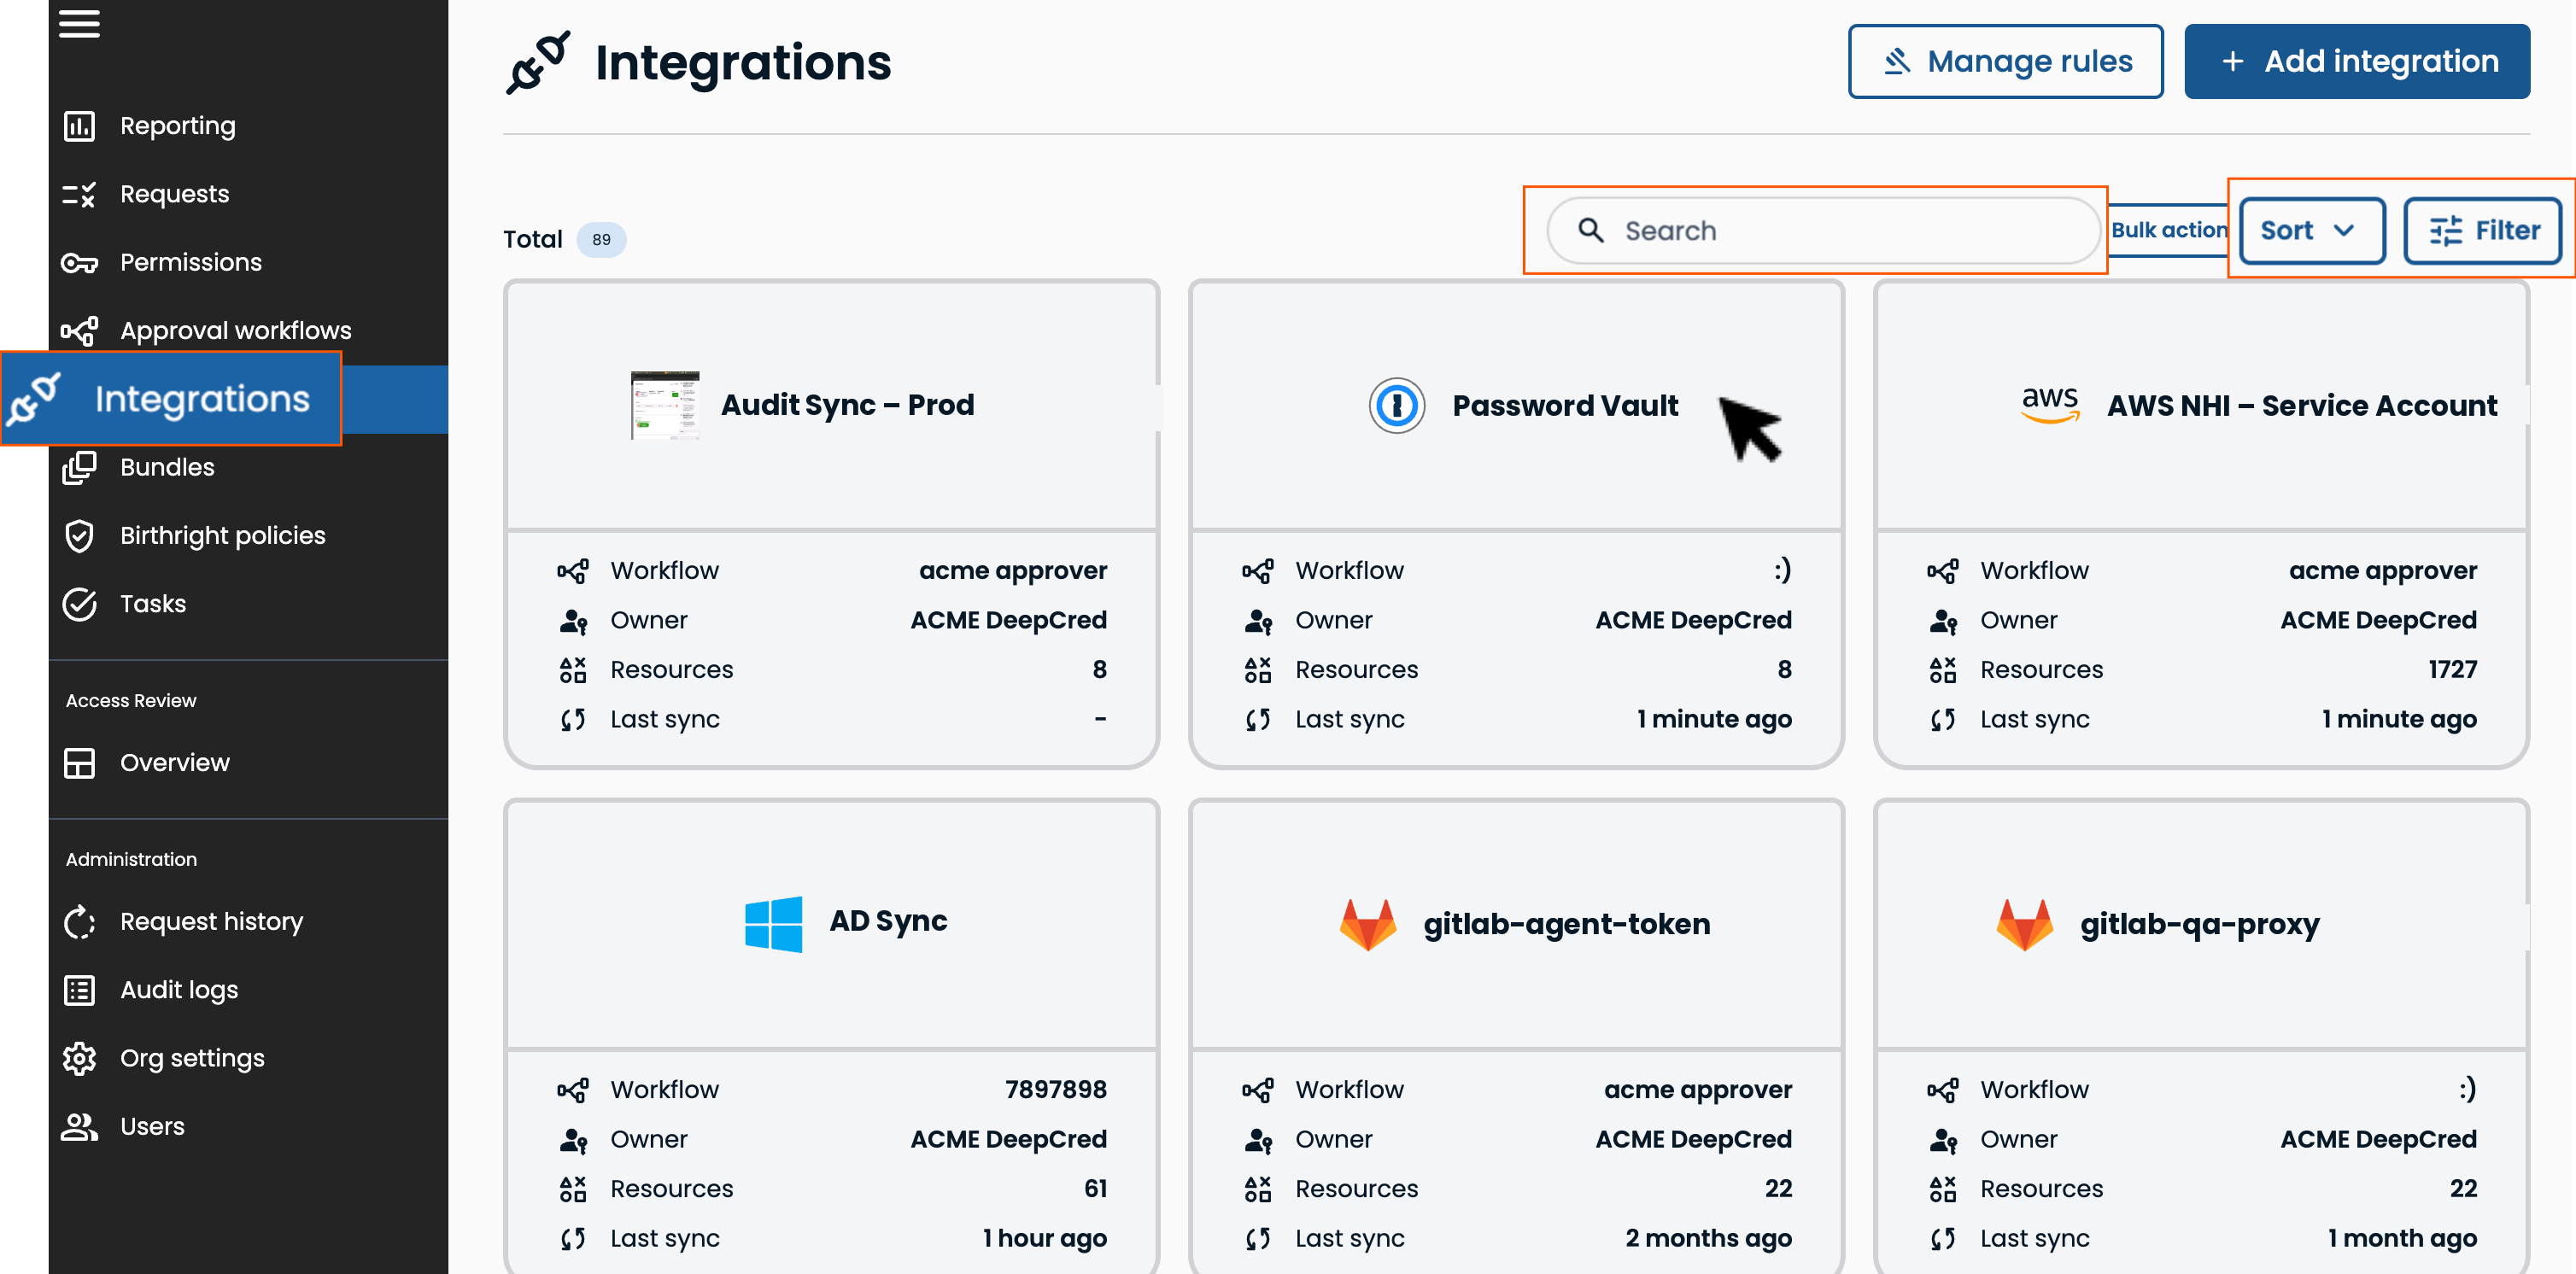
In Entitle, navigate to Integrations and click on an integration. You can filter, sort, and search by integration name, owner, or workflow.
| To... | Do this... |
|---|---|
| Change the integration owner | Click Settings > select a different owner under Owner>click Save. |
| Change integration behavior options | Click Settings, check or uncheck any of the options, then click Save. |
| Adjust the integration JSON | Click Settings> Setup new Connection, complete the JSON, then click Save |
| Revert back to the original integration logo. | Click Settings > Restore logo default > Save |
| Delete an integration | Click Settings > Restore logo default > Save. |
| Change the default approval workflow | Click on Change approval workflow, then select a different workflow. |
| Add an integration maintainers | Click Add next to Maintainers then select an identity. |
| Delete an integration maintainer | Expand Maintainers then click on the trash icon. |
Delete an integration
- In Entitle, navigate to Integrations and click on an integration. You can filter, sort, and search by integration name, owner, or workflow.
- Click on Setting > Delete integration.
Integration troubleshooting
Integration sync time varies based on the number of resources, roles, and entitlements in the third-party system.
- In Entitle, navigate to Integrations.
- Confirm the date/time of the Last sync on the integration card. This indicates the last time Entitle pulled all resources, roles, and entitlements from the third-party system.
- Select the integration and check the Last sync indicator next to Resources. This indicates the last time Entitle pulled the resources from the third-party system.
- Expand Audit logs to review integration activity and errors.
Updated 7 days ago
