Entra ID (Azure Active Directory) IdP | Entitle
Overview
Entra ID (Azure Active Directory) IdP Connection enables you to use managed domain services – such as Windows Domain Join, group policy, LDAP, and Kerberos authentication – without having to deploy, manage, or patch domain controllers.
Entitle populates the following resource types in the Entra ID Directory connection:
- Groups
- Users
- Managers (optional)
This page will provide you with instructions on how to integrate Entitle and Entra ID as an IdP, both for populating the above resource types as well as for creating IdP-initiated login flows to the Entitle web app.
General guidelines
You can set up Entra ID as an Identity Provider (IdP), the source of truth for Entitle users, groups, and organizational structure, using the instructions below.
In case you have already integrated Entra ID with Entitle using the Azure AD guide, you can use the same Entra application configuration and continue to the Entitle setup section.
To integrate your Entra ID with Entitle, you will need to:
- Create an application on Entra ID, and extract Client and tenant IDs.
- Create a secret, and extract its value.
- Provide Entitle with adequate permissions for the application.
Stage 1: Create an application
-
Go to the Microsoft Azure portal.
-
Click on Microsoft Entra ID.

-
Click on the App registrations tab in the left-side menu.

-
Then, click on New registration.

-
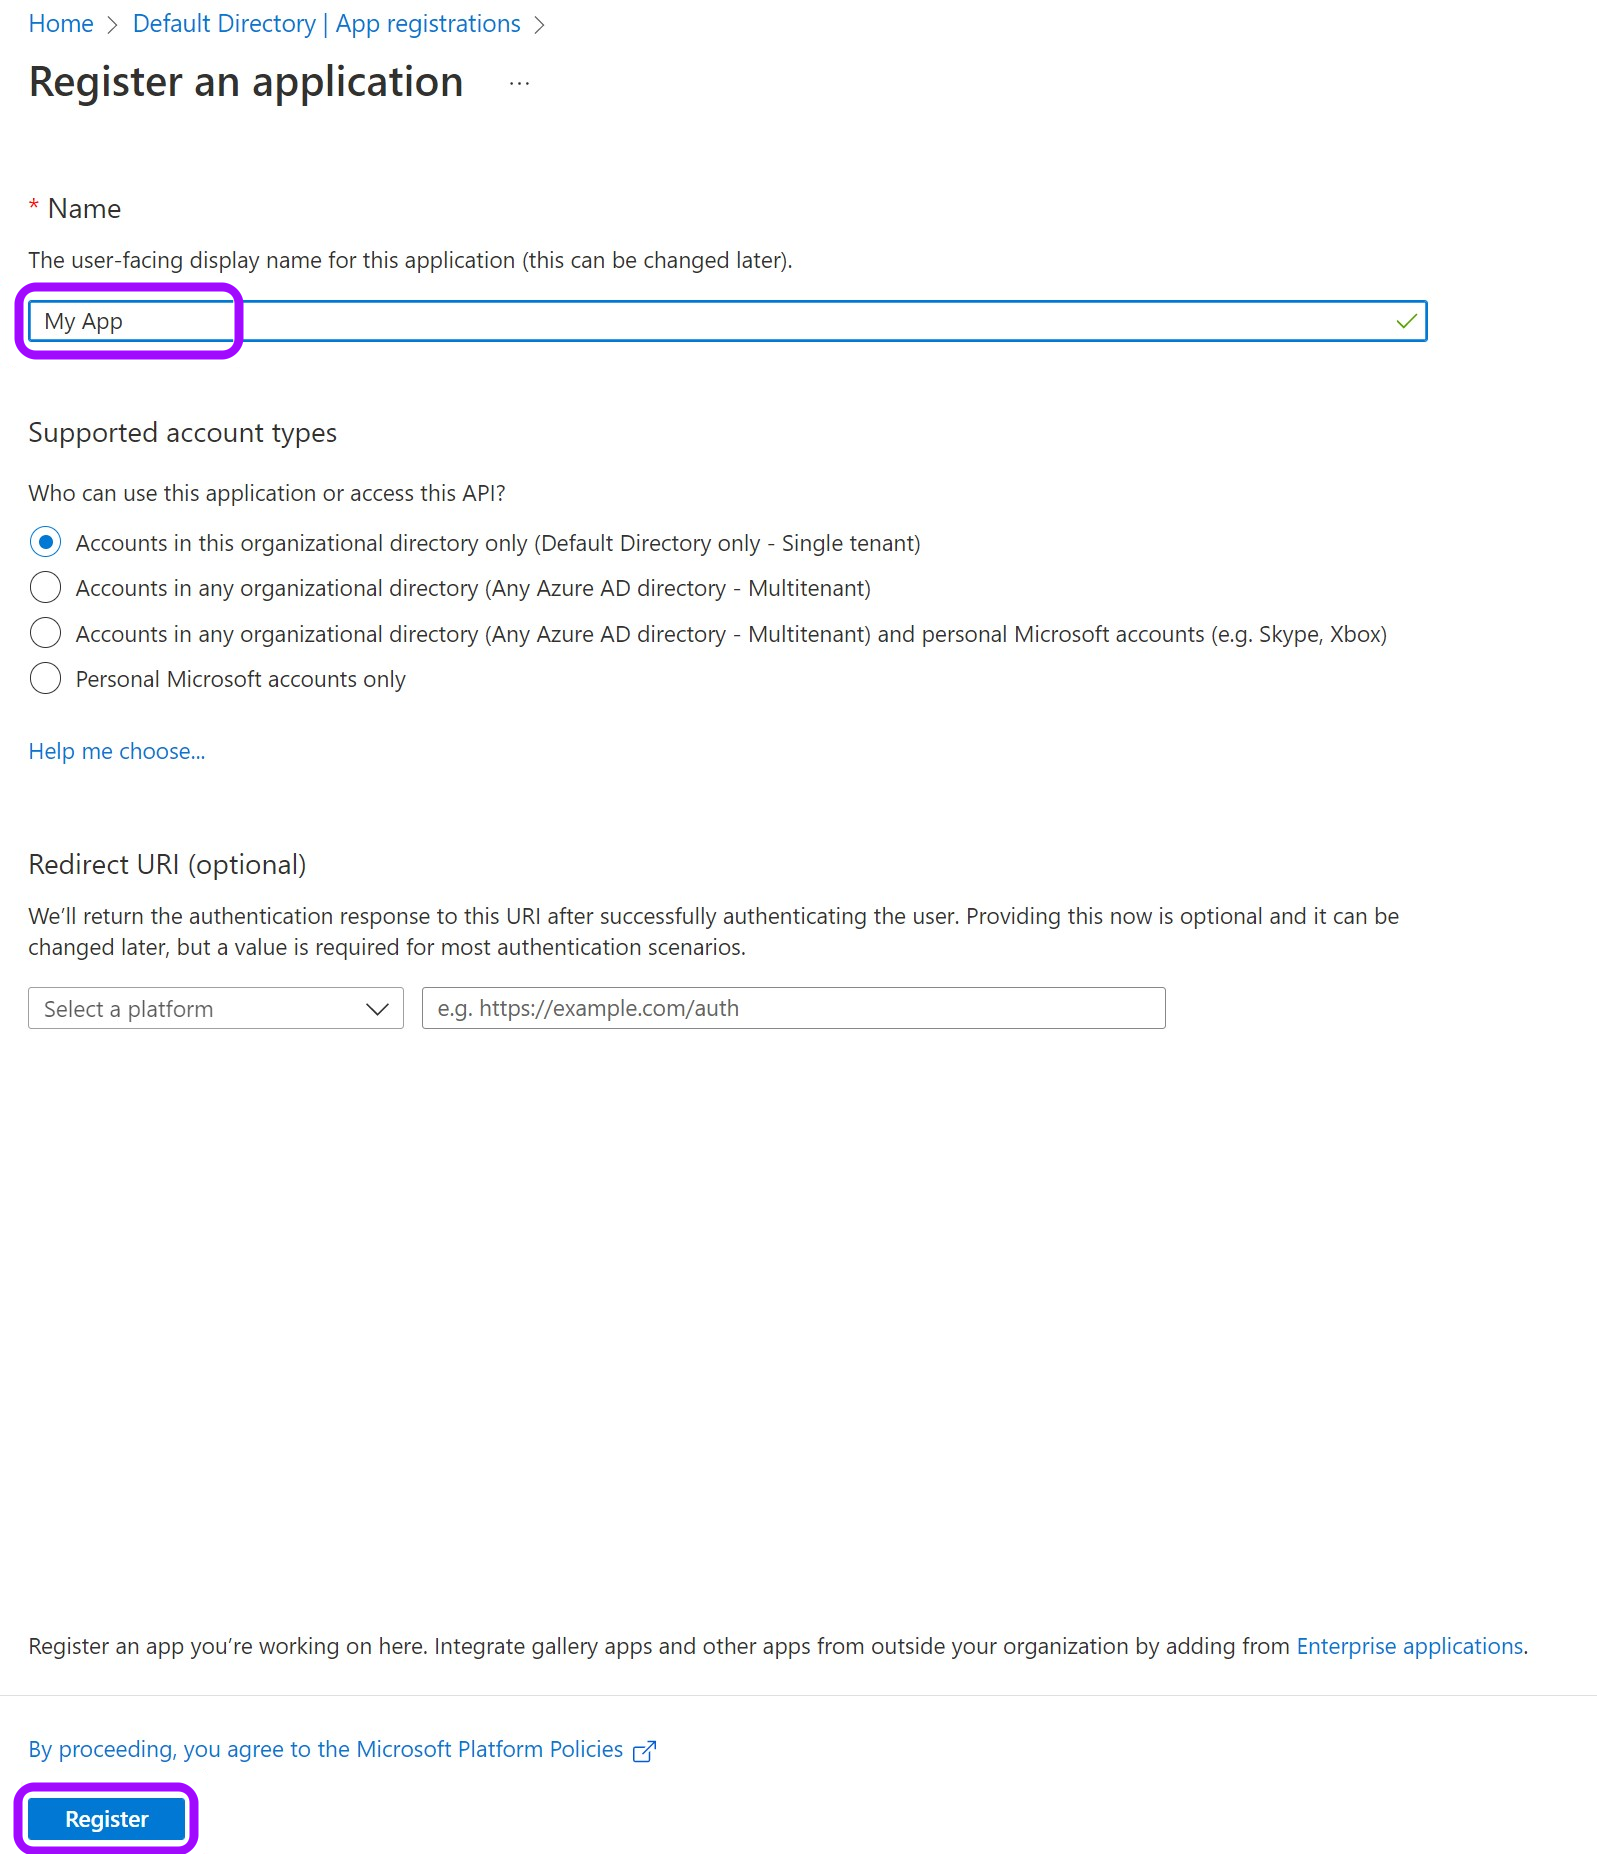
Give your app a Name and leave the rest as is. Then, click on Register.
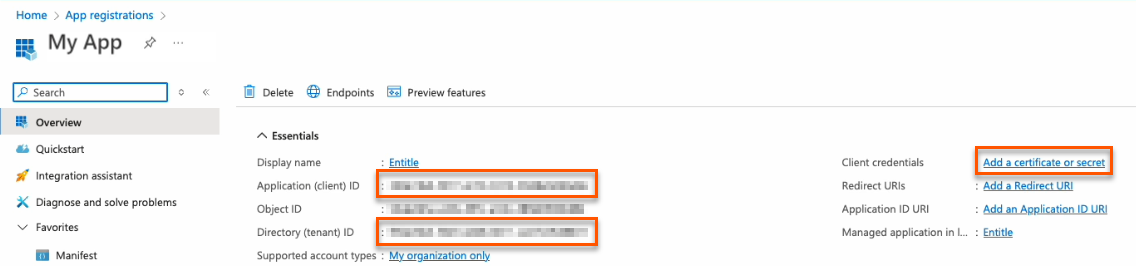
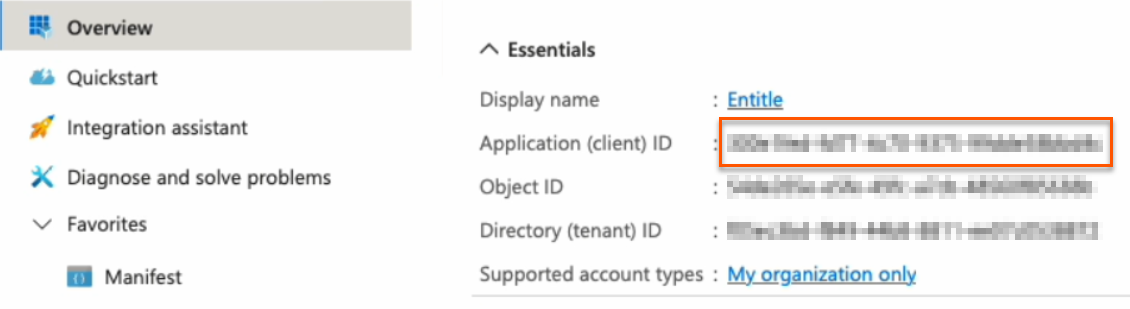
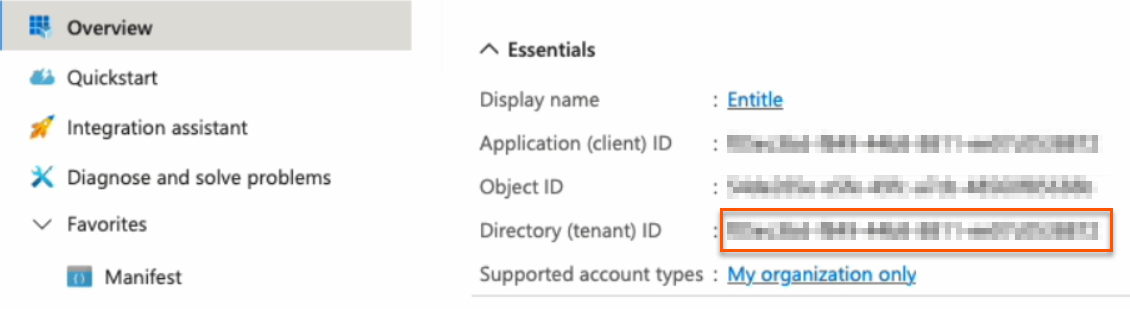
- Keep your Application (client) ID and Directory (tenant) ID for later. Then, click on Add a certificate or secret on the right side.
Choose your authentication methodYou should now choose whether to create a client secret or federated credentials.
- Client secret: The simplest option. Create a secret through the Azure portal user interface. This method works for most cases and takes only a few minutes to set up.
- Federated credentials: A more advanced option that uses Azure identity federation to avoid long-lived secrets and strengthen your security posture.
- Support OIDC-based federation for Azure applications.
- Work alongside existing client-secret methods without affecting current setups.
- Enable access to common Azure resources through role assignments.
- Prevent cross-tenant access by isolating each customer's service principal.
- Automatically remove temporary onboarding credentials after setup.
Federated credentials are supported only for integrations saved on Entitle's Cloud or on an on-premises agent hosted in Amazon Elastic Kubernetes Service (EKS).
Create a client secret
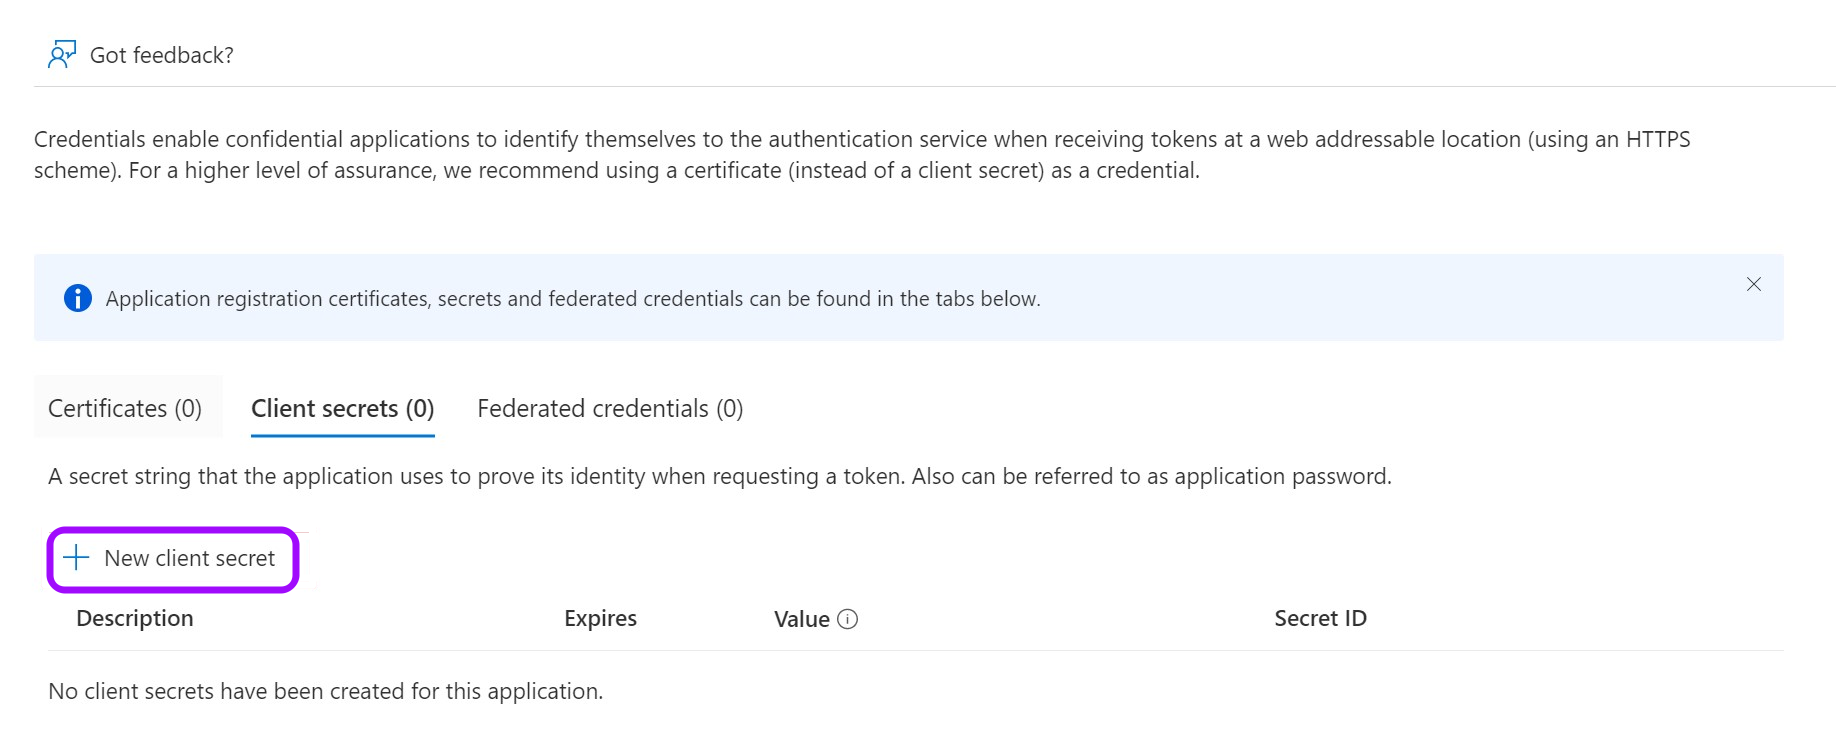
7. Click on New client secret.
-
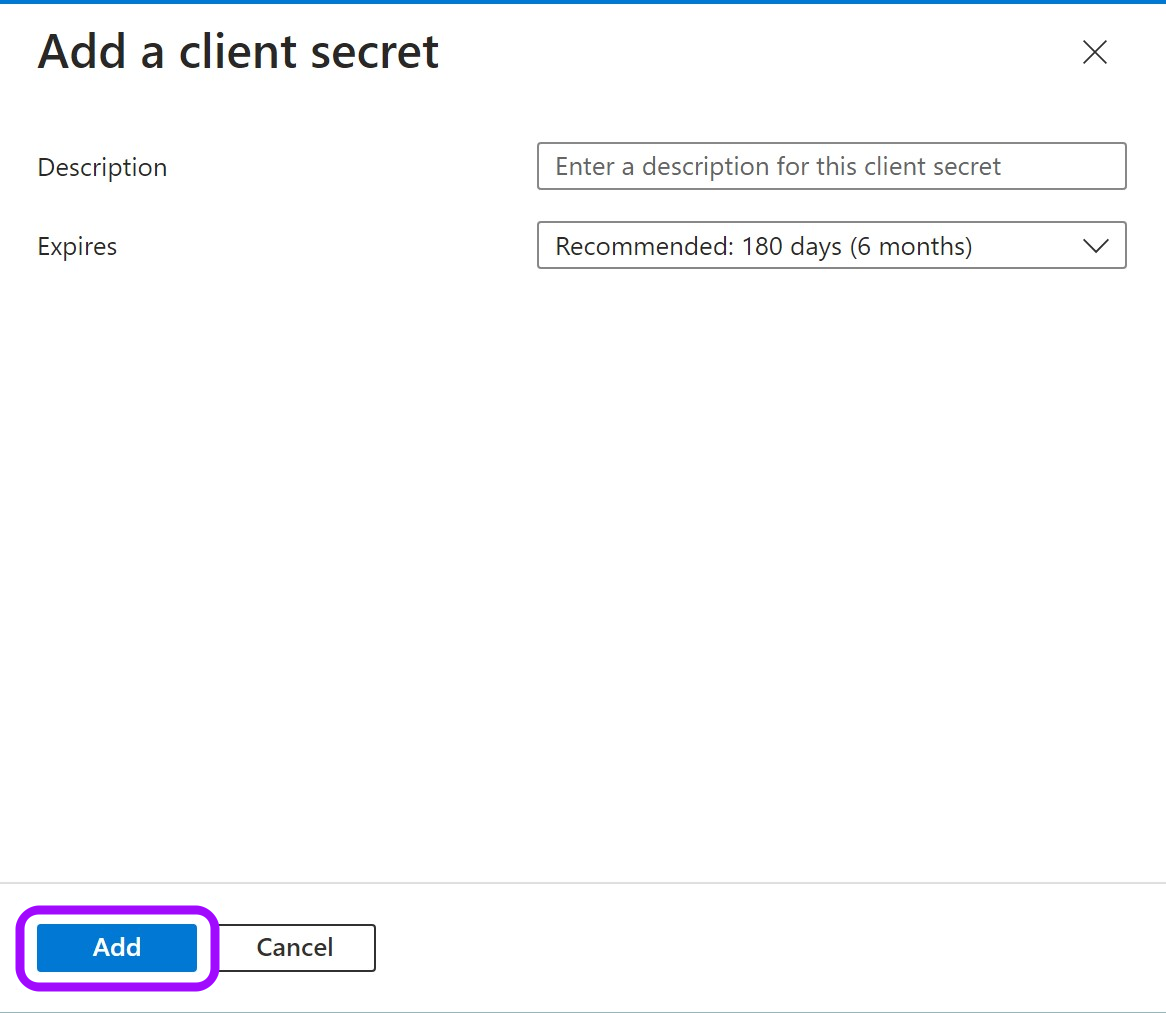
In the pop-up window, choose a Description that you will remember and an expiration time and click Add.
-
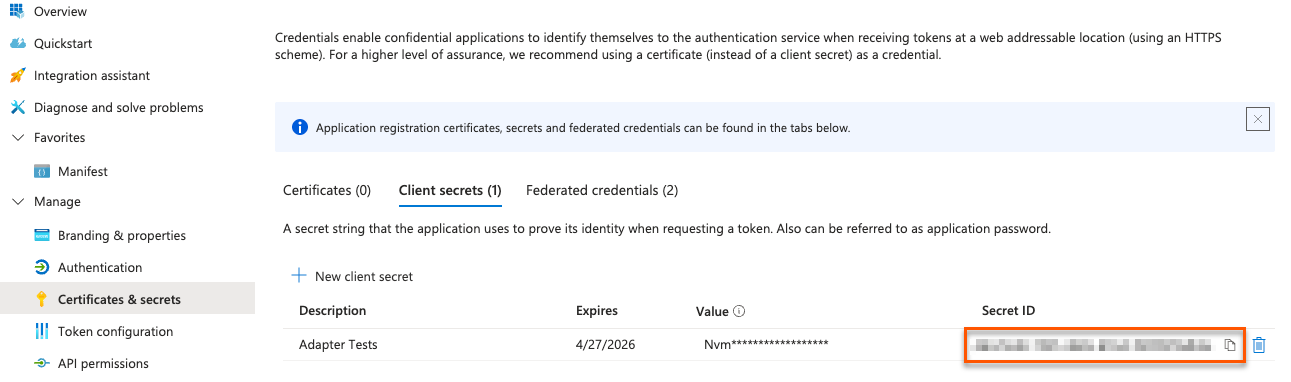
Click on the Copy icon to copy your new Client Secret Value and keep it for later.

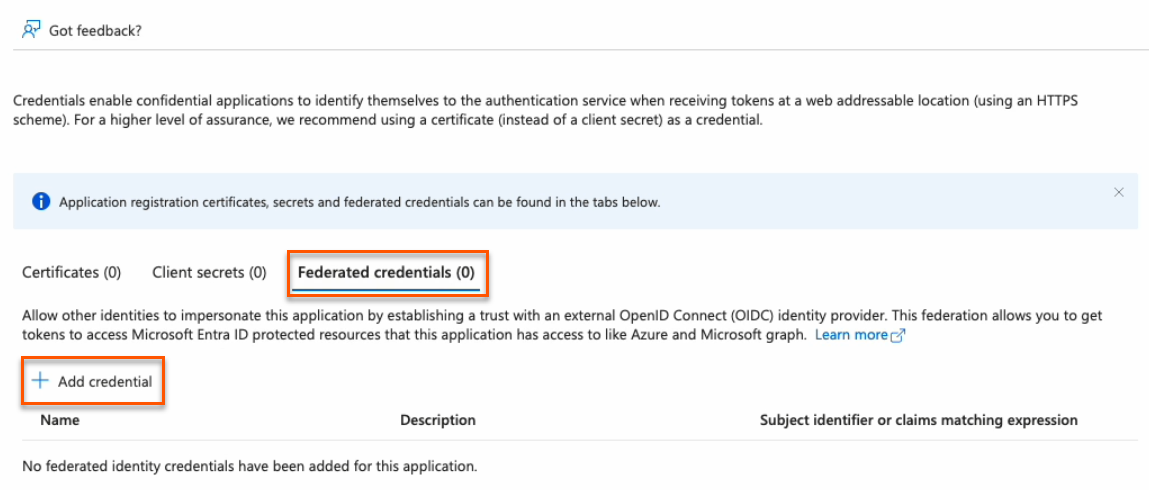
Create federated credentials for an ephemeral account
7. Click on the Federated credentials tab, then click Add credential.
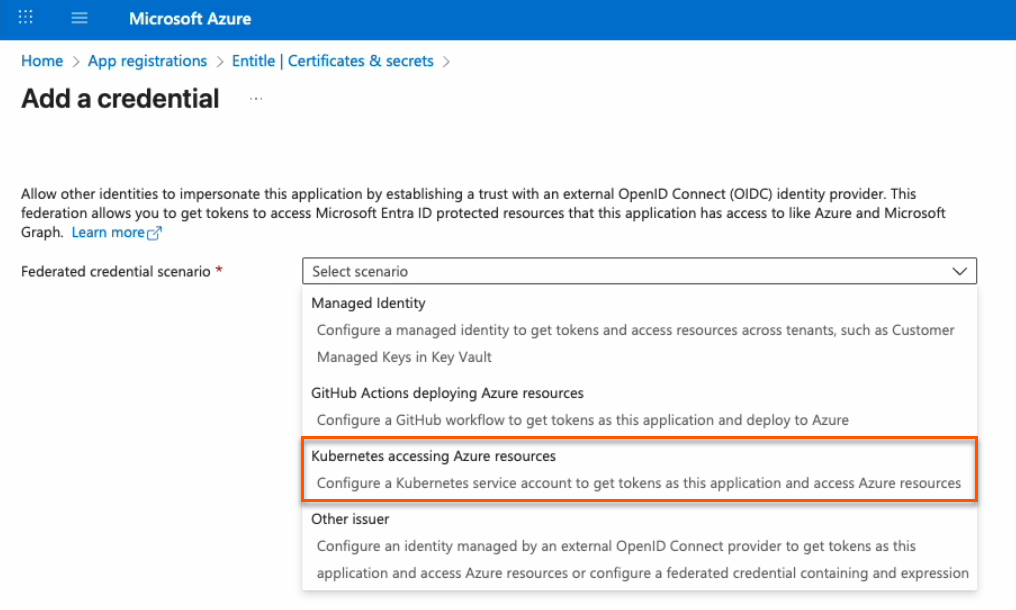
- In the Federated credential scenario dropdown, select Kubernetes accessing Azure resources.
-
On the Add a credential page, fill out the fields as needed.
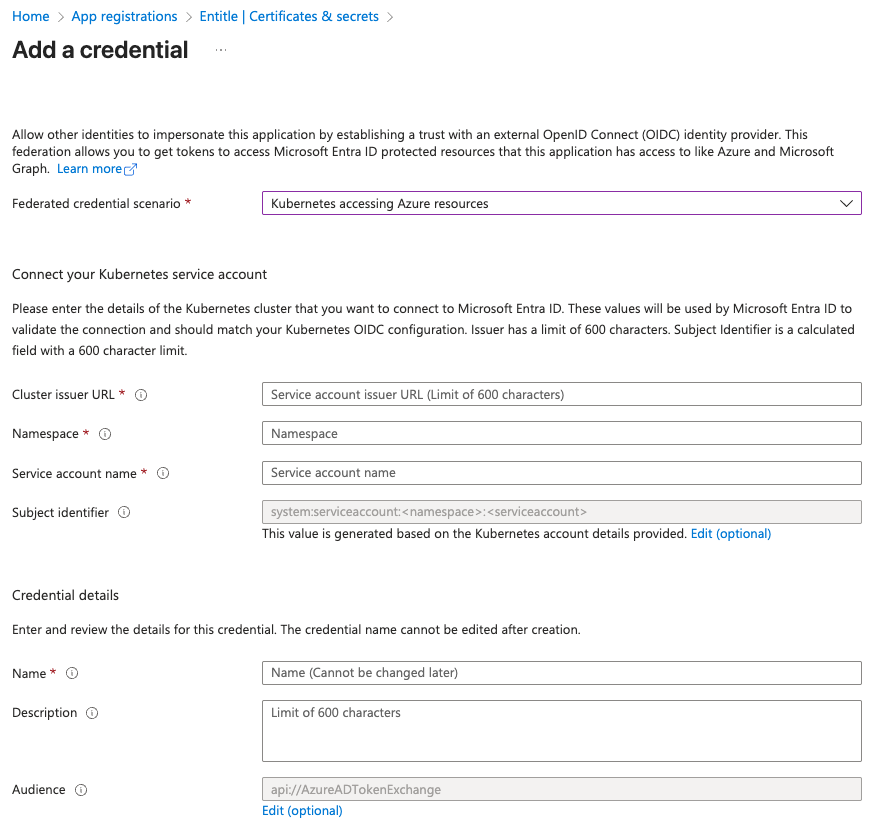
- Cluster issuer URL:
- If you're using Entitle Europe:
https://oidc.eks.eu-west-1.amazonaws.com/id/7104B0E9ED58DCD19AE0DC0EC7D46D5D - If you're using Entitle USA:
https://oidc.eks.us-east-1.amazonaws.com/id/E1F031C91539B03EE726ED530E719F4C - If you're using Entitle Canada:
https://oidc.eks.ca-central-1.amazonaws.com/id/7A1DB459F431A4AFAE24BC244ACE88BB - If you're using an EKS hosted agent on your AWS account, run this command on your cluster and use its output:
aws eks describe-cluster --name <CUSTOMER_CLUSTER_NAME> --query "cluster.identity.oidc.issuer" --output text --region <CUSTOMER_CLUSTER_REGION>
- If you're using Entitle Europe:
- Namespace: Enter entitle.
- Service account name:
- When using a Cloud agent, enter ichilov.
- When using an EKS hosted agent on your AWS account, use entitle-agent-sa.
- Subject identifier: This is automatically generated and should not be edited.
- Name: Enter a name to help identify this credential.
- Description: You may enter a description to help identify the purpose of this credential.
- Audience: Click the Edit link, then enter:
sts.amazonaws.com
- Cluster issuer URL:
-
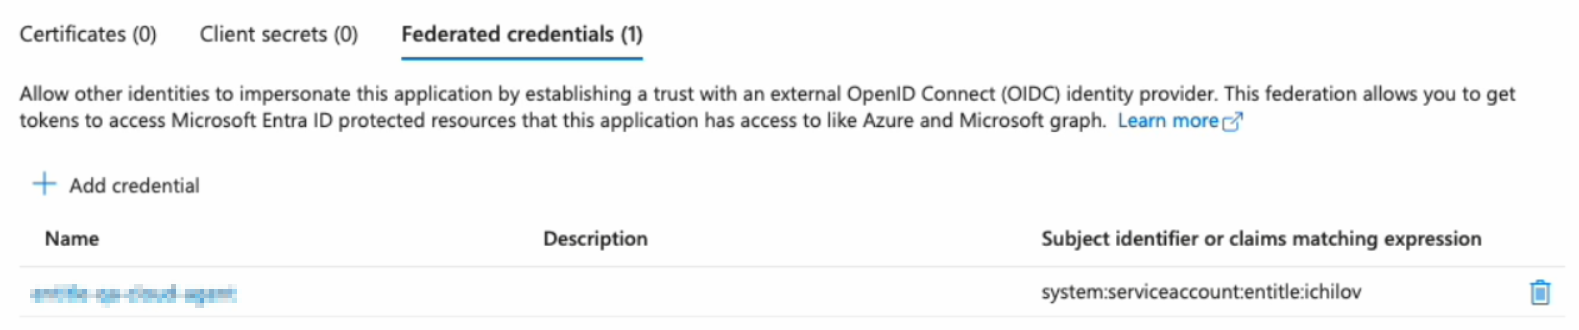
Click Add. Your federated credential now appears on the Certificates & secrets page.
You must now create a temporary secret for onboarding. This secret is short-lived and will be removed automatically after setup.
You can create it either through the Azure portal (easier, but with a minimum lifetime of one day) or using PowerShell commands (slightly more complex, but more secure with a lifetime of two hours or less).
PowerShell method (recommended)
> 🚧 Important information
Using this method deletes all previously issued client secrets for this app registration. Any other integrations or scripts that rely on those secrets will stop working.
This is an intentional security measure. If an unauthorized user were to learn your app ID and tenant ID, they could attempt to create their own integration and misuse your Azure resources.
Entitle uses your new secret only during the first authentication with your Azure tenant and does not store it in the rest of your configuration. The secret is automatically deleted after your setup is complete.
- Go to the Overview page from the left navigation.
- Under Essentials, copy the Application (client) ID to your clipboard.

- Go to Certificates & secrets from the left navigation.
- Click the Cloud Shell icon in the top right bar.

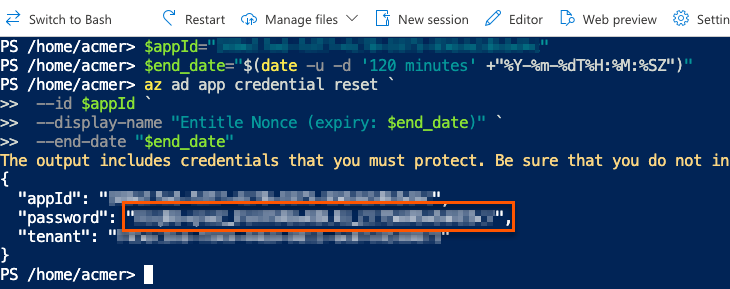
- Run this command, first replacing
<APP_ID>with the Application (client) ID you just copied.
$appId="<APP_ID>"
$end_date="$(date -u -d '120 minutes' +"%Y-%m-%dT%H:%M:%SZ")"
az ad app credential reset `
--id $appId `
--display-name "Entitle Nonce (expiry: $end_date)" `
--end-date "$end_date"- The output gives you the app ID, password, and tenant. The password is your new nonce value. Safely store it for later use.
Azure portal method
11. Click on New client secret.
- In the pop-up window, choose a Description that you will remember and an Expires duration and click Add. The duration should be as short as possible.
- Click on the Copy icon to copy your new Client Secret Value and keep it for later.

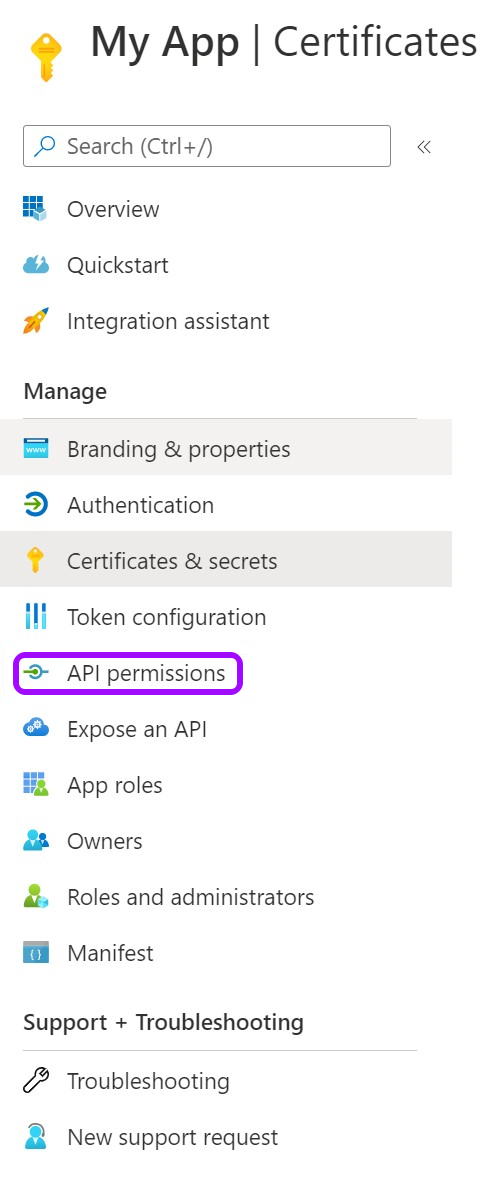
Stage 2: Assign permissions to Graph API
- Go to API permissions.
- Remove the existing default permission by clicking on the ellipses … on the right, then click Remove permission > Yes, remove.

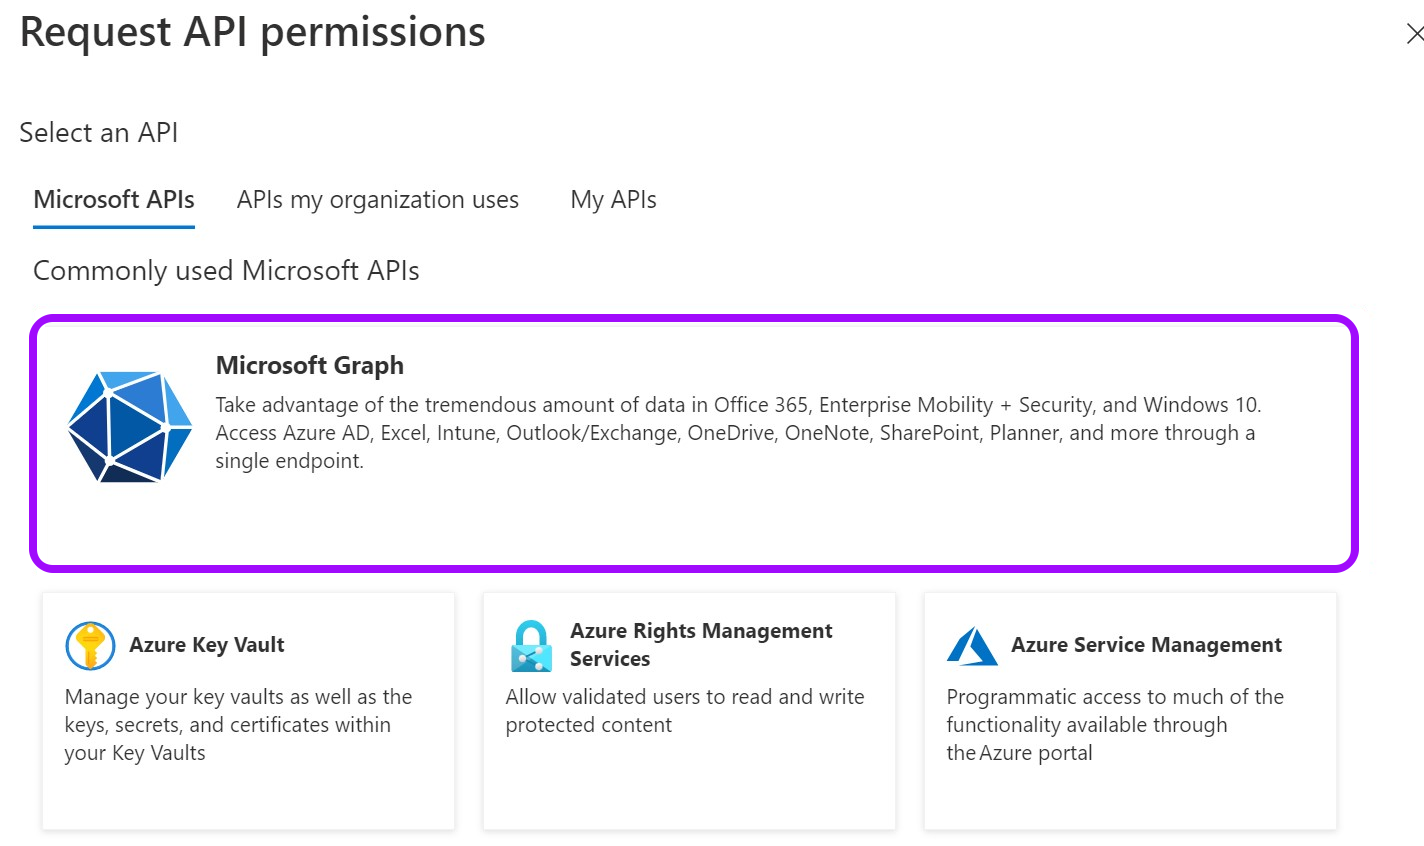
- Now, click Add a Permission.

- From the Request API permissions pane, click Microsoft Graph.
- Select Application permissions.
-
Search for and select the required permissions.
Choose the access level for your Entra ID instance:
- Full access. Grants directory-wide permissions.
- GroupMember.ReadWrite.All
- User.Read.All
- Owned groups access. Limits access to only groups owned by the Entitle service principal.
- User.ReadBasic.All
Use this option if your organization follows least-privilege principles or cannot grant directory-wide permissions. After selecting this option, configure the Entitle service principal as an owner of each group you want Entitle to manage.
- User.ReadBasic.All
Add the following permissions if you are using federated credentials:
-
Application.ReadWrite.OwnedBy
Allows Entitle to delete the temporary onboarding secret immediately after setup. If not granted, the secret remains until it expires.
-
Application.Read.All
Used to validate the nonce ID during setup. If not granted, an incorrect value may be accepted, and the secret will remain until it expires.
- Full access. Grants directory-wide permissions.
- When you are done selecting the permissions, click Add permissions at the bottom of the screen.
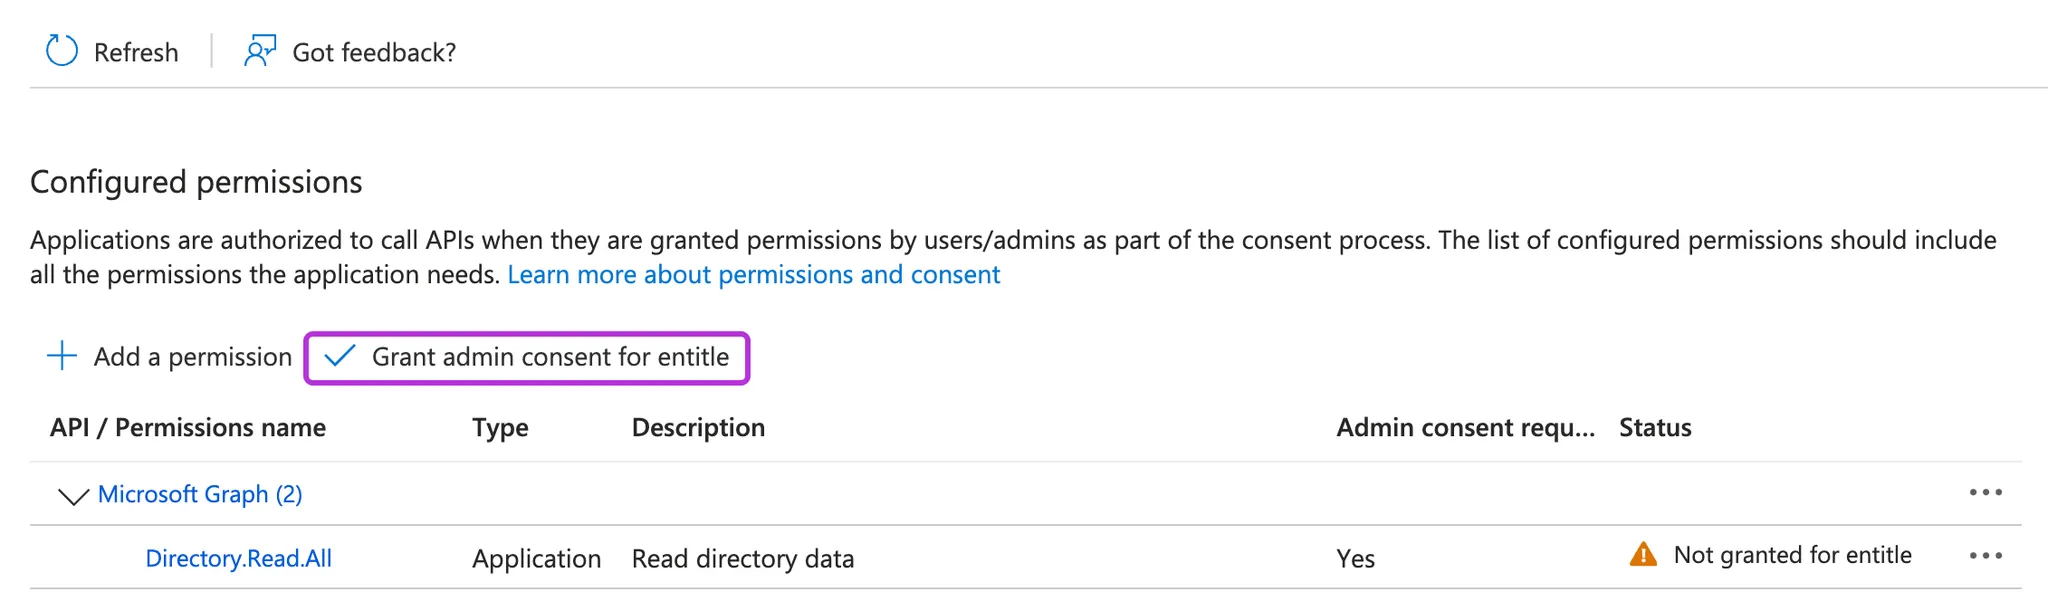
- You will now see the added permissions in the table under Configured permissions.
- Click on Grant admin consent for Default Directory > Yes.
- If you are using a client secret, you can continue with Connect your IdP in Entitle. If you are using federated credentials with the Application.ReadWrite.OwnedBy permission, continue below.
For federated credentials
> ✅
The optional steps below are for additional security. When the integration setup is complete, Entitle immediately deletes the one-time secret created for the initial authentication to your Azure tenant.
If you choose not to run this command, the one-time secret remains active until it expires.
- Click the Cloud Shell icon in the top right bar.

- Run this command, first replacing
<APP_ID>with your Application (client) ID.
$appId=<APP_ID>
$appServicePrincipalId=$(az ad sp list --filter "appId eq '$appId'" --query "[0].id" -o tsv)
az ad app owner add --id $appId --owner-object-id $appServicePrincipalId
Connect your IdP in Entitle
-
Log in to Entitle and go to the Org Settings page.
-
Under the System integrations section, click the + Add button and select Azure AD from the list of IdPs.
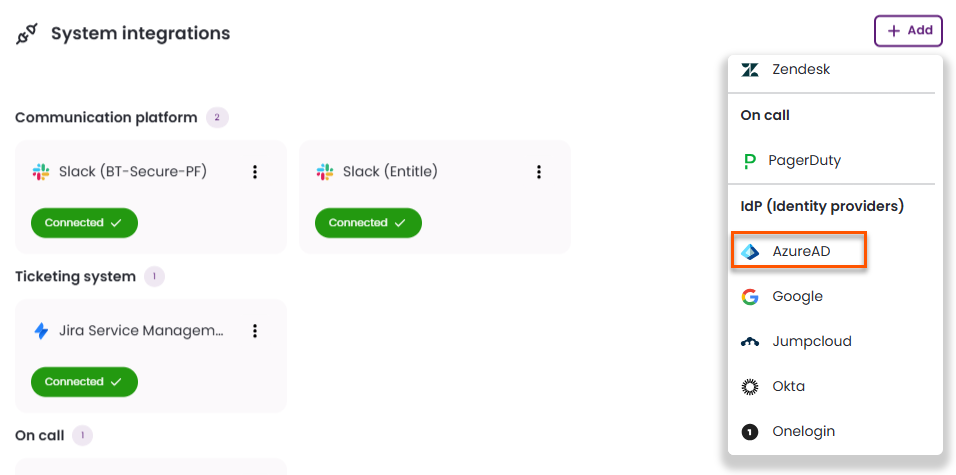
Follow the steps for your chosen authentication method: client secret or federated credentials.
Client secret
3. In the pop-up window Configure Microsoft Entra ID - Azure AD, fill in the required details:
-
Display Name: Enter a name to identify this integration.
-
Tenant: Your Directory (tenant) ID, found on the Overview page.

-
Client ID: Your Application (client) ID, found on the Overview page.
-
Authentication mode: Select Secret.
-
Secret: Your Client secret, found on the Certificates & secrets page.

-
User identity source: Choose what will serve as the identifier for your users in Entra ID:
- UPN (User Principal Name) – default
-
Use as direct manager source: Select this option if you want managers to participate in Access Request approvals or serve as User Access Review reviewers.
When this option is selected, Entitle pulls direct manager information from the default Entra ID field. If you prefer to use a custom field, contact Entitle Support.
A common example of when you might use this is when you want the direct manager field in Entra ID to synchronize with the Active Directory extension attribute.
This option is currently available only for Entitle Cloud deployments and requires the manager’s value to be in email format.
-
Save on: Choose whether you would like this integration to be saved on your own hosted agent or in Entitle’s cloud.
- Click Save.
Federated credentials
3. In the pop-up window Configure Microsoft Entra ID - Azure AD, fill in the required details:
-
Display Name: Enter a name to identify this integration.
-
Tenant: Your Directory (tenant) ID, found on the Overview page.
-
Authentication mode: Select Federated credentials.
-
Client ID: Your Application (client) ID, found on the Overview page.
-
Nonce ID: Your Secret ID, found on the Certificates & Secrets page. Refresh your browser to see the secret ID.
-
Nonce value: Your Nonce value, found in your Cloud Shell instance.
-
User identity source: Choose what will serve as the identifier for your users in Entra ID:
- UPN (User Principal Name) – default
-
Use as direct manager source: Select this option if you want managers to participate in Access Request approvals or serve as User Access Review reviewers.
When this option is selected, Entitle pulls direct manager information from the default Entra ID field. If you prefer to use a custom field, contact Entitle Support.
A common example of when you might use this is when you want the direct manager field in Entra ID to synchronize with the Active Directory extension attribute.
This option is currently available only for Entitle Cloud deployments and requires the manager’s value to be in email format.
-
Save on: Choose whether you would like this integration to be saved on your own hosted agent or in Entitle’s cloud.
Important informationFederated credentials work only for integrations that are saved on Entitle's Cloud or on an on-premises agent that is hosted in Amazon Elastic Kubernetes Service (EKS)
- Click Save.
IdP groups sync
Filtering users by IdP groups lets admins control which Entra ID users are imported into Entitle by selecting specific groups during directory synchronization. Instead of syncing all users by default, this helps exclude non-essential users such as contractors or test users. The filter applies only to direct group members and can be adjusted later as needs evolve, keeping the user base focused and easier to manage.
To enable IdP group filtering, a feature flag must be enabled for your organization. Contact your BeyondTrust representative for details.
On the IdP groups sync page, select one of two options:
- Sync all users from all groups: Synchronize all of your Entra ID users with Entitle.
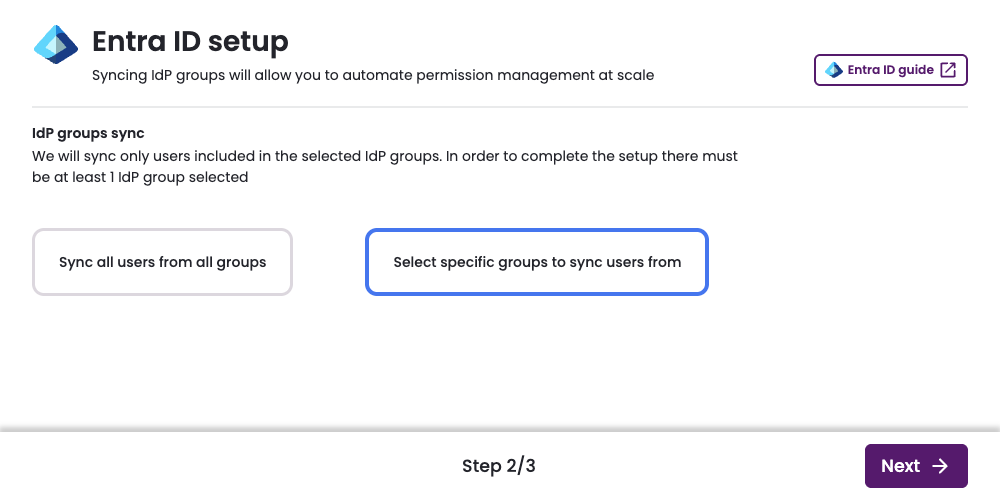
- Select specific groups to sync users from: Choose which groups to synchronize with Entitle.
Sync all users from all groups
1. Click Sync all users from all groups.
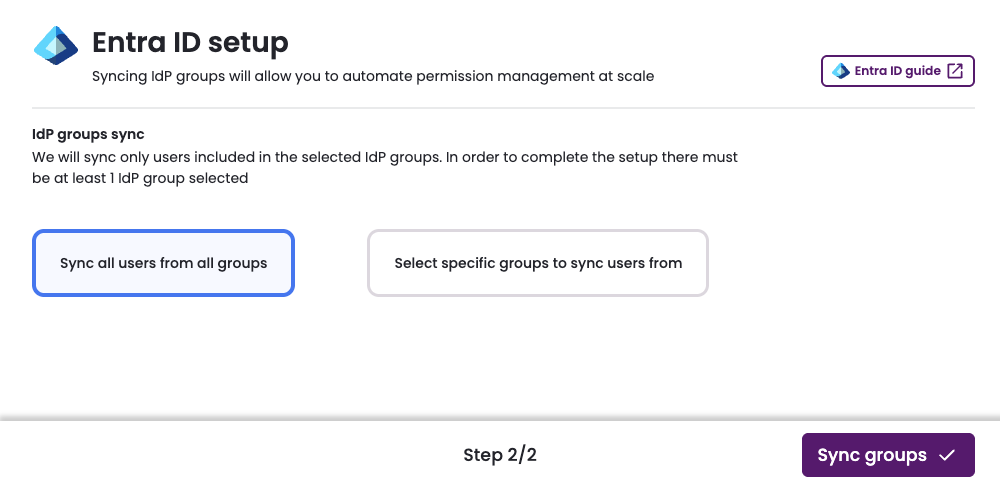
-
Click Sync groups.
-
Synchronization begins. This process might take several minutes to complete.
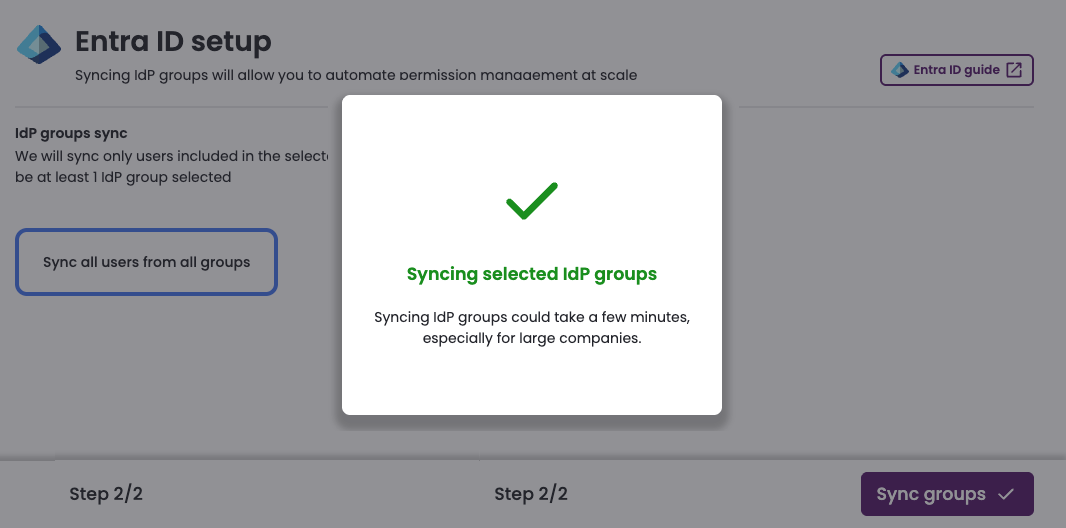
- Once synchronization has finished, the Entra ID IdP connection appears as Connected on the Integrations tab of the Org settings page.
Select specific groups to sync users from
1. Click Select specific groups to sync users from.
-
A table of groups loads in two stages: first the group name and email, and second, the count of users in each group. There are several methods to help you find the groups you want to sync.
- Search groups: Find groups by name and email.
- Sort: When creating a new connection, sort by:
- Name
- Members count
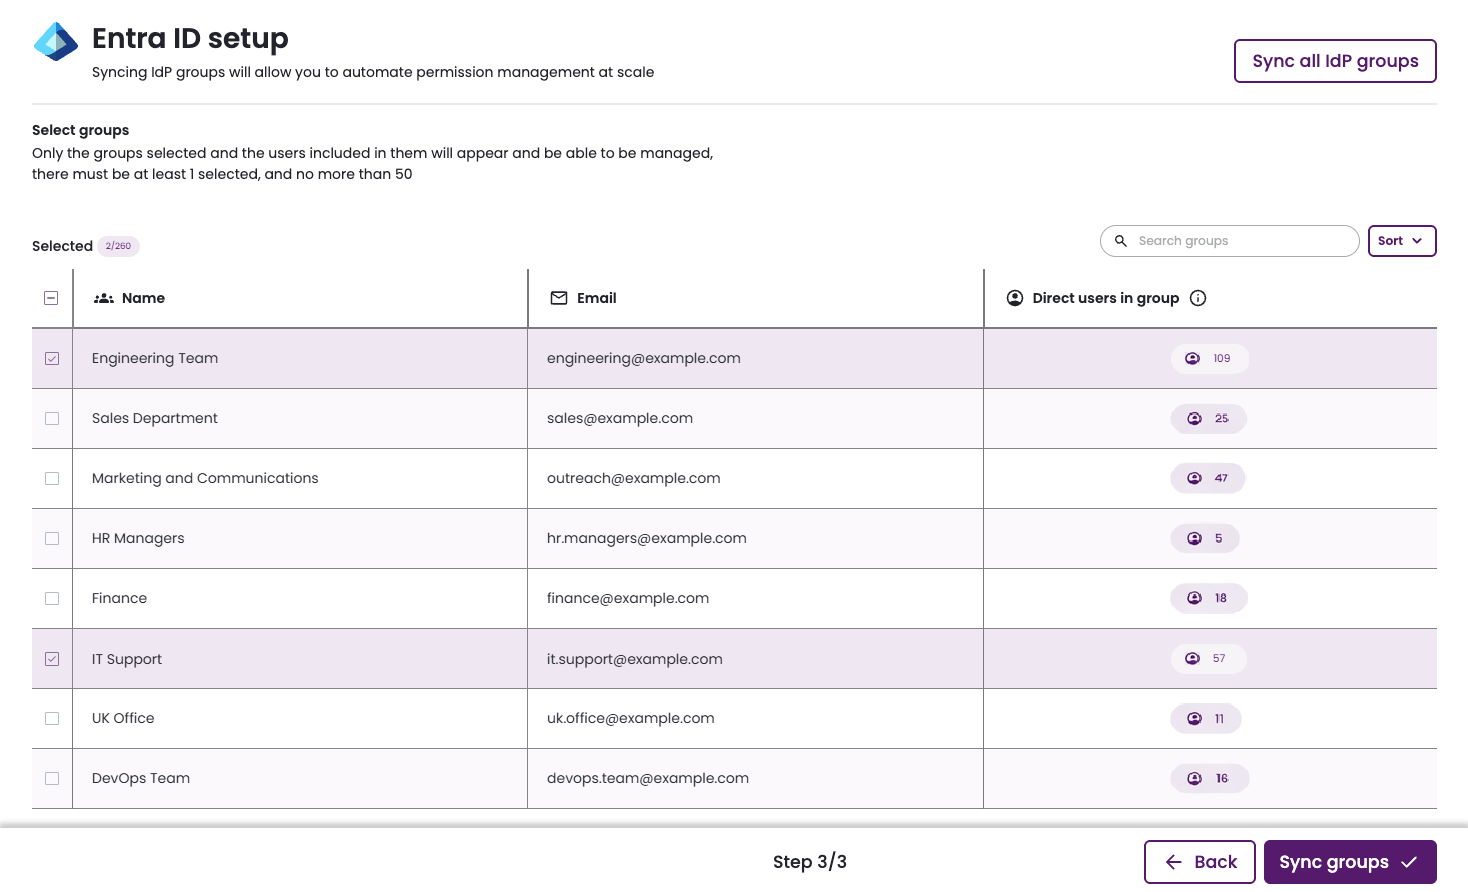
- Select the groups you would like to sync with Entitle.
- At least one group must be selected to proceed.
- For each selected group, both direct members and members of any nested sub-groups are synced with Entitle.
- The Direct users in group field counts only direct members.
- Users who are not part of these groups cannot authenticate through Entra ID to access Entitle via Slack, Teams, or the web interface.
- Click Sync groups.
- Synchronization begins. This process might take several minutes to complete.
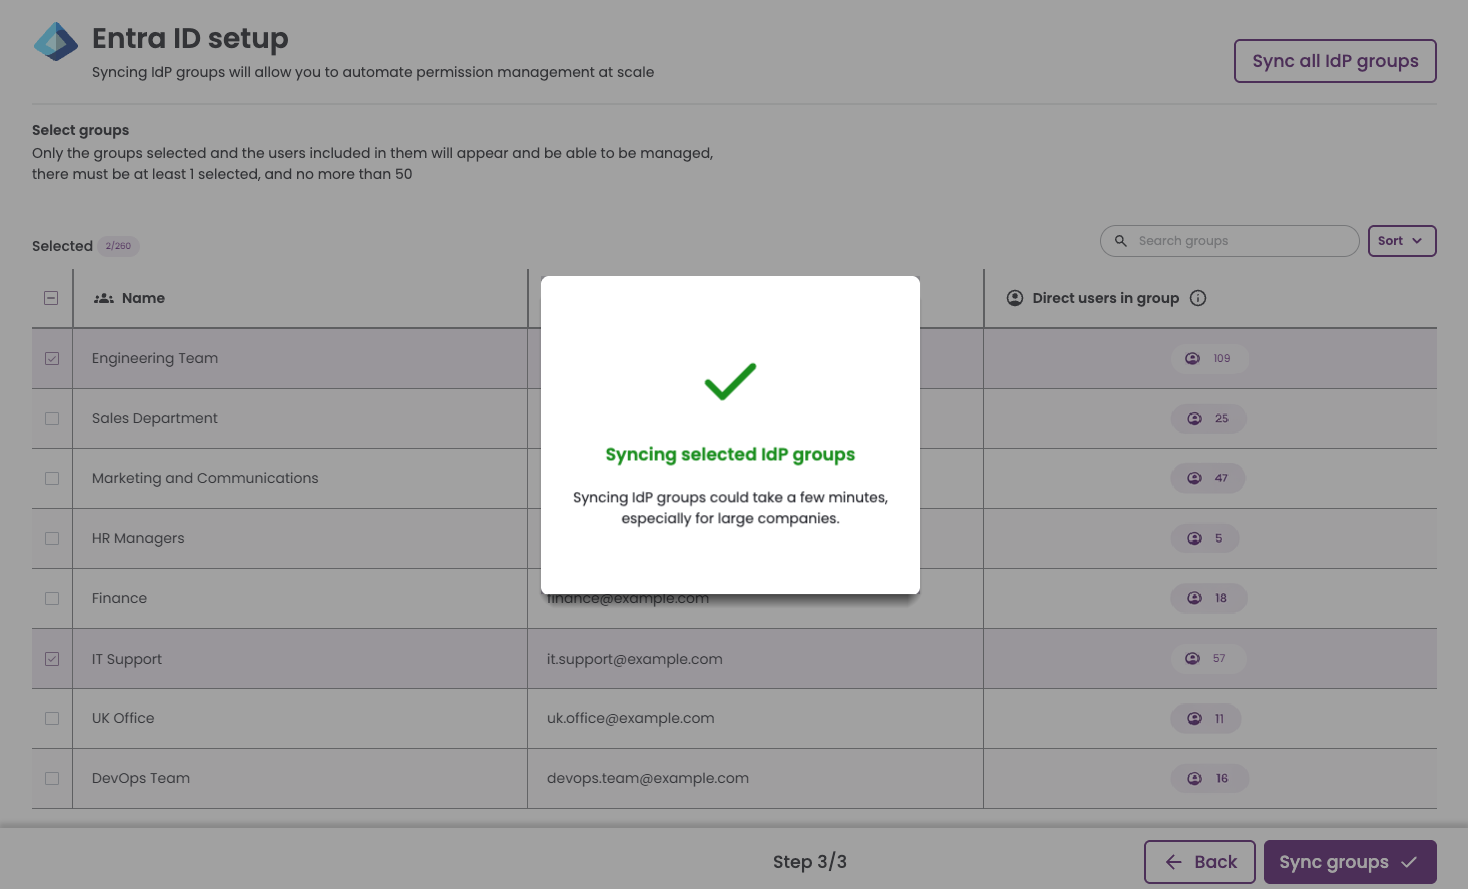
- Once synchronization has finished, the Entra ID IdP connection appears as Connected on the Integrations tab of the Org settings page.
Modify group filtering
1. To modify which groups are synchronized or to filter an existing connection, right-click the connected IdP and select Edit synced groups.
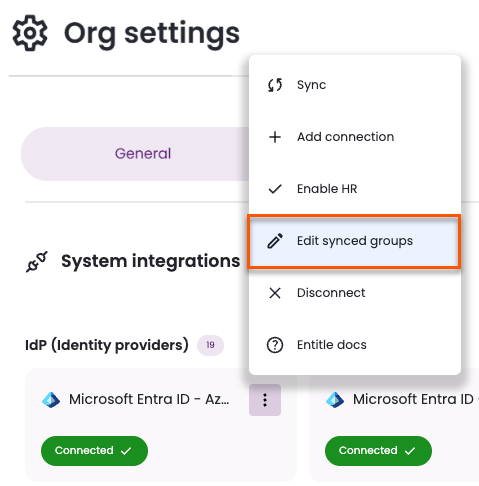
- The Select groups page shows any previously selected groups.
Groups currently in use by policies or approval workflows cannot be removed. To stop syncing a group, you must first remove it from any associated policies or approval workflows, or delete those policies or workflows.
-
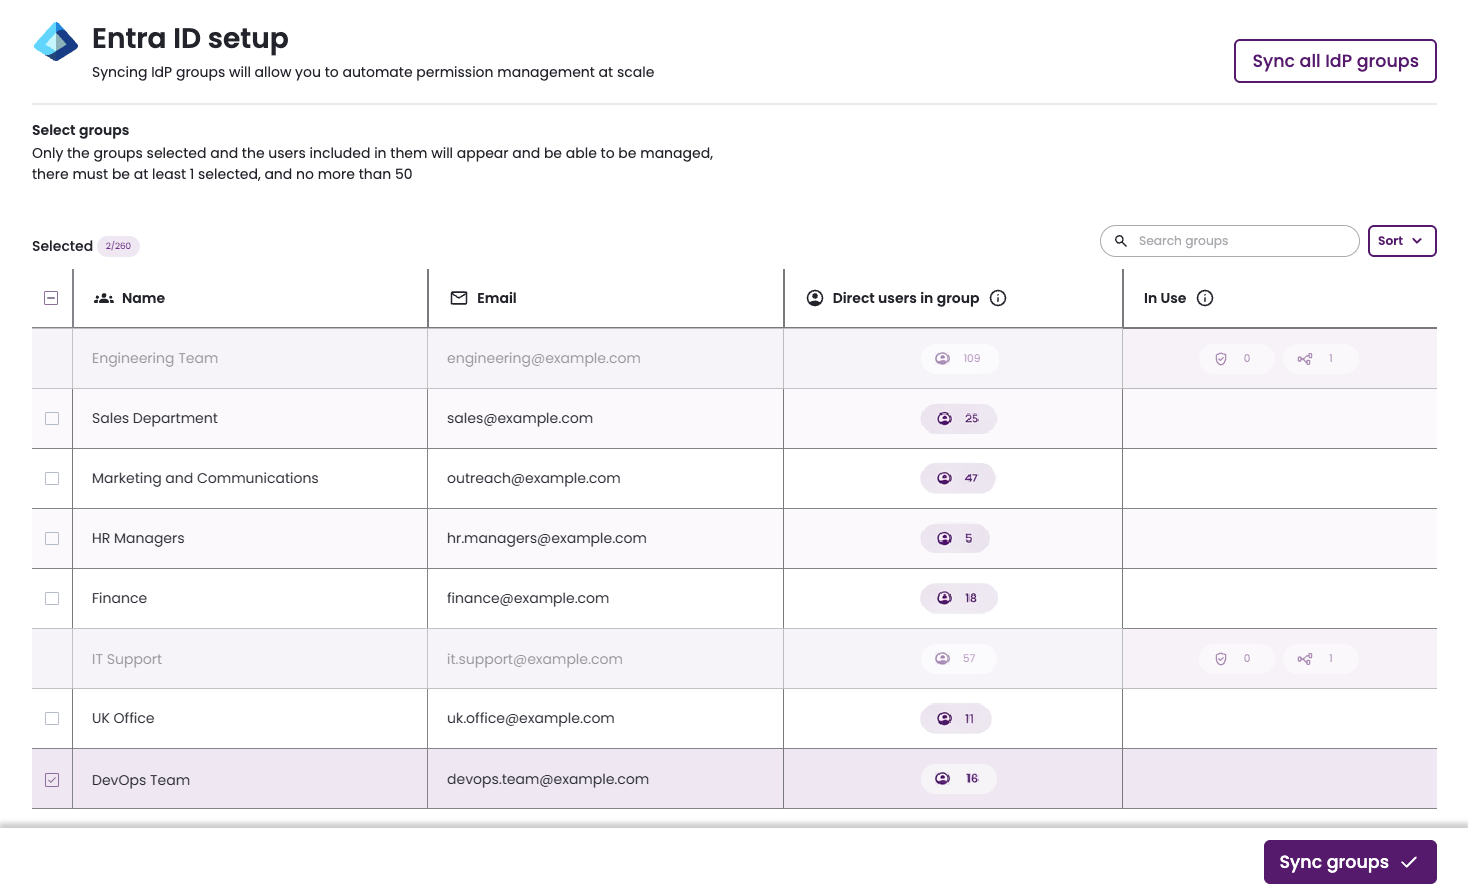
There are several methods to help you find the groups you want to sync.
- Search groups: Find groups by name and email.
- Sort: When editing an existing connection, sort by:
- Name
- Members count
- In use
- Is selected (only if the connection is not currently fully synced)
-
Select the groups you would like to sync with Entitle.
- At least one group must be selected to proceed.
- For each selected group, both direct members and members of any nested sub-groups are synced with Entitle.
- The Direct users in group field counts only direct members.
- Users who are not part of these groups cannot authenticate through Entra ID to access Entitle via Slack, Teams, or the web interface.
-
Click Sync groups.
-
Synchronization begins. This process might take several minutes to complete.
Test your IdP connection
- After being redirected to the Org Settings page, you should be able to see that the Entra ID directory is now Connected.

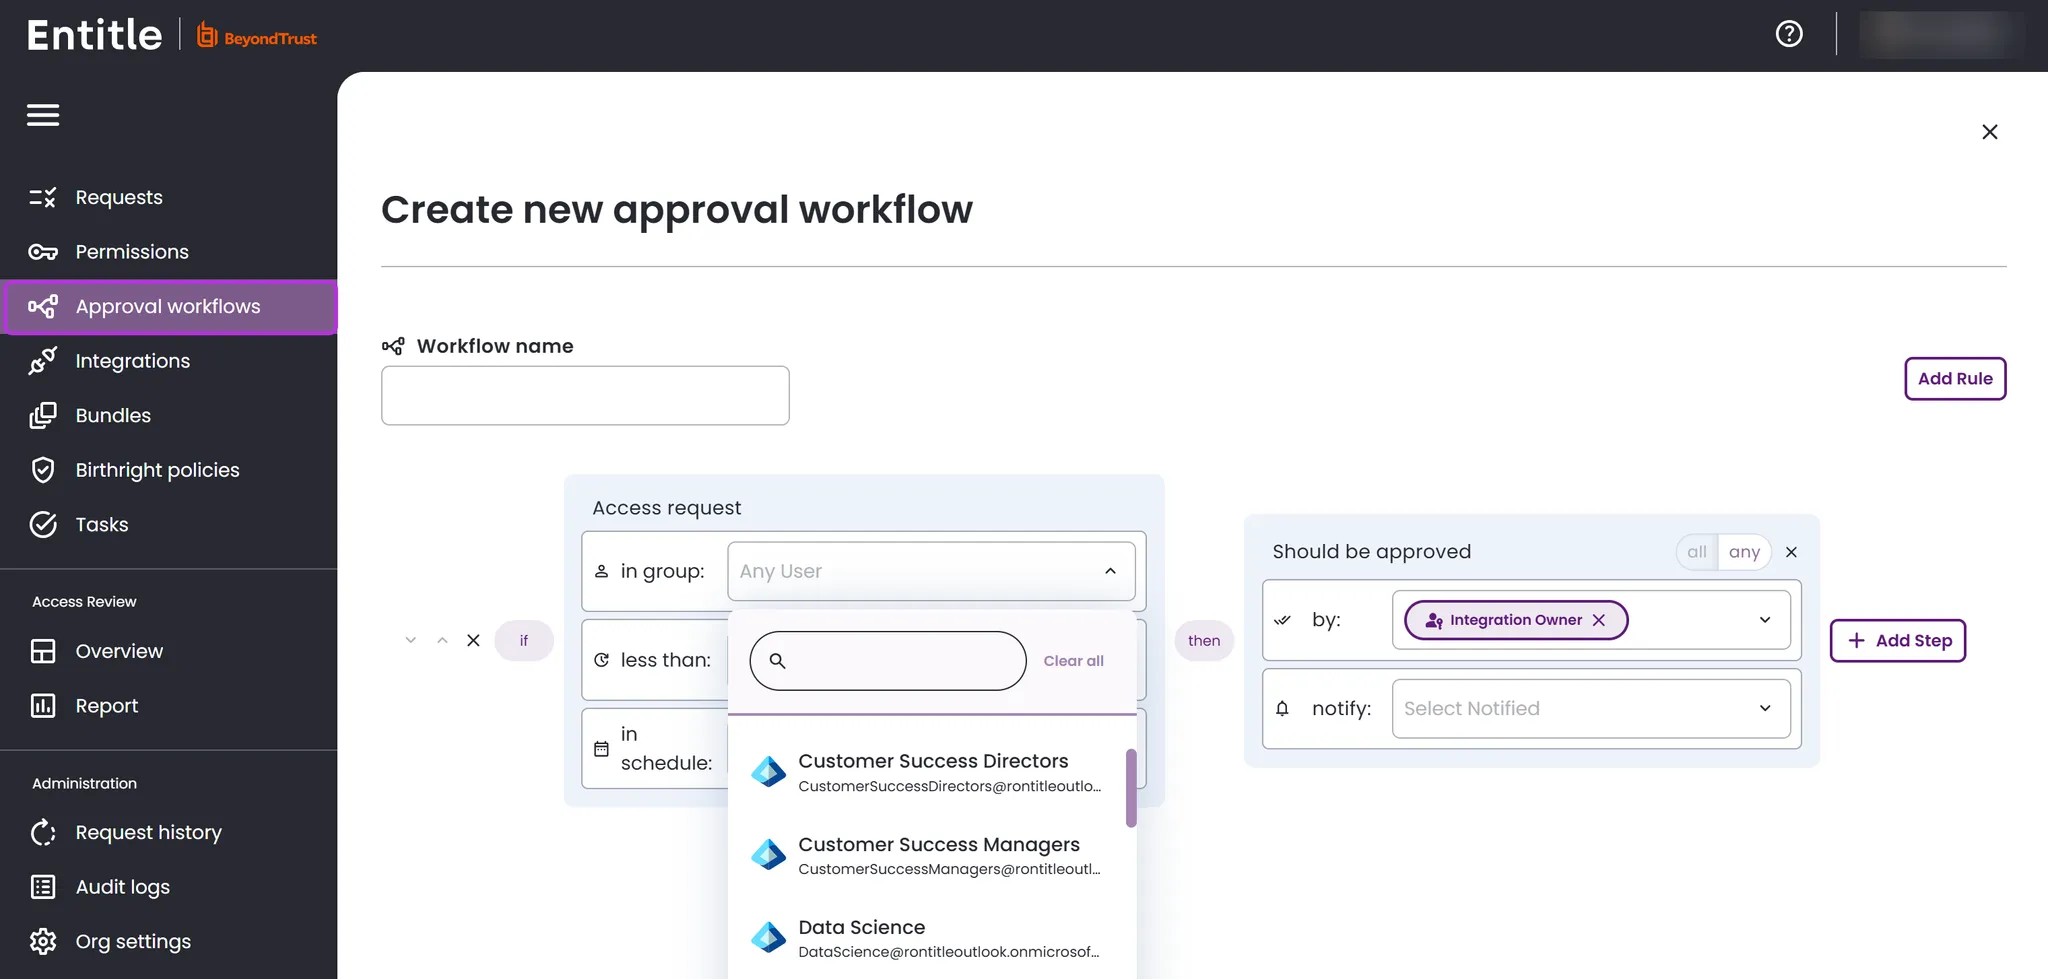
- Your data synchronizes within a few minutes. Go to Approval workflows and click New approval workflow at the top right. You should now see that all groups have been fetched. If not, wait a few more minutes and refresh the page.
Set up an Entitle SSO tile in Entra ID
Optionally, you can set up Entitle as an Entra ID SSO tile for IdP-initiated login flow using the instructions below.
This use case is not applicable when Entitle operates as part of Pathfinder, as all authentication is handled through Pathfinder. See Entitle on Pathfinder for more details.
-
Log in to your Microsoft Entra Admin Center.
-
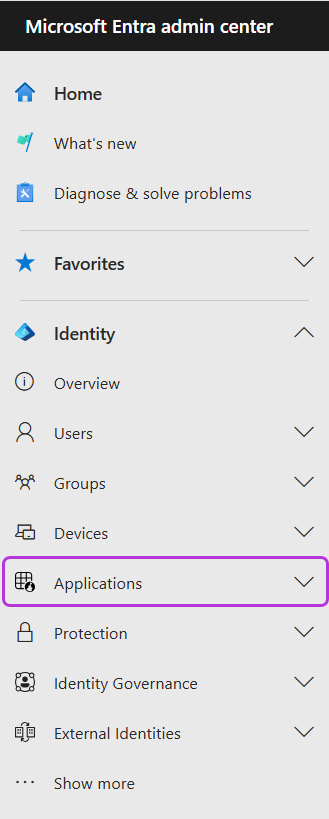
Select Applications under the Identity section.
-
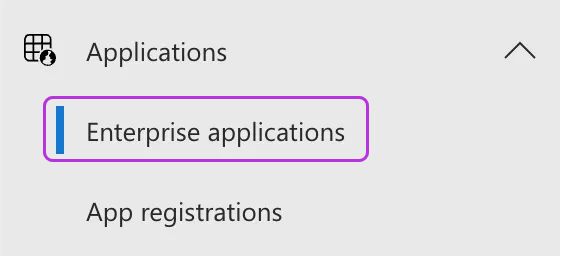
Expand Applications to choose Enterprise applications.
-
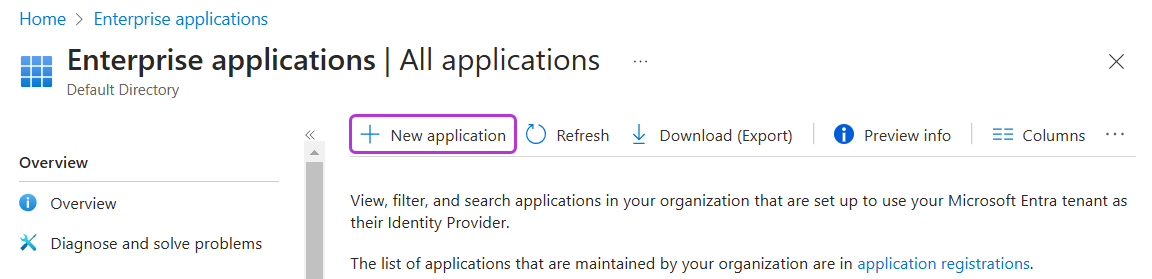
Click New application.
-
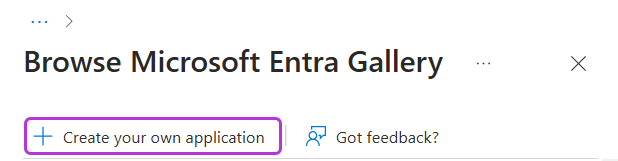
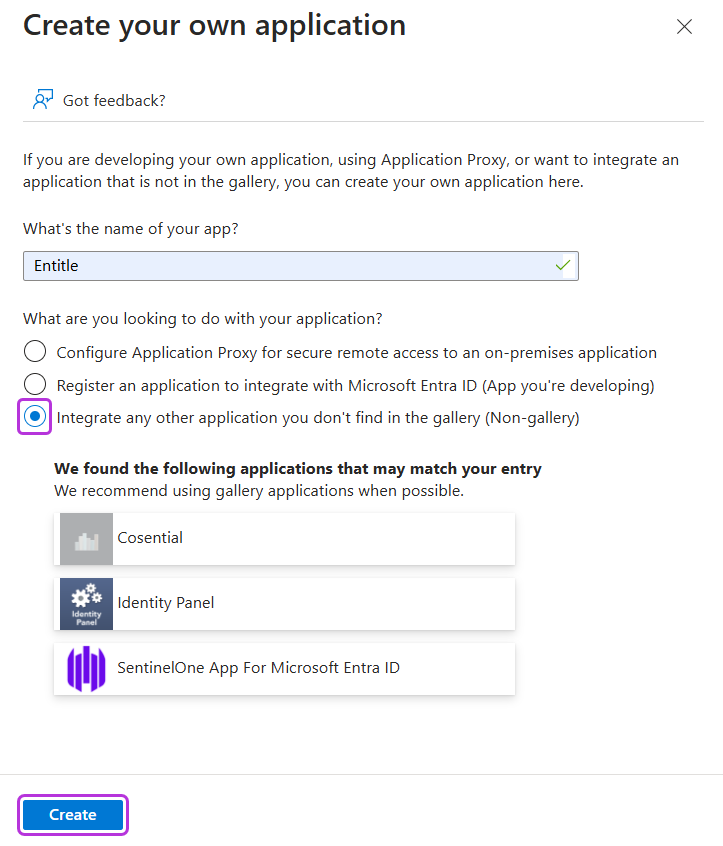
Click Create your own application.
-
Choose a name for the application, and select Integrate any other application you don’t find in the gallery (non-gallery). Then click Create.
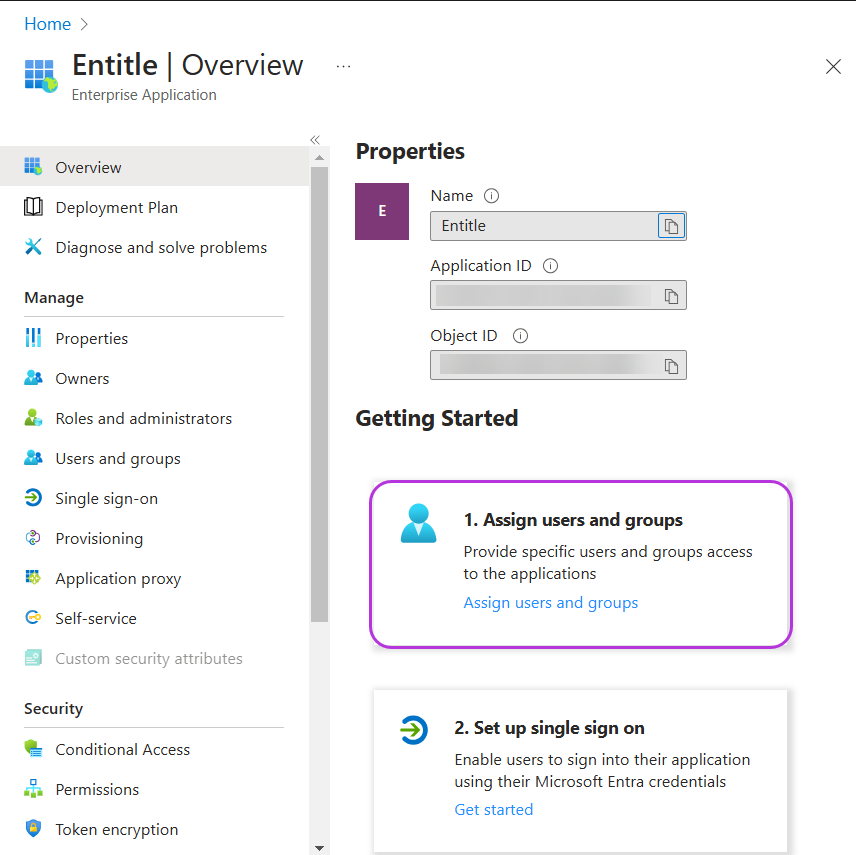
You are now redirected to your new application’s Overview page.
-
Select Assign users and groups to set an owner for the application and grant access permissions to specific users.
-
Set the application logo in the application properties.

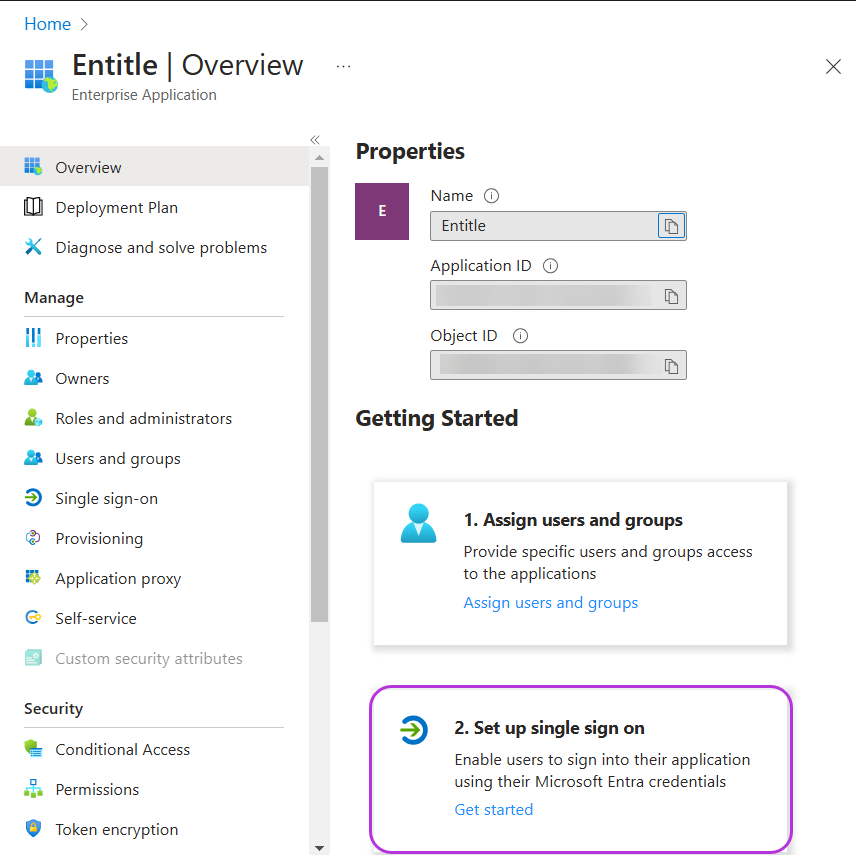
-
Return to your application’s Overview page, and select Set up single sign on.
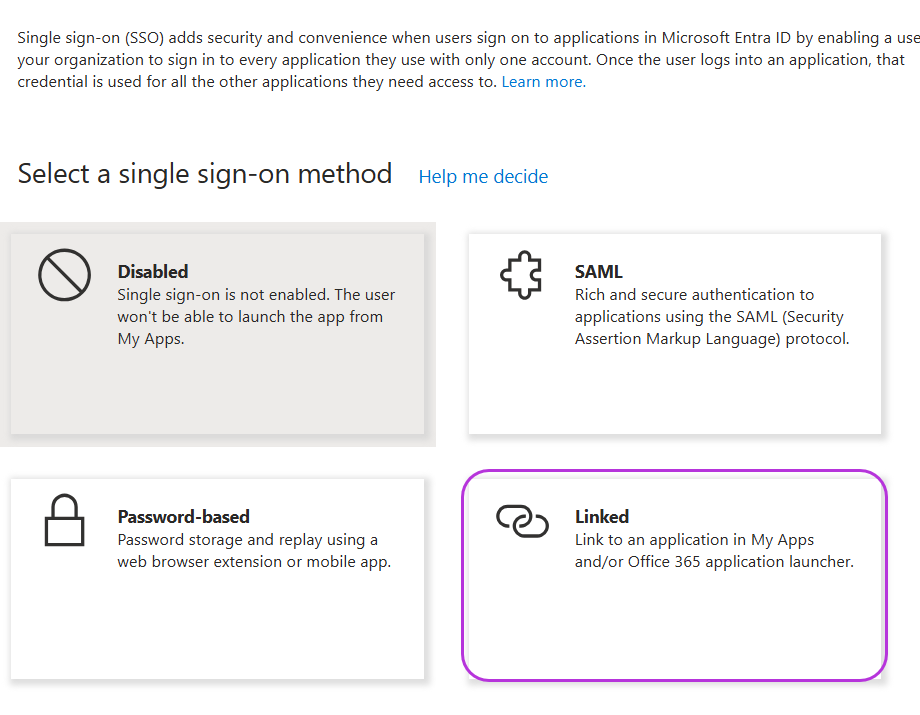
-
Select Linked from the available sign-on options.
-
Copy the following URL for your region and paste it in the Sign on URL field.
https://login.microsoftonline.com/common/oauth2/v2.0/authorize?client_id=40653a07-6423-4c6b-9e40-7ce34c8656d6&scope=User.Read&redirect_uri=https://app.entitle.io/api/v1/signIn/microsoft&response_type=codehttps://login.microsoftonline.com/common/oauth2/v2.0/authorize?client_id=40653a07-6423-4c6b-9e40-7ce34c8656d6&scope=User.Read&redirect_uri=https://us.entitle.io/api/v1/signIn/microsoft&response_type=codehttps://login.microsoftonline.com/common/oauth2/v2.0/authorize?client_id=40653a07-6423-4c6b-9e40-7ce34c8656d6&scope=User.Read&redirect_uri=https://ca.entitle.io/api/v1/signIn/microsoft&response_type=code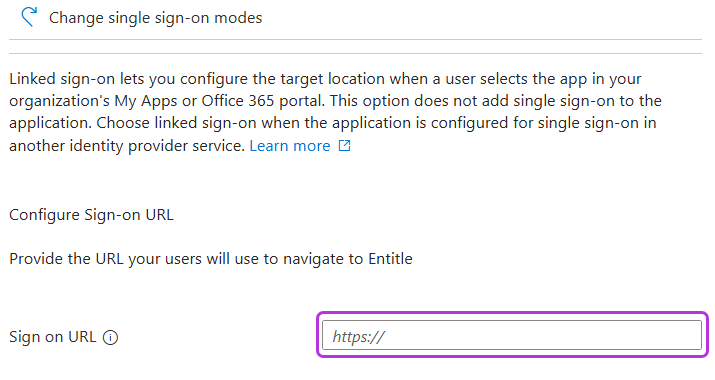
-
Click Save.
-
Your Entitle SSO application now appears as a new tile in your Microsoft My Apps portal.
Should you need to allowlist this integration, these are the IP addresses from which Entitle's service reaches the integration:
- Entitle EU (Cloud deployment)
- 34.243.199.171
- 54.216.133.226
- Entitle US (Pathfinder deployment)
- 52.45.229.219
- 54.88.235.213
- 3.224.15.134
- Entitle CA (Pathfinder deployment)
- 35.182.218.208
- 15.156.179.153
Test your SSO tile
- Locate the Entitle application in your Microsoft My Apps portal.
- Open the application. You should now be logged in to the Entitle app.
Updated 7 days ago
