Email configuration | PRA Pathfinder
What is email configuration?
Email configuration allows administrators to set up and manage email notifications for various events within the BeyondTrust system, such as session invitations, alerts, and updates.
How is email configuration useful?
Email configuration enables the automation of communication within the BeyondTrust system, ensuring users are promptly notified about important events. It helps streamline support processes and improves communication between administrators, support staff, and customers.
How do I access the Email Configuration page?
- Sign into app.beyondtrust.io.
The BeyondTrust Home page displays. - From the main menu, click Privileged Remote Access > Management.
The Managment page opens and the Software tab displays by default. - Click the Email Configuration tab.
The Email Configuration tab displays.
The Email Configuration page
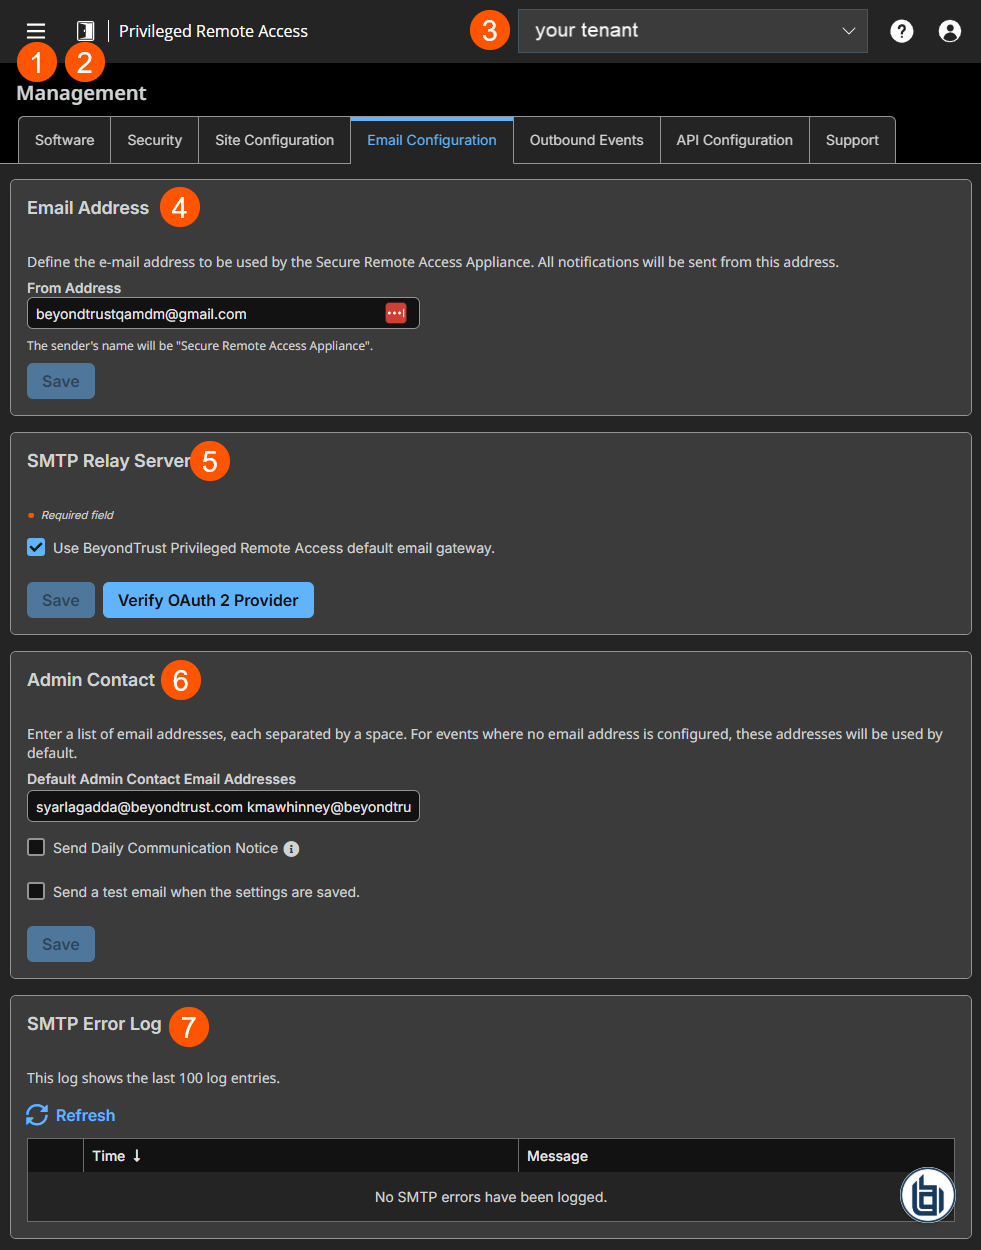
- Left menu: Easy access to all pages in Privilege Remote Access, including Status, Consoles & Downloads, My Account, Configuration, Asset Management, Vault, Console Settings, Users & Security, Reports, Management, and Appliance pages.
- Status: Opens the Status page.
- Header: Change your tenant site, manage your profile, and access documentation.
- Email Address: Add the e-mail address to be used by the Secure Remote Access Appliance
- SMTP Relay Server: Add the settings to the SMTP Relay Server.
- Admin Contact: Add a list of email addresses as site contacts.
- SMTP Error Log: Displays the most recent 100 log entries.
How to configure email notifications
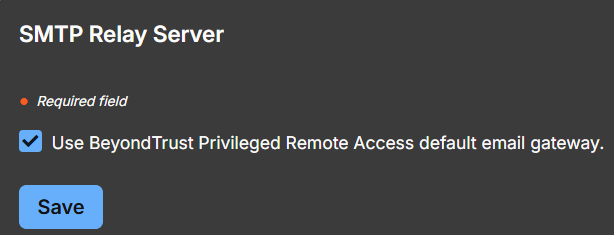
For those that want to use BeyondTrust hosted email settings, you can select the Use BeyondTrust Remote Support default email gateway checkbox.
Email address
If a B Series Appliance is designated as a backup B Series Appliance or a traffic node, the email configuration for that B Series Appliance will be overwritten with the email configuration defined on the primary B Series Appliance.
From address
Set the email address from which automatic messages from your B Series Appliance will be sent.
SMTP relay server
Configure your B Series Appliance to work with your SMTP relay server in order to send automatic email notifications of certain events.
SMTP relay server
Enter the hostname or IP address of your SMTP relay server.
SMTP port
Set the SMTP port to contact this server on.
SMTP encryption
If your SMTP server supports TLS encryption, choose TLS or STARTTLS. Otherwise, select None.
SMTP authentication type
To use a form of authentication with this server, select either Username and Password or OAuth2. Otherwise, select None.
Username and password
Enter a username and password to configure this form of authentication.
OAuth2
Admin contact
Default admin contact email addresses
Enter one or more email addresses to which emails should be sent. Separate addresses with a space.
Send daily communication notice
You can have the B Series Appliance send a daily notification to ensure that alert communication is working correctly.
In addition to the test email and daily communication notices that can be configured above, emails are sent for the following events:
-
During any failover operation, the product version on the primary node does not match the product version on the backup node.
-
During a failover status check, any of the following problems are detected.
- The current B Series Appliance is the primary node and a shared IP address is configured in /login, but its network interface is not enabled.
- A shared IP address is configured in /login but is not listed as an IP address in /appliance.
- The backup node could not contact the primary node, and it also could not contact any of the test IP addresses configured on the Management > Failover page.
- The backup node could not contact any of the test IP addresses configured on the Management > Failover page.
- The backup node's backup operations are disabled on the Management > Failover page.
- The backup node unexpectedly failed to perform a probe of itself, indicating that it is malfunctioning.
- The backup node failed to contact the primary node using the primary node's hostname.
- Automatic failover is disabled, and the backup node failed to probe the primary node.
- Automatic failover is enabled, and the backup node failed to probe the primary node. The backup node will automatically become the primary node if the primary node remains unresponsive.
- Automatic failover is enabled, and the backup node is automatically becoming the primary node because the primary node was down for too long.
- The primary node failed to perform a data sync with the backup node sometime in the past 24 hours.
Send a test email when the settings are savedIf you wish to receive an immediate test email to verify that your SMTP settings are accurately configured, check this option before clicking the Save button.
Configure your SMTP Relay Server with OAuth2 for Entra ID
Configuration requires changing specific settings on your appliance and in your Microsoft 365 subscription with Entra ID.
Important information about Microsoft's deprecation of basic authentication in Exchange Online
What do I have to do?If you have username and password basic authentication configured as your Authenticated SMTP method in your Microsoft Exchange Online account(s), you must update this to OAuth 2.0 prior to September 2025 to ensure your BeyondTrust email server settings continue to work as expected.
Why do I have to do this?Microsoft is deprecating their username and password basic authentication beginning March 1st, 2026 and completing April 30th, 2026 (previously September 2025).
For more information, see Microsoft's Deprecation of basic authentication in Exchange Online notice, or contact Microsoft Support.
Prerequisites
Azure uses "apps" for creating OAuth 2.0 providers. In order to create an OAuth 2.0 app in Azure, you need the following:
- An Azure instance configured for Exchange and Entra ID.
- A user account in Azure with access to create apps in Entra ID.
- Authenticated SMTP enabled in your Exchange Online accounts. See Microsoft's Configure each Microsoft Exchange Online account to enable OAuth2 for procedures.
- The Authenticated SMTP setting can be overridden by the CAPs in Entra ID. That procedure is out-of-scope for this document.
- A user account with permission to configure SMTP.
For the OAuth user email, set the following Microsoft Graph properties in Entra ID:
API/Permissions Name Type Description Admin consent required Mail.Send Delegated Send mail as a user No SMTP.Send Delegated Send emails from mailboxes using SMTP AUTH. No User.Read Delegated Sign in and read user profile No
-
In your Entra ID console, register your appliance:
The following is third-party documentation from Microsoft. We recommend you verify these steps via their official documentation: Register your appliance as a new app in Entra ID.
-
Sign in to portal.azure.com.
-
Navigate to Microsoft Entra ID.
-
Click App registrations > New registration.
-
Enter and select the following:
- Name: Use a name to identify the appliance/platform.
- Supported Account Types: Select Accounts in this organizational directory only.
- Redirect URI (optional): Select Web, and enter
https://{URL OF APPLIANCE}/login/smtp-verification.If you plan to use the app for both the appliance and Pathfinder, register both Authorization Redirect URIs with the app:
- In the activity pane, click the link under Redirect URIs.
- Click Add URI.
- Enter the second Authorization Redirect URI.
- Click Save.
-
From the left menu, navigate to the Overview page, and in the activity pane in the center of the page, copy the Application (client) ID value to a text file.
-
On the same Overview page, click Endpoints.
An Endpoints dialog box displays. -
Copy the OAuth 2.0 authorization endpoint (v2) and OAuth token endpoint (v2) URI URI values from the Endpoints dialog box to a text file.
Each Azure app has unique endpoint URIs.
-
From the left menu, click Manage > Certificates & secrets, and in the activity pane in the center of the page, click the Client Secrets tab.
-
Click New client secret.
-
Enter a text value in the Description field.
-
Select a value from the Expires drop-down.
-
Click Add.
-
In the activity pane in the center of the page, copy the Value to a text file.
-
-
In PRA, from the left menu, click Management.
The Software page opens and displays by default. -
At the top of the page, click Email Configuration.
The Email Configuration page displays. -
In the Email Address section, in the From Address field, enter the address you want to use to send system notifications.
-
In the SMTP Relay Server section, enter the following information:
-
SMTP Relay Server: The hostname or IP address of your SMTP relay server.
- The default value is
smtp.office365.com, but your installation may require a different host name.
- The default value is
-
SMTP port: The SMTP port used to contact the SMTP relay server.
- The default value for STARTTLS is
587. Other methods may require a different port.
- The default value for STARTTLS is
-
SMTP Authentication Type: Select OAuth2 and enter the following information:
-
Email: Enter the same email used in your Entra ID account.
-
This email must have permission in Entra ID to send emails, and have permission to send emails as the address you entered in the From Address field in step 4, above.
In Entra ID, if you have enabled and configured an Alternate Login ID, you may use any address in this Email field in Remote Support. To enable and configure an Alternate Login ID, see Microsoft's Configuring Alternate Login ID.
-
-
SMTP OAuth Provider ID: Enter the Application (client) ID you obtained in step 1.v, above.
-
SMTP OAuth Client Secret: Enter the client secret you obtained in step 1.xiii, above.
-
SMTP OAuth Scopes: Enter
https://outlook.office.com/SMTP.Send offline_access. -
SMTP OAuth Authentication Endpoint: Enter the OAuth 2.0 Authorization Endpoint (v2) you obtained in step 1.vii, above.
-
SMTP OAuth Token Endpoint: The OAuth token endpoint (v2) URI Endpoint you obtained in step 1.vii, above.
-
-
-
Click Save.
The settings save. -
Ensure you are signed into the SMTP-enabled account in Azure.
-
Click Verify OAuth2 Provider.
A sign-in page displays in a new tab. -
Accept the permissions request.
In PRA, the Email Configuration page reloads, and the SMTP settings show as Authorized.
Configure OAuth2 for Google
1. Configure your Google Cloud Platform for OAuth.
1. Log into Google Cloud Platform.
Use the correct Gmail account, as only the owner of the project is able to work with the project. If you do not already have a paid account, you might choose to purchase an account by clicking Activate in the top banner. BeyondTrust cannot provide assistance with purchasing an account. Click Learn More in the top banner for information regarding the limitations of free accounts.
- Follow Google's Manage OAuth Clients procedure.
- Use the following information during GCP OAuth configuration:
- Authorized domains: The BeyondTrust test appliance domains include:
- qabeyondtrustcloud.com
- bomgar.com
- Credentials: When you create your credentials, select Web application for your appliance setup.
- Authorization Redirect URI- When you create the Redirect URI, use this form: _https://{URL OF YOUR APPLIANCE}/login/smtp-verification
- Authorized domains: The BeyondTrust test appliance domains include:
2. Provide credentials to the SMTP relay server.
1. Ensure you are signed into the provider portal as the email address for the SMTP relay.n.
2. Sign into app.beyondtrust.io.
The BeyondTrust Home page displays.
3. From the main menu, click Privileged Remote Access > Management.
The Backup Settings page opens and the Software tab displays by default.
4. Click the Email Configuration tab.
5. Under the SMTP Relay Server section, go toSMTP Authentication Type.
6. Select OAuth2, and enter the following information:
- Email: The email address for the SMTP relay.
- SMTP OAuth Provider ID: The client_id from the JSON file generated during the Google configuration.
- SMTP OAuth Client Secret: The client_secret from the JSON file generated during the Google configuration.
- SMTP OAuth Scopes: Enter https://mail.google.com/.
- SMTP OAuth Authentication Endpoint: The auth_uri from the JSON file generated during the Google configuration.
- SMTP OAuth Token Endpoint: The token_uri from the JSON file generated during the Google configuration.
- Click Save.
- Click Verify Oauth2 Provider to verify and connect the provider account.
Updated 2 days ago
