Sessions | PRA for Web
Active Sessions
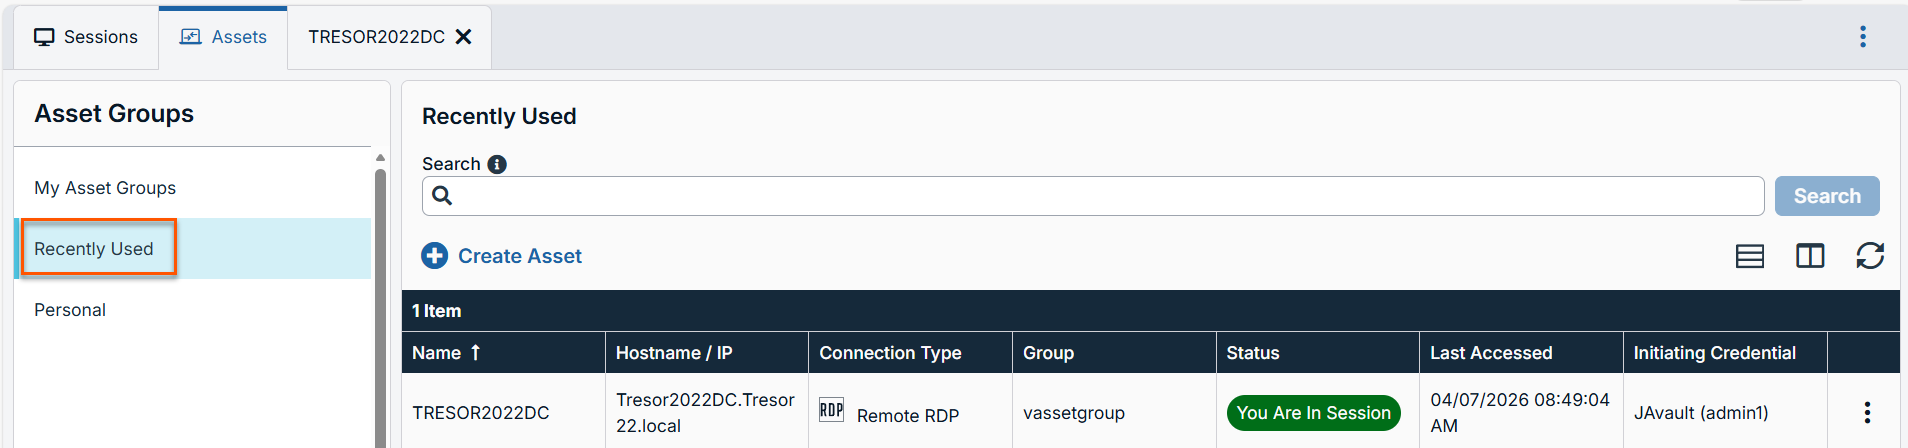
If you have multiple access sessions in progress, you have the ability to return to any of these sessions at any time. To return to an endpoint already accessed in another session, click on the session at the top of the screen.
Search for endpoints
While using the privileged web access console, you can search for specific endpoints while in an access session. Within the search results, you can also click on the Start button to begin a session with that endpoint.
- Click on the Search icon located in the top left of the screen.
- In the search bar, type in the name of the endpoint.
- From the results provided, select the endpoint you wish to start a session with and click on the Jump button to begin a session.
Screen share
To view and control remote systems, use the screen sharing action while in an access session.
-
From the session window, click on the Screen Sharing tab at the top of the screen. Or, you can click on the Start Screen Sharing icon to begin accessing the endpoint if screen sharing does not start automatically.

-
Use any of the following actions while in a session to perform different functions.
Screen sharing tools
| Icon | Description |
|---|---|
 | Stop screen sharing |
 | If your permissions allow, you can disable the remote user's screen view and mouse and keyboard input. The end user's view of the privacy screen clearly explains that the BeyondTrust user has disabled the end user's view. The end user can regain control at any time by pressing Ctrl+Alt+Del. Alternatively, disable the end user's mouse and keyboard input while still allowing them to view the screen. When input is restricted, an orange border appears around the end user's monitors, and a message indicates that the BeyondTrust user has mouse and keyboard control. The end user can regain control at any time by pressing Ctrl+Alt+Del. Restricted endpoint interaction is available only when accessing macOS or Windows computers. Restricted customer interaction is available only when supporting Windows computers. In Windows Vista and above, the endpoint client must be elevated. On Windows 8, this feature is limited to disabling the mouse and keyboard. |
 | While viewing the remote computer, start or stop control of the remote keyboard and mouse. Representatives using a macOS system can send CTRL+Left-Click through the connected screen sharing session to the remote system by using CTRL+CMD+Left-Click. |
 | Perform the Power Control Special Action on the endpoint. |
 | Send a Ctrl-Alt-Del command to the remote computer. |
 | Perform a special action on the remote system. Based on remote operating system and configuration, available tasks will vary. Canned scripts available to the user appear in a fly-out menu. With the Run As special action on a Windows® system, you may select credentials from an Endpoint Credential Manager. Use of the Endpoint Credential Manager requires a separate services agreement with BeyondTrust. Once a services agreement is in place, you may download the required middleware from the BeyondTrust Support Portal. In a Remote Desktop Services or virtual desktop environment with an elevated session, you can switch between active sessions on the same machine using the Terminal Sessions option in the Special Actions dropdown during a screen sharing session. This option is available in any environment that uses Remote Desktop Services to manage virtual sessions, provided there are other active sessions and the representative has the permission to use elevated special actions. |
 | If System Sound Sharing is enabled, click this button to unmute and hear sounds from the endpoint. |
 | Toggle the clipboard. |
 | Toggle the virtual keyboard. |
 | Take a screenshot. You can save it to a file or to the clipboard. |
 | Select an alternate remote monitor to display. The primary monitor is designated by a P. |
 | View the remote screen at actual or scaled size. |
 | Select the color optimization mode to view the remote screen. If you are going to be primarily sharing video, select Video Optimized; otherwise select between Black and White (uses less bandwidth), Few Colors, More Colors, or Full Color (uses more bandwidth). Both Video Optimized and Full Color modes allow you to view the actual desktop wallpaper. |
 | View the remote desktop in full screen mode or return to the interface view. When in full screen mode, special keys are passed through to the remote system. This includes but is not limited to modifier keys, function keys, and the Windows Start key. Note that this does not apply to the Ctrl-Alt-Del command. |
Command Shell
Remote command shell enables a privileged user to open a virtual command line interface to a remote system. The user can then type locally but have the commands executed on the remote system. You can work from multiple shells. Note that scripts available to the user may also be executed on the remote system from the screen sharing interface.
Your administrator can also enable remote shell recording so that a video of each shell can be later viewed from the session report. If shell recording is enabled, a transcript of the command shell will also be available.
Depending on session policy and type of jump, Command Shell may not be available.
- To access the Command Shell while in an access session, click on the Command Shell tab at the top of the screen.
- If you are not automatically directed to the command shell, click the Start the Command Shell button.
- The command options and prompt appears.
Command shell tools
| Icon | Description |
|---|---|
 | Stop command prompt access when it is no longer needed. |
 | Open a new shell to run multiple instances of command prompt, or close individual shells without relinquishing command prompt access. Shells are tabulated at the bottom of the screen. |
System information
Privileged users can view a complete snapshot of the remote device's or computer's system information to reduce the time needed to diagnose and resolve the issue. The system information available varies depending on the remote operating system and configuration.
- From the session window, click on the System Info tab at the top of the screen. You can click the Start System Info button if system information doesn't open automatically.
- Use any of the following actions while in a session to perform different functions.
System information tools
| Icon | Description |
|---|---|
 | Refresh system info. |
 | Copy to clipboard. |
 | Save to file. |
File transfer
During a session, privileged users can transfer, delete, or rename files both to and from the remote system or device. You do not need to have full control of the remote system or device to transfer files.
Depending upon the permissions your administrator has set for your account, you may be only allowed to upload files to the remote system or to download files to your local computer. File system access may also be restricted to certain paths on the remote or local system, thereby restricting uploads and downloads to specific directories. Transfer files by using the upload and download buttons. Review transfer and deletion progress by clicking the plus sign at the bottom of the screen. Download, rename, or delete files by clicking on the More Options icon.
To start transferring files to a system, click on the File Transfer tab at the top of the screen.
Select a place to start browsing from the Volumes column. The breadcrumbs at the top show your current location. Double click on a folder to open it.
If an ICAP server is enabled, any files transfers using FTP are scanned for malware. If malware is detected in the file, it is not transferred. Details regarding a failed file transfer might be displayed on the file transfer screen, and are available in session or team reports. To enable an ICAP server, see Security.
File transfer tools
| Icon | Description |
|---|---|
 | Stop access to the remote device's file system. |
 | Go up a directory in the selected file system. |
 | Refresh your view of the selected file system. |
 | Show hidden files. |
 | Create a new directory. |
 | Upload a file to a directory / share files with the RDP clipboard. |
 | Download selected files from a directory. |
 | Toggle modifier keys. |
 | Send clipboard text to remote system. |
 | Retrieve clipboard text from remote system / retrieve clipboard text or files from remote system (RDP). |
 | Delete selected files from a directory. |
 | Download, rename, or delete a directory or file. ℹ️ When deleting a file or folder, it is permanently deleted. It is not sent to the recycle bin. |
RDP file transfer
Download files
You can transfer files during RDP sessions by using Ctr+C to copy to the Clipboard, pick right-click > Copy from a context menu, or click a copy button in the Explorer toolbar. These files are copied to the endpoint's clipboard.
Copying files or directories on the remote endpoint triggers a file download in your browser. The selected file downloads into the folder you have specified in your machine. Depending on your browser settings, you may be asked to specify a download location.
Upload files
Uploading files in the privileged web access console is a two step process:
- Tell the browser which files you want to share with the remote clipboard.
- Perform a Paste on the remote endpoint.
There are two ways to tell the browser which files to share:
- Click a toolbar button that shows a standard system file picker, similar to uploading files in the file transfer tab.
- Drag & drop files into the screen sharing view.
After you select one of these methods, a toast message at the bottom of the page reminds you to paste on the remote endpoint.
Once you paste on the endpoint, Windows shows the progress of the transfer in a dialog on the endpoint and provide a cancel button.
If you select more than one file using the file picker or drag and drop before pasting the previous file selection on the endpoint, the first file selected is overwritten.
Settings
In order for the file transfer to work as described, you need to ensure that the following settings are as follows:
- Clipboard Synchronization Mode is set to Automatic (see /login > Management > Security > Access Console)
- The user's Clipboard Synchronization Direction is set to Allowed in Both Directions (see /login > Users & Security > Users > Session Permissions > Clipboard Synchronization Direction).
Share sessions
Invite team members
Within a session, you can request for a team member to participate in an access session. To share a session, follow the steps outlined below.
- Click the Invite other users into this session icon.
- Select the team that the user is a member of from the menu.
- From the team listing, choose the user with whom you would like to share the session.
- The user being invited will see a notification appear in the lower left corner of the screen indicating they have a new session invitation.
- Clicking VIEW on the notification banner displays information regarding the session. The user can then click ACCEPT to enter the session.
- Once the user has entered the session, you can chat with them by clicking on the Chat icon at the top of the screen.
You can send multiple invitations if you want more members from the team to join your session. Users are listed here only if they are logged into the access console or if they have extended availability enabled.
If you are permitted to share sessions with users who are not members of your teams, additional teams are displayed, provided that they contain at least one member logged into the access console or if they have extended availability enabled.
Only the session owner can send invitations. Invitations do not time out as long as you remain the session owner. Multiple active invitations cannot exist for the same user to join the same session. The invitation will disappear if:
- The inviting user cancels the invitation.
- The inviting user leaves the session.
- The session ends.
- The invited user accepts the invitation.
Invite external users
You can invite an external user or vendor to participate in an access session. To share a session, follow the steps outlined below:
- Click the Invite other users into this session icon.
- Select Invite External User....
- Select a policy, if applicable, and enter a short description for the type of invitation.
- In the Invitation Parameters area, enter the name of the person being invited, plus some comments to go along with the invitation.
- Click Create Invitation.
You can now invite an external user by either clicking on the Copy to Clipboard icon and providing the user with the link to the session URL, or by sending an email invitation.
Remove a member
When needed, you can remove another user from a shared access session. To remove a user, click on the Remove Member icon.
From the menu, choose the participant you wish to remove. Click Remove Member.
You must be the owner of the session to remove another member.
Close the session
- To exit an access session, click on the X icon in the top right corner of the screen. If you are the session owner, note that the End Session action will close the session page in your access console and will remove any additional members who may be sharing the session.
- Next, you will receive a prompt asking if you would like to end the session.
- If you click OK, the session will end, and you will be directed back to the All Assets list.
Updated 1 day ago
