Discovery | PRA On-prem
What is discovery in Vault?
Discovery in Vault refers to the process of scanning and importing privileged credentials from external sources, such as Active Directory or local accounts, into BeyondTrust Vault. This process can be done manually or through the built-in discovery tool.
How is discovery useful in Vault?
Discovery simplifies credential management by automatically finding and importing privileged credentials into Vault. This ensures that credentials are securely stored and centrally managed, enhancing security and reducing the risk of manual errors in credential handling.
How do I access the Discovery page?
- Use a browser to sign in to your Privileged Remote Access URL.
This URL is provided in the BeyondTrust welcome email and includes your site URL followed by /login. - From the left menu, click Vault.
The Accounts page opens and displays by default. - At the top of the page, click Discovery.
The Discovery page displays.
Initiate a discovery job
-
From the left menu, click Privileged Remote Access > Vault.
The Vault page opens and the Accounts tab displays by default. -
Click the Discovery tab.
The Discovery tab displays. -
Click New Discovery Job.
The Discovery: New Job page displays. -
You have the following four options to choose:
- Windows Domain
- Local Windows Accounts on Jump Clients
- AWS Secrets
- Password Safe
- The AWS Secrets and Password Safe options are only available in version 25.2 and above. For more information on how to configure AWS Secrets or Password Safe, see Discovery of AWS Secrets or Discovery of Password Safe.
- The Local Windows Accounts on Jump Clients option only displays if you have the Jump Clients permission located in Users & Security > Users > Access Permissions > Jump Technology. If you have any issues, contact your site administrator.
-
Select Windows Domain (default value), and then click Continue.
The Discovery: Windows Domain page displays. -
You are presented with the option to select a new or existing domain to discover. The default value is New Domain, select Add a New Domain. If a domain does exist, select Existing Domain and select from the dropdown.
-
For DNS Name of the Domain, enter a valid fully qualified DNS name for the domain you are performing the discovery action on.
-
For Gateway, enter a valid Gateway.
Discovery is currently supported on Windows Gateways.
-
For Management Account, select either New Account (default value) or Existing Account.
New Account
- Username: The valid username of a domain. For example, [email protected].
- Password: The password of the account.
- Confirm Password: Confirmation password of the account.
Existing Account
- Search for an account: Type the name of an existing account.
- This account is used to connect and perform the discovery of accounts and endpoints of the specified domain.
- This account should be a functional account and only requires password change and reset permissions.
-
Click Save and Continue.
Define the discovery scope
-
Select the types of objects you wish Vault to discover:
- Domains Accounts
- Endpoints
- Local Accounts
- Services
Discovery of Services is available only if Domain Accounts, Endpoints, and Local Accounts are selected. Only Windows service accounts are discovered.
- Enter a Search Path, or leave it blank to search all OUs and containers.
- Click Browse to refine your search by specifying which OUs to target.
- Use the LDAP Query field to narrow the scope of user accounts and endpoints searched.
- Once the scope is defined, click Start Discovery.
TipThe discovery process can take some time. While discovery is underway, the Discovery Progress page appears and tracks the number of accounts and endpoints discovered.
Import discovered endpoints, accounts, and services
Once the discovery job is complete, a Discovery Results page appears.
You can switch between the Endpoints, Local Accounts, Domain Accounts, and Services tabs to view the discovered items and import them. When you import items, they are saved for later use in your Vault.
- Endpoints: Shows the Name and Description of the endpoints discovered, as well as their Operating System and Distinguished Name.
- Local Accounts: Shows the Username, Endpoint (system associated with account), Description, Last Login Date, Password Age, and Status for all discovered local accounts.
- Domain Accounts: Shows the Username, Distinguished Name, Description, Last Login Date, Password Age, and Status for all discovered domain accounts.
- Services: Shows the Display Name (Description) (name displayed in Services snap-in), Short Name (name used by Service Controller command line tool, Endpoint (system where service is used) , and Username (account used to run the service) for all discovered service accounts.
Only services that use an account other than a built-in account to run are returned in the discovery results.
The user must have permission to use Remote RDP Jump Technology in order to import discovered endpoints.
Import selection
From the Discovery Results page, to import discovered items follow these steps:
- Choose any of the tabs: Endpoints, Local Accounts, Domain Accounts, or Services.
- Select the items you wish to import, and then click Import Selected.
You can filter the list of items based on their attributes using the filter box above the grid. For each tab, click the i next to the filter box to see which attributes can be searched.
- The Import Discovered Items page appears, listing the number of endpoints, accounts, and services selected for import. If importing endpoints and services, select a Asset Group from the list or select the Do not create Asset option. If importing accounts, select an Account Group from the list.
- Click Start Import.
- A status page appears, indicating the import completed successfully, and lists the number of endpoints, accounts, and services imported. You can click the links to view the specific items that were imported. Click Done Importing to close the status page.
Upon successful import, the accounts, endpoints, and services are listed on the Accounts, Endpoints, and Services pages in Vault.
On the Accounts page, the endpoints associated with the shared accounts are indicated for each account, and if the account is used to run a Windows service, this is indicated in the Status column.
On the Endpoints page, the number of accounts, Assets, and services associated with each endpoint is indicated. You can view the specific associated accounts, Assets, and services when you click the links.
For imported endpoints, RDP Jump shortcuts are created with an automatic association to local accounts.
For more information about Gateways, see the Gateway guide.
Click the Select visible columns button
above the grid to customize the columns displayed in the grid.
Non-domain linked endpoints can be associated with RDP items for improved security and user experience. To create the association, follow these steps:
- Click Assets on the Endpoints screen.
- Click Add and select Add Remote RDP Asset or Associate Existing RDP Assets.
- If associating an existing shortcut, click the shortcut(s) to add, and then click Associate Selected.
On the Services page, the endpoints and accounts associated with each service are indicated, as well as the last status of the service. Also, from the Services page, you have the option to restart the service upon rotation of the service account by checking the Restart box for the service.
Initiate a discovery job for an existing domain
Discovery jobs can be initiated on domains that have already been added or imported to BeyondTrust Vault. You can initiate a discovery job from the Vault > Domains page and from the Vault > Discovery page.
Initiate discovery job from the Domains page
-
From the left menu, click Privileged Remote Access > Vault.
The Vault page opens and the Accounts tab displays by default. -
Click the Domains tab.
The Domains page displays. -
From the Domains list, select a domain.
-
Click the Discover button
 for the domain.
 -
Define the scope of the discovery, and then click Start Discovery.
-
Select the items to import from the discovery results and start the import.
Initiate discovery job from the Discovery page
-
From the left menu, click Privileged Remote Access > Vault.
The Vault page opens and the Accounts tab displays by default. -
Click the Discovery tab.
The Discovery Jobs page displays. -
Click New Discovery Job.
The Discovery: New Job page displays. -
Leave the default Windows Domain option selected, and then click Continue.
-
Select Existing Domain.
-
Select the domain from the dropdown list.
-
Click Continue with Existing Domain.
-
Define the scope of the discovery, and then click Start Discovery.
-
Select the items to import from the discovery results and start the import.
Schedule discovery jobs
Discovery jobs can be scheduled to run on defined days and times, avoiding the need for manually initiating new jobs on regularly updated workspaces.
Schedule discovery job for a new domain
-
From the left menu, click Privileged Remote Access > Vault.
The Vault page opens and the Accounts tab displays by default. -
Click the Domains tab.
The Domains page displays. -
Click Add.
-
For DNS Name of the Domain, enter a valid fully qualified DNS name for the domain you are performing the discovery action on.
-
For Gateway, enter a valid Gateway.
Discovery is currently supported on Windows Gateways.
-
For Management Account, select either New Account (default value) or Existing Account.
New Account
- Username: The valid username of a domain. For example, [email protected].
- Password: The password of the account.
- Confirm Password: Confirmation password of the account.
Existing Account
- Search for an account: Type the name of an existing account.
- This account is used to connect and perform the discovery of accounts and endpoints of the specified domain.
- This account should be a functional account and only requires password change and reset permissions.
-
Click Save and Continue.
-
Set the options in the Scheduled Domain Discovery section.
-
Click Save. The discovery job runs on the days and time you specify.
-
To import items discovered from a scheduled job:
-
From the left menu, click Privileged Remote Access > Vault.
The Vault page opens and the Accounts tab displays by default. -
Click the Discovery tab.
The Discovery Jobs page displays. -
Locate the completed scheduled job. (Scheduled jobs are indicated as being performed by System.)
-
Click View Results for the completed job.
-
Import selected items.
-
Schedule a discovery job for an existing domain
- From the left menu, click Privileged Remote Access > Vault.
The Vault page opens and the Accounts tab displays by default. - Click the Domains tab.
The Domain page displays. - Click the pencil icon to edit an existing domain from the list.
- From the Scheduled Domain Discovery section, click the Enable Schedule Delivery checkbox.
- Select the days and time for the schedule.
- Select the objects in the Discovery Scope section, and then click Save.
DNS name of the domain
Enter the DNS name for your environment.
Gateway
Choose an existing Gateway located in the environment where you wish to discover accounts.
Management account
Select the management account needed to initiate the discovery job. Choose to use a new account, which requires a Username, Password, and Password Confirmation to be entered. Or, choose to use an existing account discovered from a previous job or added manually in the Accounts section.
Username
Enter a valid username to use for discovery (username@domain).
Password
Enter a valid a password to user for discovery.
Confirm password
Re-enter the password to confirm.
You can define which parts of a domain to run a Discovery/Import job. Once you select the required fields for a Discovery Job, you can refine the search by specifying which OU’s to target or entering LDAP queries.
Discovery scope
Select the objects you wish Vault to discover:
- Domain Accounts
- Endpoints
- Local Accounts
- Services
You can enter a Search Path, or leave it blank to search all OUs and containers. You can also use an LDAP Query to narrow the scope of user accounts and endpoints searched.
Discovery: Jump Client search criteria
Enter one or more search criteria to find active Jump Clients you'd like to use to discover local Windows accounts. All text field searches are partial and case-insensitive. Jump Clients that match all the search criteria will be displayed on the next page for you to select before discovery begins.
The following types of Jump Clients cannot be used for local account discovery and are not included in the search results:
- Jump Clients that are currently offline or disabled
- Jump Clients that are not running as an elevated service
- Jump Clients that are installed in a domain controller
Asset Groups
Administrators can search for Jump Clients via their Asset Groups and their attributes. If the user is not a member of any Asset Group, the Asset Groups selection section is grayed out and either a tool tip or note is shown indicating that user must be a member of at least one Asset Group to proceed with the Jump Client discovery process. This is similar to how domain discovery works when a user is not a member of a Gateway during discovery or not a member of an Asset Group when importing an endpoint.
You can search All of Your shared Asset Groups or Specific Asset Groups.
Jump Client attributes
You can select one or more shared Asset Groups. Private Asset Groups are not supported.
One or more Jump Client attributes can be entered. If more than one search criteria is entered, only Jump Clients matching all criteria are used for discovery.
The following attributes can be used as search criteria:
- Name: The Jump Client's name as it appears in the Name column in the access console.
- Hostname: The Jump Client's hostname as it appears in the Hostname/IP column of the access console.
- FQDN: The Jump Client's fully qualified domain name, as it appears under the FQDN label of the Jump Client details pane in the access console.
- Tag: The Jump Client's tag as it appears in the Tag column of the Representative Console.
- Public/Private IP: The Jump Client's public and private IP addresses, as they appear under the Public IP label of the Jump Client details pane in the access console. Jump Clients whose IP address starts with the given search value will match.
Click Continue to initiate the discovery.
Discovery: Select Jump Clients
This screen displays the Jump Clients that will be used in discovery. Select one or more and click Start Discovery.
Discovery results
The results display a list of discovered Endpoints and Local Accounts. Select one or more and click Import Select.
Import discovered items
A list of the selections you made displays.
Account group
Select from which account group you want to import, then click Start Import. A warning display indicating this process cannot be stopped once it has started. Click Yes to proceed, or No to abort.
Importing
A message displays indicating the import was completed successfully. A list of Endpoints and Local Accounts displays.
Accounts
Search shared/personal accounts
If you get an extensive list of accounts discovered, use the Search field to search accounts by Name, Endpoint, or Description (by Name and Description only for personal accounts).
Toggle between Shared and Personal accounts. Select one or more accounts. Click ... to Rotate Password, Edit or Delete the account. You can also click Rotate at the top of the page to rotate the password for the select accounts.
Discovery jobs
View discovery jobs that are in progress for a specific domain, or review the results of successful and failed discovery jobs.
View results
Click View Results for a discovery job to view the Discovery Results, which includes discovered endpoints, local accounts, domain accounts, and services found in the domain.
You can filter the list of items based on their attributes using the filter box above the grid. For each tab, click the i next to the filter box to see which attributes can be searched.
Select which endpoints, accounts, and services to import and store in your BeyondTrust Vault instance. For each list item you wish to import, check the box beside it and click Import Selected.
Discovery of AWS Secrets
Use discovery to locate AWS Secrets that are in AWS Secrets Manager.
Prerequisites
- You must install a Gateway on an EC2 instance in an AWS environment.
- You must assign an IAM role to the EC2 instance that has the IAMFullAccess and SecretsManagerReadWrite permission.
Initiate an AWS Secrets discovery job
-
From the main menu, click Privileged Remote Access > Vault.
The Vault page opens and the Accounts tab displays by default. -
Click the Discovery tab.
The Discovery tab displays. -
Click New Discovery Job.
The Discovery: New Job page displays. -
You have the following four options to choose:
- Windows Domain
- Local Windows Accounts on Jump Clients
- AWS Secrets
- Password Safe
-
Click AWS Secrets.
-
Click Continue.
-
For Gateway, select the AWS Gateway.
Discovery of clustered Gateways only supports all nodes on EC2 instances in the same organization.
-
Click Start Discovery.
-
From the Discovery Results table, select the items you want to import.
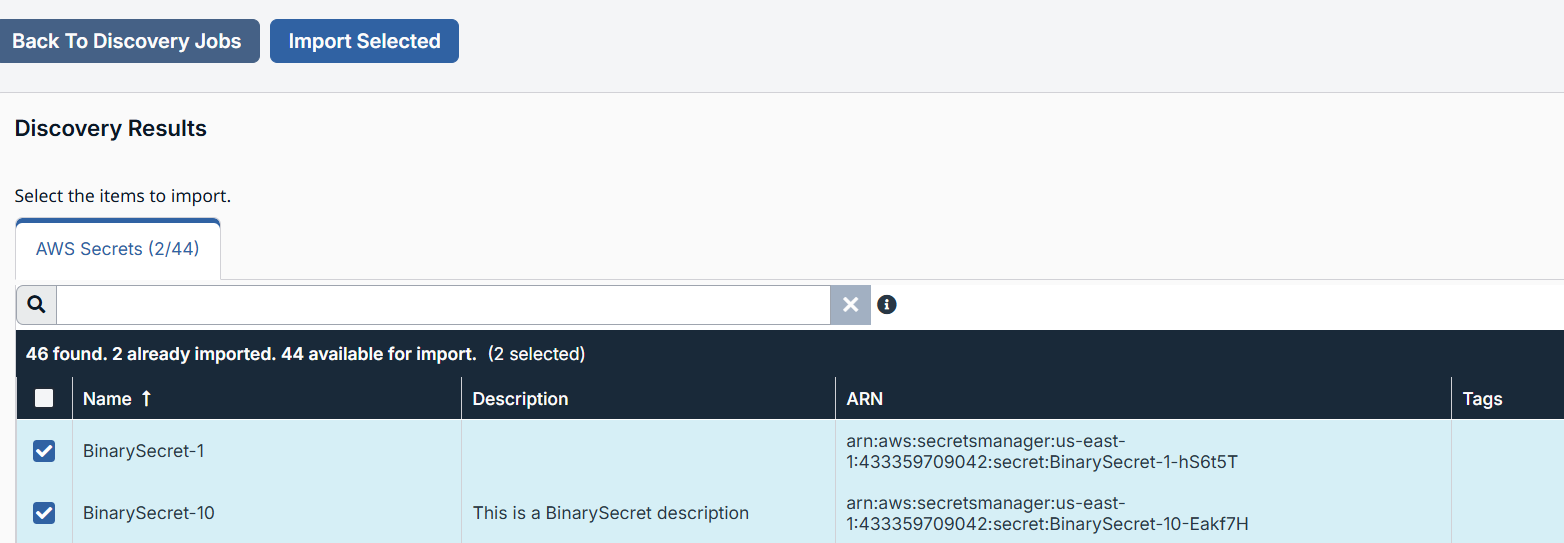
-
Click Import Selected.
-
For Account Group, you can specific a particular group you want the results to reside, or select the Default Group.
-
Click Start Import.
-
Click Yes if the dialog box says "This process cannot be stopped after it is started. Are you sure you want to continue?"
-
Click Done Importing.
-
From the Vault > Accounts page, click the AWS Secrets tab to display the AWS Secrets table.
Checkout an account
-
From the main menu, click Privileged Remote Access > Vault.
The Vault page opens and the Accounts tab displays by default. -
Click the AWS Secrets tab.
-
From the AWS Secrets table, select the account you want to checkout. The user must have Inject And Checkout Vault role, otherwise the Checkout button in step 4 does not display.

-
Click Checkout
 .
. -
The AWS Secret dialog box displays.
You can either view the secret , copy the secret
  , or download the secret by clicking the Download Secret button.
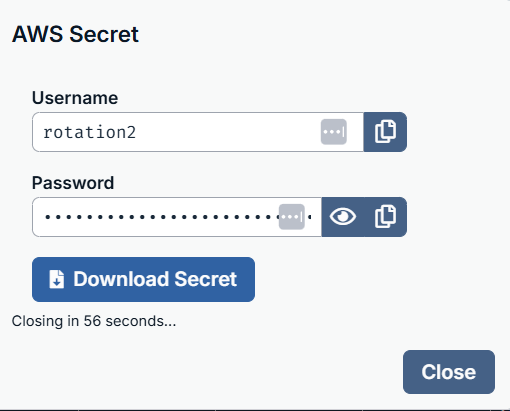
-
After you make your selection, click Close.
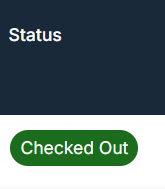
In the Status field of the AWS Secrets table, it displays that item is checked out.
Rotate Secrets
From the main menu, click Privileged Remote Access > Vault.
The Vault page opens and the Accounts tab displays by default.
-
Click the AWS Secrets tab.
-
From the AWS Secrets table, select the account you want to rotate.
-
Click Rotate or select the horizontal ellipsis from the row in the table and select Rotate Secret.
The Rotate Summary displays.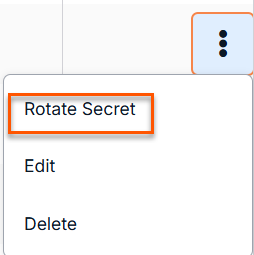
-
Click Start Rotation.
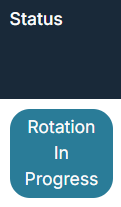
In the Status field of the AWS Secrets table, it displays that the item is in rotation.
Once rotation is complete, the Password Age information updates with a time stamp of a few seconds.
A Lambda function is needed for rotate secrets to work.
Edit Secrets
- From the main menu, click Privileged Remote Access > Vault.
The Vault page opens and the Accounts tab displays by default. - Click the AWS Secrets tab.
- From the AWS Secrets table, select the account you want to edit.
- Click Edit.
- Make the necessary changes and click Save.
You cannot make changes to the Name field. Changes to imported accounts must be made in the originating system and will be reflected after re-discovery.
Delete Secrets
- From the main menu, click Privileged Remote Access > Vault.
The Vault page opens and the Accounts tab displays by default. - Click the AWS Secrets tab.
- From the AWS Secrets table, select the account you want to delete.
- Click Delete.
- A confirmation dialog box displays, click Yes.
Credential injection of AWS Secrets account
AWS Secrets accounts are available for injection into matching Jump Clients from the representative console. At the time of injection, the Credential Store dialog box displays.
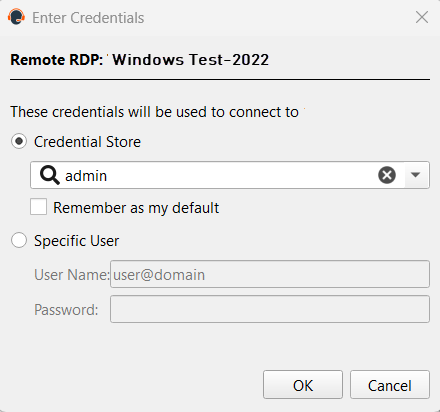
-
For the Credential Store option, click the dropdown and select the appropriate AWS Secrets account.
-
Click OK.
-
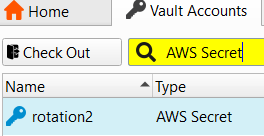
To view all the AWS Secrets accounts available for credential injection, click the Vault tab at the top of the screen.
-
In the Search bar, enter AWS Secret.
A list of only AWS Secret account displays. -
Users with the Inject and Checkout role can also select an AWS Secret account from the list and choose the appropriate option of Check In or Check Out.
Password Safe Discovery
You can use Vault to discover and import Managed Accounts and Managed Systems from your Password Safe instance.
The direct integration with Password Safe supports all credential types, with the exception of with the exception of Application and Kubernetes credentials. To import these credentials, continue using the ECM-based integration. Endpoint discovery and import is limited to Windows endpoints only.
Manual Import
Prerequisites
- A valid commercial CA-signed SSL certificate.
- An API registration for the SRA appliance IP address in the Authentication Rules.
- A user must be chosen or created to be used as the impersonating user. The impersonating user must be in a user group with the following properties:
- For Features: Password Safe Account Management and Password Safe System Management (read-only).
- Assigned access to the API registration for the SRA appliance IP address. This is used as a connection in SRA.
- Any Managed Account Smart Groups added to the user group for import must have the Password Safe Requestor role with an access policy assigned that has a 24x7 schedule and view password set to auto-approve.
- To import domain-linked accounts, the domain account must be linked to the asset.
Create connection
Start by creating a connection between the SRA site and Password Safe. Most of the information entered in this step comes from Password Safe; ensure you have that information on hand. To do this, follow these steps:
- From the main menu, click Privileged Remote Access > Vault.
The Vault page opens and the Accounts tab displays by default. - Click the Connections tab.
The Password Safe Connections page displays. - Click Add.
- For Name, type a unique name to help identify this role. This is a required field.
- For Password Safe Host, type the name of the Password Safe Host. This is a required field.
- For API Key, copy the information from the Key field in Password Safe for the API registration you created and paste it into the API Key field in PRA. This is a required field.
- For Impersonating Username, select a valid username from one of the following groups: Password Safe's Administrators, Global Approvers, or Secure Remote Access Requestors. This is a required field.
- Impersonating Username Password is determined by the User required password checkbox on the API registration from Password Safe. If the checkbox is not selected, then no password is required for this field in PRA. If the checkbox is selected, then use the password associated with the username on the Password Safe API registration and enter it in this field in PRA.
Initiate a Password Safe discovery job
-
From the main menu, click Privileged Remote Access > Vault.
The Vault page opens and the Accounts tab displays by default. -
Click the Discovery tab.
The Discovery tab displays. -
Click New Discovery Job.
The Discovery: New Job page displays. -
You have the following four options to choose:
- Windows Domain
- Local Windows Accounts on Jump Clients
- AWS Secrets
- Password Safe
-
Click Password Safe.
-
Click Continue.
-
For the Password Safe Connection, make sure a valid Password Safe connection exists. Select the connection. This is a required field.
-
Click Continue.
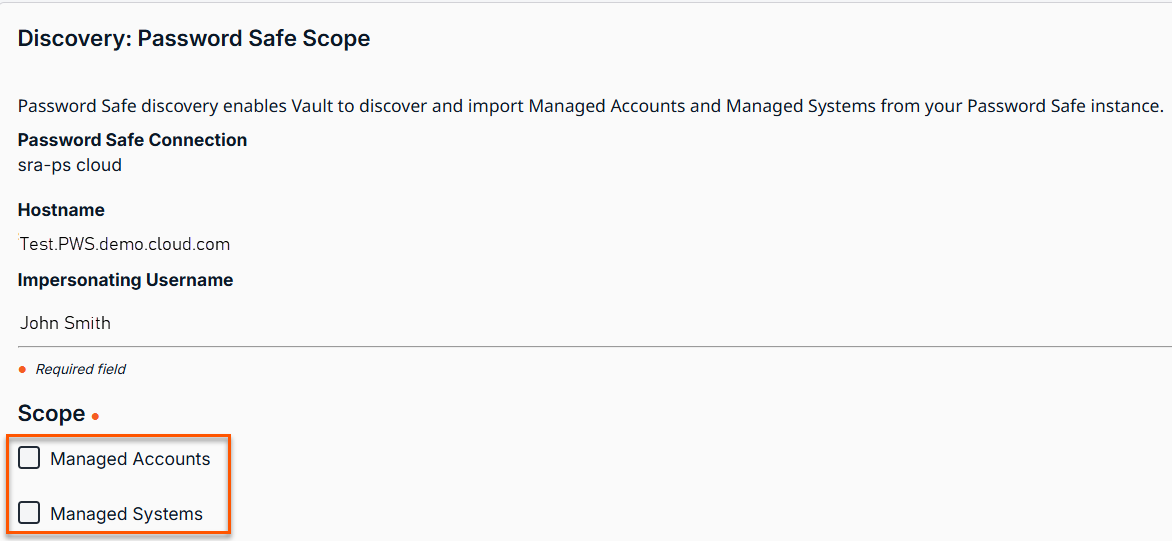
The Discovery: Password Safe Scope page displays. -
Select the appropriate checkboxes you want to receive information for from Password Safe:
-
Managed Accounts
-
Managed Systems
-
-
Click Start Discovery.
The Discovery Progress page displays. -
From the Discovery Results table, select the items you want to import.
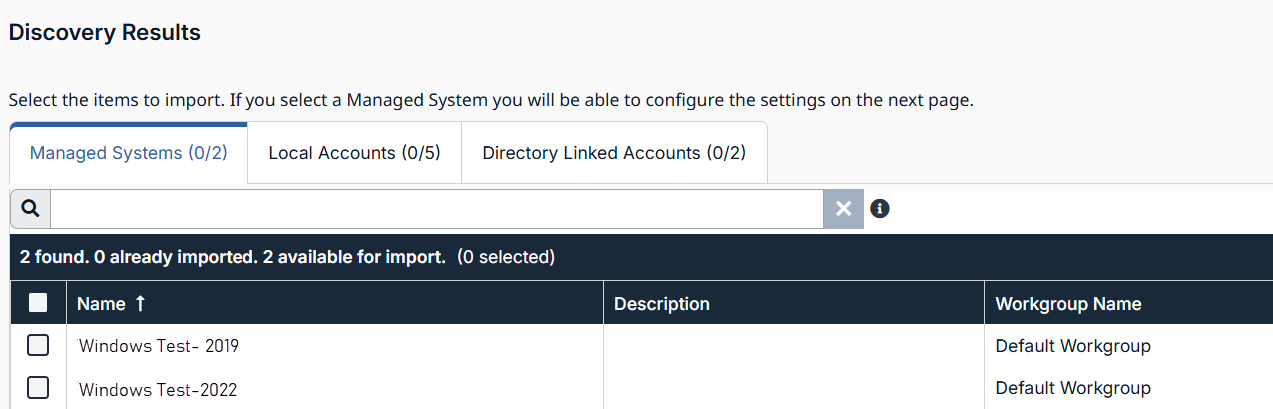
The Workgroup Name field is new.
-
Click Import Selected.
The Import Discovered Items page displays. -
For Account Group, choose the account group that the selected Managed Accounts is associated with.
-
Create one Asset per Managed System is available when importing Managed Systems and a Gateway is available. Choose an Asset Group and Gateway to associate the created RDP Assets with when importing. If you do not want to immediately create Assets for the imported Managed Systems, select Do not create Asset.
-
Click Start Import.
-
Click Yes in the following dialog box: "This process cannot be stopped after it is started. Do you want to continue?"
-
On the Importing page, the results of the Managed Accounts and Managed Systems display.
-
To view Managed Systems, click the View Endpoints link. This takes you to the Vault > Endpoints page.
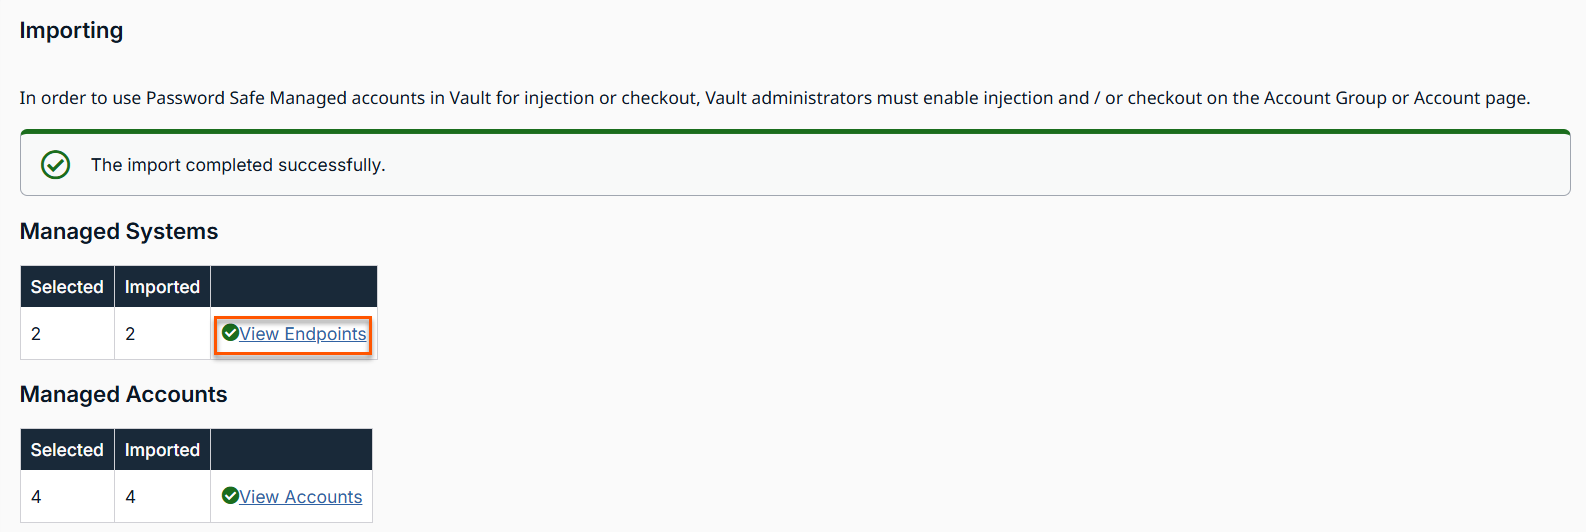
-
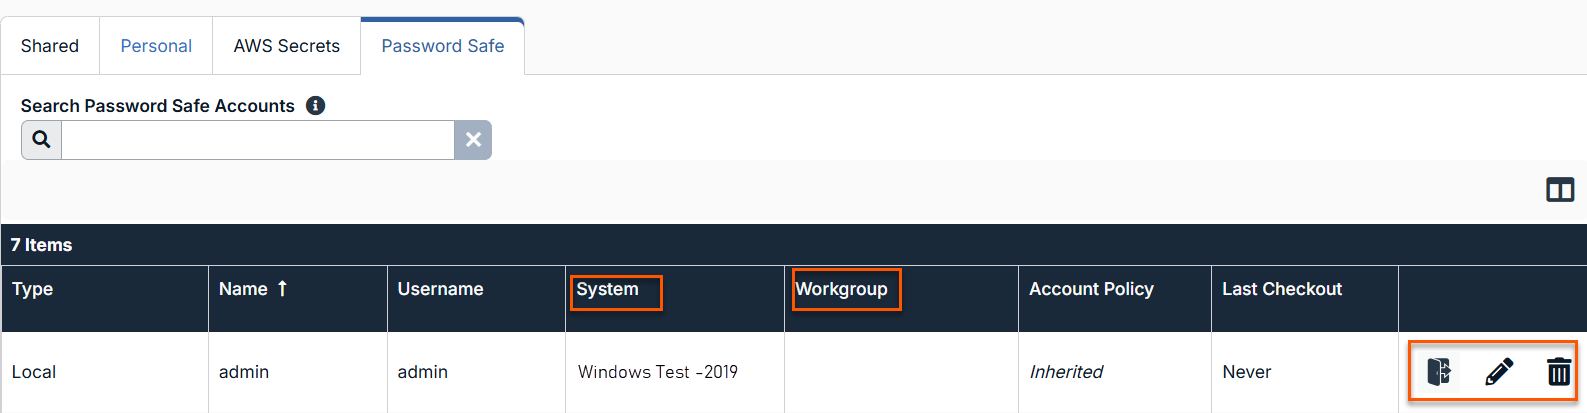
To view Managed Accounts, click the View Accounts link. This takes you to the Vault > Accounts page. The Password Safe table with Managed Accounts and Managed Systems displays.
-
From the Accounts page, you can check out a Password Safe account
 , edit a Password Safe account
  , or delete a Password Safe account
  from the Password Safe table.
- The option to rotate credentials does not exist in discovery of a Password Safe account.
- There are two new fields: System and Workgroup.
Check out a Password Safe account
-
From the main menu, click Privileged Remote Access > Vault.
The Vault page opens and the Accounts tab displays by default. -
Click the Password Safe tab.
-
From the Password Safe table, locate the account you want to check out. The user must have Inject And Checkout Vault role, otherwise the Checkout button in step 4 does not display.

-
Click Check Out
.
The Account Password dialog box displays. The password displays in plain text for one minute when you click Reveal.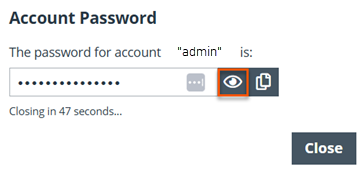
-
To copy the displayed password, click Copy
 .
.
Important infoCredentials are sourced from Password Safe at time of Check Out and Check In. No passwords are ever stored in the SRA Vault for Password Safe Accounts.
Check out a Directory Linked account
-
From the main menu, click Privileged Remote Access > Vault.
The Vault page opens and the Accounts tab displays by default. -
Click the Password Safe tab.
-
From the Password Safe table, locate the account you want to check out .
-
For the Target Endpoint for Directory Linked Account Checkout, ensure a valid endpoint exists in Password Safe.
Important infoDirectory Linked accounts must be checked out against a Managed System. If the Target Endpoint for Directory Linked Account Checkout field is left blank in the Connections tab, the following error occurs on checkout:
System name is not configured for directory linked account checkout.
If the supplied endpoint name does not match a Managed System in Password Safe, or the account has not been linked to the Managed System in Password Safe, checkout fails with an error.
This configuration is not necessary for Credential Injection.
-
Click Checkout
.
The Status column should display .
. -
To check in the account, click Check In
 .
.
Edit a Password Safe account
- From the main menu, click Privileged Remote Access > Vault.
The Vault page opens and the Accounts tab displays by default. - Click the Password Safe tab.
- From the Password Safe table, locate the account you want to edit.
- Click the pencil
 to edit.
 - Make the necessary changes and click Save.
Delete a Password Safe account
- From the main menu, click Privileged Remote Access > Vault.
The Vault page opens and the Accounts tab displays by default. - Click the Password Safe tab.
- From the Password Safe table, locate the account you want to delete.
- Click the trash can
 to delete.
 - A confirmation dialog box displays. Click Yes.
Credential injection of a Password Safe account
Password Safe accounts are available for injection into matching RDP Assets or Jump Clients. At the time of injection, the Credential Store dialog box displays.
- For the Credential Store option, click the dropdown and select the appropriate Password Safe account.
- Click OK.
- To view all the Password Safe Vault accounts available for credential injection, click the Vault tab at the top of the screen.
- In the Search bar, enter password safe.
A list of only Password Safe account displays. - Users with the Inject and Checkout role can also select a Password Safe account from the list and choose the appropriate option of Check In or Check Out.
Automatic import of accounts and endpoints
Vault administrators can automatically import selected domain accounts, endpoints, and local accounts using import rules after scheduled discovery runs using predefined filters. This reduces time and effort required for manual imports.
Automatic import jobs run in three phases:
- Matching phase
- Removal phase
- Import phase
If any rule in the batch fails during the matching or removal phases, all of the rules in that batch fail. However, if any rule fails during the import phase, this does not prevent other rules in the connection from running and completing their imports.
Prerequisites
- Vault administrator privileges
Create a Password Safe connection
Start by creating a connection between the SRA site and Password Safe. Most of the information entered in this step comes from Password Safe; ensure you have that information on hand. To create the connection:
- From the main menu, click Privileged Remote Access > Vault.
The Vault page opens and the Accounts tab displays by default. - Click the Connections tab.
The Password Safe Connections page displays. - Click Add.
- For Name, type a unique name to help identify this role. This is a required field.
- For Password Safe Host, type the name of the Password Safe Host. This is a required field.
- For API Key, copy the information from the Key field in Password Safe for the API registration you created and paste it into the API Key field in PRA. This is a required field.
- For Impersonating Username, select a valid username from one of the following groups: Password Safe's Administrators, Global Approvers, or Secure Remote Access Requestors. This is a required field.
- Impersonating Username Password is determined by the User required password checkbox on the API registration from Password Safe. If the checkbox is not selected, then no password is required for this field in PRA. If the checkbox is selected, then use the password associated with the username on the Password Safe API registration and enter it in this field in PRA.
Create the Discovery Schedule
After the Password Safe connection is created, complete the Scheduled Discovery section to automatically import managed credentials and endpoints from Password Safe.
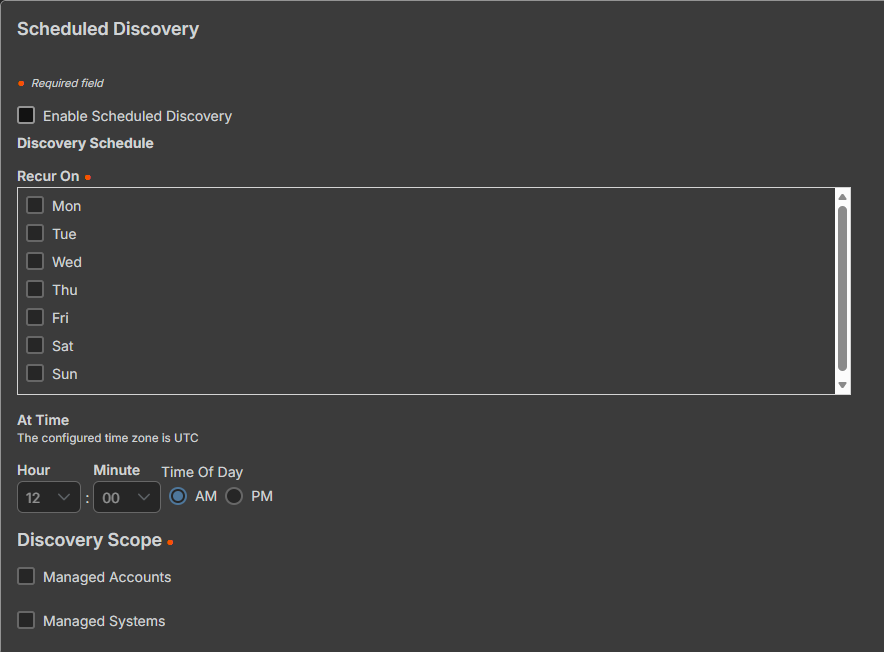
- In the Scheduled Discovery section, check the Enable Scheduled Discovery box.
- Set the Discovery Schedule:
- Set the day(s) discovery recurs on
- Set the time the discovery recurs on
- Select the Discovery Scope:
- Managed Accounts
- Managed Systems
Create Password Safe import rules
Password Safe import rules determine how accounts and assets are imported after scheduled discoveries. Once import rules are created, they're owned and run by the system user in an automatic fashion. Imported Vault accounts, Vault endpoints, and any associated Assets associated with those endpoints are owned by that rule.
- Import rules are only executed automatically following a scheduled discovery. They do not run without one.
- Up to 50 rules can be created per connection, with priority determining which rule applies if an account matches multiple criteria.
Once the connection and discovery schedule are created, create one or more import rules:
-
In the Password Safe Import Rules section, click +Add Import Rule.

-
Under Create Password Safe Rule, add a Rule Name.
-
Set filters to define criteria for the import rule.
- At least one filter is required per rule. Accounts and endpoints can both have up to 10 filters.
- Multiple filters use And logic, meaning the rule uses the first filter and any subsequent filters.
-
Check Accounts to add account filters to the rule.
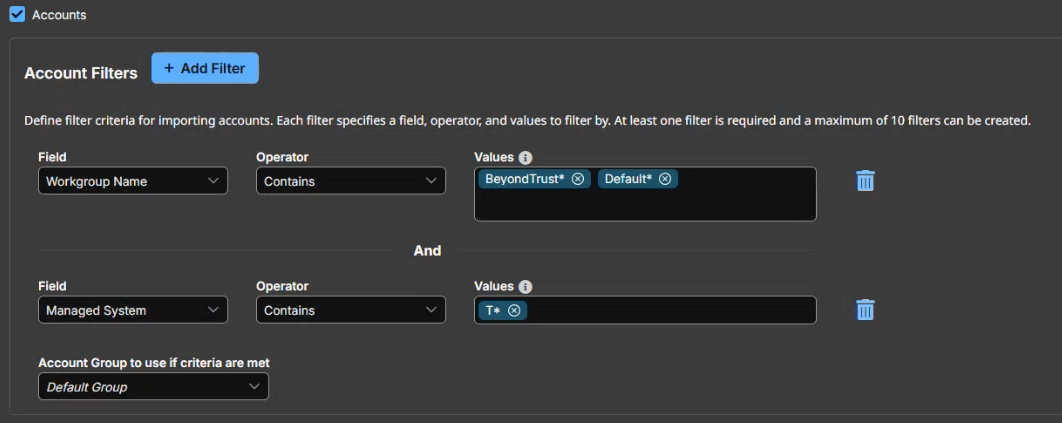
- Select a Field to filter by from the dropdown list.
- Select an Operator. Options include Contains and Does not contain.
- Enter a value to filter by in the Value field. Add multiple values by typing and pressing Enter after each value.
Multiple values use Or logic, meaning the filter looks for the selected field, operator, and value one or value 2, etc.
- Select an option from the Account Group to use if criteria are met dropdown list. This defines the group that accounts matching filter criteria are imported into.
- Once an account is imported, it cannot move between Account Groups unless an administrator moves it, or the account is removed and reimported. See the Important note below for more information.
- If there are overlapping rules (rules are matched on multiple rules), the account is only imported once, and assigned to the Account Group from the filter with the higher precedence at the time of import.
- Click +Add Filter to add a new account filter.
- Click
 to delete an account filter.
- If a manually imported account is matched on an import rule, the import rule takes ownership of that account, and the account is now considered an automatically imported account.
- Accounts imported via an import rule are automatically removed if, after a scheduled discovery, they no longer match any previously matched rules. The are also removed if the associated import rules are deleted. For example, if a previously imported account is deleted in Password Safe, it is not found in the next scheduled discovery, and when failed to match against an import rule, is removed from the system.
-
Check System (Assets) to add system filters to the rule.
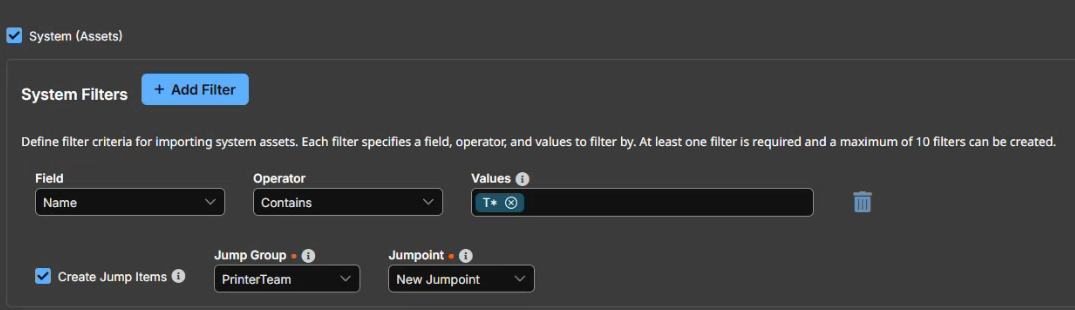
- Select a Field to filter by from the dropdown list.
- Select an Operator. Options include Contains and Does not contain.
- Enter a value to filter by in the Value field. Add multiple values by typing and pressing Enter after each value.
- Check the Create Asset box to create one remote RDP Asset per each of the imported systems. Select the Asset Group and Gateway to assign the Asset to.
Asset Groups and Gateways listed in the dropdowns are limited to those that the Vault administrator has access to. This only applies on rule set up. Once the rule is created, the rule is owned by the system and there is no permission check. The only exception occurs when a user clicks Process Using Rules manually. When a user clicks that button, they're running the job with the user's permissions. If the user doesn't have sufficient permissions to to modify Assets associated with that rule, the job will fail.
- Click +Add Filter to add a new system filter.
- Click to delete an account filter.
-
Click Save at the top of the page.
Once import rules are created, the next time a scheduled discovery runs, those rules run on that discovery, find all filter matches, and automatically import those matches.
Accounts, endpoints, and related Assets that no longer match a rule are automatically removed. This also applies when an administrator deletes a rule or connection, which grants the system permission to clean up items tied to those rules.
View and Edit Password Safe import rules
To view or edit import rules associated with a connection:
- From the main menu, click Privileged Remote Access > Vault.
The Vault page opens and the Accounts tab displays by default. - Click the Connections tab.
The Password Safe Connections page displays. - Locate a connection in the list.
- Click
 to the right of the connection to view connection information.
 - Locate the import rules in the Password Safe Import Rules section at the bottom of the page.
- Click to the right of the rule to view and edit information.
- After changes are made, click Save at the top of the screen.
Change order of import rules
Each rule in the list takes precedence over the rules below it. To change the order of import rules:
- Click the Change Order button.
- Drag and drop rules in the order you wish to see them, or enter the order number in the field.
- Click Save Order once updated.
Process Using Rules outside of scheduled discovery
If you don't want to wait until the next scheduled discovery to automatically import matches, you can run those import rules by clicking the Process Using Rules button, located on the Discovery Results page. Process Using Rules always processes against the entire discovery, and not just against items that haven't been imported.
- From the main menu, click Privileged Remote Access > Vault.
The Vault page opens and the Accounts tab displays by default. - Click the Discovery tab.
The Discovery Jobs page displays. - Locate a manual discovery in the list.
- Click View Results to the right of the discovery.
The Discovery Results page displays. - Click Process Using Rules at the top of the page.
- A confirmation dialog box displays. Click Yes.
The Discovery Jobs page displays. - Locate the discovery job in the list.
- Click View Results to the right of the discovery.
The Discovery Results page displays. - Click the Automatic Import Jobs tab to view jobs run against that discovery. Each import rule has a corresponding job in the results list and includes information associated with that job.
The Status column lists the status of the job, including Pending and Complete statuses. If a status of Error displays, hover over the status to view the reason for the error.
When a rule fails or aborts, no action is taken on existing accounts or endpoints at the point of failure. If the error occurs during matching and removal, they are not removed or imported. If the error occurs during import, they are not imported.
Track Import Rule type
You can track whether the account is manually imported or automatically imported.
To view account import type, select the Vault > Accounts tab to see the Import Type column. Click the Automatic Import link to view which rules the import matched on.
To view endpoint import type, select the Vault > Endpoints tab to see the Import Type column. Click the Automatic Import link to view which rules the import matched on.
To view import rules in Vault or Asset reports:
- From the left menu, click Privileged Remote Access> Reports.
The Reports page opens and the Support tab displays by default. - At the top of the page, click the Vault or Asset tab.
- Click Show Report.
- The Data column displays if Vault accounts were created or deleted using an import rule.
Delete an import rule
- From the main menu, click Privileged Remote Access > Vault.
The Vault page opens and the Accounts tab displays by default. - Click the Connections tab.
The Password Safe Connections page displays. - Locate the import rule in the Password Safe Import Rules list.
- Click
 to the right of the import rule.
 - A confirmation dialog box displays. Click Yes.
Deleting an import rule also deletes any accounts and Assets associated with it that do not match any other import rules.
Updated 9 days ago
