Splunk | PRA
IT administrators using Splunk can now integrate BeyondTrust Privileged Remote Access (PRA) to strengthen access control, identify and prioritize threats seamlessly in real time, and remediate incidents proactively.
The BeyondTrust PRA integration helps safeguard your business by giving you complete visibility into activity across the IT infrastructure, including external threats such as malware hackers, internal threats such as data breaches and fraud, risks from application flaws and configuration changes, and compliance pressures from failed audits.
Through the integration, session event data captured through BeyondTrust PRA's rich logging capability is populated into Splunk's platform, and reports are provided for security review.
Prerequisites
Confirm software versions
Using this integration requires the following software and versions:
- A currently supported version of BeyondTrust Privileged Remote Access.
- Splunk On-Premises or Cloud: 6.3.0 or newer.
Review network considerations
The following network communication channels must be open for the integration to work properly:
| Outbound From | Inbound To | TCP Port # | Purpose |
|---|---|---|---|
| Splunk Server | BeyondTrust Appliance B Series | 443 | Session event data pulled from the Reporting API |
| BeyondTrust Appliance B Series | Splunk Server | 514 | Syslog event information from the B Series Appliance |
Configure Privileged Remote Access
The Splunk integration supports consumption of syslog output directly from the B Series Appliance.
Create the syslog feed
-
Sign into BeyondTrust B Series Appliance.
Your URL is the hostname of your B Series Appliance followed by /appliance (for example, https://support.example.com/appliance). -
From the top menu, click Security > Appliance Administration.
The Syslog page displays.
The image below is modified to show only the relevant Syslog section on the page.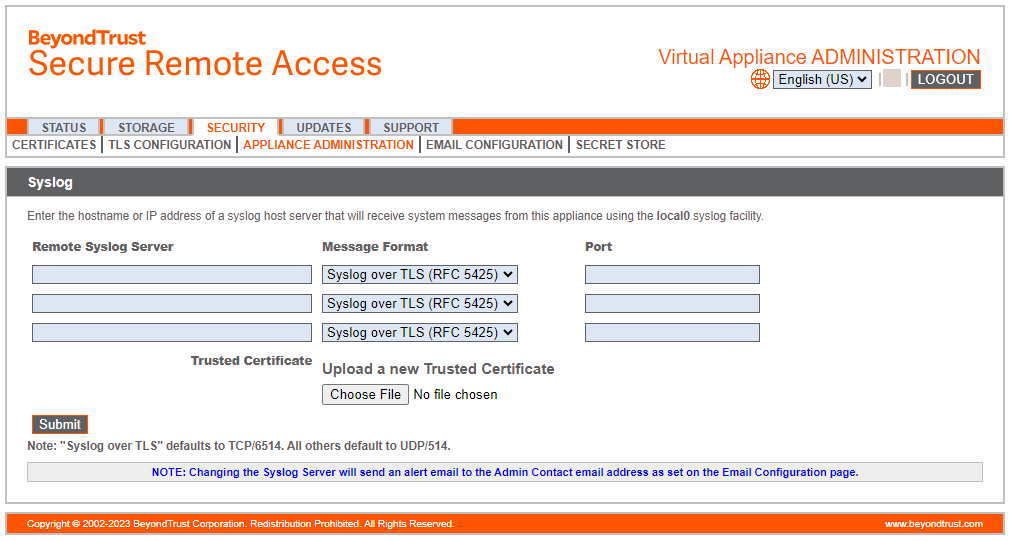
-
In the Syslog section, enter the hostname or IP address for your Remote Syslog Server.
-
Select your preferred message format.
-
Click Submit.
The syslog feed is created.
Verify the API is enabled
This integration requires the BeyondTrust XML API to be enabled. This feature is used by the BeyondTrust Middleware Engine to communicate with the BeyondTrust APIs.
Go to /login > Management > API Configuration and verify that Enable XML API is checked.
Create an OAuth API account
The Splunk API account is used from within Splunk to make Privileged Remote Access Command API calls to Privileged Remote Access.
-
In /login, navigate to Management > API Configuration.
-
Click Add.
-
Check Enabled.
-
Enter a name for the account.
-
OAuth Client ID and OAuth Client Secret are used during the OAuth configuration step in Splunk.
-
Under Permissions, check the following:
- Command API: Full Access.
- Reporting API: Allow Access to Support Session Reports and Recordings.
-
Click Save at the top of the page to create the account.
Configure Splunk
The integration application is available in the Splunkbase. You must log in to your Splunk account to download the application.
Once the new application is installed, follow these steps in the app to configure it:
-
In the list of Splunk Apps, click the new BeyondTrust Privileged Remote Access option.
-
On the BeyondTrust Privileged Remote Access Inputs page, click Create New Input.
-
Enter the required input information:
- Name: Desired unique input name.
- Interval: Desired polling interval. A short polling interval can result in poor performance. At least 60 seconds is recommended.
- Index: Must be beyondtrust_pra. Create this index if it does not already exist.
- PRA Site hostname: Your Privileged Remote Access hostname. Do not include the protocol (https://) or other URL components. This value must be the hostname only. For example, support.example.com.
- Client ID: Your previously configured Client ID.
- Client Secret: Your previously configured Client Secret.
-
Click Add.
