Special actions | PRA Pathfinder
What are Special Actions?
Special actions are custom tasks created to speed up processes on Windows, Mac, and Linux systems. These actions are designed to automate specific functions during remote sessions.
How are Special Actions useful?
Special actions allow representatives to perform tasks more efficiently by automating common actions across different operating systems. This helps reduce the time spent on routine tasks and ensures consistent execution during support sessions.
How do I access the Special Actions page?
- Sign into app.beyondtrust.io.
The BeyondTrust Home page displays. - From the main menu, click Privileged Remote Access > Console Settings.
The Console Settings page opens and the Access Console Settings tab displays by default. - Click the Special Actions tab.
The Custom Special Actions page displays.
The Special Actions page
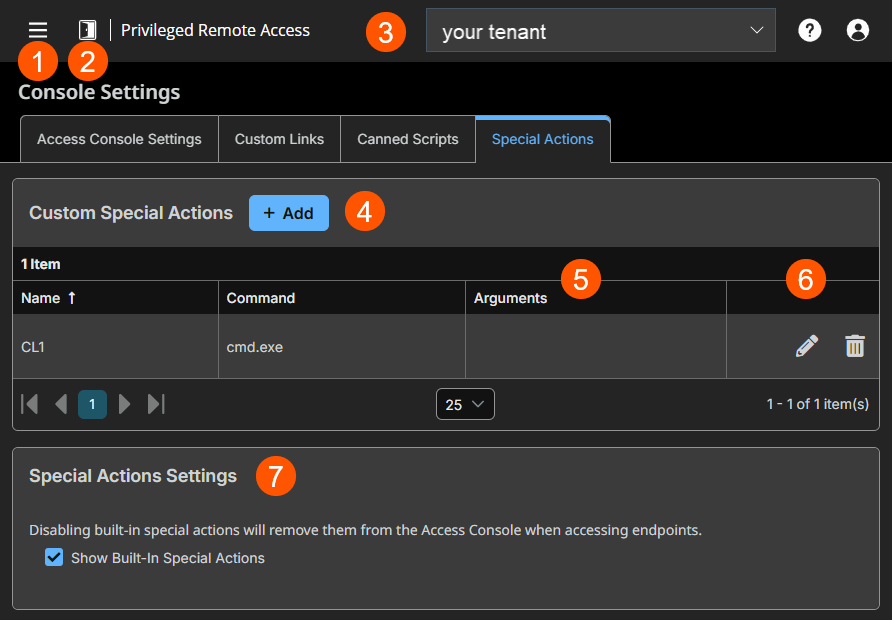
- Left menu: Easy access to all pages in Privilege Remote Access, including Status, Consoles & Downloads, My Account, Configuration, Asset Management, Vault, Console Settings, Users & Security, Reports, Management, and Appliance pages.
- Status: Opens the Status page.
- Header: Change your tenant site, manage your profile, and access documentation.
-
Special Actions columns: The list of Special Actions columns.
Special Actions columns
- Name: Unique name of the special action.
- Command: The name of the command line to run. For example, cmd.exe.
- Arguments: Provide any arguments of the command.
-
Special Actions list options: Edit or delete a special action.
-
Special Actions Settings: Enable or disable built-in settings.
Add a special action
- Sign into app.beyondtrust.io.
The BeyondTrust Home page displays. - From the main menu, click Privileged Remote Access > Console Settings.
The Console Settings page opens and the Access Console Settings tab displays by default. - Click the Special Actions tab.
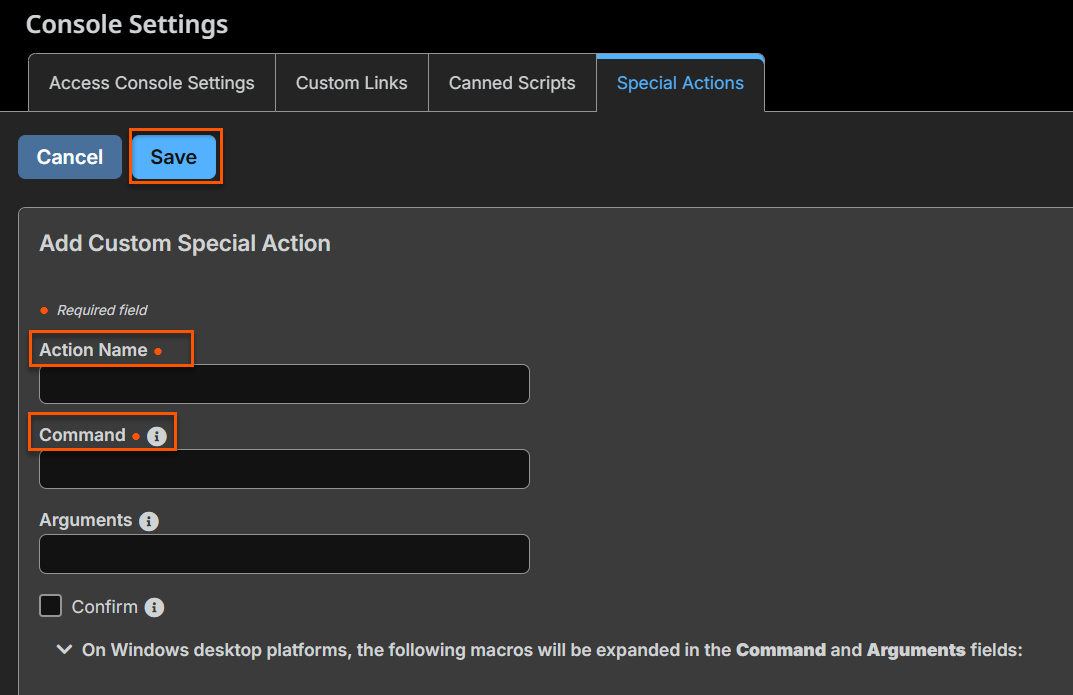
The Custom Special Actions page displays. - Click Add.
- For Action Name, create a unique name to help identify this action. During a session, a user can see this name on the special actions dropdown.
- For Command, enter the full path of the application you wish to run.
Do not use quotation marks. They are added as necessary. Windows systems may make use of the macros provided. If the command cannot be located on the remote system, then this custom special action does not appear in the user's list of special actions.
- For Arguments, enter arguments provided the command line accepts them. Arguments may use quotation marks if necessary, and arguments for Windows systems may use the provided macros.
For help with Windows arguments, search for "command line switches" on learn.microsoft.com.
- For Confirm, if you check the Confirm checkbox, users are prompted to confirm they want to run this special action before it executes. Otherwise, when you select the special action from the menu during a session causes that special action to run immediately.
Edit a special action
- Sign into app.beyondtrust.io.
The BeyondTrust Home page displays. - From the main menu, click Privileged Remote Access > Console Settings.
The Console Settings page opens and the Access Console Settings tab displays by default. - Click the Special Actions tab.
The Custom Special Actions page displays. - Select a special action from the list.
- Click the pencil
 to edit the special action.
 - Make the necessary changes, and click Save.
Delete a special action
- Sign into app.beyondtrust.io.
The BeyondTrust Home page displays. - From the main menu, click Privileged Remote Access > Console Settings.
The Console Settings page opens and the Access Console Settings tab displays by default. - Click the Special Actions tab.
The Custom Special Actions page displays. - Select a special action from the list.
- Click the trash can
 to delete the special action.
 - A confirmation dialog box displays, click Yes.
Special actions settings
Show built-in special actions
If you want to enable the default special actions provided by BeyondTrust, check the Show Built-In Special Actions checkbox. Otherwise, to enable only your custom special actions, clear the checkbox.
The Windows Security (Ctrl+Alt+Del) special action cannot be disabled.
Updated 3 days ago
