SSH and RDP proxy connections | PS Cloud
What are proxy connections?
Proxy connections direct your internet traffic through an intermediary server that serves as a bridge between your device and the internet.
How are they useful?
Instead of connecting to the destination website directly, your requests go through a proxy server, which forwards them on your behalf. The proxy uses its own IP address for this process, which helps improve privacy and security.
Configure SSH and RDP proxy connections
In the Password Safe web portal, requesters can request access to use SSH or RDP remote connections. To permit remote connections, you must configure an access policy.
The following section provides additional information on setting up SSH or RDP connections.
All registry changes must be done on each computer hosting a resource broker.
Host key algorithms
Below is a list of host key algorithms enabled for use by Password Safe's SSH client and server. Supported algorithms in default order of preference are:
- ecdsa-sha2-nistp256
- ecdsa-sha2-nistp384
- ecdsa-sha2-nistp521
- ssh-ed25519
- rsa-sha2-512
- rsa-sha2-256
- ssh-dss (disabled by default)
- ssh-rsa (disabled by default for incoming client connections only)
Use the following registry key to change the available client host key algorithms:
HKEY_LOCAL_MACHINE\SOFTWARE\BeyondTrust\ PBPS\SessionManager\ssh_proxy\client_host_key_algorithms (REG_MULTI_SZ)
Use the following registry key to change the available server host key algorithms:
HKEY_LOCAL_MACHINE\SOFTWARE\BeyondTrust PBPS\SessionManager\ssh_proxy\host_key_algorithms (REG_MULTI_SZ)
KEX algorithms
Below is a list of key exchange (KEX) algorithms enabled for use by Password Safe's SSH client and server. Supported algorithms in default order of preference are:
- curve25519-sha256
- ecdh-sha2-nistp256
- ecdh-sha2-nistp384
- ecdh-sha2-nistp521
- diffie-hellman-group-exchange-sha256
- diffie-hellman-group16-sha512
- diffie-hellman-group18-sha512
- diffie-hellman-group14-sha256
- diffie-hellman-group14-sha1 (disabled by default for incoming client connections only)
- diffie-hellman-group-exchange-sha1 (disabled by default)
- diffie-hellman-group1-sha1 (disabled by default)
Use the following registry key to change the available key exchange algorithms for the client side of Password Safe's SSH proxy (between the proxy and the managed systems):
HKEY_LOCAL_MACHINE\SOFTWARE\BeyondTrust\PBPS\SessionManager\ssh_proxy\kex_algorithms (REG_MULTI_SZ)
Use the following registry key to change the available key exchange algorithms for the server side of Password Safe's SSH proxy (between the user's SSH client and the proxy):
HKEY_LOCAL_MACHINE\SOFTWARE\BeyondTrust\PBPS\SessionManager\ssh_proxy\client_kex_algorithms (REG_MULTI_SZ)
MAC algorithms
Below is a list of message authentication code (MAC) algorithms enabled for use by Password Safe's SSH client and server. Supported algorithms in default order of preference are:
- hmac-sha2-256
- hmac-sha2-512
- hmac-sha1
- hmac-sha1-96 (disabled by default)
- hmac-md5 (disabled by default; not supported in FIPS mode)
- [email protected]
- [email protected]
- [email protected]
Use the following registry key to change the available mac client host key algorithms:
HKEY_LOCAL_MACHINE\SOFTWARE\BeyondTrust\ PBPS\SessionManager\ssh_proxy\client_macs (REG_MULTI_SZ)
Use the following registry key to change the available mac server host key algorithms:
HKEY_LOCAL_MACHINE\SOFTWARE\BeyondTrust\ PBPS\SessionManager\ssh_proxy\macs (REG_MULTI_SZ)
When Password Safe is running in FIPS mode, every supported MAC algorithm is enabled by default.
Ciphers
Below is a list of ciphers enabled for use by Password Safe's SSH client and server. Supported ciphers in default order of preference are:
- aes256-ctr
- aes192-ctr
- aes128-ctr
- aes256-cbc (disabled by default)
- aes192-cbc (disabled by default)
- aes128-cbc (disabled by default)
- [email protected]
- [email protected]
- 3des-cbc (disabled by default)
Use the following registry key to change the available client cipher algorithms:
HKEY_LOCAL_MACHINE\SOFTWARE\BeyondTrust\ PBPS\SessionManager\ssh_proxy\client_ciphers (REG_MULTI_SZ)
Use the following registry key to change the server cipher algorithms:
HKEY_LOCAL_MACHINE\SOFTWARE\BeyondTrust\ PBPS\SessionManager\ssh_proxy\ciphers (REG_MULTI_SZ)
When Password Safe is running in FIPS mode, every supported cipher is enabled by default.
RSA host key size
You can configure the size (in bits) of the RSA private host key generated and used by Password Safe's SSH server.
Use the following registry key to change the host key size:
HKEY_LOCAL_MACHINE\SOFTWARE\BeyondTrust\PBPS\SessionManager\ssh_proxy\rsa_host_key_size (REG_DWORD)
Valid values are: 2048 (default), 3072, and 4096.
Auto-Launch PuTTY registry file
To launch the SSH client automatically, the SSH protocol must be associated with an application. To register an application, such as PuTTY, which is used in the example below, change the references to PuTTY to point to the application.
Windows Registry Editor Version 5.00
[HKEY_CLASSES_ROOT\ssh]
@="URL:Secure Shell Protocol"
"URL Protocol"=""
[HKEY_CLASSES_ROOT\ssh\DefaultIcon]
@="%%ProgramFiles%%\\PuTTY\\putty.exe"
[HKEY_CLASSES_ROOT\ssh\shell]
[HKEY_CLASSES_ROOT\ssh\shell\open]
[HKEY_CLASSES_ROOT\ssh\shell\open\command]
@="cmd /V:ON /s /c @echo off && set url=%1 && for /f \"tokens=1,2,3 delims=:/ \" %%a in (\"!url!\") do set protocol=%%a&set host=%%b&set port=%%c && start \"\" \"%%ProgramFiles%%\\PuTTY\\putty.exe\" -P !port! !host!"
Supported SSH session protocols
You can use the following protocols with an SSH session: X11, SCP, and SFTP. You also have options to allow local and remote port forwarding.
When you transfer files using SCP, there may be some incompatibilities with specific clients (that is, WinSCP). We recommend using SFTP or a different client.
Use the Registry Editor to turn these settings on. These settings are all type DWORD with toggle values of either 0 (no) or 1 (yes).
-
X11:
HKEY_LOCAL_MACHINE\SOFTWARE\BeyondTrust PBPS\SessionManager\ssh_proxy\allow_x11 = 1(DWORD)
-
SCP:
HKEY_LOCAL_MACHINE\SOFTWARE\BeyondTrust\ PBPS\SessionManager\ssh_proxy\allow_scp
-
SFTP:
HKEY_LOCAL_MACHINE\SOFTWARE\BeyondTrust PBPS\SessionManager\ssh_proxy\allow_sftp
-
Local Port Forwarding: Whether or not to allow local port forwarding requests from the user's SSH client through to the managed system (default: 0)
HKEY_LOCAL_MACHINE\SOFTWARE\BeyondTrust\ PBPS\SessionManager\ssh_proxy\allow_local_port_forwarding
-
Remote Port Forwarding: Whether or not to allow remote port forwarding requests from the user's SSH client through to the managed system (default: 0).
HKEY_LOCAL_MACHINE\SOFTWARE\BeyondTrust\ PBPS\SessionManager\ssh_proxy\allow_remote_port_forwarding
For more information, see Issues with WinSCP Using SCP Mode.
Multiple SSH sessions
To avoid a potential security risk, more than one SSH session is not permitted through a single SSH connection.
You can turn on the following registry key to permit more than one session on a connection:
HKEY_LOCAL_MACHINE\SOFTWARE\Beyondtrust\PBPS\SessionManager\ssh_proxy\allow_multiplex = 1
Enable login accounts for SSH sessions
Creating a login account allows the user to open an SSH session in environments where remote shell access is not permitted, for instance, the root account. A login account will be used to establish the initial shell connection and then switch the session to the managed account.
The functional account used should be a low privilege user and not the same elevated functional account that has elevated privileges to change passwords.
This feature supports the following platforms: AIX, HPUX, Linux, and Solaris.
Enable login accounts manually
To manually enable login accounts, you must enable the function on both the managed system and the managed account you want to use for the SSH session.
-
Use a browser to sign in to your BeyondInsight/Password Safe URL.
This URL is provided in the BeyondTrust welcome email and includes your site URL followed by /login. -
From the left menu, click
 .
.
The Managed Systems page displays. -
Create a new managed system, or select one from the grid.
-
Click
 > Edit Managed System.
The Edit <system name> panel displays.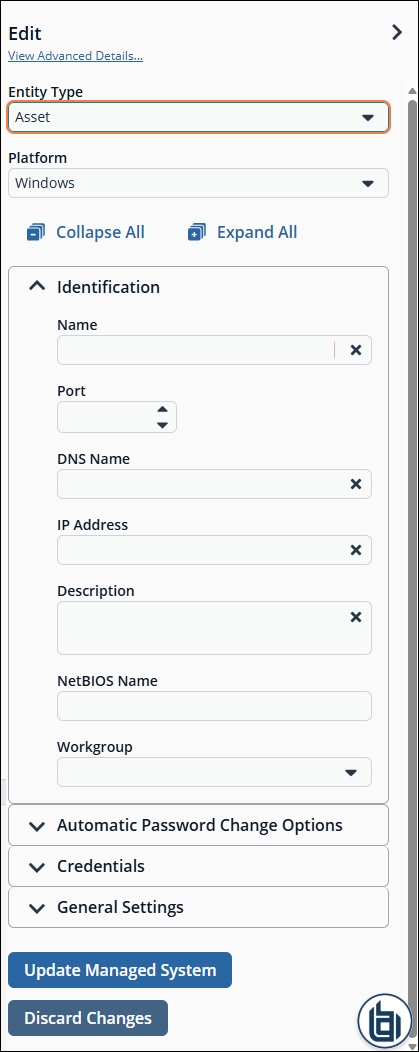
- Under Credentials section, toggle User Login Account for SSH Sessions to enable the option.
- Select your account from the Login Account dropdown.
- Click Update Managed System.
- Dismiss the configuration slide-out.
- Locate the managed system in the grid.
- Click > Go to Advanced Details.
The Advanced Details page displays. - Under Advanced Details, select Managed Accounts.
- Locate the managed account in the grid.
- Click > Edit Account.
- Within the Credentials section, toggle Login Account for SSH Sessions to enable the option.
- Click Update Account.
Enable login accounts with a Smart Rule
For organizations managing many assets and accounts, administrators can enable login accounts with a Smart Rule as follows:
- Use a browser to sign in to your BeyondInsight/Password Safe URL.
This URL is provided in the BeyondTrust welcome email and includes your site URL followed by /login. - From the left menu, click
 .
.
The Smart Rules page displays. - From the Smart Rule Type filter dropdown, select Asset.
- Click Create Smart Rule to manage the assets to use to access the SSH session.
- Under Actions, select the Manage Assets using Password Safe.
- Select the platform and the functional account.
- From the Enable Login Account for SSH Session list, select yes.
- Select a login account.
- Click Create Smart Rule.
- From the Smart Rules home page select Managed Account from the Smart Rule type filter.
- Click Create Smart Rule to manage the managed accounts to allow users to log in for an SSH session.
- Under Actions, select Managed Account Settings.
- Scroll to Account Options and select Enable Login Account for SSH Sessions.
- Click Create Smart Rule.
Use Direct Connect for SSH and RDP session requests
You can use Direct Connect for remote session requests for SSH and RDP sessions. Direct Connect requests access to a managed account on behalf of the requester. The requester accesses the system without ever viewing the managed account's credentials.
If the requester is not granted auto-approval for a session, the user receives a message stating Request requires approval. If the request is not approved within 5 minutes this connection will close. After 5 minutes the client disconnects and the user can send another connection request. When the request is approved, the user is automatically connected.
When there is an existing request for the system and account, the request is reused and the session created.
Direct Connect does not work with Entra ID accounts.
SSH session requests
Using an SSH client, a user can use the Password Safe Request and Approval system for SSH remote connections. The requester's information, including the Reason and the Request Duration, are auto-populated with default Password Safe settings.
To access a managed account or application using Direct Connect, the requester has to connect to Password Safe's SSH Proxy using a custom SSH connection string with one of the following formats:
- For UPN credentials:
<Requester>+<Username@Domain>+<System Name>@<Password Safe> - For down-level logon names\non-domain credentials:
<Requester>@<Domain\\Username>@<System Name>@<Password Safe>
You can override the default SSH port and enter port 4422. The requester is then prompted to enter their password, which they use to authenticate with Password Safe.
- For UPN credentials:
ssh -p 4422 <Requester>+<Username@Domain>+<System Name>@<Password Safe> - For down-level logon names\non-domain credentials:
ssh -p 4422 <Requester>@<Domain\\Username>@<System Name>@<Password Safe> - For an SSH application:
ssh -p 4422 <Requester>@<Account name>:<Application alias>@<System name>@<Password Safe>
Once the requester is authenticated, they are immediately connected to the desired machine.
RDP session requests
RDP Direct Connect supports push two-factor authentication. An access-challenge response is not supported.
LDAP users that use the mail account naming attribute cannot use RDP Direct Connect.
To request an RDP session using Direct Connect:
-
Click the arrow to download the RDP Direct Connect file from Password Safe.
- This is a one-time download. Each account and system combination requires that the user download the unique RDP file associated with it.
- For more information, see Use Direct Connect for RDP sessions.
-
Run the file to establish a connection to the targeted system.
-
Enter the password used to authenticate with Password Safe.
Direct Connect delimiters
You can customize the character delimiters accepted in a Direct Connect connection string (in addition to + and @) by setting the following registry key:
HKEY_LOCAL_MACHINE\SOFTWARE\BeyondTrust\ PBPS\SessionManager\direct_connect\delimiters (REG_SZ)
Additionally, you can enable support for a dynamic delimiter. When this is enabled, any connection string that starts and ends with the same non-alphanumeric character is split on that character.
Example'/' used as the delimiter:
ssh -p 4422 /requestor/maccount/msystem/@bihost
To enable dynamic delimiters (default is off), set the following registry key:
HKEY_LOCAL_MACHINE\SOFTWARE\BeyondTrust\PBPS\SessionManager\direct_connect\dynamic_delimiter = 1 (REG_DWORD)
Use two-factor authentication token
RDP and SSH Direct Connect sessions support using a two-factor authentication token.
-
RDP session: A delimiter (,) must be entered after you enter the password. For example: password, token
The delimiter can be changed using the following registry key:
HKEY_LOCAL_MACHINE\SOFTWARE\BeyondTrust\PBPS\SessionManager\rdp_proxy\2fa_delimiter
The delimiter must be excluded from user login passwords.
-
SSH session: You are prompted to enter a token after you enter the password.
Configure RDP sessions
Enable smart sizing
When in an RDP session, the user can choose to smart size the client window so that no scroll bars display.
You can enable Smart Sizing on the Session Monitoring Configuration page by checking the box.
Turn off font smoothing
Font smoothing is turned on by default. To turn off font smoothing, change the following registry key value from 0 to 1
HKEY_LOCAL_MACHINE\SOFTWARE\Beyondtrust\PBPS\SessionManager\rdp_proxy\disable_font_smoothing = 1 (DWORD)
Configure RDP port for connection to target system
Administrators can set an RDP connection port for a specific Windows managed system on a per-system basis. One or more RDP ports can be configured. Administrators can also use a Smart Rule to target a set of managed systems with the new RDP connection port.
- To set the RDP port for a managed system:
- Use a browser to sign in to your BeyondInsight/Password Safe URL.
This URL is provided in the BeyondTrust welcome email and includes your site URL followed by /login. - From the left menu, click
 .
.
The Configuration page displays. - Under Privileged Access Management, select Global Settings.
The Global Settings page displays. - Under Global Settings, enter the Default RDP port for new Managed Systems.
- Click Save.
- Use a browser to sign in to your BeyondInsight/Password Safe URL.
- To edit an RDP port:
- Use a browser to sign in to your BeyondInsight/Password Safe URL.
This URL is provided in the BeyondTrust welcome email and includes your site URL followed by /login. - From the left menu, click .
The Managed Systems page displays. - Locate the Windows managed system.
- Click
 > Edit Managed System.
 - Under Identification, edit the port.
- Use a browser to sign in to your BeyondInsight/Password Safe URL.
- To set an RDP port using a Smart Rule:
- Use a browser to sign in to your BeyondInsight/Password Safe URL.
This URL is provided in the BeyondTrust welcome email and includes your site URL followed by /login. - From the left menu, click .
The Smart Rules page displays. - From the Smart Rule Type filter dropdown, select Asset.
- Click + Create Smart Rule.
- Under Selection Criteria, select Platform.
- Select Windows in the next dropdown.
- Click Add another condition.
- Select Port in the dropdown.
- Complete options.
- Click Create Smart Rule.
- Use a browser to sign in to your BeyondInsight/Password Safe URL.
- To set more than one port:
- Use a browser to sign in to your BeyondInsight/Password Safe URL.
This URL is provided in the BeyondTrust welcome email and includes your site URL followed by /login. - From the left menu, click .
The Smart Rules page displays. - From the Smart Rule Type filter dropdown, select Managed System.
- Click + Create Smart Rule.
- Under Actions, select Set port on each system.
- Enter the port.
- Click Add another action for each additional port.
- Click Create Smart Rule.
- Use a browser to sign in to your BeyondInsight/Password Safe URL.
Configure session proxy ports
Ports are configured in the registry.
RDP:
HKEY_LOCAL_MACHINE\SOFTWARE\BeyondTrust\PBPS\SessionManager\rdp_proxy\listen_port (DWORD, default 4489)
SSH:
HKEY_LOCAL_MACHINE\SOFTWARE\BeyondTrust\PBPS\SessionManager\ssh_proxy\listen_port (DWORD, default 4422)
Session countdown duration
You can configure the maximum amount of time for which the session countdown timer is displayed by setting the following registry key:
HKEY_LOCAL_MACHINE\SOFTWARE\Beyondtrust\ PBPS\SessionManager\rdp_proxy\countdown_duration (DWORD value in seconds, default is 1800)
Updated 15 days ago
