
Directory service settings | EPM-WM Cloud
Configure Active Directory (AD) connectors to discover AD groups in your estate. The Policy Editor queries the Active Directory to populate the group information when adding account filters or designated users.
Microsoft Entra ID
Searches for Entra ID groups.
Okta
Searches for groups in your Okta instance.
Local AD
Searches for groups in the local Active Directory environment.
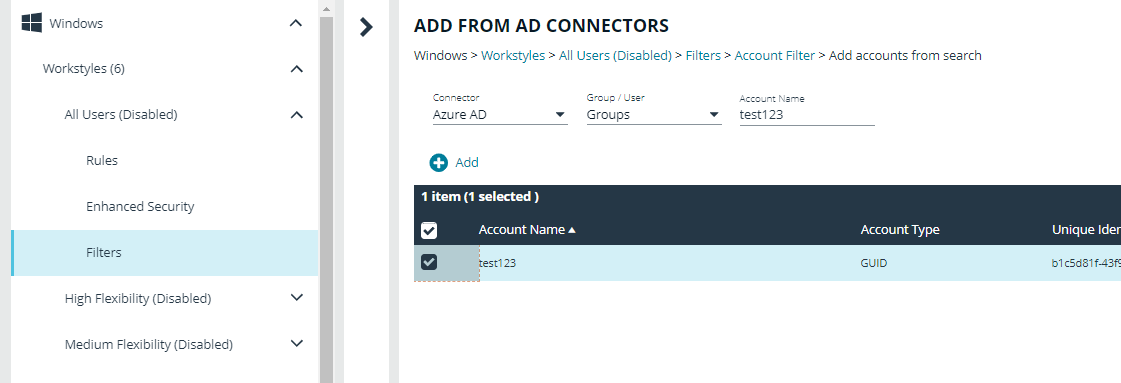
After the connectors are set up, the Policy Editor can discover and read information from the Active Directory source. The screen capture shows an example when adding an account filter for a workstyle.
A standard user requires delegated access to this feature. For more information, see User management.
Add Microsoft Entra ID connector
You must create an app registration in Azure before you can configure the Microsoft Entra ID connector here. There can only be one Microsoft Entra ID connector per EPM-WM instance.
For complete end-to-end configuration, see Microsoft Entra ID and EPM config guide.
-
Select Configuration > Directory Service Settings.
-
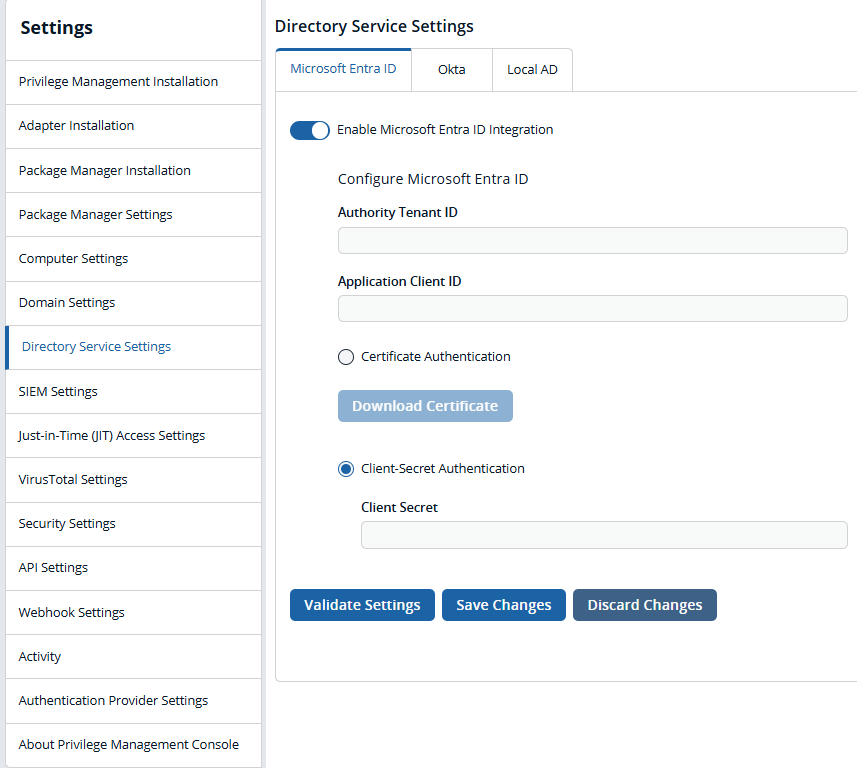
Select the Microsoft Entra ID tab, and then select Enable Microsoft Entra ID Integration.
-
Add the tenant ID and client ID.
-
Select an authentication method. This depends on the app registration details you configured.
For more information, see Microsoft's documentation Quickstart: Register an application with the Microsoft identity platform
Add a local AD connector
Create an on-premises local Active Directory connector that can be queried from the Policy Editor. Adding a local directory makes it easier to add Active Directory users and groups to a policy.
- You must set up one connector for each local Active Directory.
- The connector installation is a Windows service installed to the endpoint. The endpoint requires access to the local directory.
- After the connector is installed and active, the connector is discoverable and available for use.
- If you disable a connector, then the Policy Editor can no longer query Active Directory.
- When deleted, the connector is no longer available in the console and must be reinstalled to be available for queries.
To install the local AD connector:
- Select Configuration > Adapter Installation to download the connector.
- On the same page, click the AD Connector button to include the connector in the installation string.
- After the download is complete, go through the installation wizard to complete the installation.
- After the connector is installed, select Configuration > Directory Services Settings, and select the Local AD tab.
- You can edit properties for the connector. The host name is the computer name where the connector is installed; this cannot be changed. You can, however, add a name that is more meaningful.
- After saving the connector properties, select the connector menu, and then select Enable Connector. The connector must be enabled before it can query the local AD environment.
Edit local AD connector
You can change the name of the local AD connector.
The host name value cannot be changed.
To edit a local AD connector:
- Select Configuration > Directory Services Settings.
- Select the Local AD tab.
- Find the connector in the list.
- Select
 > Edit Connector.
Disable a connector
A disabled connector is no longer discoverable by the Policy Editor.
- Select Configuration > Directory Services Settings.
- Select the Local AD tab.
- Find the connector in the list.
- Select >Disable Connector.
Delete a local AD connector
Delete a local AD connector when it is no longer required. When deleted, the authentication details provided when adding the connector are deleted to ensure communication is no longer available between EPM-WM and the local AD.
- Select Configuration > Directory Services Settings.
- Select the Local AD tab.
- Find the connector in the list.
- Select > Delete Connector.
Updated about 2 months ago
