
BeyondTrust EPM for Windows & Mac | Insights
Learn how to create an Endpoint Privilege Management for Windows and Mac (EPM-WM) connector in BeyondTrust Identity Security Insights.
Prerequisites
EPM-WM access
- Administrator access to the EPM-WM administration dashboard.
- Your EPM environment is cloud-hosted (Privilege Management Cloud). This connector does not support on-premises deployments.
- You can create API accounts under Configuration > API Settings.
Identity Security Insights access
- Administrator access to Identity Security Insights.
- Your Insights site is provisioned and active.
Network requirements
- The Insights IP addresses for your region are allowlisted in your EPM-WM configuration.
Step 1: Create an EPM for Windows & Mac API account
- In your Endpoint Privilege Management administration dashboard, navigate to Configuration > API Settings and click Create an API Account.
- When prompted, enter a human-readable name and description for referencing your token.
- Select Read Only for Audit and Management under the API Access section.
- EPM generates a new Client ID and Client Secret.
ImportantCopy and securely store the Client ID and Client Secret before exiting this page. These values are only displayed once.
Final step: Add an EPM for Windows & Mac connector
- Select
 > Connectors.
 - Click the Total configured link.
- Select Create Connector > Privilege Management Cloud.
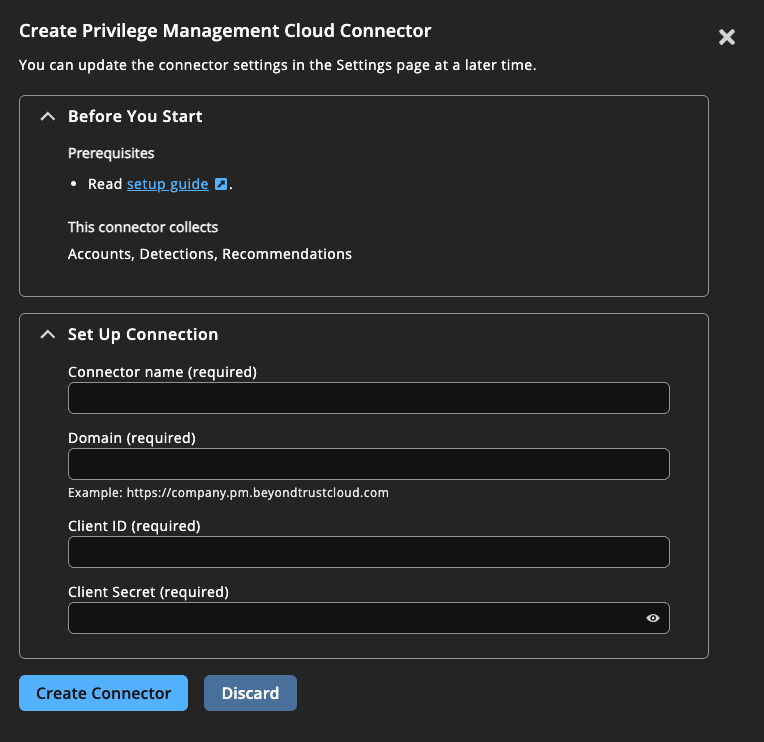
- Provide the following information to connect to EPM:
- Name: A human-readable name for your PM Cloud connector.
- Domain: Your full PM Cloud domain, e.g., https://company.pm.beyondtrustcloud.com.
- Client ID: Paste the Client ID. See Step 1.
- Client Secret: Paste the Client Secret. See Step 1.
- Click Create Connector.
Navigate to the Configured Connectors panel ( > Connectors > Total Configured) to confirm the connector is successfully created and review any connector settings.
Updated 2 months ago
