Application Groups | EPM-WM Cloud
What are Application Groups?
Application Groups are used to define logical groupings of applications. Application Groups are assigned to Workstyles, so you must define Application Groups for all the applications you want to assign to a Workstyle.
There are three ways to add an application to a group:
- Events: Add an existing application on-the-fly from the Events tab on the Analytics page.
- Application templates: Add an existing application from a list of known applications (application templates).
- Application definitions: Create an application using the application definitions and properties.
Environment variables
You can use the following environment variables in file path and command line application definitions.
To use the variables, enter the variable, including the % characters, into a file path or command line. EPM expands the environment variable prior to attempting a file path or command line match.
System variables
- %ALLUSERSPROFILE%
- %COMMONPROGRAMFILES(x86)%
- %COMMONPROGRAMFILES%
- %PROGRAMDATA%
- %PROGRAMFILES(x86)%
- %PROGRAMFILES%
- %SYSTEMROOT%
- %SYSTEMDRIVE%
User variables
- %APPDATA%
- %USERPROFILE%
- %HOMEPATH%
- %HOMESHARE%
- %LOCALAPPDATA%
- %LOGONSERVER%
Create a new Application Group
There are predefined application groups available that are already populated with applications and linked to Workstyles. You can create application groups and customize the application and associated properties.
- From the left menu, click
 .
.
The Policies page displays.
- Create a new policy.
- Alternatively, locate an unlocked policy you want to edit from the list and click
 > Edit & Lock Policy.
The Policy Editor opens, and the Workstyles page displays by default. - In the left panel, click Application Groups.
The Application Groups page displays. - On the Policy Editor page, expand Windows or macOS.
- Click Application Groups.
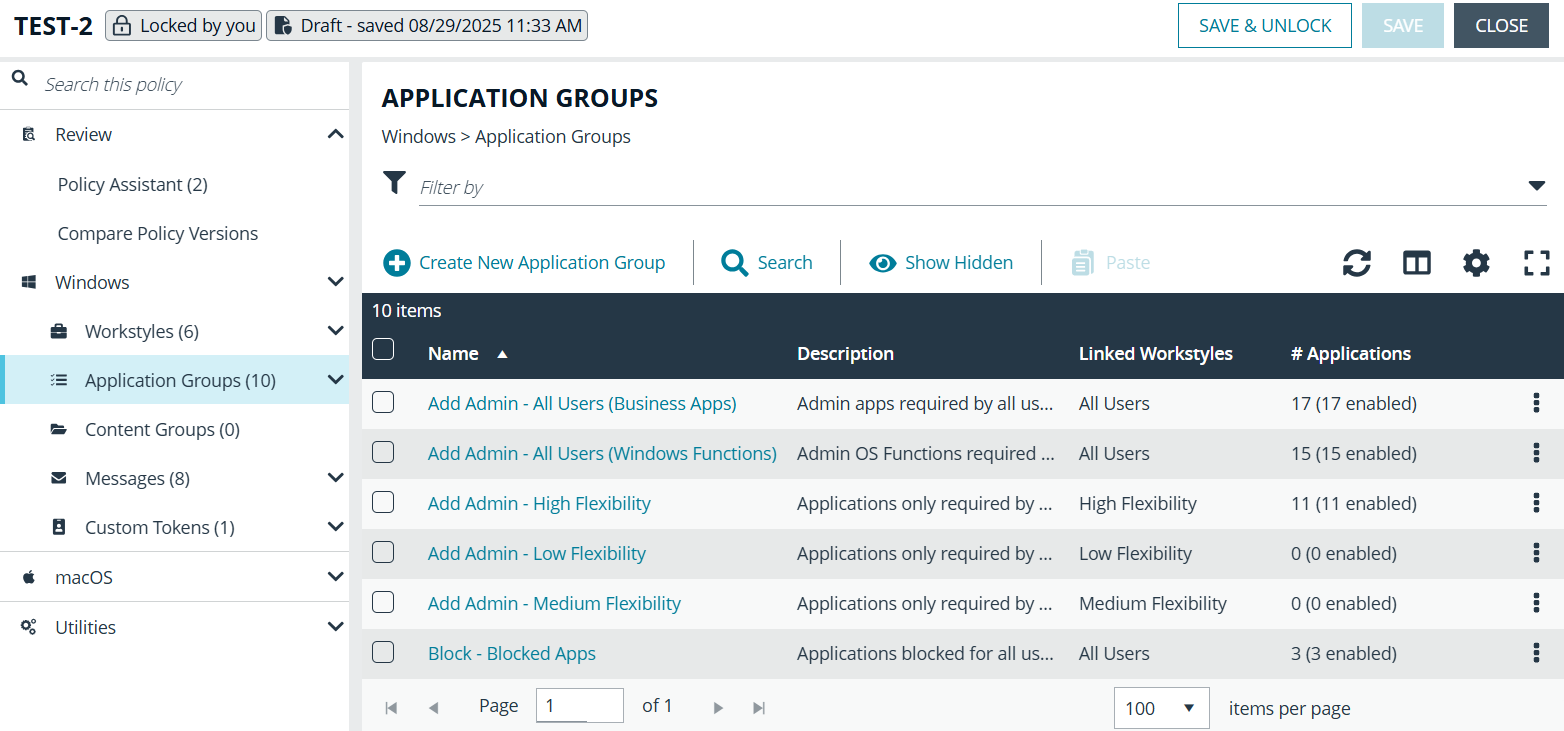
- Click Create New Application Group.
- Add a name and description.
- Click Create Application Group.
The Application Group is created and displays in the navigation pane and the grid. You are now ready to add applications to the group.
Show hidden groups
Some Application Groups are hidden by default; for example, Application Groups prefixed by (Default) in the QuickStart Policy. You can show or hide Application Groups.
To show groups hidden by default:
- In the Policy Editor, expand the Windows or macOS node.
- Select Application Groups.
- Select Show Hidden.
- Hide the groups again by selecting Hide Hidden.
Add an application to a policy and Application Group via an event
Important informationYou can add an application to a policy based on events generated from a particular application type. Supported event types include:
- Process
- Process with File
- COM Class
- Service
- ActiveX
- Challenge Response Failed
You can select more than one event in the list to add to the same policy. The matching criteria for all selected and compatible events are added to the selected policy and Application Group selected.
You can only add an event's application to an unlocked policy.
- From the left menu, click
 .
.
The Analytics page displays. - Locate the event that contains an application you want to add to a policy.
- In the event row, click
 .
.
The Add to Policy panel displays. - Select an unlocked policy and available application group from the drop-down list.
- Click Add and Edit Policy.
The Policy Editor opens and the Applications Group page displays. - Edit the application settings.
- Click Save Changes.
The policy saves.
Add application using Application Definitions
Important informationYou must add an application to an Application Group inside of a policy. When adding an application, you can configure the following properties:
- Application Definitions: The application definitions are the properties of an application that are used to detect the application in your environment. When the application matches on the configured criteria the rule triggers.
- Advanced Options: When adding the application, advanced settings on child processes and standard user rights enforcement can be configured.
When adding file or folder paths, you can use environment variables as part of the entry. Using environment variables is optional.
The procedure for adding an application is generally the same for every application. The matching criteria varies depending on the application.
- From the left menu, click .
The Policies page displays.
- Create a new policy.
- Alternatively, locate an unlocked policy you want to edit from the list and click > Edit & Lock Policy.
The Policy Editor opens, and the Workstyles page displays by default. - In the left panel, click Application Groups.
The Application Groups page displays. - Click the Create New Application Group.
The Create New App Group panel displays. - Enter a unique name and description.
The description can have up to 1024 characters. The description is not used in rule matching. - Click Create App Group.
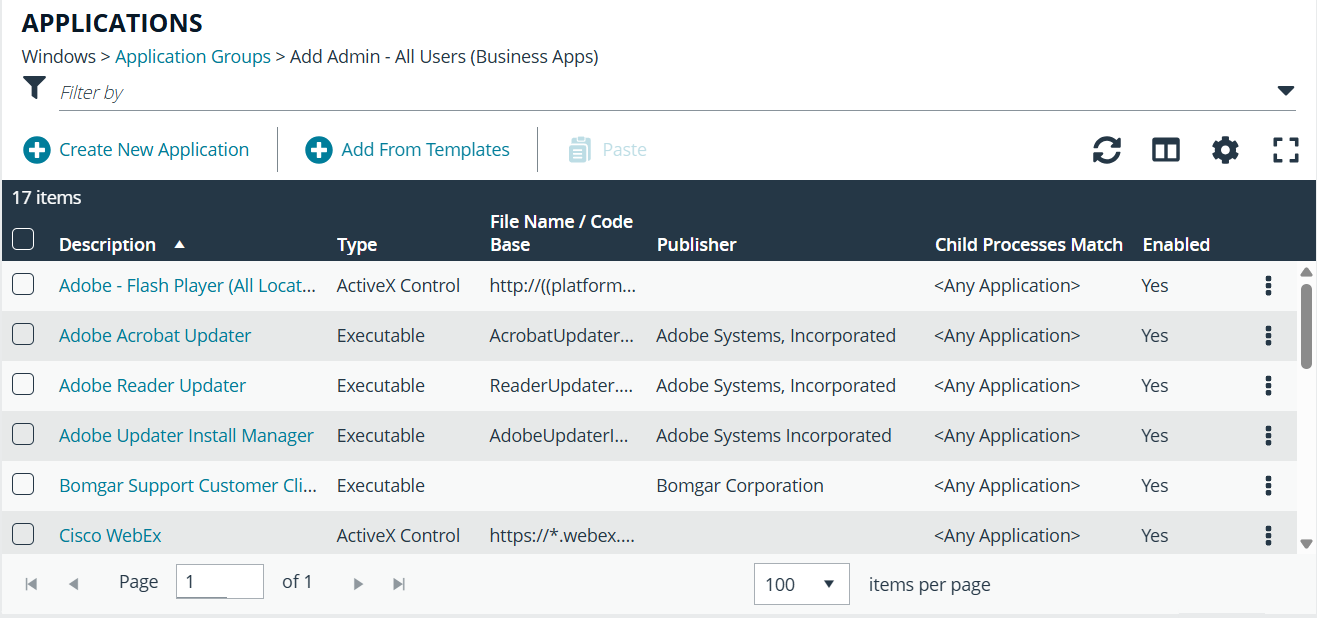
The Application Group is created and displays in the Application Groups list. - Click the new Application Group's name.
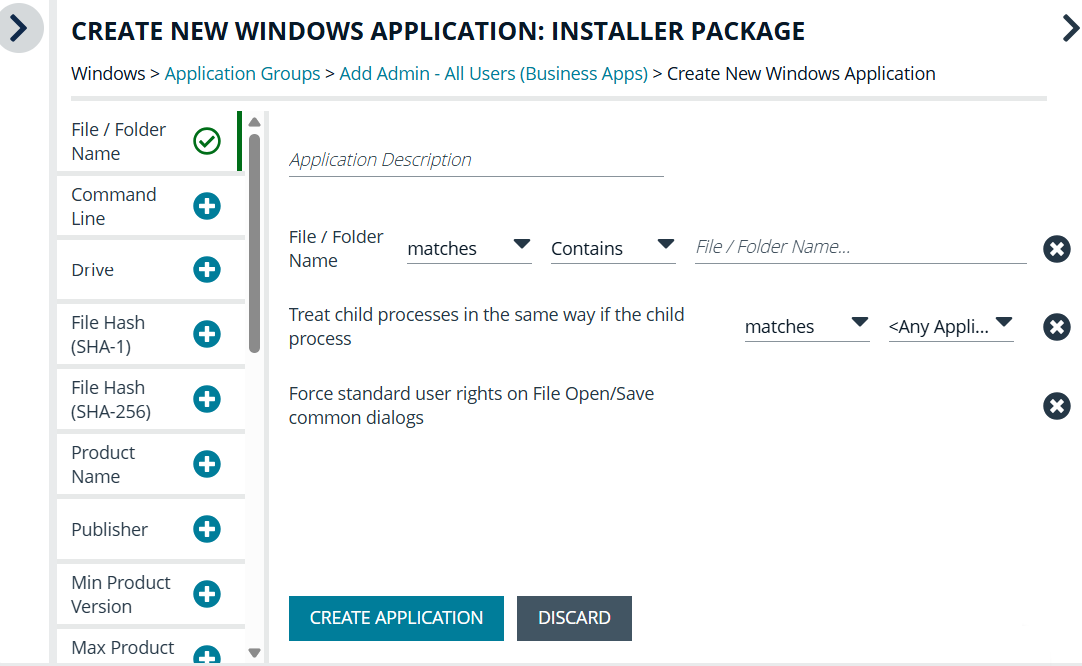
The Applications page displays. - Click Create New Application.
A drop-down with a list of application definitions displays. - Select an application definition and configure it based on the Application definitions.
The screen capture shows the installer package application type and the app definitions you can configure. Scroll to see all options.
- Optionally, configure the Advanced Options.
-
Child Processes
When selected, any child processes that are launched from this application (or its children) will also match this rule. The rules are still processed in order, so it is still possible for a child process to match a higher precedence rule (or Workstyle) first. Therefore, this option prevents a child process from matching a lower precedence rule.
When an application is launched by an on-demand rule and this option is selected, then the children are processed against the on-demand rules, and not the Application Rules. If this option is not selected, then the children will be processed against the Application Rules in the normal way. You can further refine this option by restricting the child processes to a specific Application Group. The default is to match <Any Application>, which will match any child process.
If you want to exclude specific processes from matching this rule, then toggle match to does not match.
Child processes are evaluated in the context that the parent executed. For example, if the parent executed through on-demand shell elevation, then it will first attempt to match On-Demand Application Rules for any children of the executed application.
-
Force user rights
When the application allows a user to open or save files using the common Windows open or save dialog box, this option ensures the user does not have admin privileges within these dialog boxes. These dialog boxes have Explorer-like features, and allow a user to rename, delete, or overwrite files. If an application is running with elevated rights and this option is disabled, the open/save dialog boxes will allow a user to replace protected system files.
Where present, this option is selected by default to force these dialog boxes to run with the user’s standard rights, to prevent the user from tampering with protected system files.
When enabled, this option also prevents processes launched from within these dialog boxes from inheriting the rights of an elevated application.
- Click OK.
Copy an application definition
For ease-of-use, copy one or more application definitions to save time when setting up an application group. Copy to another application group in the same policy or another policy.
- From the left menu, click .
The Policies page displays.
- Create a new policy.
- Alternatively, locate an unlocked policy you want to edit from the list and click > Edit & Lock Policy.
The Policy Editor opens, and the Workstyles page displays by default. - In the left panel, click Application Groups.
The Application Groups page displays. - Click an Application Group's name.
The Applications page displays. - Locate the application you want to copy and click > Copy.
- In the left panel, click Application Groups again.
The Application Groups page displays. - Locate the Application Group to which you want to copy the application to.
- Click Paste.
If the Paste button is not available, check that the XML is a valid application definition. Copy the XML to a text editor to confirm.
Add application from template
Use application templates to select an application from a list of known applications. The Policy Editor provides a standard set of templates that covers basic administrative tasks for all supported operating systems, common ActiveX controls, and software updates.
- From the left menu, click .
The Policies page displays.
- Locate an unlocked policy you want to edit from the list and click > Edit & Lock Policy.
The Policy Editor opens, and the Workstyles page displays by default. - Go to Application Groups.
- Select the application group you want to add the app to, and then click Add From Templates.
- Select an application template from the list, and then click Add. You can select more than one template at a time.
Disable an application in an Application Group
You can temporarily pause the processing of an application rule against an application in an Application Group.
Use this feature if you are rolling out or testing new rules, or while you investigate and fix any problems.
- From the left menu, click .
The Policies page displays.
- Create a new policy.
- Alternatively, locate an unlocked policy you want to edit from the list and click > Edit & Lock Policy.
The Policy Editor opens, and the Workstyles page displays by default. - In the left panel, click Application Groups.
The Application Groups page displays. - Locate the Application Group with the application you want to temporarily disable.
- Click the Application Group's name.
The Applications page displays. - Locate the application in the list.
- Click > Disable.
The application temporarily disables.
Enable a disabled application in an Application Group
You can enable a paused application in an Application Group.
Use this feature if you are rolling out or testing new rules, or while you investigate and fix any problems.
- From the left menu, click .
The Policies page displays.
- Create a new policy.
- Alternatively, locate an unlocked policy you want to edit from the list and click > Edit & Lock Policy.
The Policy Editor opens, and the Workstyles page displays by default. - In the left panel, click Application Groups.
The Application Groups page displays. - Locate the Application Group with the application you want to enable.
- Click the Application Group's name.
The Applications page displays. - Locate the application in the list.
- Click > Enable.
The application enables.
Updated 1 day ago
