
Workload Credentials on Pathfinder
Workload Credentials beta program
The guides included with the Workload Credentials beta program:
What is Workload Credentials on Pathfinder?
Workload Credentials on Pathfinder is a cloud-native secrets management feature providing a solution for customers to manage static, rotating, and dynamic secrets.
In addition to providing a user-friendly interface for humans to interact with the product, Workload Credentials can also support programmatic, machine-to-machine access through APIs, SDKs, and a CLI.
How is it useful?
Workload Credentials authentication focuses on workloads rather than typical user accounts. For example, Workload Credentials can be used in the runtime path of a service or instance to dynamically fetch credentials so the service can temporarily access database credentials or API keys when they are in use.
Workload Credentials can manage the lifecycle of creating, rotating, and deleting these sensitive values.
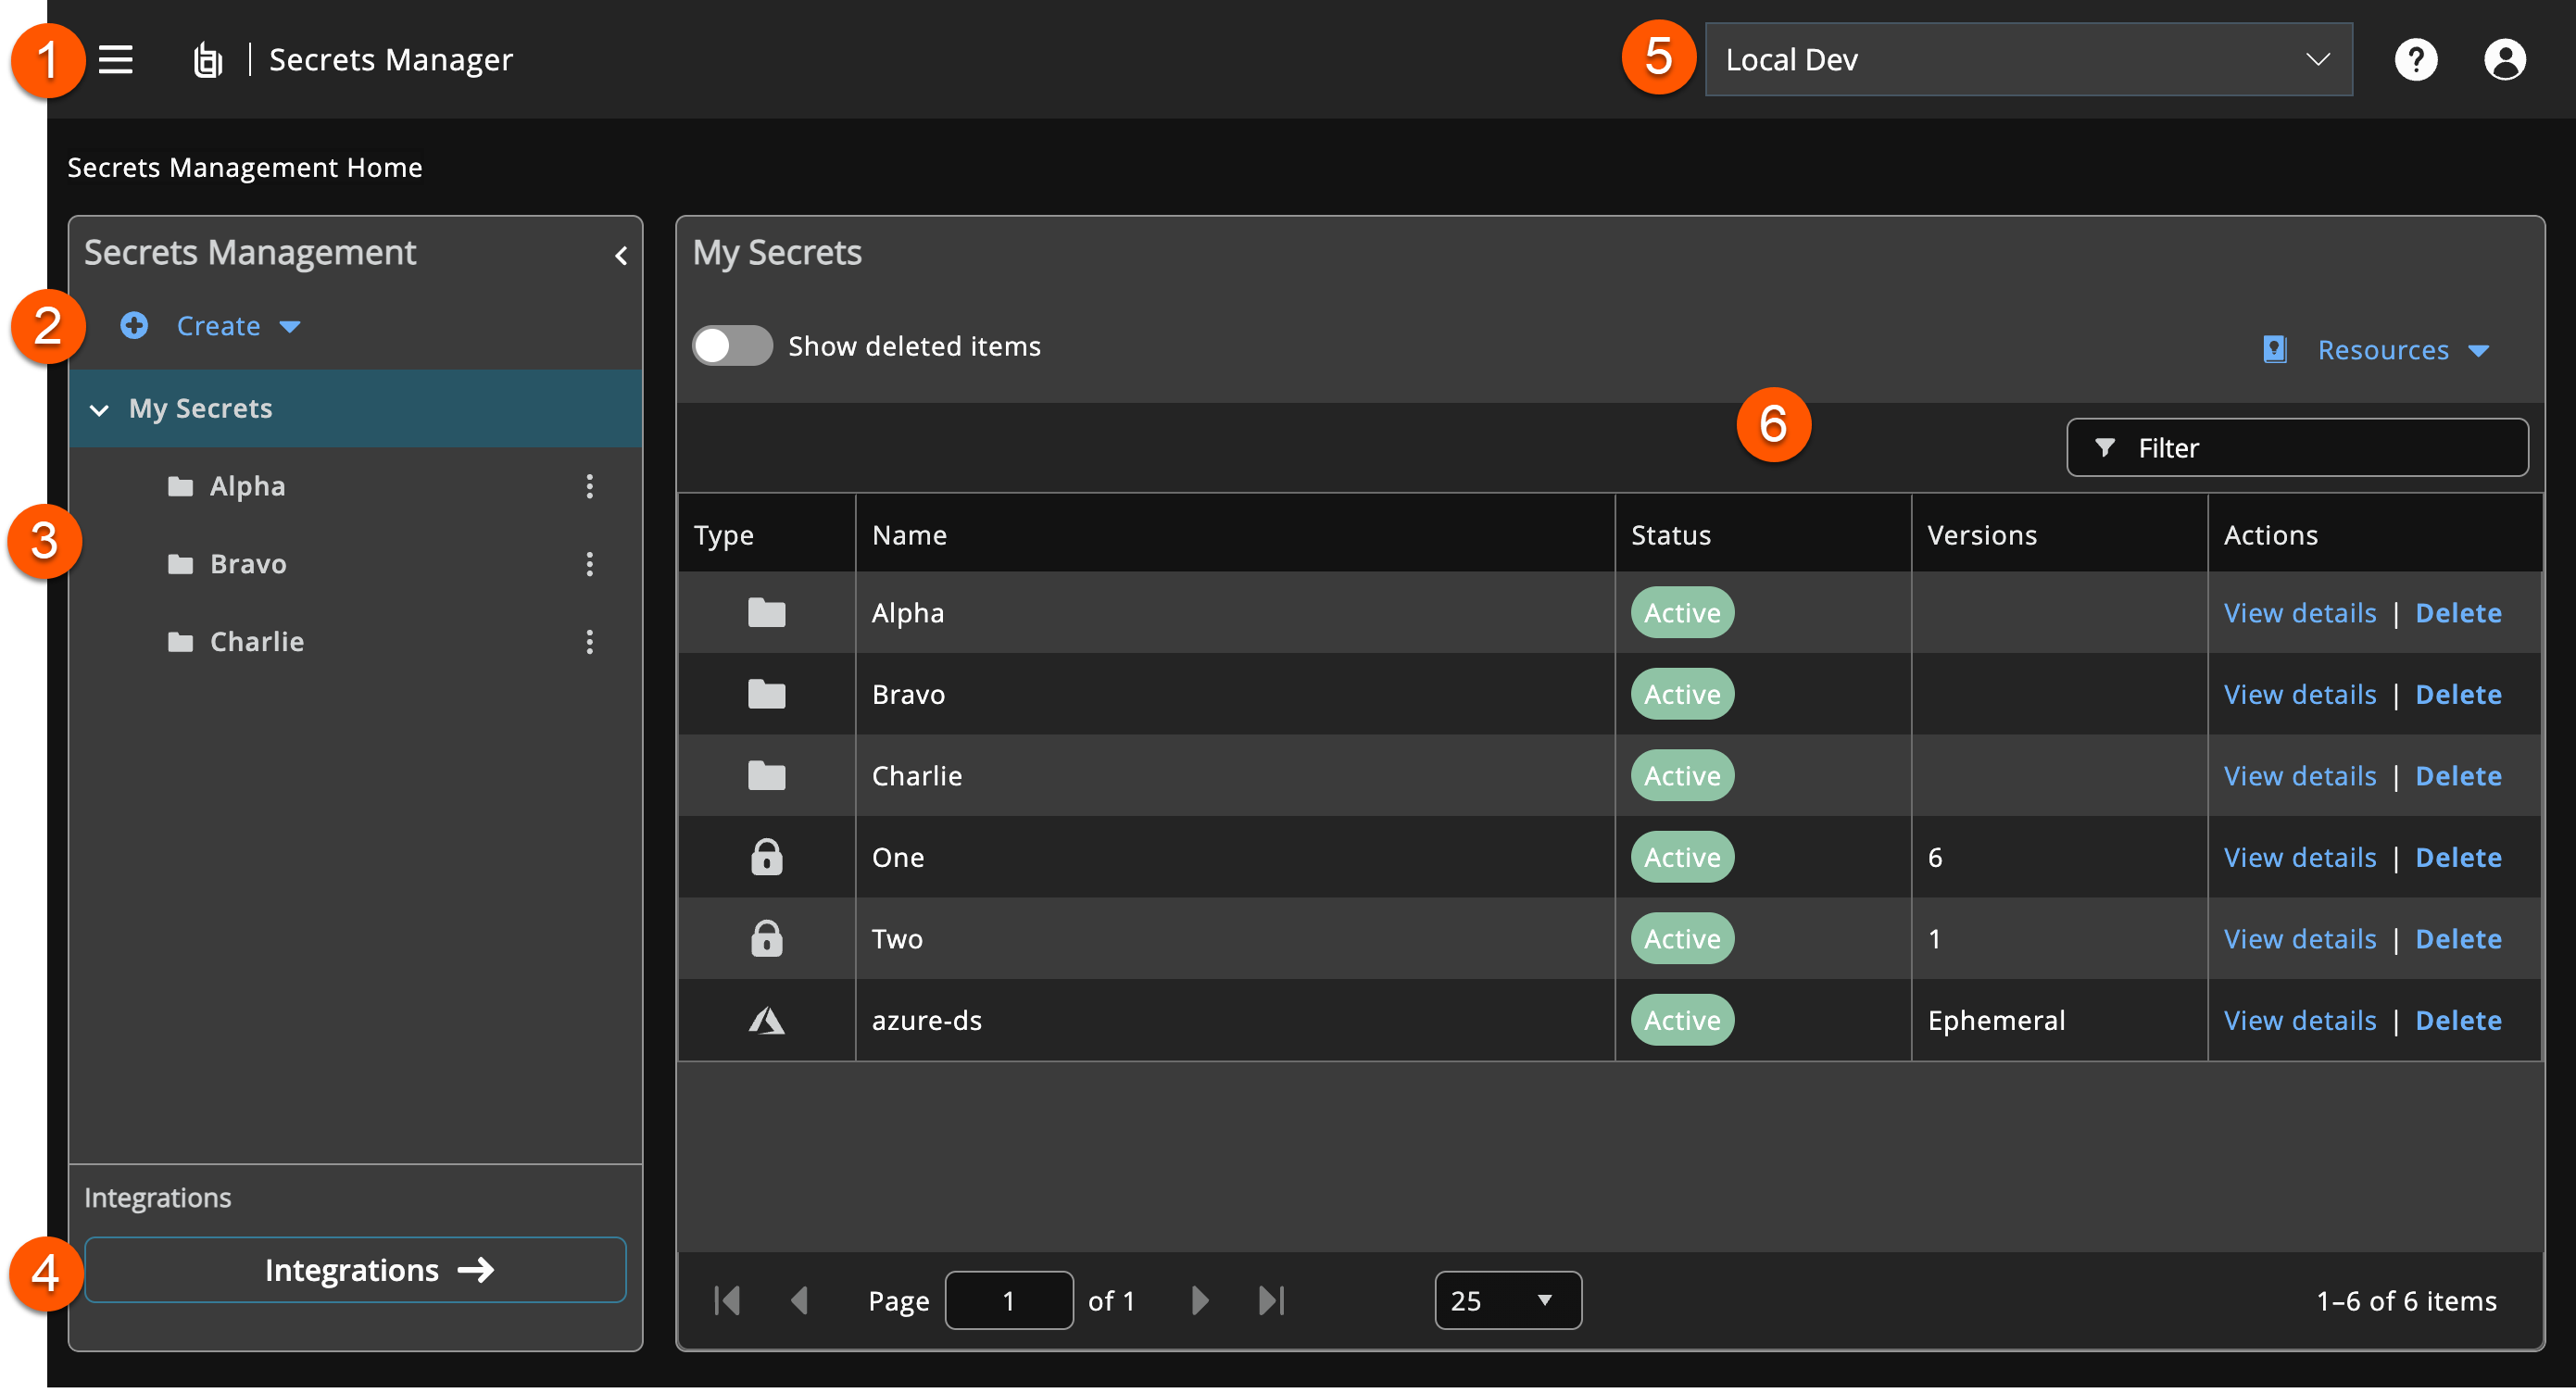
The Secrets Manager page
- Navigation menu: Access BeyondTrust apps and their menus, and Pathfinder administration pages if you are assigned as an administrator.
- Create menu: Create a secret, folder, or dynamic secret.
- Secret and folder navigation pane.
- Integrations: Opens the Integrations page where you can manage AWS and Azure connectors used for dynamic credential generation.
- Header: Select a site or access your user profile where you can change your password, create a personal access token (for Workload Credentials), or set up MFA on your account.
- Manage secrets and folders, review secret status, change settings, and delete secrets or folders.
RBAC
A Pathfinder user can be assigned the following roles and permissions that Workload Credentials will reference to determine whether a user is allowed to perform an action within the application. The permissions currently associated with each role currently cannot be modified:
| Role | Permissions |
|---|---|
| Standard User | View folders, static secrets, integrations, and dynamic secrets; Generate credentials from a dynamic secret; View active leases |
| Administrator | Create, view, modify, and delete folders, secrets, integrations, and dynamic secrets; Generate credentials; View and inspect active leases |
Create a secret
-
Log on to your Pathfinder instance.
-
Select Menu > Secrets.
-
Click Create > Secret.
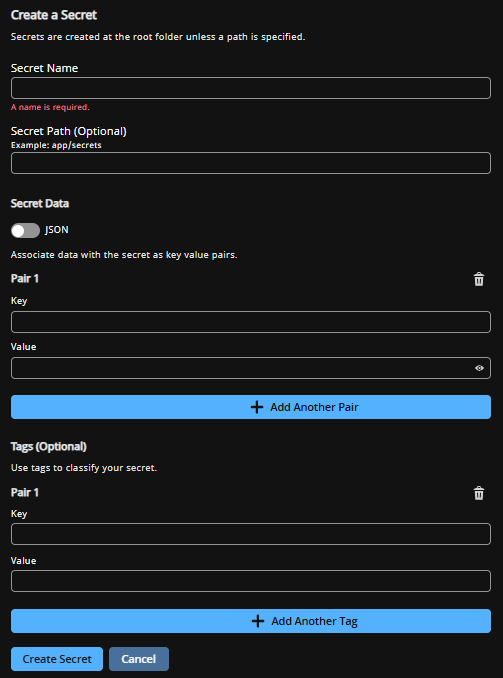
The Create a Secret panel displays.
-
Complete the fields:
- Secret Name: A unique name for the secret.
- Path (optional): Set a folder path (for example,
prod/db) to organize the secret in a folder structure. If blank, the secret is created at the root level. - Key/Value Pairs: Add one or more key/value pairs. Click Add Another Pair to include additional entries. You can add as many key/value pairs as needed to store multiple pieces of sensitive data under a single secret.
-
Click Create Secret.
Delete a secret
- Log on to Pathfinder.
- Select Menu > Secrets.
- Locate the secret.
- Select Delete from the Actions column.
- Confirm deletion.
Edit a secret
To view details:
-
Log on to your Pathfinder instance.
-
Select Menu > Secrets.
-
Locate the secret.
-
In the Actions column, select View Details.
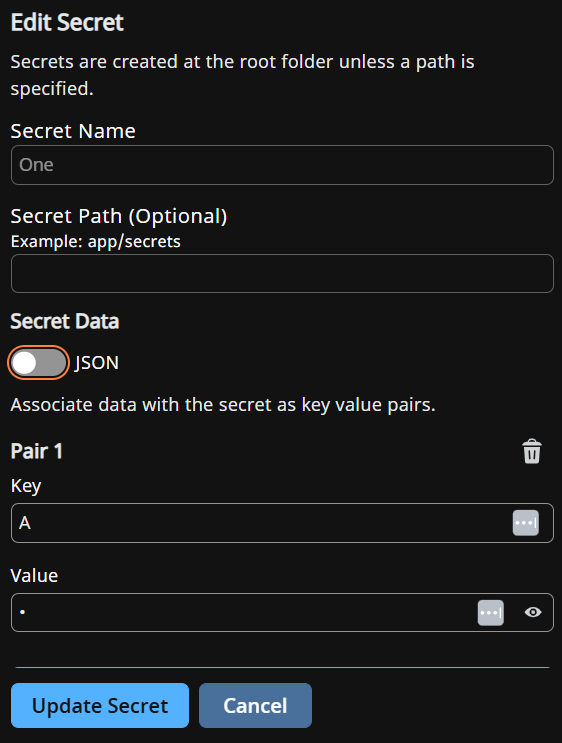
The Edit Secret panel displays.
-
Update settings.
-
Click Update Secret.
Create a folder
Create a folder to organize and manage secrets.
Creating a folder is optional.
-
Log on to your Pathfinder instance.
-
Select Menu > Secrets.
-
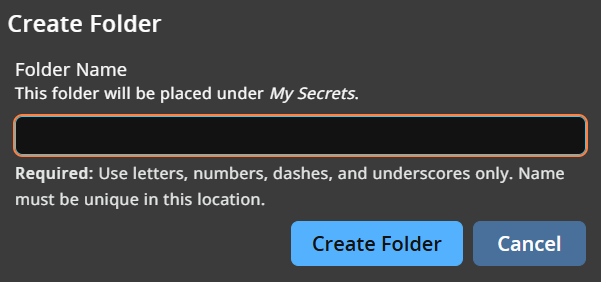
Click Create > Folder.
-
Enter a name and click Create Folder.
-
Select Create > Secret or Create > Folder to continue setting up your secrets.
The Integrations page
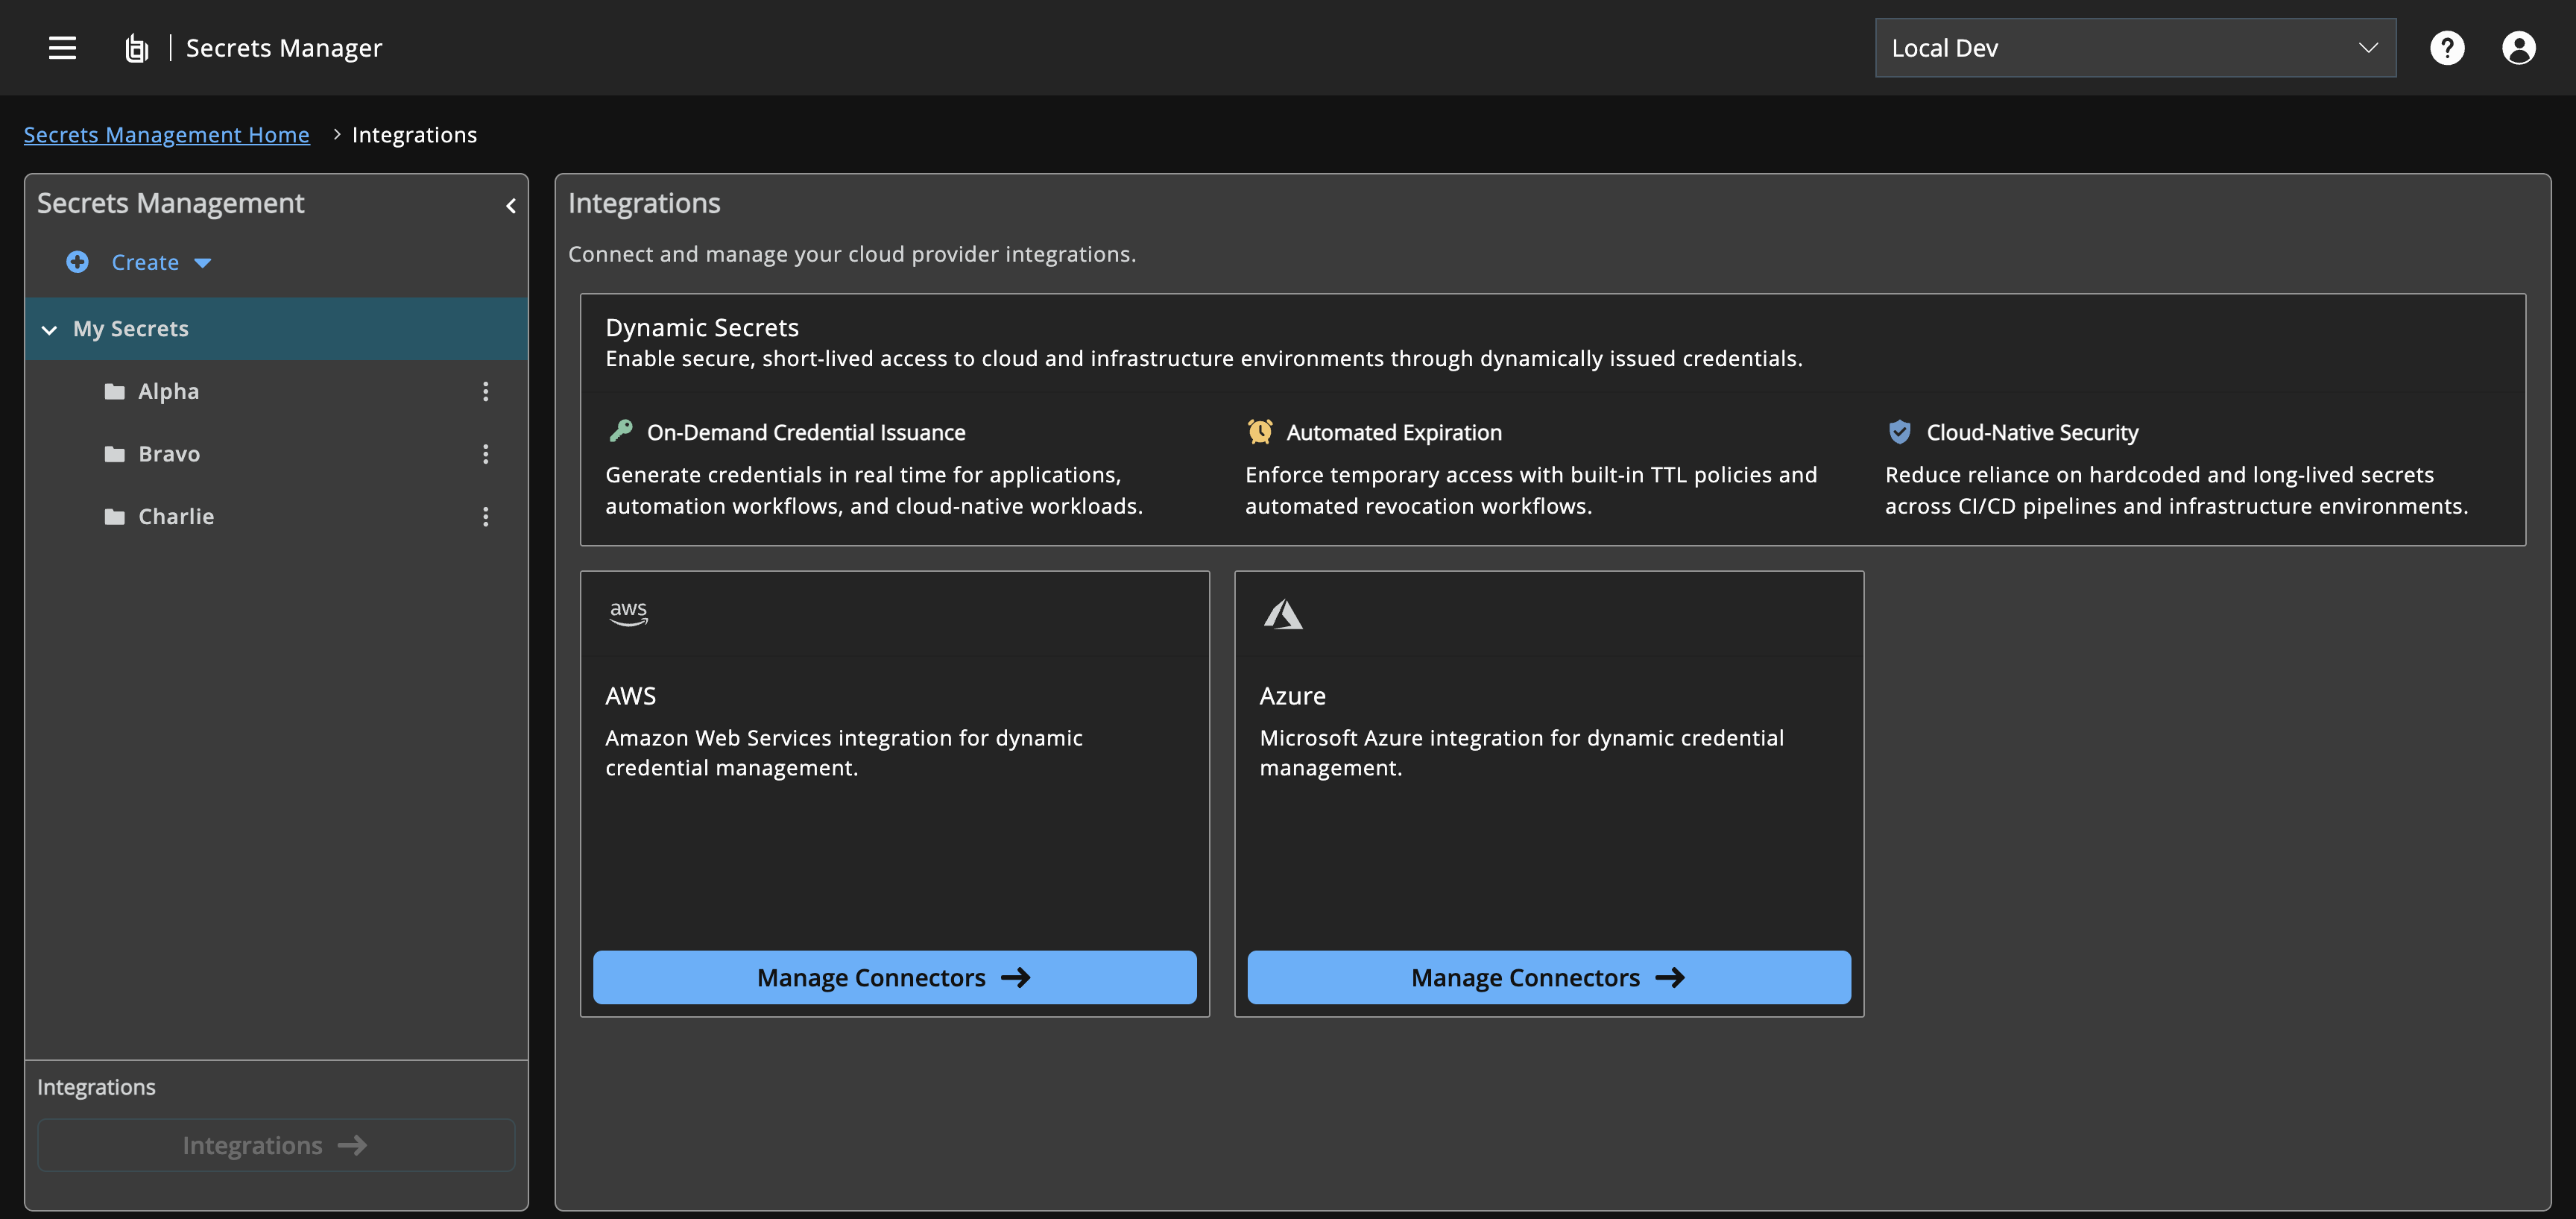
The Integrations page is the entry point for managing all cloud provider connectors. It contains a Dynamic Secrets information banner and a card for each supported provider (AWS and Azure). Each provider contains a Manage Connectors button that navigates to the provider's connectors page.
To open the Integrations page:
- Log on to your Pathfinder instance.
- Select Menu > Secrets.
- Click Integrations in the secrets sidebar.
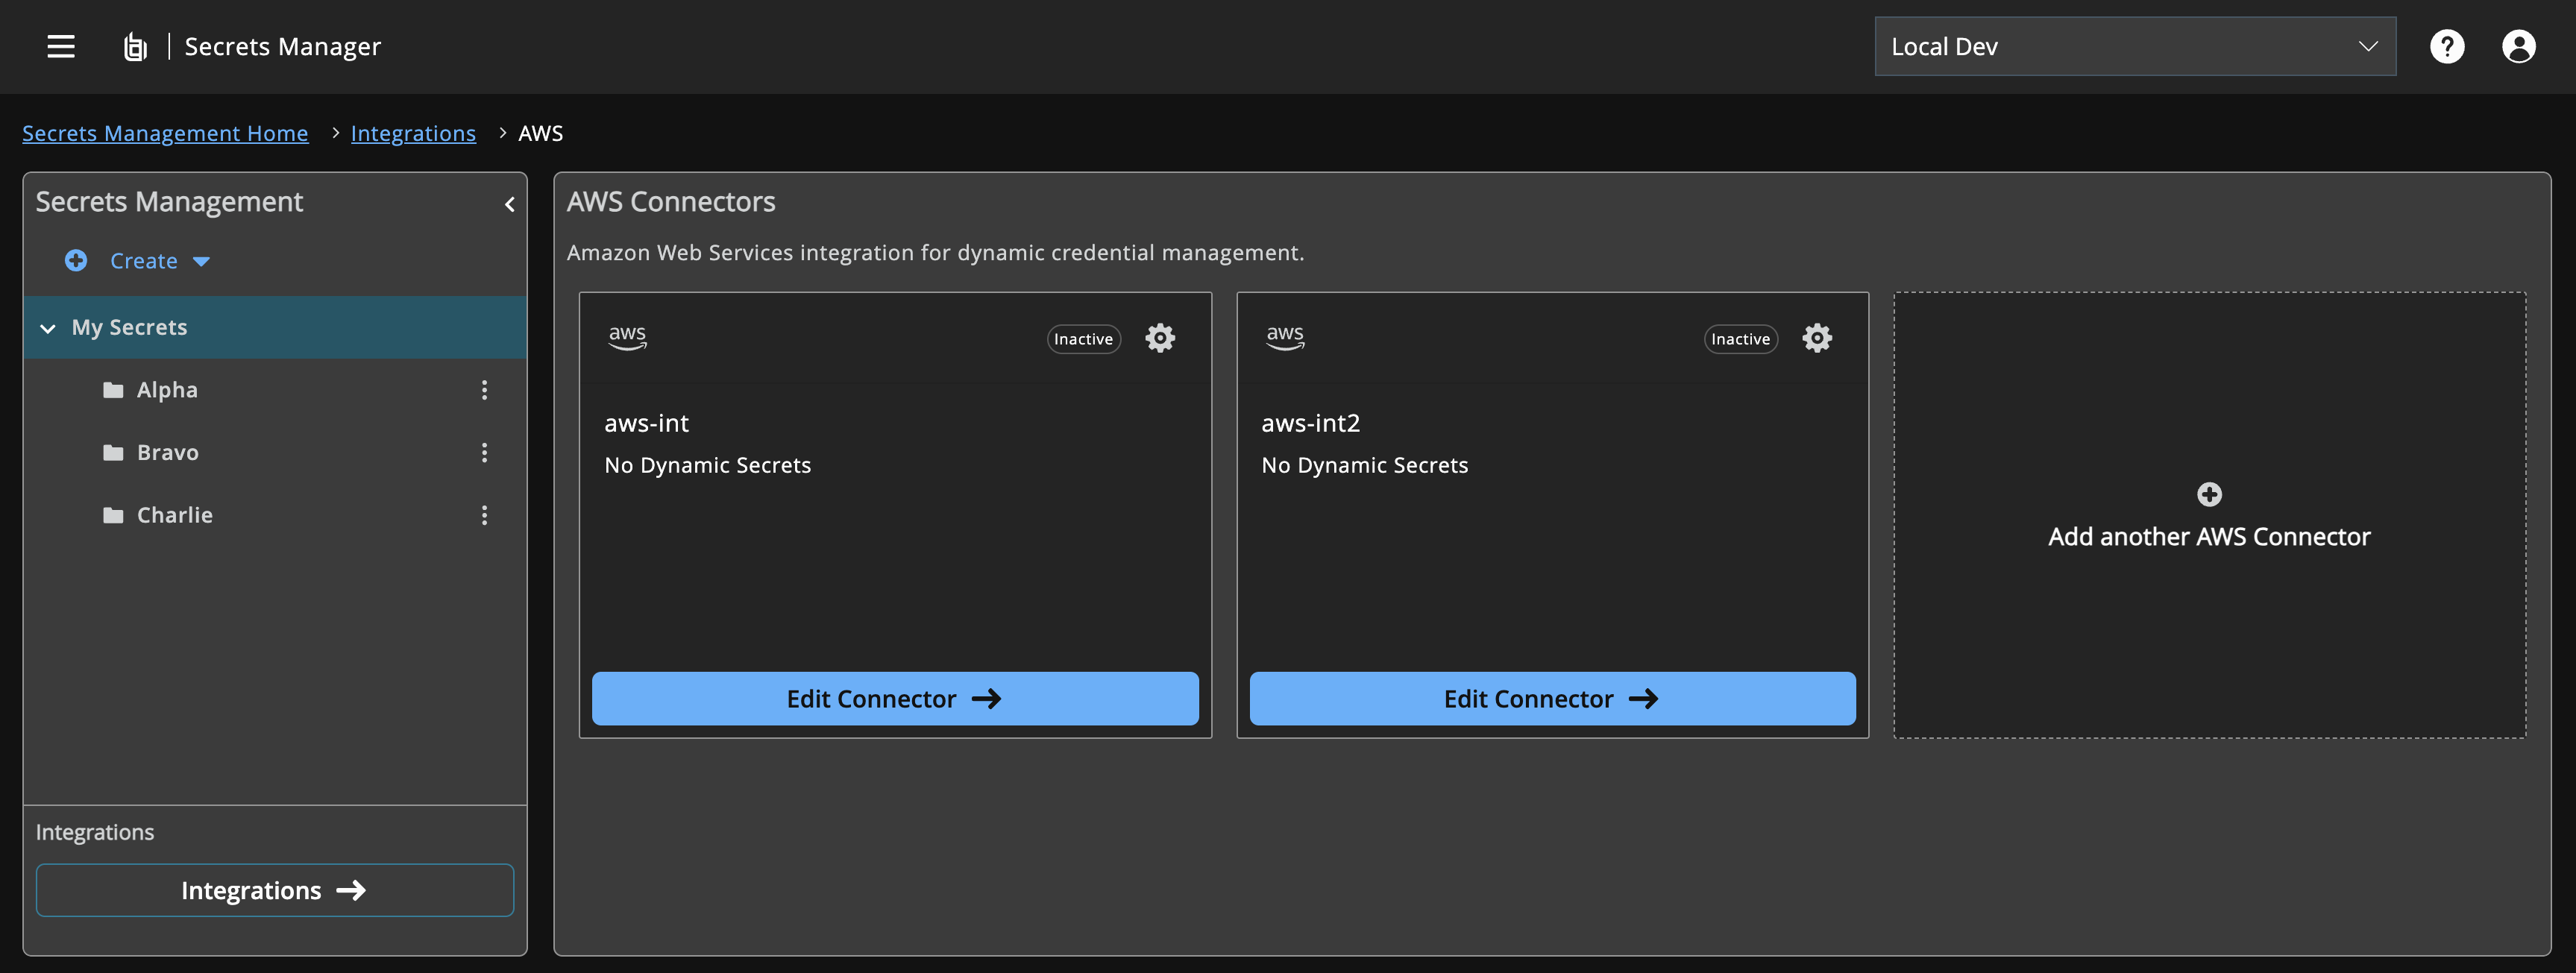
From a provider's connectors page you can:
-
View existing connectors as cards, each showing the connector name, status badge (active if a connector has an active lease), and dynamic secret count.
-
Click Edit Connector on any card to open the connector drawer.
-
Click the Add another Connector card to add a new connector.
Create an AWS integration
When you create an AWS integration, Workload Credentials:
- Generates short-lived, scoped AWS IAM credentials on-demand.
- Supports Assume-Role operations, generating security token service (STS) session tokens for enhanced security context and privilege isolation.
To create the integration:
- Log on to your Pathfinder instance.
- Select Menu > Secrets.
- Click Integrations in the sidebar.
- On the AWS card, click Manage Connectors.
- Click the Add another AWS Connector card.
The Create AWS integration drawer opens.
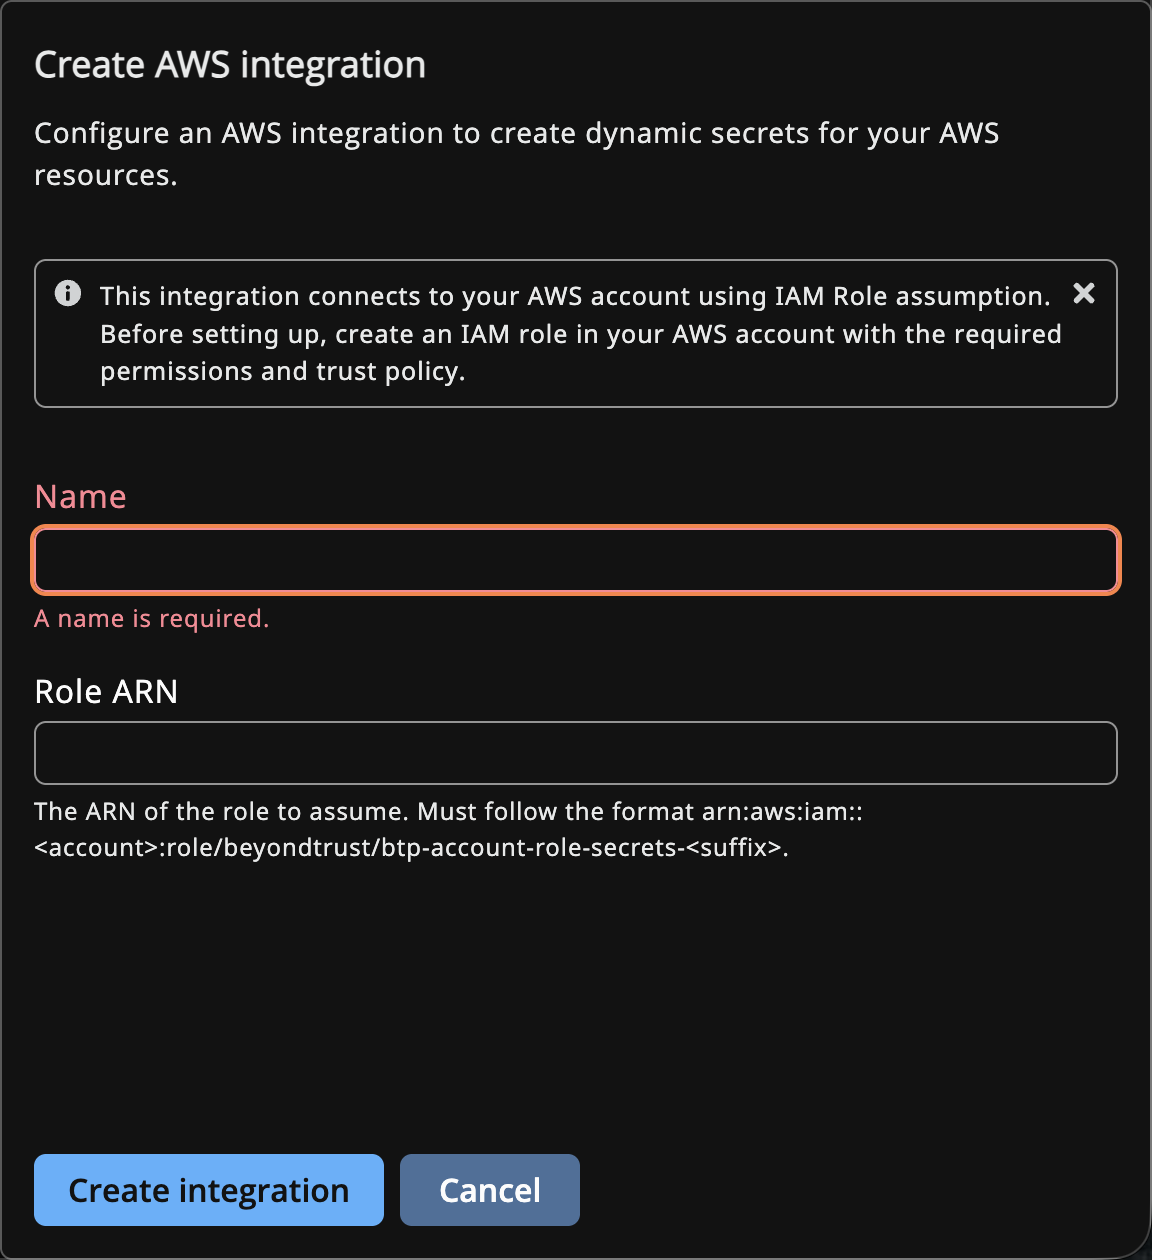
- Complete the fields:
- Name: A unique name for this connector.
- Role ARN: The Amazon Resource Name (ARN) of the role to assume.
- Click Create integration.
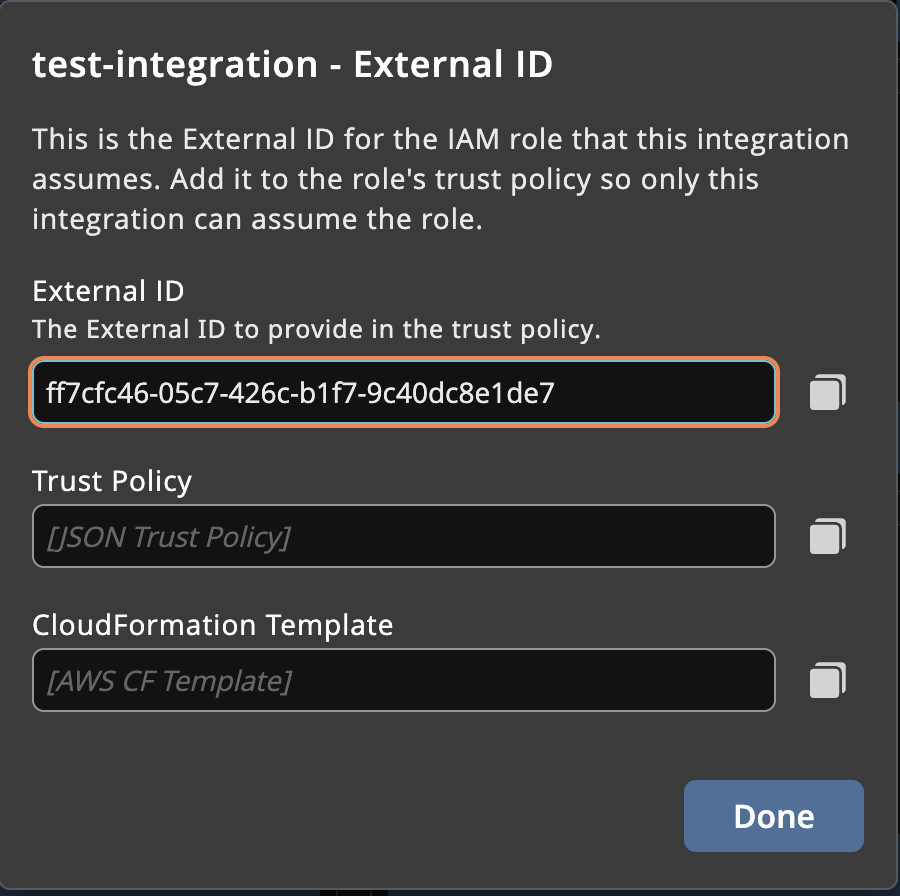
- A pop-up window will appear, showing the external ID that is associated with this integration. The external ID needs to be provided to an existing or new AWS role used by this integration.
Set up an AWS integration role
Before you start using the AWS integration, you need an IAM role in your AWS account with the correct trust relationship. You may either use an existing role and update its trust policy or create a new role for this use case.
The CLI can generate a CloudFormation template that creates this role for you.
Run the following command to generate the template:
secrets integration aws template --site-id <site-id> --integration-name <name>The command outputs a CloudFormation template in YAML format. Below is a snippet of the output:
AWSTemplateFormatVersion: '2010-09-09'
Description: Creates an IAM role for Pathfinder Secrets AWS integration
Resources:
  SecretsIntegrationRole:
    Type: AWS::IAM::Role
    Properties:
      AssumeRolePolicyDocument:
        ...
To deploy the template:
-
Save the output to a file:
secrets integration aws template --site-id <site-id> --integration-name <name> > secrets-role.yaml -
Deploy with the AWS CLI:
aws cloudformation deploy --template-file secrets-role.yaml --stack-name secrets-integration-role --capabilities CAPABILITY_NAMED_IAM
Create an AWS dynamic secret
A dynamic secret defines how dynamic credentials are generated and is linked to a connector.
To create a new AWS dynamic secret:
-
Log on to your Pathfinder instance.
-
Select Menu > Secrets.
-
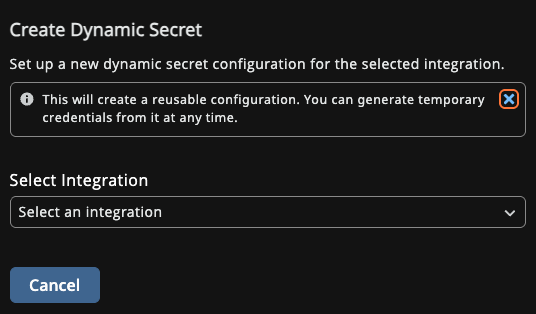
Click Create > Dynamic secret. The option is disabled if you have no integrations configured.
The Create a Dynamic Secret panel displays.
-
Select an AWS integration.
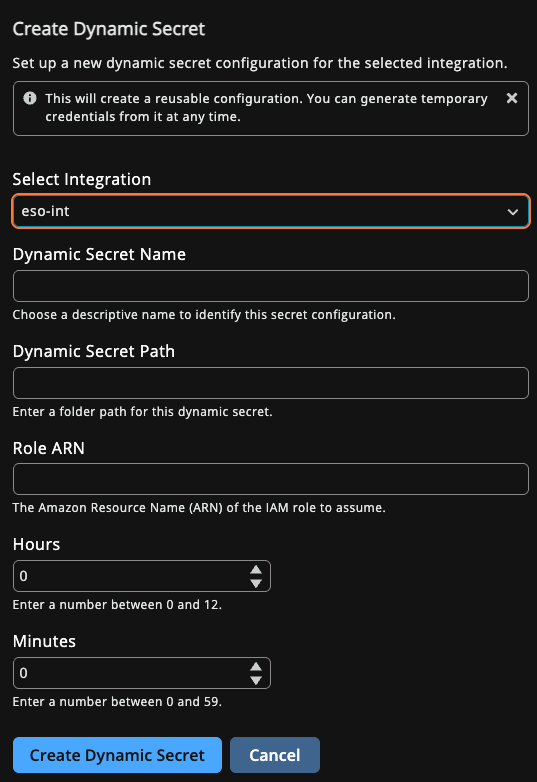
-
Provide the required fields: Name, Role ARN, and Duration.
- Ensure the integration role has permission
sts:AssumeRoleon the given role ARN. - If AWS tag fields are entered, ensure the integration role has permission
sts:TagSessionon the given role ARN. - If the Group field is entered, ensure the integration role has permission
iam:ListAttachedGroupPolicies,iam:ListGroupPolicies, andiam:GetGroupPolicyon the given groups. - If Policy ARNs are entered, ensure the policies define permissions that are a subset of the role's identity-based policy specified on AWS; otherwise, they are ignored.
- If a Policy is entered, ensure that the policy's permissions are a subset of the role's identity-based policy specified on AWS; otherwise, it is ignored.
- Ensure the integration role has permission
-
Click Create Dynamic Secret.
Generate AWS dynamic credentials
Generate AWS assumed role STS credentials on demand using the settings configured in the dynamic secret.
-
Log on to your Pathfinder instance.
-
Select Menu > Secrets.
-
Locate the dynamic secret.
-
In the Actions column, select View Details.
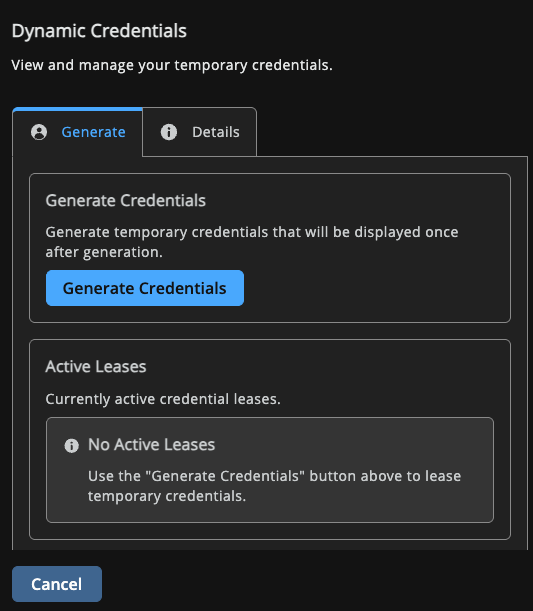
The Dynamic Credentials panel displays.
-
Click Generate Credentials.
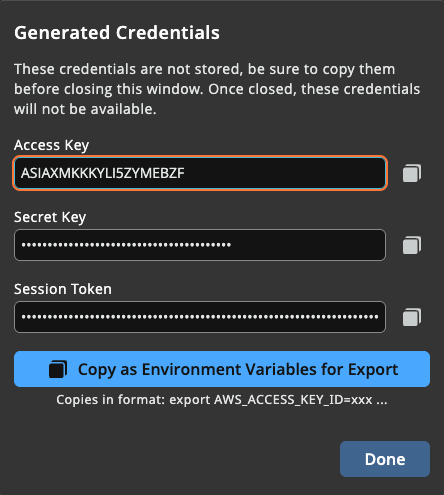
The Generated Credentials dialog displays the Access Key, Secret Key, and Session Token.
-
Click Copy as environment variables to copy the credentials to the clipboard. The credentials are displayed only once and cannot be recovered after you close the dialog.
-
The lease appears in the Active Leases panel. It is automatically revoked when it expires.
Set up an Azure integration
Before you can create an Azure integration in Workload Credentials, you need a Microsoft Entra ID app registration that Workload Credentials authenticates as. This app registration represents the integration service principal and its tenant ID, client ID, and client secret are the values you enter when creating the integration.
To set up the integration app registration:
-
In the Azure portal, navigate to Microsoft Entra ID > App registrations and click New registration.
-
Enter a name (for example,
beyondtrust-secrets-integration) and click Register. -
From the overview page, copy the Application (client) ID and the Directory (tenant) ID. You will need both when creating the integration.
-
Generate a client secret:
- Open Certificates & secrets > Client secrets.
- Click New client secret, set a description and expiry, and click Add.
- Copy the secret Value immediately. Azure does not display it again.
-
Grant the integration permission to manage app password credentials:
- Open API permissions > Add a permission.
- Select Microsoft Graph > Application permissions.
- Search for and add Application.ReadWrite.OwnedBy.
- Click Grant admin consent for [tenant]. The permission status must show Granted before the integration can generate credentials.
Application.ReadWrite.OwnedBy is the least-privilege permission needed by the integration. It lets the integration manage only the app registrations it explicitly owns. Ownership of each target app is configured separately during dynamic secret setup.
Set up a target app registration for an Azure dynamic secret
Each Azure dynamic secret issues temporary password credentials for a target app registration. The target represents the identity that downstream consumers authenticate as after they receive a generated client secret.
To set up a target app registration:
-
In the Azure portal, navigate to Microsoft Entra ID > App registrations and click New registration.
-
Enter a name (for example,
db-readonly-target) and click Register. -
From the overview page, copy the Object ID of the app registration. Workload Credentials needs the Object ID, not the Application (client) ID
-
Assign the permissions and roles the consumer requires:
-
For Microsoft Graph or other API access, open API permissions, add the required Application permissions, and click Grant admin consent for [tenant].
-
For Azure resource access, open the target resource's Access control (IAM) blade in the Azure portal and assign the appropriate role to this app's service principal.
-
-
Add the integration service principal as an owner of the target app registration. Owners are the only principals that can manage an app's password credentials when the integration is granted
Application.ReadWrite.OwnedBy.The Azure portal's owners picker only accepts users, so this step must be done from the Azure CLI:
az ad app owner add \
    --id <target-app-object-id> \
    --owner-object-id <integration-sp-object-id>
To find the integration service principal's object ID, run:
az ad sp show --id <integration-app-client-id> --query id -o tsv
Once ownership is set, the integration can add and remove password credentials on this target app, and you can reference its Object ID when creating an Azure dynamic secret.
Create an Azure integration
When you create an Azure integration, Workload Credentials:
-
Generates short-lived service principal password credentials on-demand for a target Azure app registration you designate.
-
Returns the target app's client ID along with a freshly issued password for each request, so consumers can authenticate as the target service principal independently of Workload Credentials until the lease expires.
To create the integration:
-
Log on to your Pathfinder instance.
-
Select Menu > Secrets.
-
Click Integrations in the sidebar.
-
On the Azure card, click Manage Connectors.
-
Click the Add another Azure Connector card.
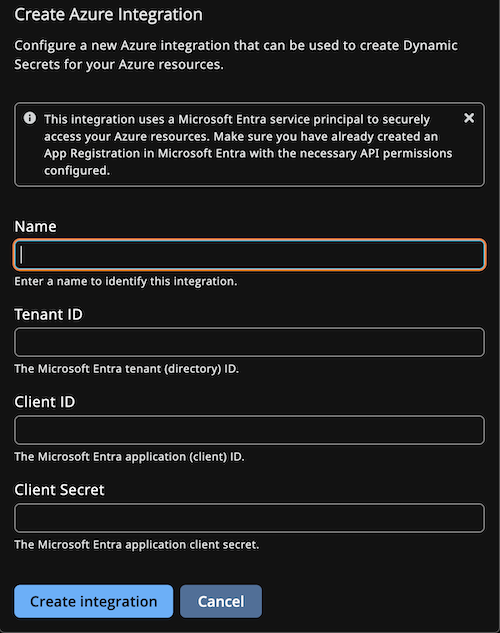
The Create Azure Integration drawer opens.
-
Complete the fields:
-
Name: A unique name for this connector.
-
Tenant ID: The Microsoft Entra ID tenant (directory) ID.
-
Client ID: The Microsoft Entra ID application (client) ID.
-
Client Secret: The Microsoft Entra ID application client secret.
-
-
Click Create integration.
Workload Credentials validates the credentials by requesting a Microsoft Graph token. If validation fails, an error displays. Verify that the tenant ID, client ID, and client secret are all correct, and that the integration app registration has
Application.ReadWrite.OwnedBygranted with admin consent.
Create an Azure dynamic secret
A dynamic secret defines how dynamic credentials are generated for a specific target Azure app registration and is linked to an Azure integration.
To create a new Azure dynamic secret:
-
Log on to your Pathfinder instance.
-
Select Menu > Secrets.
-
Click Create > Dynamic secret. The option is disabled if you have no integrations configured.
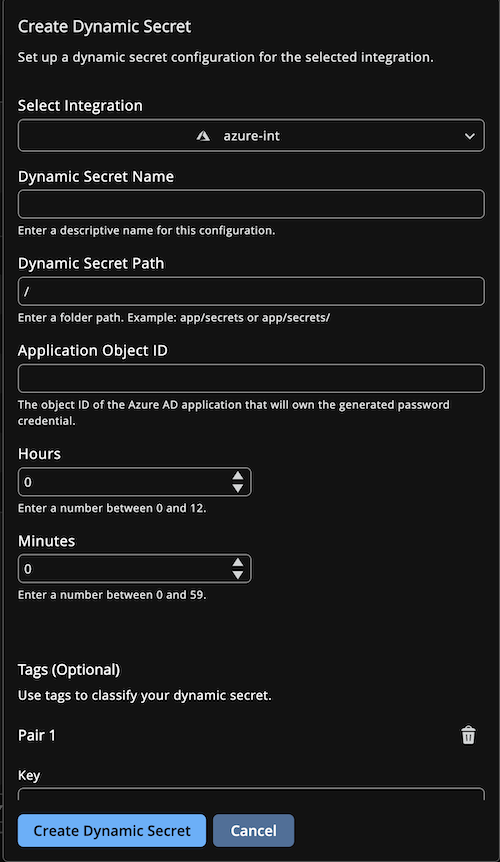
The Create a Dynamic Secret panel displays.
-
Select an Azure integration.
-
Provide the required fields:
-
Name: A unique name for this dynamic secret.
-
Application Object ID: The Object ID of the target Azure app registration. Use the Object ID, not the Application (client) ID.
-
TTL Hours and TTL Minutes: How long each generated credential is valid. The total TTL must be between 1 hour and 24 hours.
-
-
Click Create Dynamic Secret.
Generate Azure dynamic credentials
Generate a temporary service principal password on demand for the target app registration configured on the dynamic secret.
-
Log on to your Pathfinder instance.
-
Select Menu > Secrets.
-
Locate the dynamic secret.
-
In the Actions column, select View Details.
The Dynamic Credentials panel displays.
-
Click Generate Credentials.
The Generated Credentials dialog displays three values:
-
Client ID: The target app's Application (client) ID.
-
Client Secret: The newly issued password credential.
-
Tenant ID: Your Azure tenant ID.
-
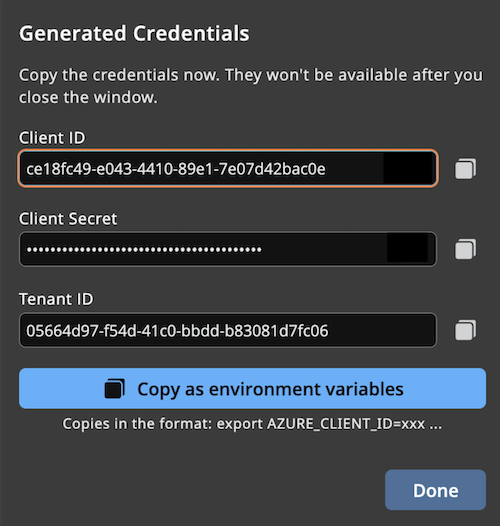
- Click Copy as environment variables to copy the credentials to the clipboard. The credentials are displayed only once and cannot be recovered after you close the dialog.
- The lease appears in the Active Leases panel. It is automatically revoked when it expires.
Revoke an active Azure lease
Azure password credentials can be revoked before their TTL expires. Use this to invalidate a credential the moment a consumer is done with it, instead of waiting for the lease to expire.
- Log on to your Pathfinder instance.
- Select Menu > Secrets.
- Locate the Azure dynamic secret.
- In the Actions column, select View Details.
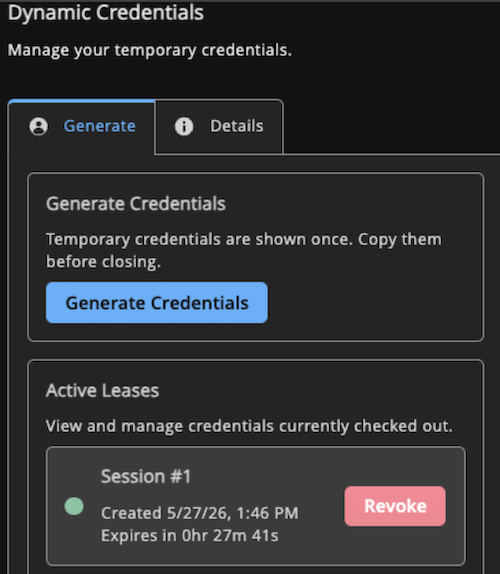
- In the Active Leases panel, find the lease you want to revoke.
-
Click Revoke.
Workload Credentials removes the password credential from the target Azure app registration immediately and deletes the lease. Any client that still holds the revoked client secret will fail to authenticate to Azure on its next token request.
Edit an integration
To edit an integration:
-
Log on to your Pathfinder instance.
-
Select Menu > Secrets.
-
Click Integrations in the sidebar.
-
On the provider card (AWS or Azure), click Manage Connectors.
-
Locate the connector and click Edit Connector.
The connector drawer opens to the Details tab.
-
Update editable fields.
-
Click Save changes.
Workload Credentials re-validates the credentials on save. If validation fails, an error displays.
List dynamic secrets associated to an integration
- Log on to your Pathfinder instance.
- Select Menu > Secrets.
- Click Integrations in the sidebar.
- On the provider card (AWS or Azure), click Manage Connectors.
- Locate the connector and click Edit Connector on its card.
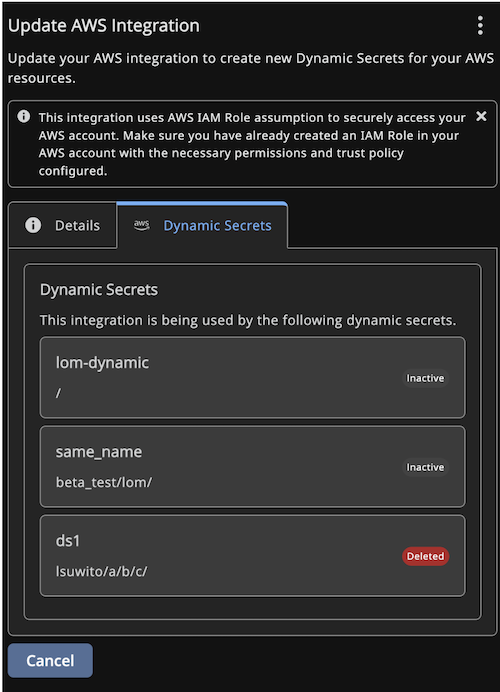
- Click the Dynamic Secrets tab.
- The tab displays all dynamic secrets associated with the selected integration.
Destroy an integration
To destroy an integration:
-
Log on to your Pathfinder instance.
-
Select Menu > Secrets.
-
Click Integrations in the sidebar.
-
On the provider card (AWS or Azure), click Manage Connectors.
-
Locate the connector and click Edit Connector on its card.
-
Open the kebab menu and select Destroy integration.
-
In the confirmation dialog, type the required keyword and click Destroy integration.
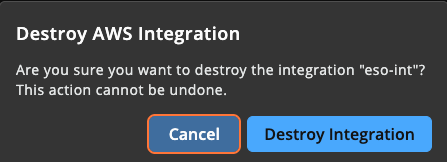
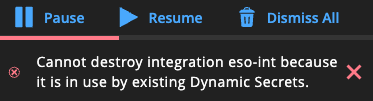
If the connector is used by existing dynamic secrets, the destroy is blocked and an error displays. Remove or reassign those dynamic secrets first.
Edit a dynamic secret
To view details:
-
Log on to your Pathfinder instance.
-
Select Menu > Secrets.
-
Locate the dynamic secret.
-
In the Actions column, select View Details.
The Dynamic Credentials panel displays.
-
Click the Details tab.
-
Update any editable fields.
-
Click Update Dynamic Secret.
Delete a dynamic secret
To delete a dynamic secret:
-
Log on to your Pathfinder instance.
-
Select Menu > Secrets.
-
Locate the dynamic secret.
-
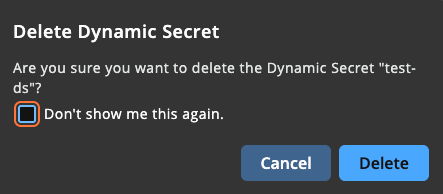
In the Actions column, select Delete.
The Delete Dynamic Secret message displays.
-
Select Delete to confirm.
Restore a dynamic secret
To restore a dynamic secret:
-
Log on to your Pathfinder instance.
-
Select Menu > Secrets.
-
Locate the dynamic secret.
-
In the Actions column, select View Details.
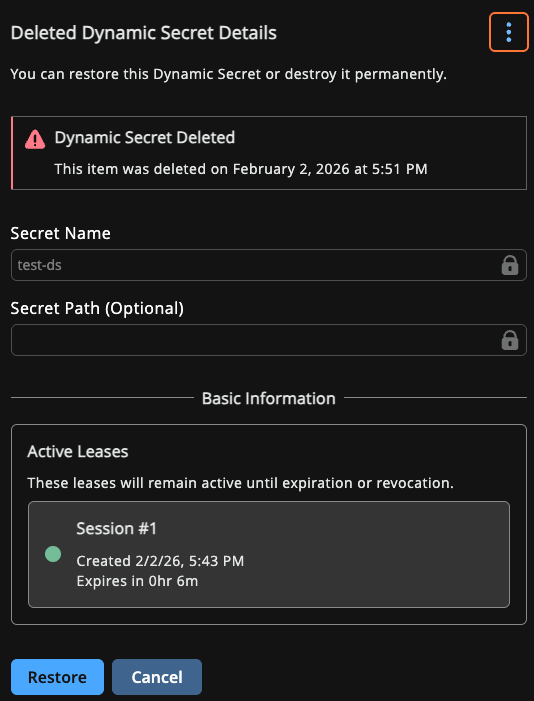
The Deleted Dynamic Secret Details panel displays.
-
Click Restore.
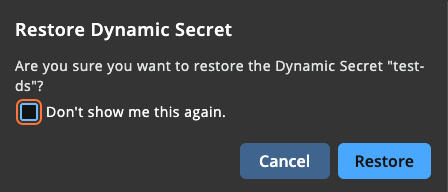
The Restore Dynamic Secret message displays.
-
Click Restore to confirm.
Destroy a dynamic secret
To permanently delete a dynamic secret:
-
Log on to your Pathfinder instance.
-
Select Menu > Secrets.
-
Locate the dynamic secret.
-
Click Delete from the Actions column.
-
After delete succeeds, the Destroy button is displayed in the Actions column.
-
Click Destroy.
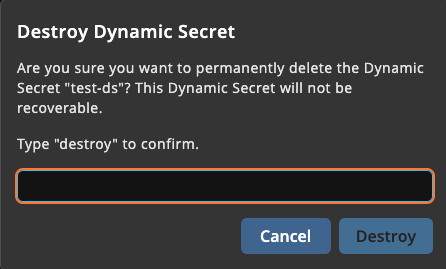
The Destroy Dynamic Secret message displays.
-
Enter
destroyand click Destroy.
If there are active leases for the dynamic secret, an error displays.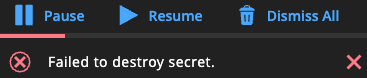
Updated 20 days ago
