
Forcepoint DSPM
Overview
Forcepoint DSPM can receive security incidents from Identity Security Insights (Insights) over an outbound webhook. Today, you configure this using the generic custom webhook integration in Insights. This guide documents every parameter needed to turn that generic configuration into a dedicated, out-of-the-box (OOTB) Forcepoint DSPM entry in the Insights Integrations catalog, and walks through the end-to-end configuration.
Each Forcepoint DSPM tenant exposes its own unique webhook endpoint and bearer token, generated from the Forcepoint DSPM Administration console. You enter that endpoint and token on the Insights webhook configuration screen, together with a fixed JSON payload template.
Prerequisites
- Administrator access to Forcepoint DSPM (Administration > Data Sources > BeyondTrust).
- Administrator access to Identity Security Insights (Integrations > Webhooks).
- A network path from Insights to the customer's Forcepoint DSPM webhook endpoint over HTTPS (TLS).
Step 1: Generate the webhook URL and bearer token in Forcepoint DSPM
-
In Forcepoint DSPM, go to Administration > Data Sources > BeyondTrust.
-
Copy the Webhook URL shown on the page. This URL is unique per tenant and follows this pattern:
https://<tenant-hostname>/scan-manager/external/webhooks/notification/<unique-token> -
Confirm the endpoint uses HTTPS. Forcepoint DSPM doesn't accept credentials delivered over plain HTTP.
-
Under Authorization, click Generate Token to create a bearer token. This token authenticates inbound calls from BeyondTrust. To invalidate previously issued tokens, click Revoke All Tokens.
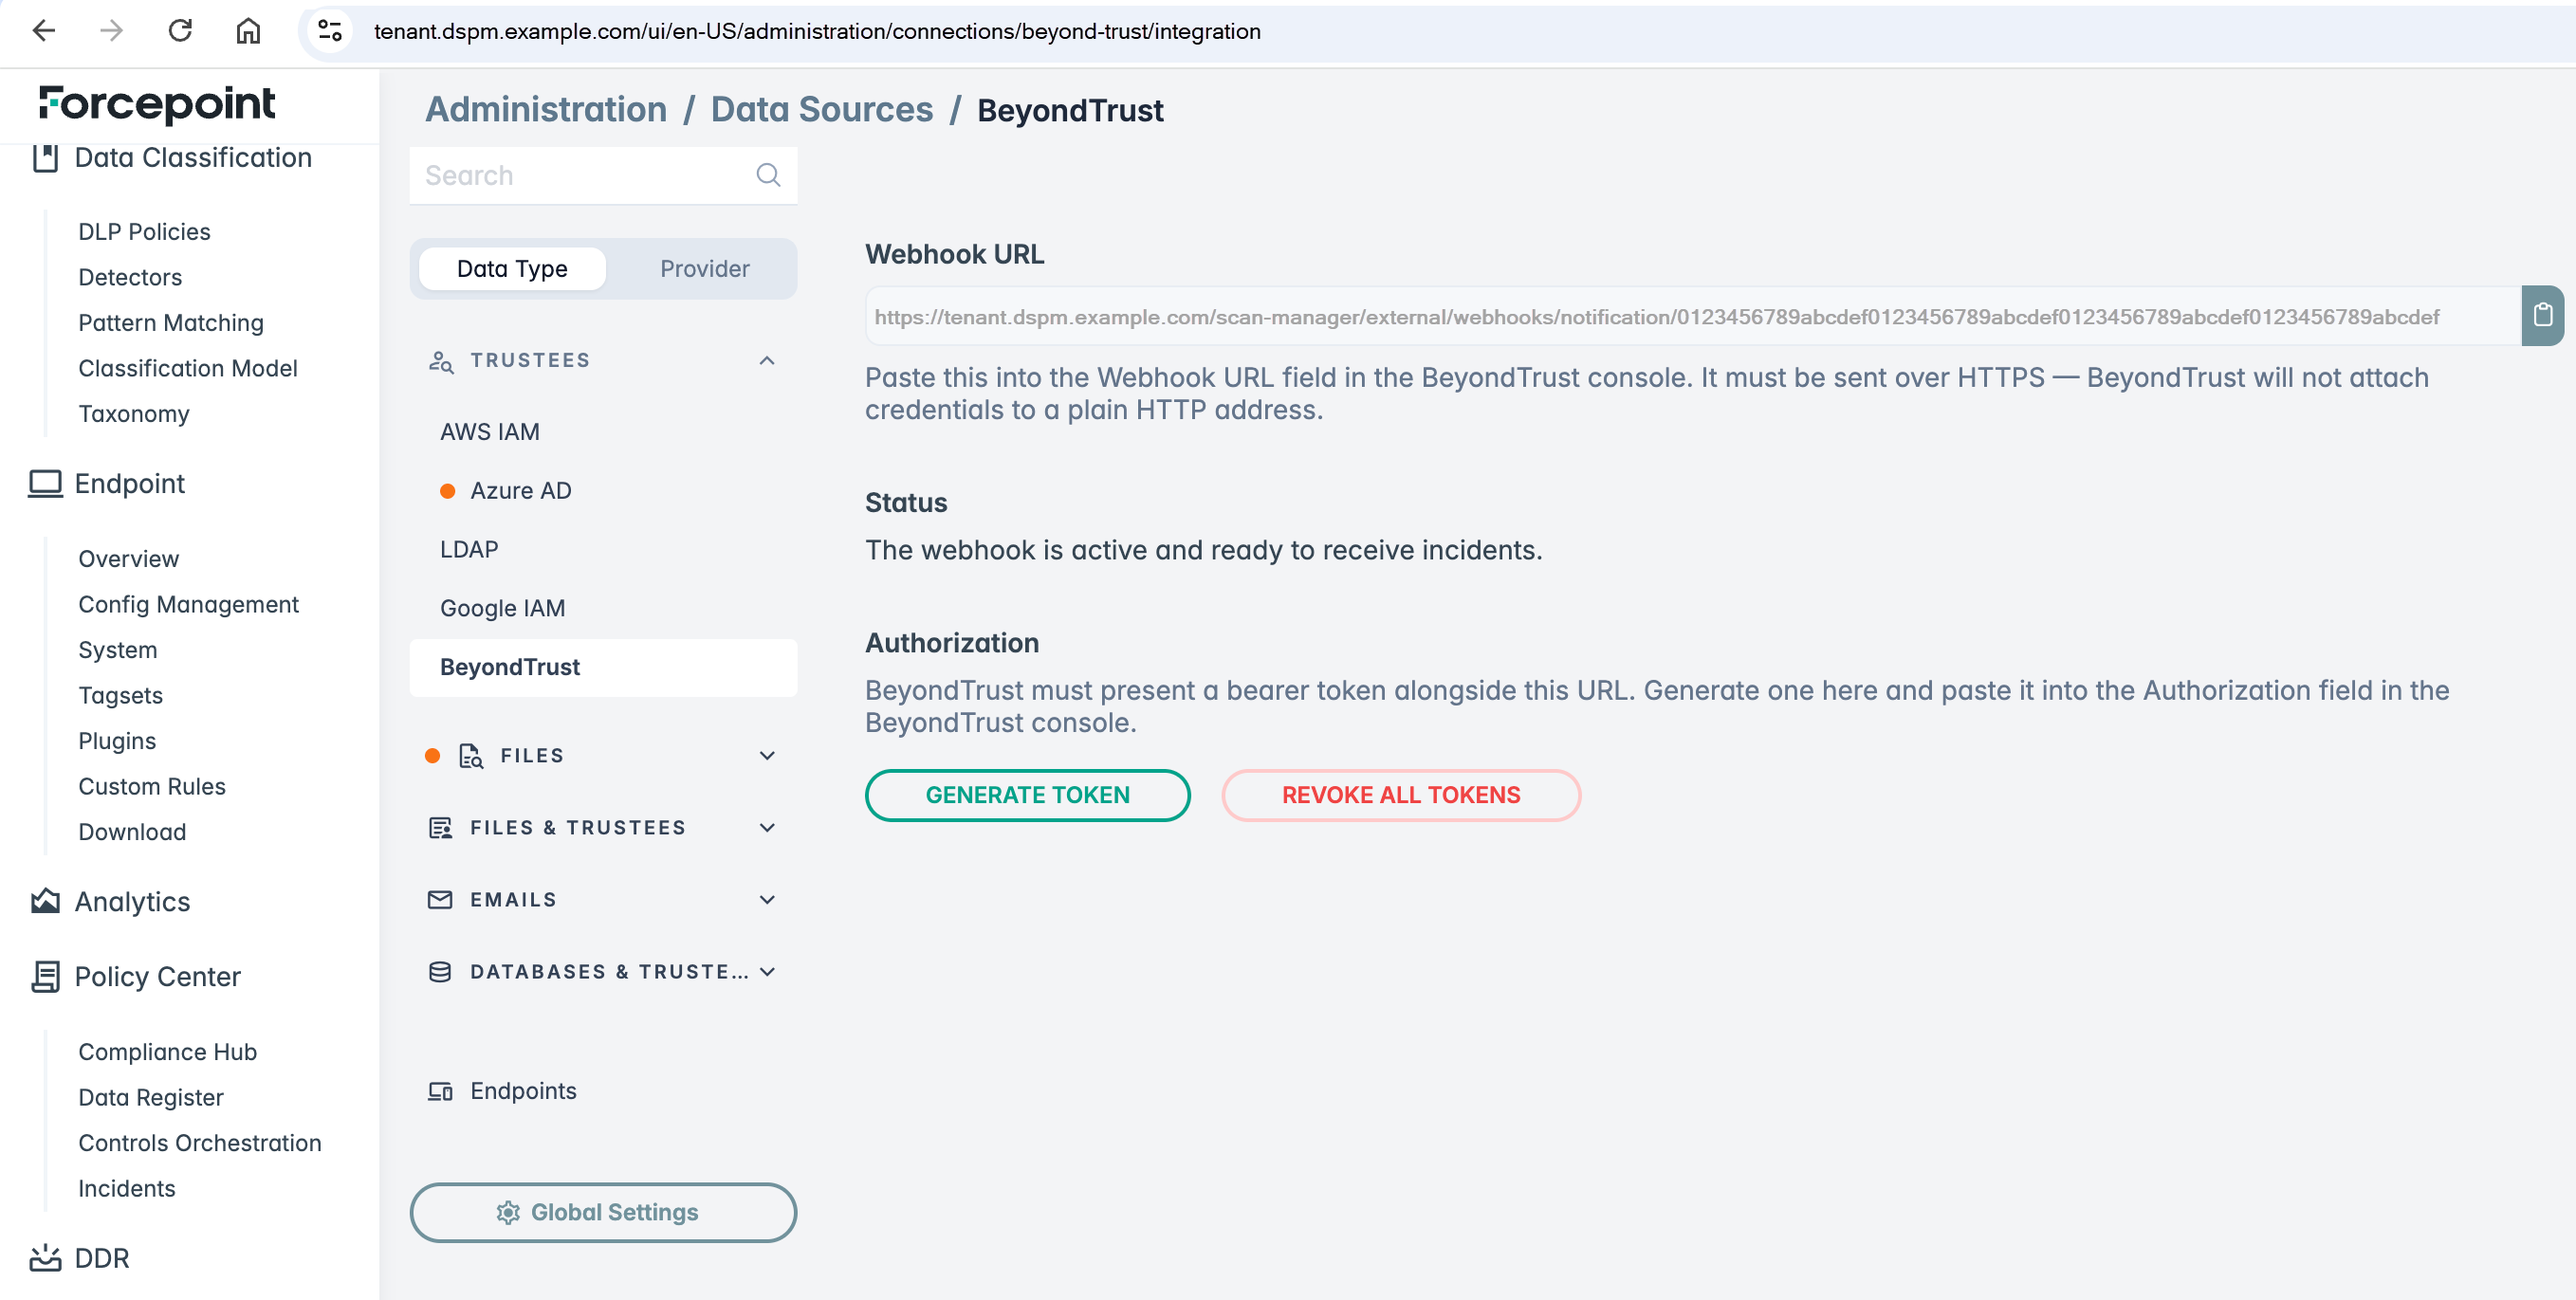
The webhook URL and token are unique per tenant and per token. Each customer generates their own values during setup. These values aren't static across installs.
Step 2: Create the webhook integration in Insights
-
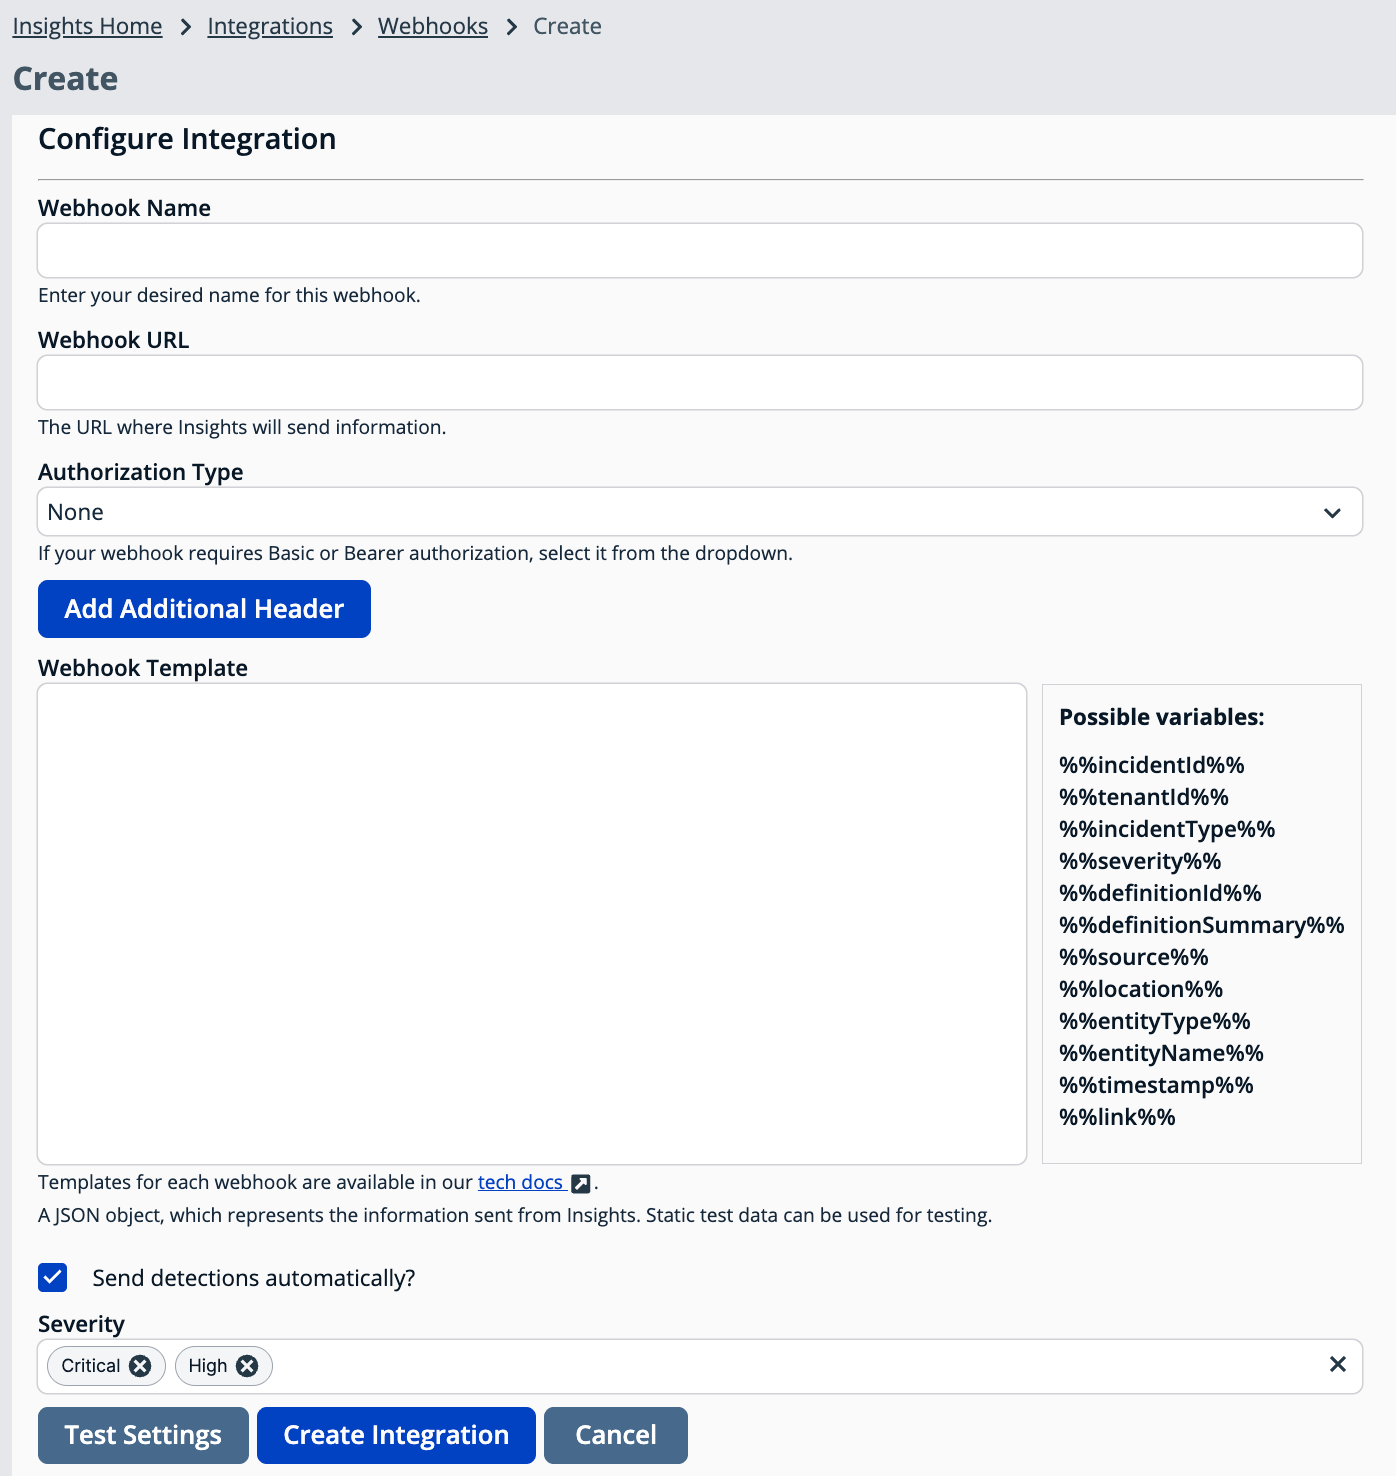
In Insights, go to Integrations > Webhooks > Create.
-
In Webhook Name, enter a descriptive name, such as
Forcepoint DSPM. -
In Webhook URL, paste the URL you copied from Forcepoint DSPM in Step 1.
Step 3: Configure authorization
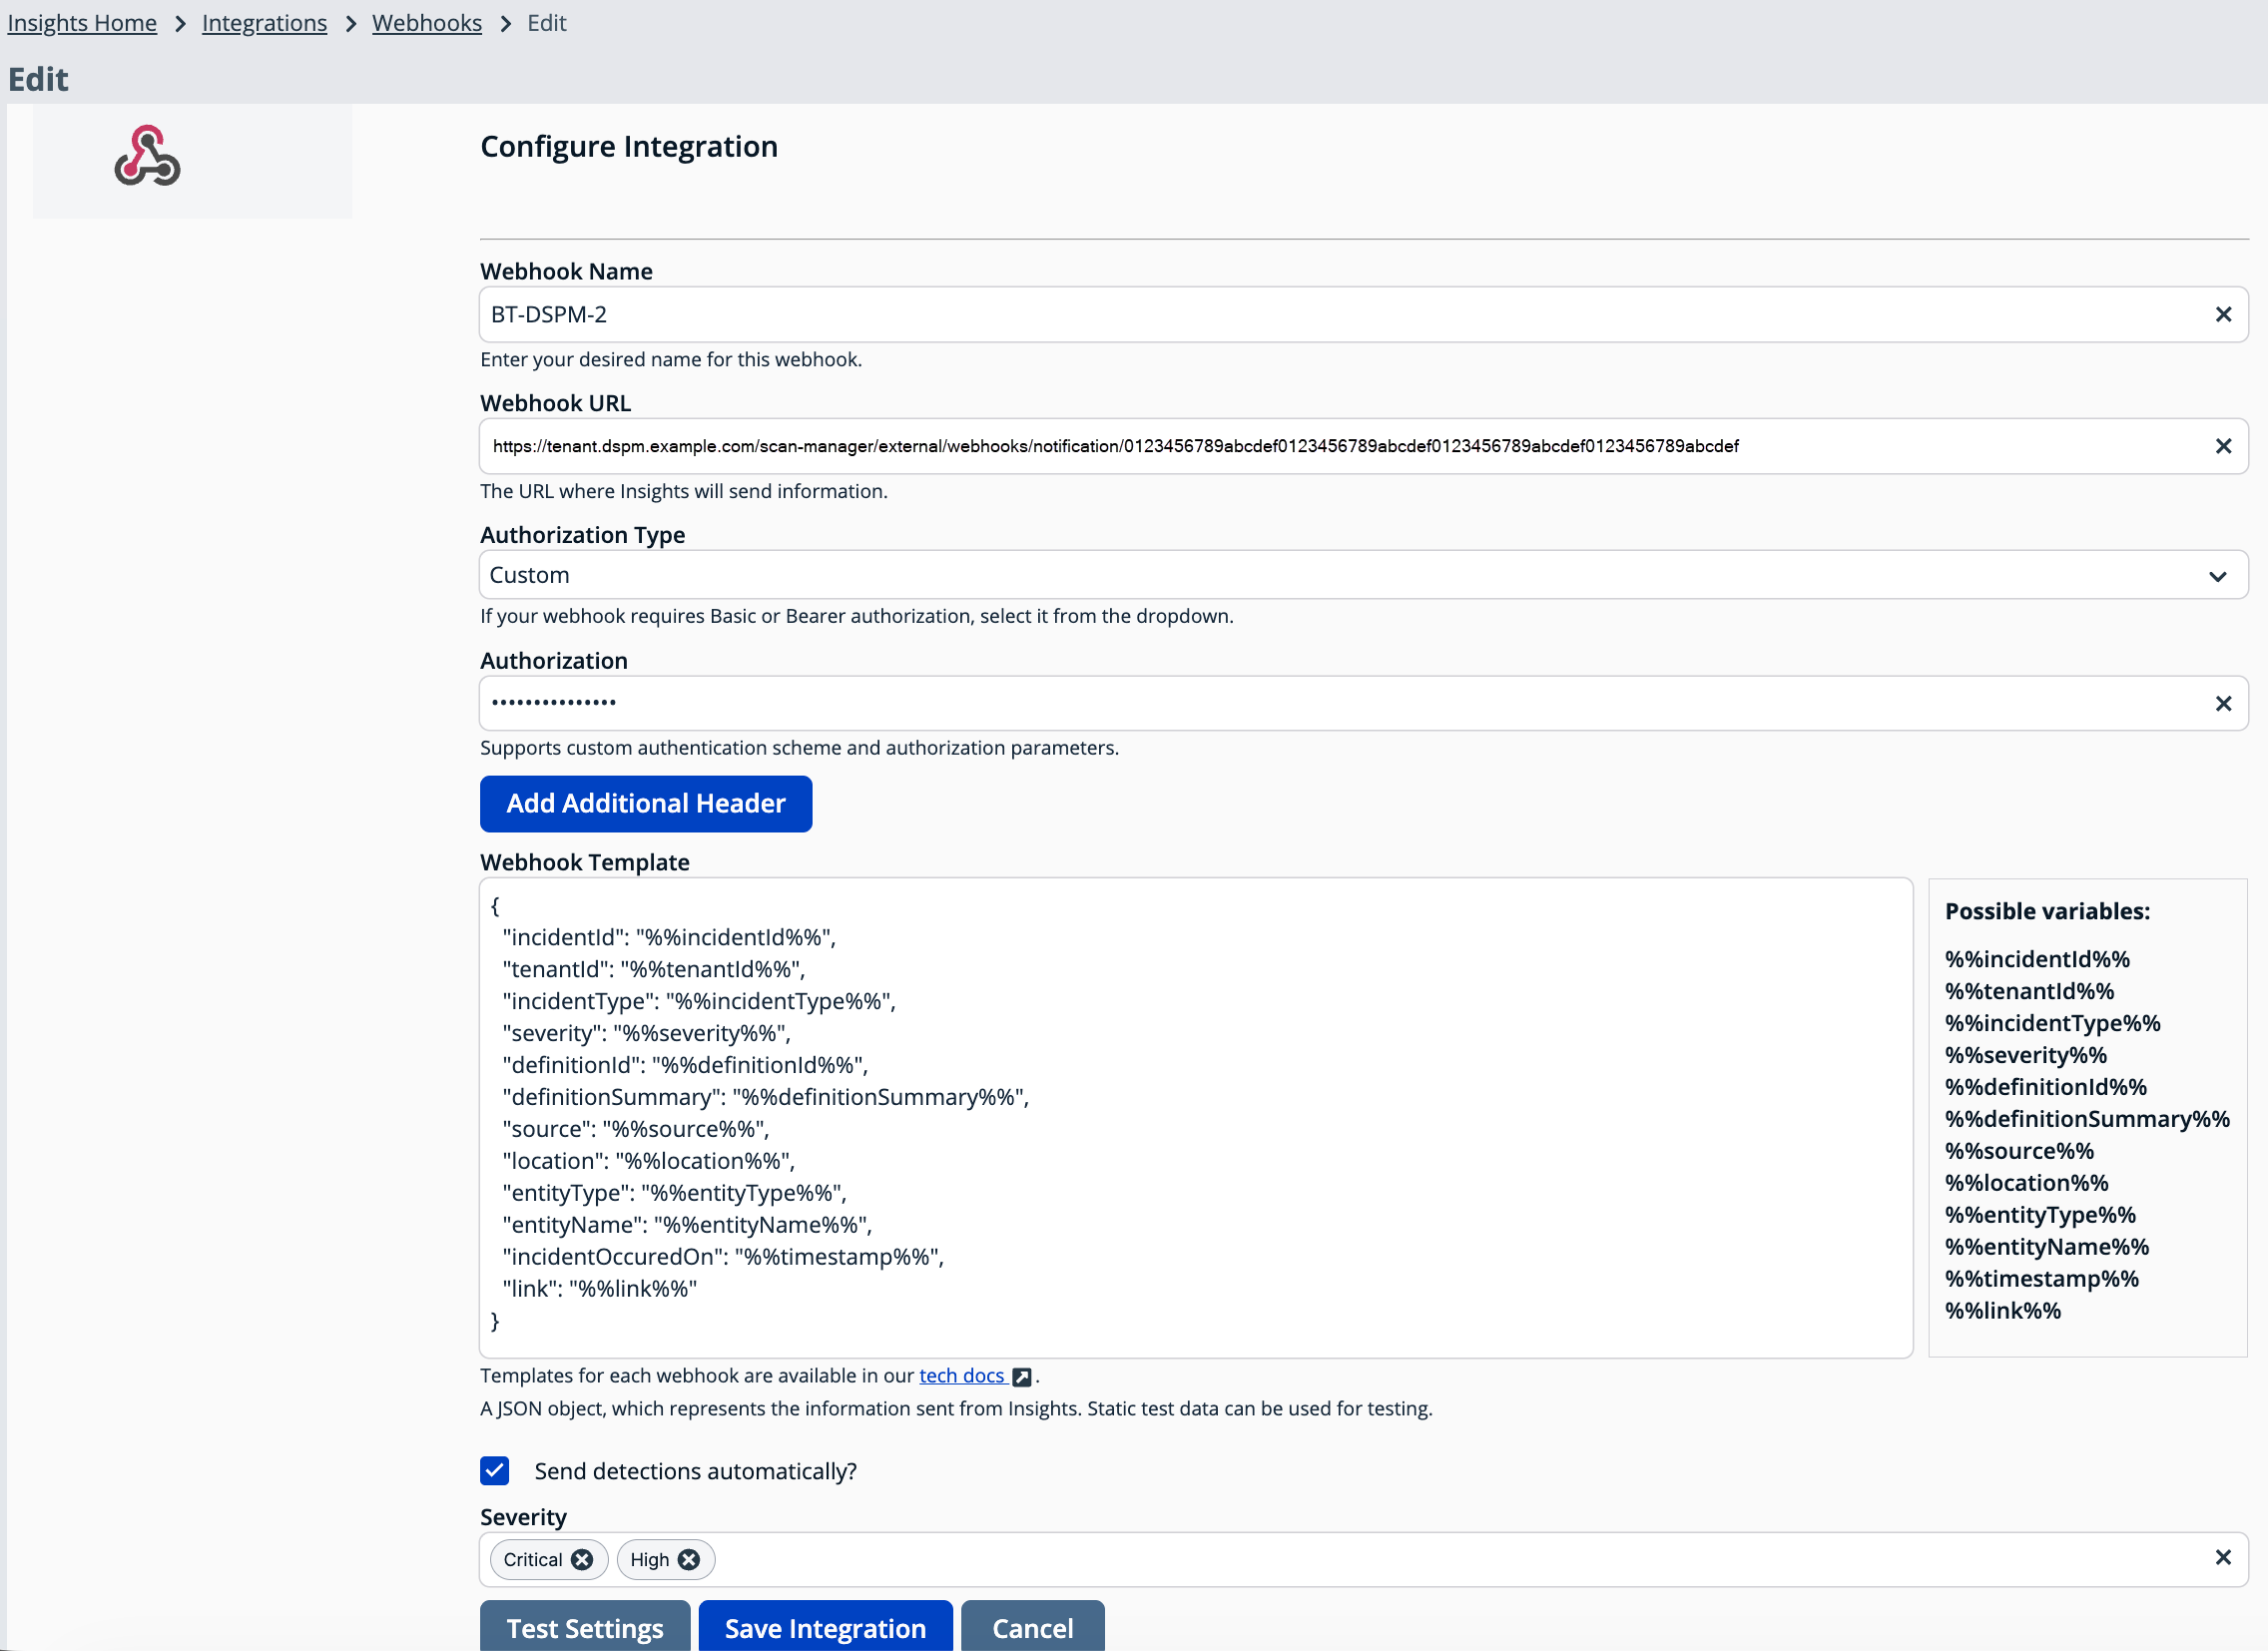
Set Authorization Type to Custom, then enter the full header value, not just the raw token, in the Authorization field:
Bearer <token-generated-in-step-1>
Why Custom and not Bearer?The validated configuration uses the Custom authorization type so that the literal word
Bearerplus the token is sent as the header value. If the native OOTB app exposes a dedicated Bearer authorization type that adds the prefix automatically, that's functionally equivalent. Just confirm the resulting header isAuthorization: Bearer <token>.
Step 4: Configure the webhook payload template
Paste the following JSON into the Webhook Template field. It maps the available Insights template variables to the field names Forcepoint DSPM expects:
{
  "incidentId": "%%incidentId%%",
  "tenantId": "%%tenantId%%",
  "incidentType": "%%incidentType%%",
  "severity": "%%severity%%",
  "definitionId": "%%definitionId%%",
  "definitionSummary": "%%definitionSummary%%",
  "source": "%%source%%",
  "location": "%%location%%",
  "entityType": "%%entityType%%",
  "entityName": "%%entityName%%",
  "incidentOccuredOn": "%%timestamp%%",
  "link": "%%link%%"
}
Field mapping reference
| Insights variable | Forcepoint field | Description |
|---|---|---|
%%incidentId%% | incidentId | Unique identifier Insights assigns to the detection or incident. |
%%tenantId%% | tenantId | BeyondTrust tenant (organization) identifier the incident belongs to. |
%%incidentType%% | incidentType | Category or type of the incident raised by Insights. |
%%severity%% | severity | Severity of the incident. Expected values: Critical, High, Medium, Low. |
%%definitionId%% | definitionId | Identifier of the detection rule or policy that triggered the incident. |
%%definitionSummary%% | definitionSummary | Human-readable description of the detection rule that fired. |
%%source%% | source | Data source or system in which the incident was detected. |
%%location%% | location | Path or location of the affected asset, such as a file path or repository. |
%%entityType%% | entityType | Type of entity involved, such as a file, user, database, or repository. |
%%entityName%% | entityName | Name of the affected entity. |
%%timestamp%% | incidentOccuredOn | Date and time the incident occurred, mapped to the Forcepoint timestamp field. |
%%link%% | link | Direct link back to the incident in Insights. |
Step 5: Configure detection and severity settings
-
Send detections automatically?: Select this checkbox so Insights pushes incidents to Forcepoint DSPM as they are generated.
-
Severity: Select the severities that trigger the webhook. The validated configuration uses Critical and High. Add Medium and Low for broader coverage.
Step 6: Test and save
-
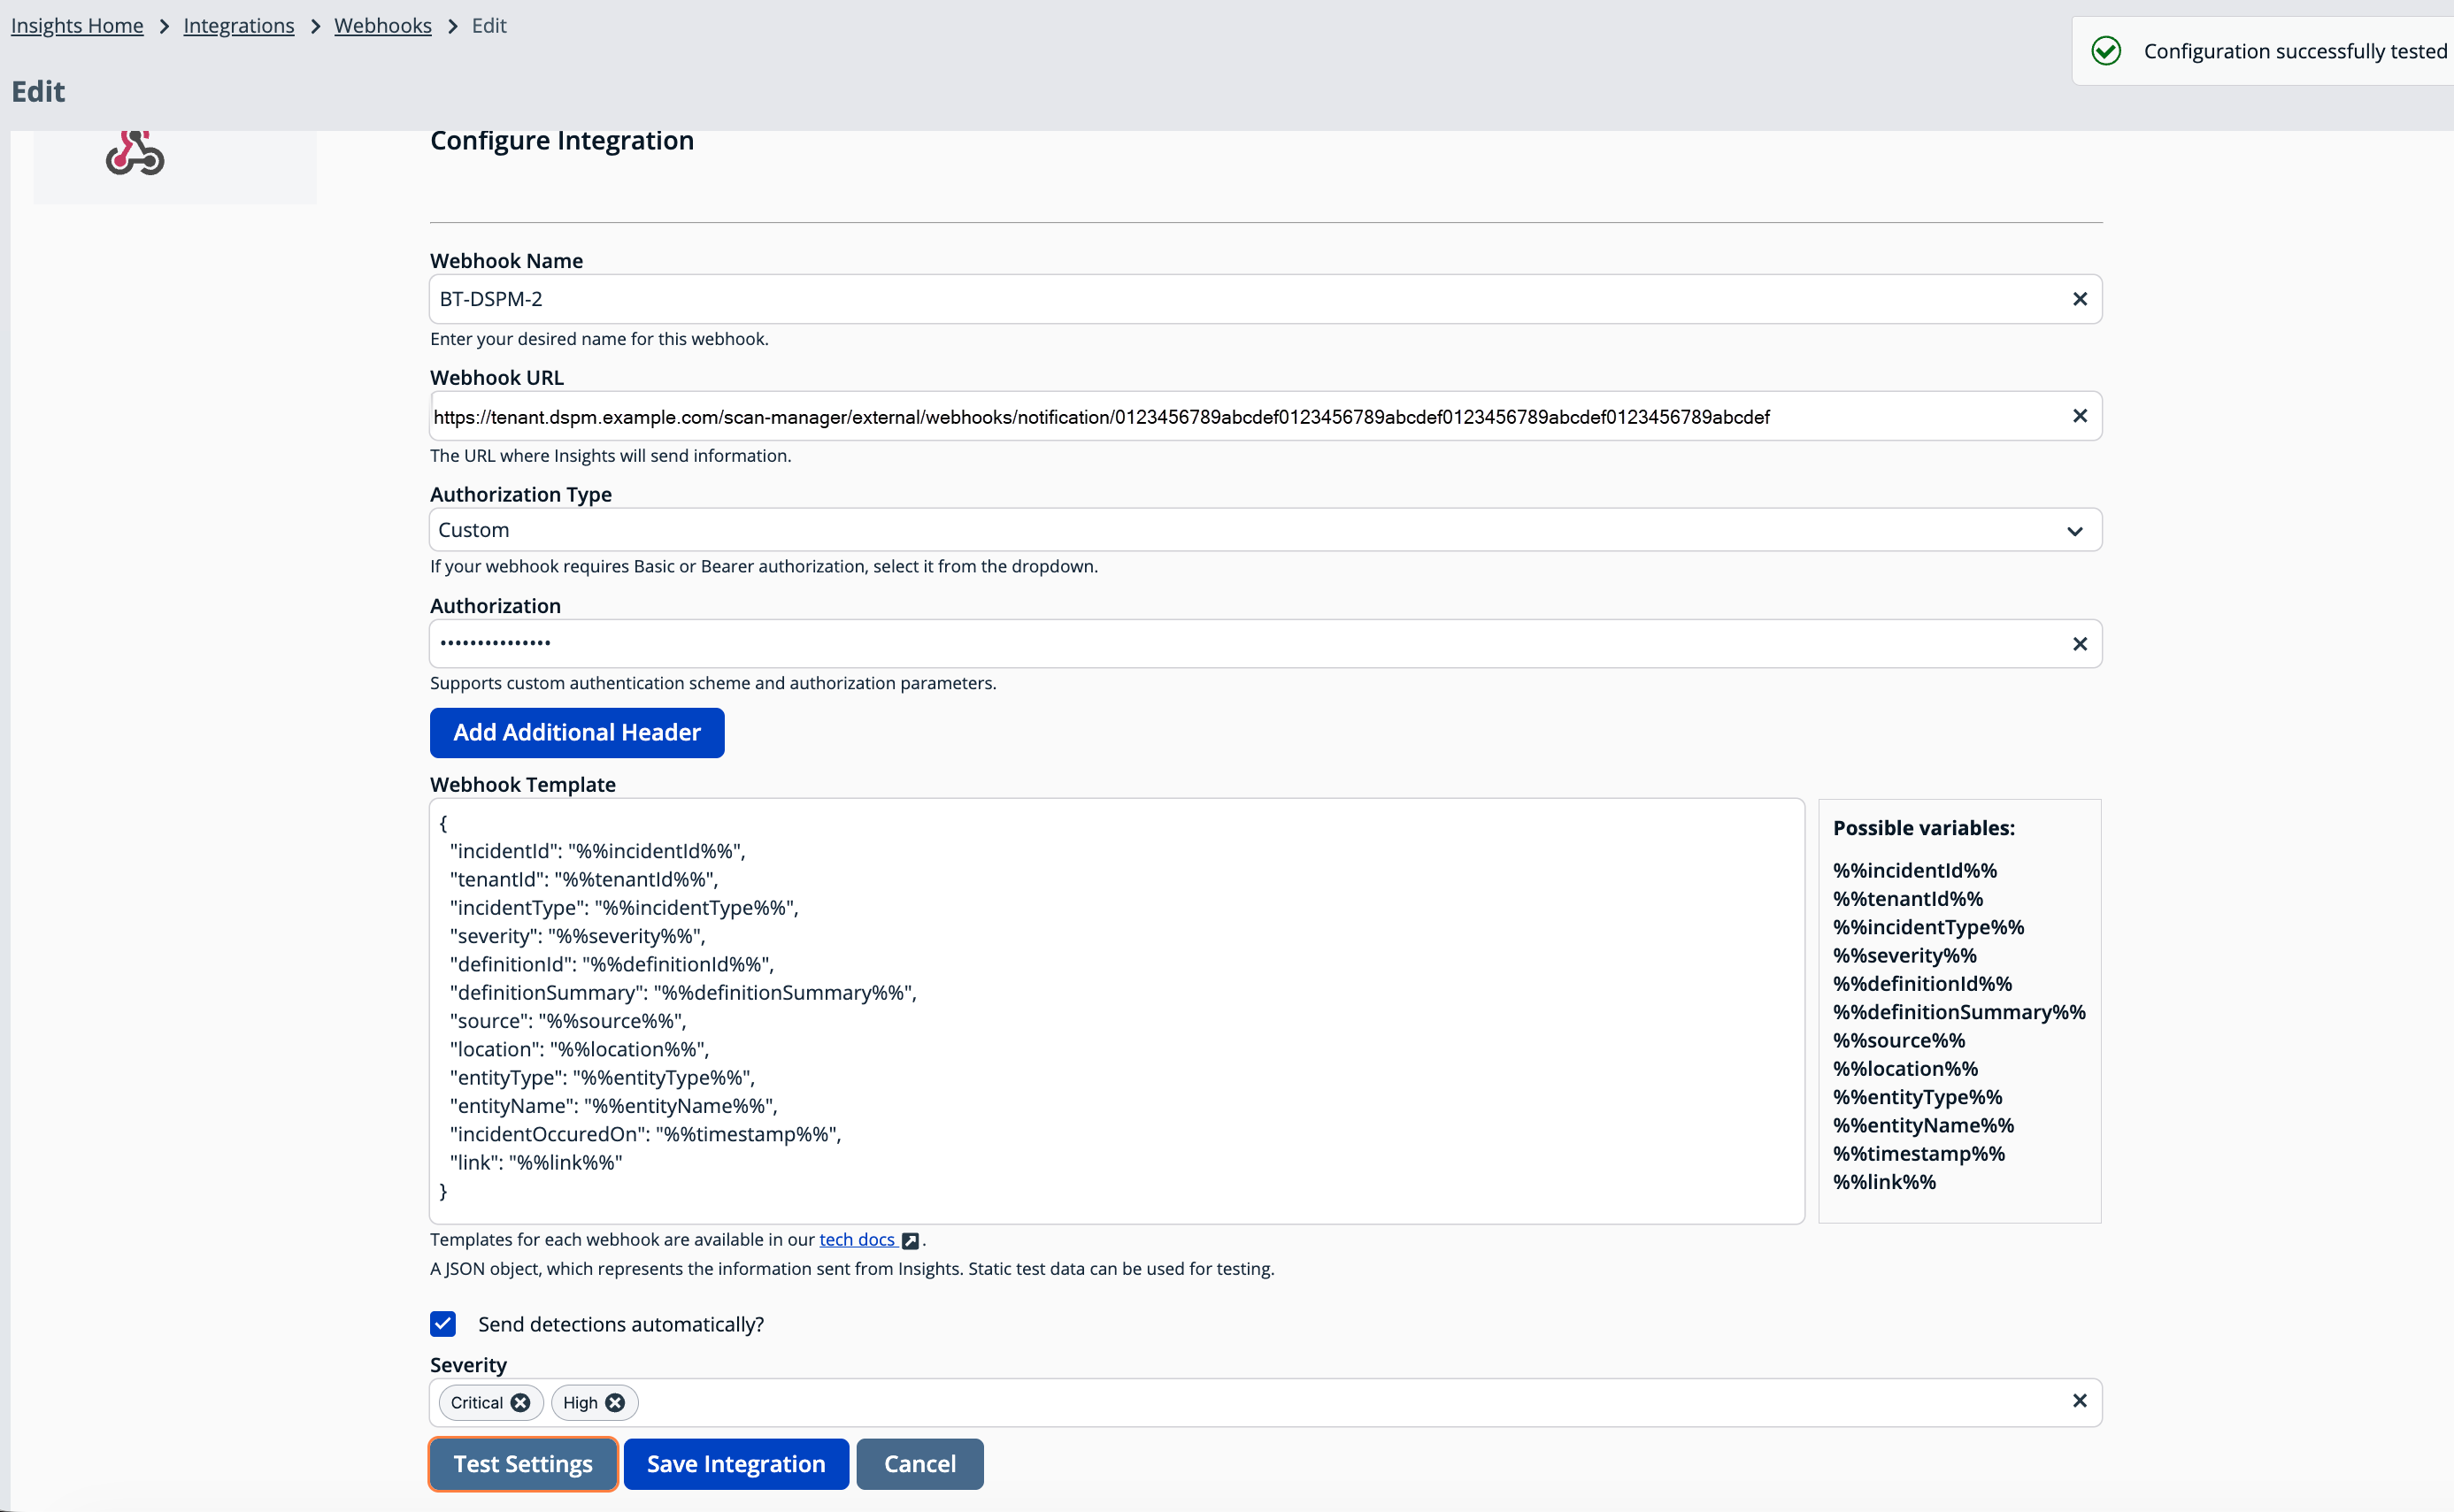
Click Test Settings to send a sample payload to the Forcepoint DSPM endpoint.
-
Confirm the green Configuration successfully tested banner displays in the upper-right corner of the page. This confirms Insights reached the Forcepoint DSPM webhook URL and authenticated successfully.
-
Click Save Integration to activate the webhook.
-
In Forcepoint DSPM, confirm the Status reads The webhook is active and ready to receive incidents.
If the test failsIf no success banner displays, Insights could not reach or authenticate to the endpoint. Check the webhook URL, confirm the Authorization value is exactly
Bearer <token>, and confirm the token hasn't been revoked in Forcepoint DSPM. For more information, see Troubleshooting.
Summary: Requirements for the OOTB app
- Webhook URL field: Free text, supplied by the tenant. Pattern:
https://<tenant-hostname>/scan-manager/external/webhooks/notification/<token>. - Authorization: Header named
Authorization, value formatBearer <token>, with a token supplied by the tenant. - Payload: Fixed JSON payload template as shown in Step 4, using the existing Insights
%%variable%%substitution. - Default severity filter: Critical and High, configurable by the customer.
- Send automatically: On by default.
Troubleshooting
- 401 or 403 response: Confirm the Authorization value is exactly
Bearerfollowed by a currently valid token. You can revoke and regenerate tokens on the BeyondTrust data source page in Forcepoint DSPM. - Connection refused or timeout: Confirm the webhook URL is reachable over HTTPS from Insights and that no proxy is blocking the request.
- No incidents arriving: Confirm Send detections automatically? is selected and that the incident's severity matches the configured Severity filter.
Updated about 1 hour ago
