Getting started | Insights
Start mapping identity risk in under 10 minutes — insights build as data flows in.
This guide walks you through connecting your first identity source and kicking off data ingestion. While full visibility takes a bit of time to develop, setup is fast. You’ll soon start seeing signals like dormant accounts, risky entitlements, and potential escalation paths.
What you need
- Access to BeyondTrust Pathfinder with the Identity Security Insights app enabled
- Read-only credentials for one supported identity source
- Connector details: For example, client ID, tenant ID, API token. Details vary by source.
Identity Security Insights supports a wide range of cloud and on-prem identity systems. Start with one and expand as needed.
Set up your first Connector
Follow these steps to connect your first identity source and start ingesting data.
1. Sign in to Pathfinder
Go to your BeyondTrust Pathfinder instance and open the Identity Security Insights app.
2. Go to the Connectors area
After launching the Identity Security Insights app in Pathfinder, you’ll be guided directly to the Connectors area — no digging through menus required.
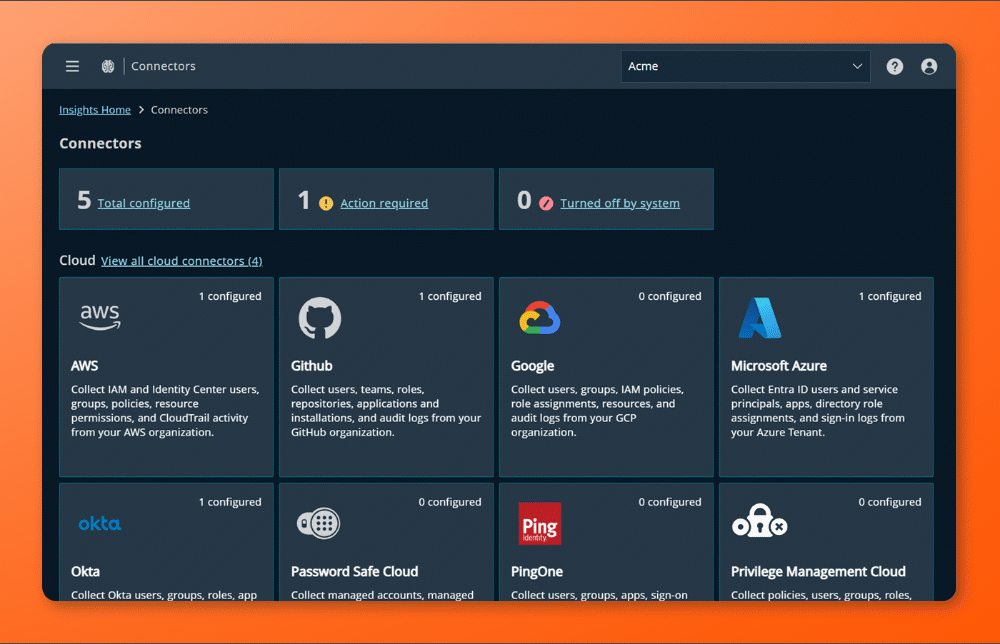
Here, connector tiles display representing supported identity sources (e.g., Okta, Azure AD, Ping, etc.). Each tile kicks off a tailored setup flow for that provider.
3. Provide connection details
Enter the credentials and config values needed to connect your identity source. This allows Pathfinder to authenticate and start ingesting data.
Common fields
Most connectors ask for:
- Connector Name — e.g.,
Okta - Prod - Tenant / Domain
- Client ID / App ID
- Client Secret / API Token
- Scopes / Permissions
Some Connectors have extra setup
Depending on your identity source, you may be prompted to complete additional steps:
-
AWS / Azure / Google:
Use prebuilt CloudFormation or deployment scripts to grant secure, scoped access to your cloud identity data. These are surfaced directly in the setup flow — just copy, paste, and run from your cloud console. -
Active Directory:
Install the Insights Collector on a Windows member server.
This lightweight agent pulls rich AD signals, including account activity, group memberships, and privilege escalation paths, directly into Identity Security Insights.
Most organizations use the Insights Collector to get full visibility into on-prem AD environments. Setup takes just a few minutes and runs quietly in the background.
Need help with a specific connector?
Browse setup guides for all supported providers: Connectors
Once everything is filled out (and any extra setup is complete), you're ready to move on.
4. What happens next
Click Create Connector to finalize setup.
The system verifies the connection automatically and begins collecting data in the background.
What to expect
As data flows in, Identity Security Insights begins building a unified view of your environment:
- Accounts: User and service accounts appear in the Accounts view.
- Identity Linking: Signals from multiple sources are stitched together to form unified identities.
- Entitlements: Roles, groups, and permissions are mapped and normalized.
- Detections & Recommendations: Risky patterns, like dormant accounts or privilege escalation paths, are surfaced automatically.
It may take some time for insights to fully populate, especially in large environments.
That’s it. Your first connector is live.You’re now on the path to full identity visibility and risk reduction.
