ServiceNow
Prerequisites
- Select Client Credentials Grant Type for your environment
- If glide.oauth.inbound.client.credential.grant_type.enabled system property exists and set to true, you can skip this step.
Follow the instructions to enable it - A Security Administrator must create the connector
Configuration
- Log in to your ServiceNow instance with administrator privileges.
- Configure the connector using an update set or manual configuration. Both methods require you to create an OAuth API endpoint.
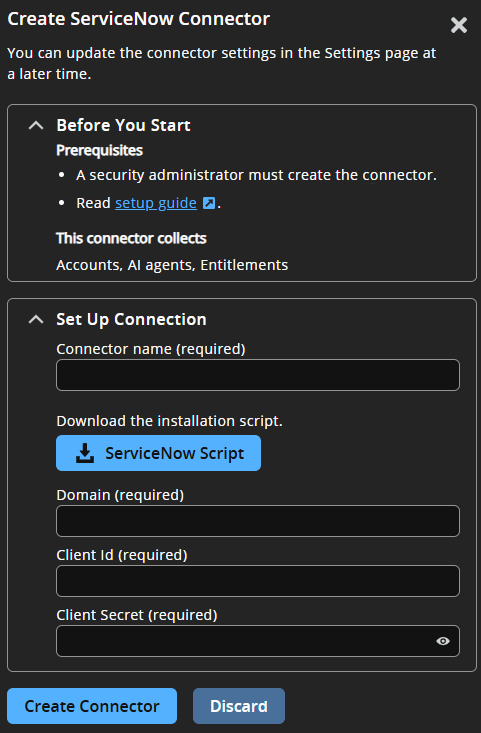
- From Insights Home, select
 > Connectors.
The Connectors page displays. - Click Total configured.
- Select Create Connector > ServiceNow.
- Download the update set.
- Follow ServiceNow documentation, Save an update set as a local XML file, to apply the update set in your ServiceNow instance.
- Go to Option 1 and Option 2: required steps to complete configuration.
Option 1 and Option 2: required steps
The following steps are required when using either option 1 or option 2 above.
You must elevate your role in ServiceNow to security_admin to perform these actions.
- In ServiceNow, go to System Definition > Tables.
- Search for the
sys_packagetable name. Click in the table and click the Application Access tab. - Ensure Allow access to this table via web services is checked.
- Ensure Can Read is checked.
- Save your changes.
- Do the same steps for
password_policytable.
Create an OAuth API endpoint
When creating an OAuth API endpoint, there are two workflows available:
- Create a new inbound integration (Option 1)
-or- - Create an API endpoint for external clients (Option 2)
To create the OAuth API endpoint:
- Navigate to System Security > Users and Groups > Users.
- Create the service account and fill in the following details:
- User ID: BT-SP-Connector
- First Name: BT-SP-Connector
- Assign the bt_read_only role to the user.
- Navigate to System OAuth > Application Registry.
- Continue with option 1 or option 2.
Option 1: New inbound integration
- Select New > New Inbound Integration Experience > New integration > OAuth - Client Credentials grant.
- Fill in the details:
- Name: BT-SP-Connector
- OAuth application user: BT-SP-Connector
- Copy the Client ID and Client Secret.
- Select Save.
- In Insights, enter the Domain, Client ID, and Client Secret in the appropriate fields.
Option 2: OAuth API endpoint for external client
- Select New > Create an OAuth API endpoint for external clients.
- Fill in the details:
- Name: BT-SP-Connector
- Client Type: Integration as a Service
- Default Grant type: Client Credentials
- OAuth Application User: bt-sp-connector
- Auth Scope: useraccount
- Select Submit.
- Select the created BT-SP-Connector application.
- Copy the Client ID and Client Secret.
- In Insights, enter the Domain, Client ID, and Client Secret.
Troubleshooting
Table does not allow web services access
- In ServiceNow, go to System Definition > Tables.
- Search for the table name. Click in the table and click the Application Access tab.
- Ensure Allow access to this table via web services is checked.
- Ensure Can Read is checked.
- Save your changes.
Updated about 18 hours ago
