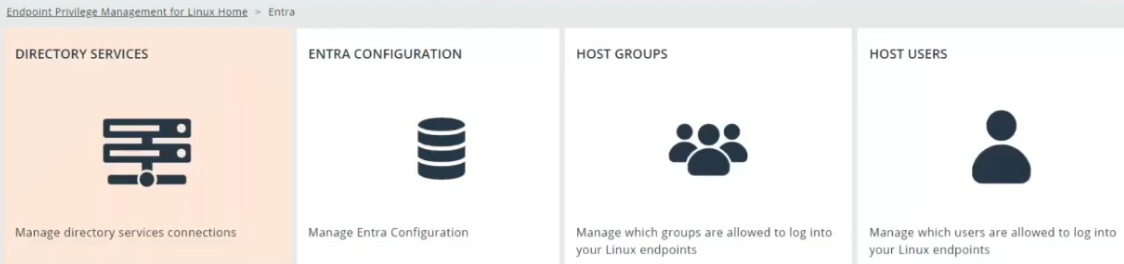
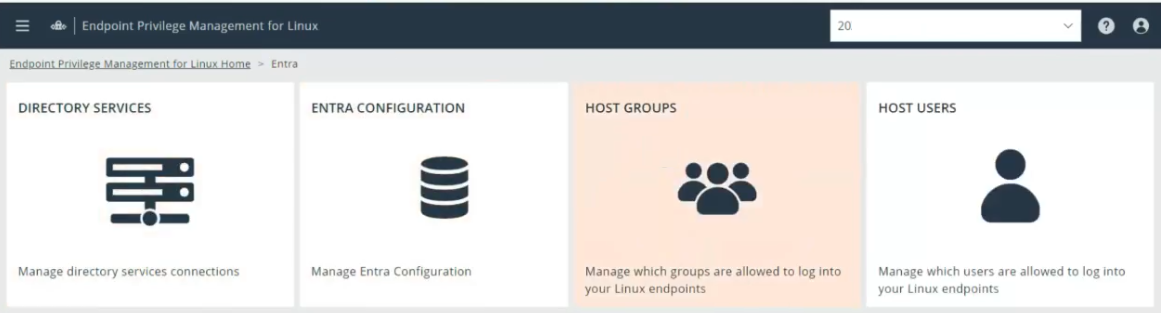
Linux host authentication management
The Linux Host Authentication Management feature provides a dedicated interface to manage Linux-specific schema attributes (UID, GID, Home Directory, and Shell) for users and groups synchronized from Microsoft Entra ID (formerly Azure AD). This allows you to manage attributes that cannot be set directly in Microsoft Entra ID and basing policies on those users and groups.
Prerequisites: Directory Services connection
- An Identity Bridge connection.
To create the connection:
- Navigate to Directory Services.
- Click Add a Connection.
- Select the Entra ID Identity Bridge connection type.
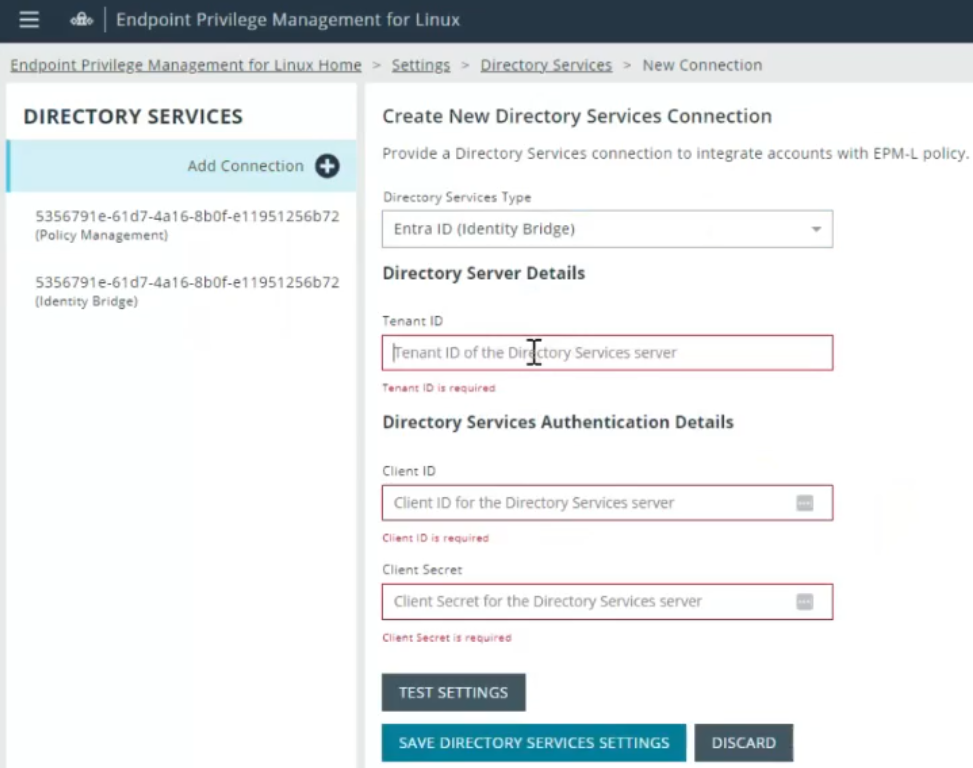
- Enter the required connection details:
- Tenant ID
- Client ID
- Client Secret
These values must be obtained from the Microsoft Entra ID where you configured the BeyondTrust Bridge.
- (Optional) Click Test to verify the connection.
- Click Save Directory Services Settings.
The Directory Services section displays two Entra ID connection types: Entra ID (Policy Management) and Entra ID (Identity Bridge). Identity Bridge is used only with Linux host authentication.
Configure global settings
After saving the Identity Bridge connection, set global settings on the Configuration tab. This section is optional.
- Select the Entra Configuration tile.
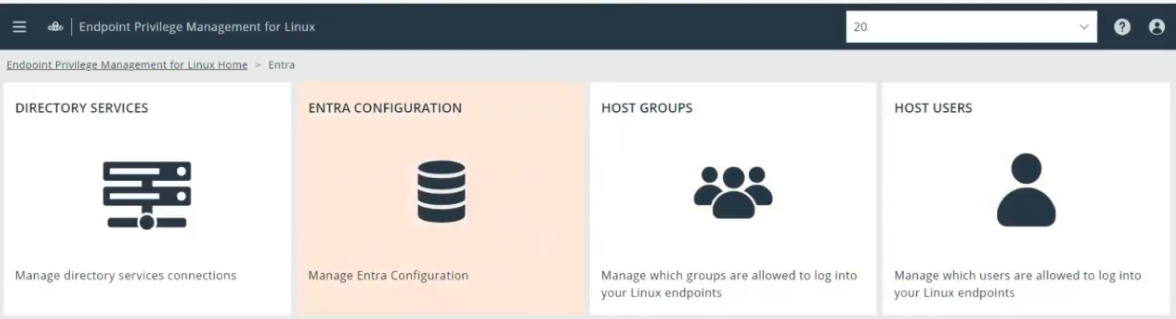
- Select the Entra Configuration tab.
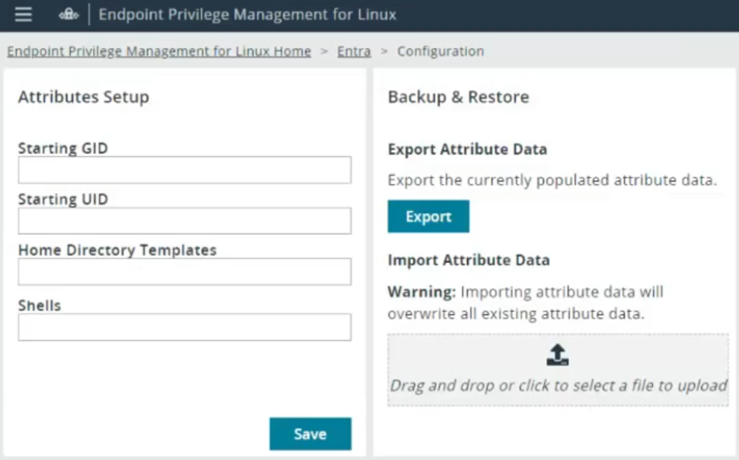
- Enter values for the attributes.
| Setting | Description | Default (If not set) | Input Requirements |
|---|---|---|---|
| Starting GID | The numerical ID where the system begins assigning new Group IDs. | 1000 | Numeric |
| Starting UID | The numerical ID where the system begins assigning new User IDs. | 1000 | Numeric |
| Home Directory Template | A template for generating a user's home directory path. | N/A | Must start with a /. Supports templating: %h (home), %u (user). |
| Shell Template | A template for generating a user's default Linux shell (e.g., /bin/bash). | N/A | Must start with a /. |
- Click Save.
Backup and Restore
Use Backup and Restore to export all custom schema attribute data (GID, UID, Shell, Home Directory) to a JSON file or import it, which is useful for backups or bulk modifications.
Manage groups
The Groups page lists all groups synchronized from Microsoft Entra ID. The GID column is the custom attribute managed here.
Select the Host Groups tile to set up groups.
Single group
- Find the group and click Edit.
- In the GID field:
- Manually enter a unique GID. The system fails to save if the GID is already in use.
- Click Suggest GID to get the next available GID based on the Starting GID configuration or the next ID after 1000.
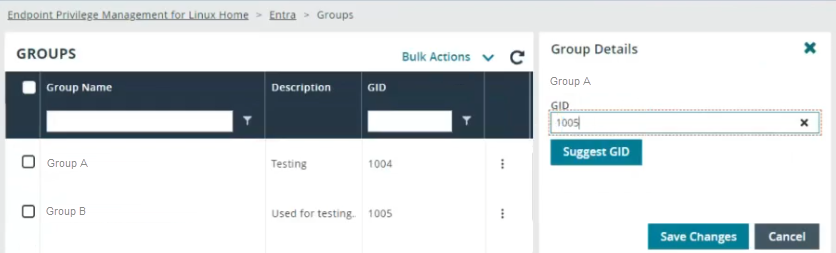
- Click Save Changes.
Bulk group
- Select multiple groups using the check boxes.
- Click Edit (Bulk Action).
- Enter a starting GID. The system will assign this ID to the first selected group and iterate downwards to assign unique, sequential GIDs to the remaining selected groups, skipping any IDs that are already in use.
- Click Save Changes.
Provision all group members
Provision Linux-specific attributes for all users who are members of the selected group in Entra ID.
- Find the group and click
 > Provision All Group Members.
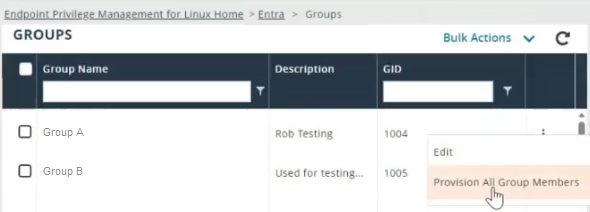
- The system will:
- Assign the group's custom GID (set in step 4.A) to every member of the group as their Primary GID.
- Assign a unique UID to all members of the group who do not already have one.
This action will not overwrite existing UID values for users who have already been provisioned.
Manage users
The Users tab lists all users synchronized with Microsoft Entra ID. The UID, Primary GID, Home Directory, and Shell are the custom attributes managed here.
Single user
- Find the user name and click > Edit.
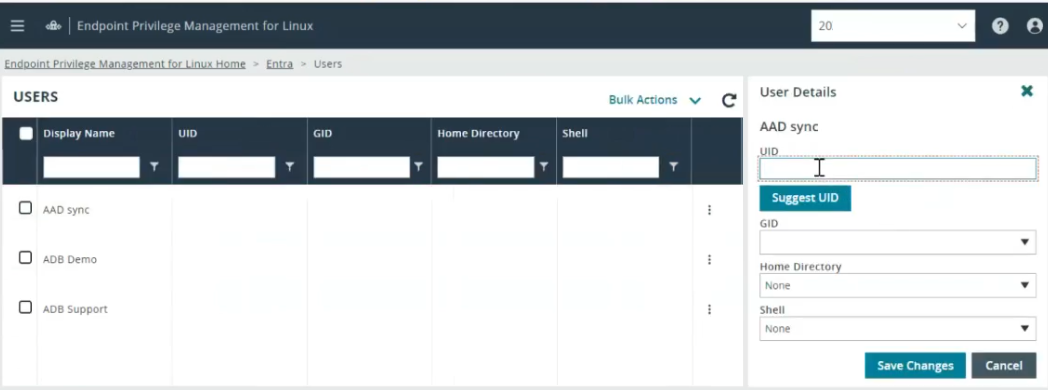
- UID:
- Manually enter a unique UID.
- Click Suggest UID to get the next available UID.
- Primary GID:
- Select an available GID from the dropdown list.
- CRITICAL CONSTRAINT: A GID can only be assigned if the user is a member of the corresponding group in Microsoft Entra ID. The dropdown is populated only with GIDs previously set in the Groups tab.
- Home Directory and Shell:
- Select a template from the dropdown list defined in the Configuration tab (Section 3) or select
(none).
- Select a template from the dropdown list defined in the Configuration tab (Section 3) or select
- Click Save.
Bulk user
- Select multiple users using the checkboxes.
- Click Bulk Action > Edit.
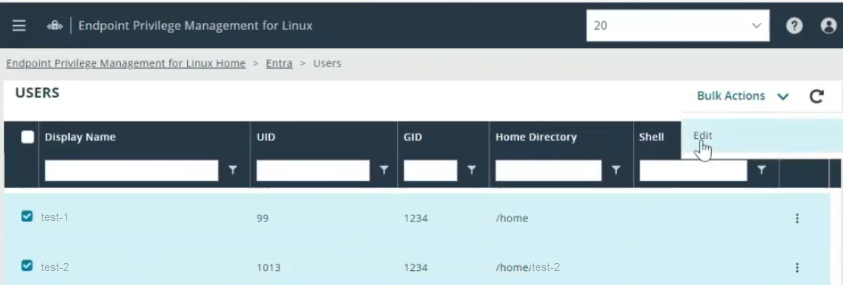
- Set the Primary GID, Home Directory, and/or Shell selections.
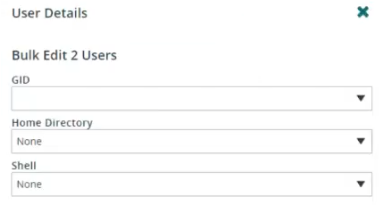
- Click Save.
Bulk GID Assignment: If you select a GID, only users who are already members of the associated group in Entra ID will have the GID applied. Users who are not members of that group will be unaffected.
Refresh data
Updates to Linux host authentication settings are saved immediately via API calls but may take a few moments to propagate to the web application.
- Click the Refresh button at the top of the Groups or Users tab to manually initiate a data pull and view the updated values.
Related information (policy management)
The custom attributes set using Linux host authentication (UID, GID, etc.) are used when the user logs into a Linux host via a Role-Based Policy.
- Linux host authentication uses the Entra ID Identity Bridge connection.
- Policy creation uses the Entra ID (Policy Management) connection.
- In the Policy Management section, configure the Entra ID attribute to map to the Username Attribute and Group Name Attribute for use in policies. This section is being updated to allow truncation of the Fully Qualified Domain Name (FQDN) part (for example, removing
@domain.com) to manage characters like#,@, and,in the username for policy application.
