Jamf Pro | Entitle
Overview
Jamf is a provider of Apple device management solutions. It offers a comprehensive set of tools and services that enable organizations to efficiently deploy, manage, and secure Apple devices such as Macs, iPhones, and iPads. Jamf's primary platform, Jamf Pro, empowers IT administrators with centralized control over device configuration, application deployment, security policies, and user settings.
Entitle can manage the following resources in Jamf Pro:
- Policies - computers policies
- Users - users and users groups
- Computers - computers and computers groups
- Mobile Devices - mobile devices and mobile devices groups
- Mac Applications - computers applications
- Mobile Device Applications - mobile devices applications
This page will provide you with instructions on how to integrate Entitle and Jamf Pro.
General guidelines
To integrate Jamf Pro with Entitle, you must configure authentication and provide your Jamf Pro tenant URL.
Entitle supports two authentication methods:
OAuth 2.0 client credentials
Requires Jamf Pro 10.49 or later
Basic authentication
Username and password
Supported on all Jamf Pro versions
Both methods are fully supported. Select the authentication method that aligns with your organization’s security requirements and Jamf Pro version.
Set up Jamf Pro to work with Entitle
Stage 1: Prepare authentication details
Entitle supports two authentication methods for connecting to Jamf Pro. Complete one of the following options.
Option 1: Use basic authentication (username and password)
- In Jamf Pro, identify an administrator account with sufficient API permissions.
- Keep the account’s username and password available.
- When creating the integration in Entitle, enter these values in the username and password fields.
Option 2: Use OAuth 2.0 Client Credentials
PrerequisiteTo use OAuth 2.0 authentication, Jamf Pro must be version 10.49 or later.
To authenticate using OAuth 2.0, create an API role and API client in Jamf Pro.
Create an API role
-
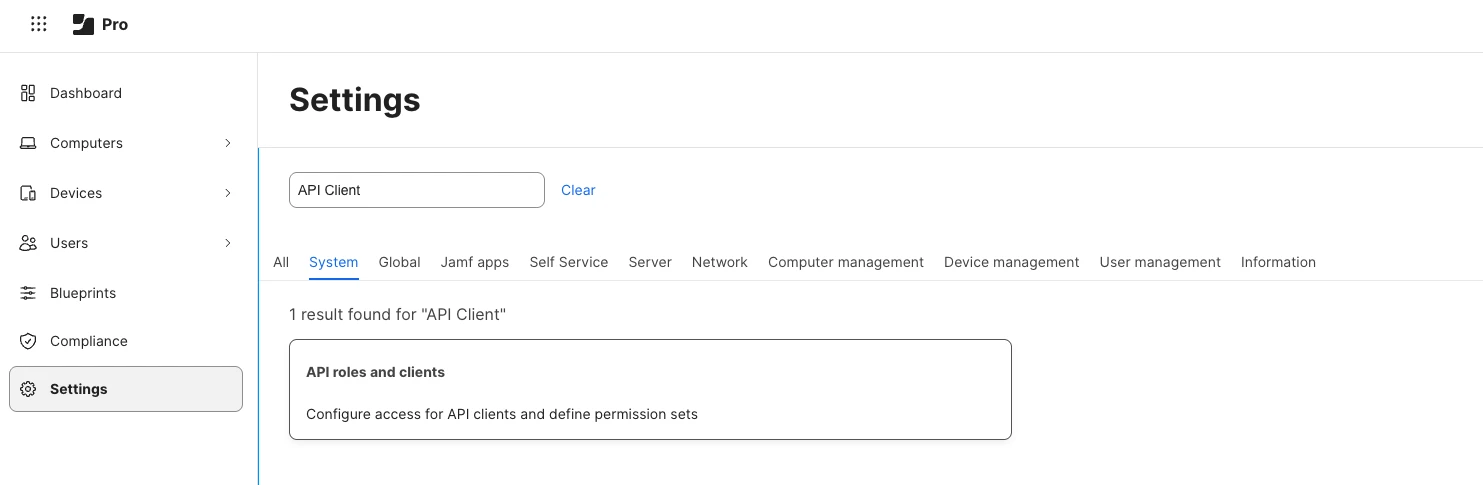
In Jamf Pro, go to Settings > API Roles and Clients.
-
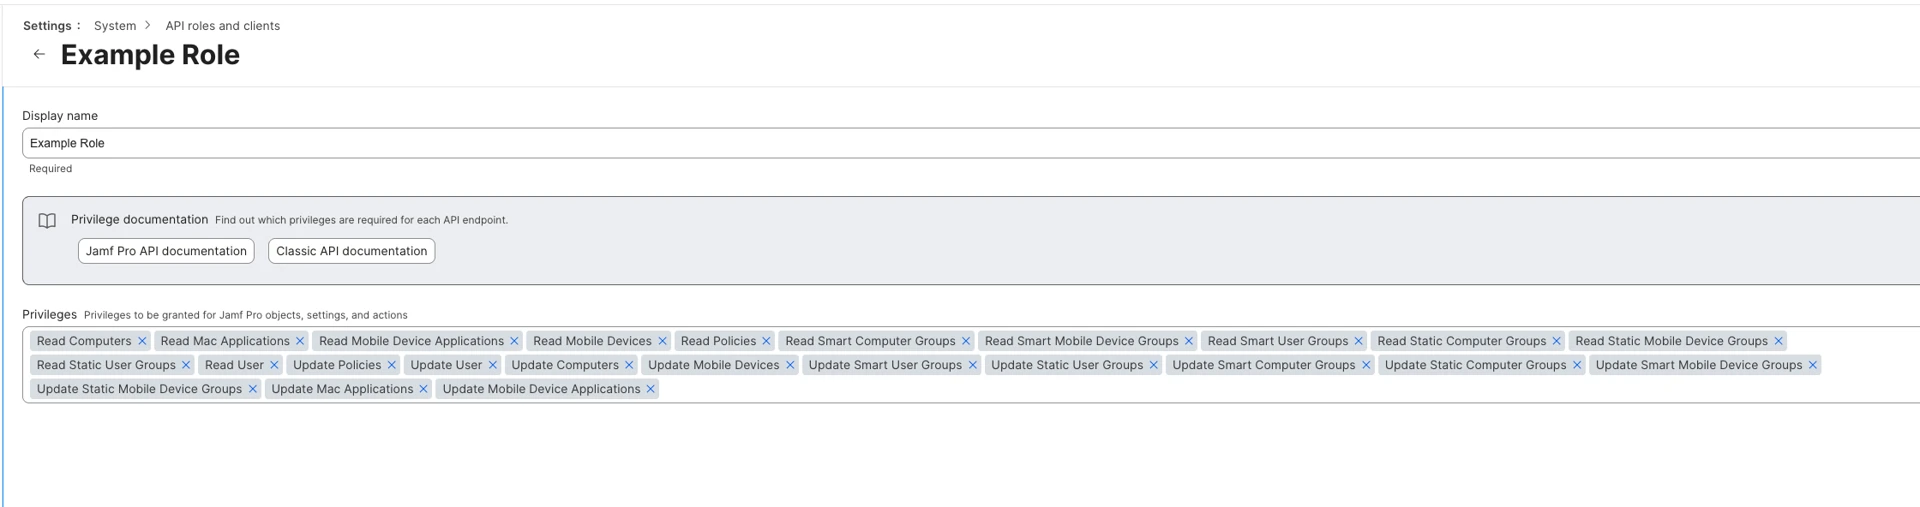
Create a new API role.
-
Assign the following privileges to the role. Entitle validates these permissions during connection and reports any that are missing.
Privilege Purpose Read - Policies, Update - Policies List, update, and manage policy scope assignments Read - Users, Update - Users List and update user actors Read - Computers, Update - Computers List and update computer actors Read - Mobile Devices, Update - Mobile Devices List and update mobile device actors Read - Smart User Groups, Update - Smart User Groups List and update user group assets Read - Static User Groups, Update - Static User Groups List and update user group assets Read - Smart Computer Groups, Update - Smart Computer Groups List and update computer group assets Read - Static Computer Groups, Update - Static Computer Groups List and update computer group assets Read - Smart Mobile Device Groups, Update - Smart Mobile Device Groups List and update mobile device group assets Read - Static Mobile Device Groups, Update - Static Mobile Device Groups List and update mobile device group assets Read - Mac App Apps, Update - Mac App Apps List and update Mac application assets Read - Mobile Device Apps, Update - Mobile Device Apps List and update mobile device application assets For give and revoke access operations, the role must include Update privileges for the relevant resource types such as groups, policies, or applications.
For more information, see the Jamf Privilege Requirements documentation.
Create an API client
-
In API Roles and Clients, switch to the API Clients tab.
-
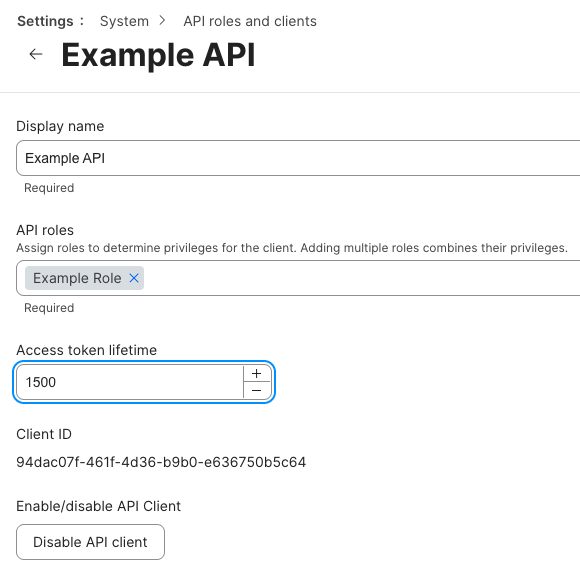
Create a new API client.
-
Assign the API role you created in above.
-
Set the access token lifetime to 1500.
-
Save the API client.
Generate client credentials
-
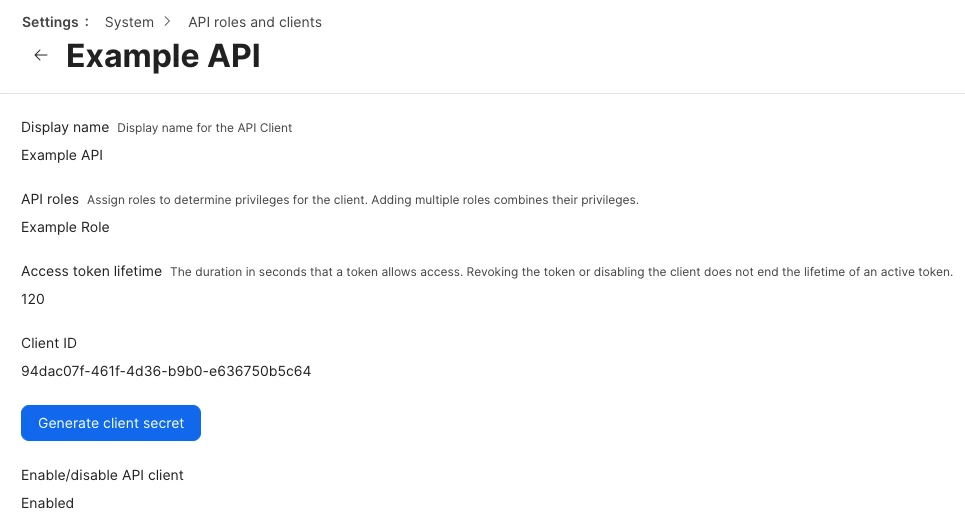
Open the newly created API client.
-
Click Generate Client Secret.
-
Copy and securely store the Client ID and Client Secret. You will enter these values when creating the Jamf integration in Entitle.
Stage 2: Extract your company’s domain
- Navigate to your company’s Jamf Pro domain.
- Copy and paste it into the Entitle configuration- as the
urlvalue. This value should be in the following form -https://<YOUR_COMPANY'S_URL>.jamfcloud.com.
Creating the integration in Entitle
-
Log in to Entitle and go to the Integrations page.
-
Click Add Integration, then type Jamf Pro in the Application field.
-
Continue the setup following the standard instructions in Set up a new integration.
-
From the Connection dropdown, select the authentication method that matches the details you prepared earlier, then enter the required values:
- OAuth 2.0 Client Credentials:
client_idclient_secreturl
- Basic Auth (Username/Password):
usernamepasswordurl
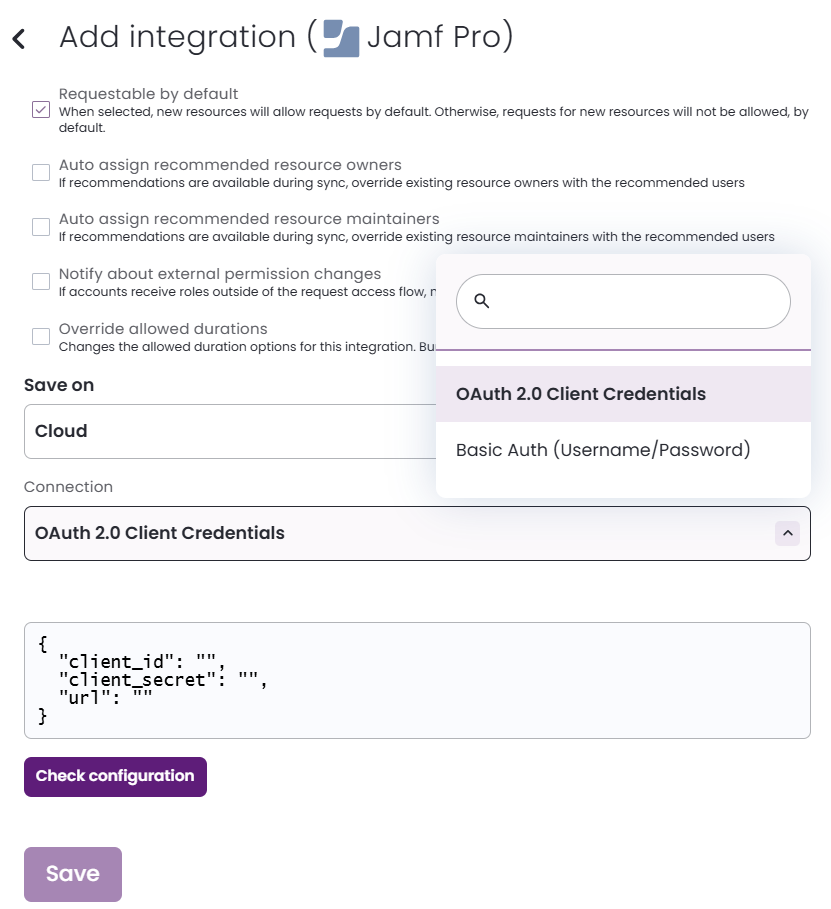 Example configuration JSON for basic authentication
{ "username": "ADMIN_ACCOUNT_USERNAME", "password": "ADMIN_ACCOUNT_PASSWORD", "url": "JAMF_TENANT_URL" }Example configuration JSON for OAuth 2.0 client credentials{ "client_id": "CLIENT_ID", "client_secret": "CLIENT_SECRET", "url": "JAMF_TENANT_URL" } - OAuth 2.0 Client Credentials:
-
Click Save.
Should you need to allowlist this integration, these are the IP address ranges from which Entitle's service reaches the integration:
- Entitle EU (Cloud deployment)
- 34.243.199.171
- 54.216.133.226
- Entitle US (Pathfinder deployment)
- 52.45.229.219
- 54.88.235.213
- 3.224.15.134
What's next?Make sure your setup is complete by testing your integration.
Updated about 9 hours ago
