Google Cloud Platform (GCP) | Entitle
What is the Google Cloud Platform (GCP) integration?
The Entitle integration with Google Cloud Platform (GCP) connects your GCP environment to Entitle to enable centralized access discovery and management across your organization. Using a dedicated service account or a pod-based identity connection, Entitle can securely interact with GCP APIs to discover resources and manage permissions without requiring persistent human credentials.
This integration allows Entitle to model GCP resources and access relationships accurately, forming the foundation for automated access requests and governance.
How is this integration useful?
By integrating GCP with Entitle, your organization can enforce just-in-time (JIT) access and least-privilege permissions across Google Cloud resources. When a user requests access, Entitle can automatically grant the required permissions for a limited time and revoke them when access expires.
This approach reduces standing access, improves security posture, and simplifies access workflows across projects and services. It also helps administrators maintain consistent access controls, improve auditability, and scale access governance as GCP environments grow.
What resources does this integration support?
With this integration enabled, Entitle can manage access to the following GCP resource types:
- Organizations
- Folders
- Projects
- Service accounts
- Groups (These can also be managed via Google Workspace integration)
- Storage buckets
- BigQuery datasets and tables
- Google Compute Engine (GCE) instances
- Cloud Functions
- Cloud SQL instances
- Secret Manager secrets
General guidelines
To integrate your Google Cloud Platform in Entitle, you must run the entitle_google_integrator setup you have downloaded and unzipped on the Google Integrations page and configure domain-wide delegation.
Service account key vs. Workload Identity Federation
Choose your authentication methodYou should now choose whether to use a Service Account Key or Workload Identity Federation.
- Service Account Key: The simpler option. Create a key pair for the Entitle dedicated service account through the GCP portal user interface, and provide Entitle with the private key. This method works for most cases and takes only a few minutes to set up.
- Workload Identity Federation: A more advanced option that uses GCP identity federation to avoid long-lived secrets and strengthen your security posture.
- Support OIDC-based federation for GCP applications.
- Work alongside existing service account key methods without affecting current setups.
- Enable access to common GCP resources through role assignments.
- Prevent cross-tenant access by isolating each customer’s federated identity.
- Automatically remove temporary onboarding credentials after setup.
Federated credentials are supported only for integrations saved on Entitle's Cloud or on an on-premises agent hosted in Amazon Elastic Kubernetes Service (EKS).
Create Workload Identity Pools – Workload Identity Federation only
- In the GCP console, select the project for the Entitle service account, or the project where you plan to create it. Then go to IAM & Admin > Workload Identity Pools.

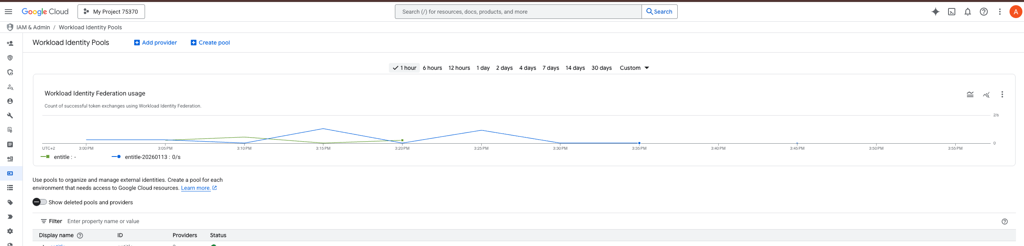
- Create an identity pool. Click the Create Pool button and enter the following information:
- Name: entitle
Use entitle only. Never user special characters.
- Description: Enter a description to help you identify this identity pool later.
- Enabled pool: toggled on
- Name: entitle

-
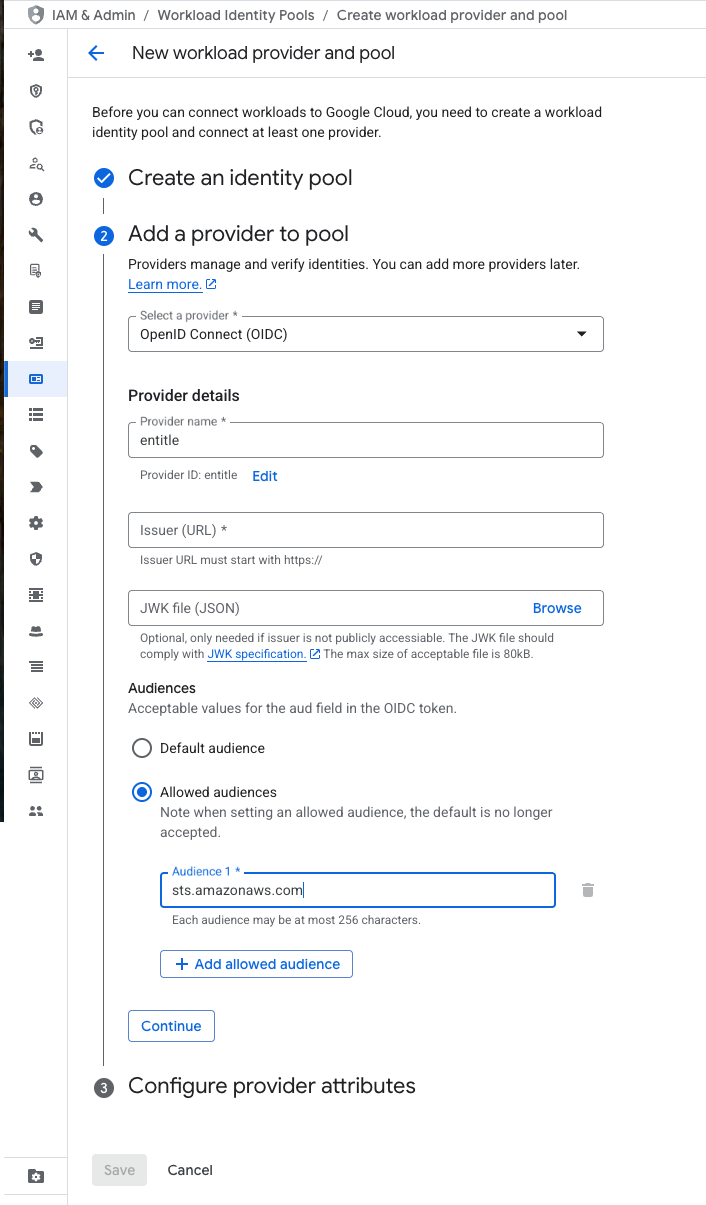
Add a provider to the pool. Enter the following information:
-
Select a provider: OpenID Connect (OIDC)
-
Provider name: entitle
Use entitle only. Never user special characters.
-
Issuer (URL): Enter the issuer URL provided for your Entitle agent environment.
- If your Entitle agent is hosted in the cloud within Entitle Europe (Ireland), use:
https://oidc.eks.eu-west-1.amazonaws.com/id/7104B0E9ED58DCD19AE0DC0EC7D46D5D - If your Entitle agent is hosted in the cloud within Entitle USA use:
https://oidc.eks.us-east-1.amazonaws.com/id/E1F031C91539B03EE726ED530E719F4C - If you are using an EKS-hosted agent running on your AWS account, run this command on your EKS cluster and use its output:
aws eks describe-cluster --name <your eks cluster name> --query "cluster.identity.oidc.issuer" --output text --region <your eks cluster's region id>
- If your Entitle agent is hosted in the cloud within Entitle Europe (Ireland), use:
-
JWK file (JSON): Leave this field empty.
-
Audiences: Allowed audiences
- Audience 1: sts.amazonaws.com
-
- Configure provider attributes. Enter the following information:
- Google 1:
google.subject - OIDC 1:
assertion.sub - Google 2:
attribute.env - OIDC 2:
assertion.iss
- Google 1:
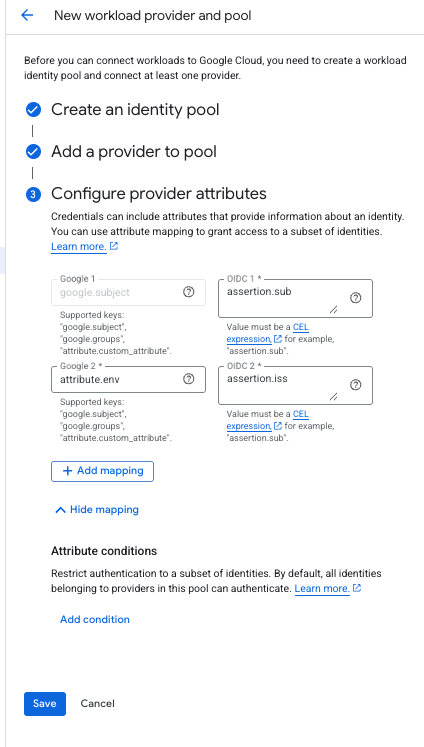
- Click Save.
Run the setup script
The setup consists of the following actions:
- Create an Entitle service account in the chosen project
- Create an organization-level role with the required permissions or add permissions to it if it already exists (stated in the .yaml file)
View the permissions attached to the role
resourcemanager.projects.get
resourcemanager.projects.list
// Manages tables and datasets
bigquery.datasets.get
bigquery.datasets.getIamPolicy
bigquery.datasets.update
bigquery.tables.get
bigquery.tables.getIamPolicy
bigquery.tables.list
bigquery.tables.setIamPolicyresourcemanager.organizations.get
resourcemanager.organizations.getIamPolicy
resourcemanager.organizations.setIamPolicyresourcemanager.folders.get
resourcemanager.folders.getIamPolicy
resourcemanager.folders.list
resourcemanager.folders.setIamPolicyresourcemanager.projects.get
resourcemanager.projects.list
resourcemanager.projects.getIamPolicy
resourcemanager.projects.setIamPolicycompute.instances.get
compute.instances.getIamPolicy
compute.instances.list
compute.instances.setIamPolicy
compute.zones.get
compute.zones.listcloudsql.instances.get
cloudsql.instances.list
resourcemanager.projects.get
resourcemanager.projects.list
resourcemanager.projects.getIamPolicy
resourcemanager.projects.setIamPolicysecretmanager.secrets.get
secretmanager.secrets.list
resourcemanager.projects.get
resourcemanager.projects.list
resourcemanager.projects.getIamPolicy
resourcemanager.projects.setIamPolicycloudfunctions.functions.get
cloudfunctions.functions.getIamPolicy
cloudfunctions.functions.list
cloudfunctions.functions.setIamPolicystorage.buckets.get
storage.buckets.getIamPolicy
storage.buckets.list
storage.buckets.setIamPolicyiam.serviceAccounts.get
iam.serviceAccounts.list
iam.serviceAccounts.getIamPolicy
iam.serviceAccounts.setIamPolicy- Bind the role to the service account at the chosen project
- Enable the required API services for the integration:
- Generate a key for the service account and download it to your local machine
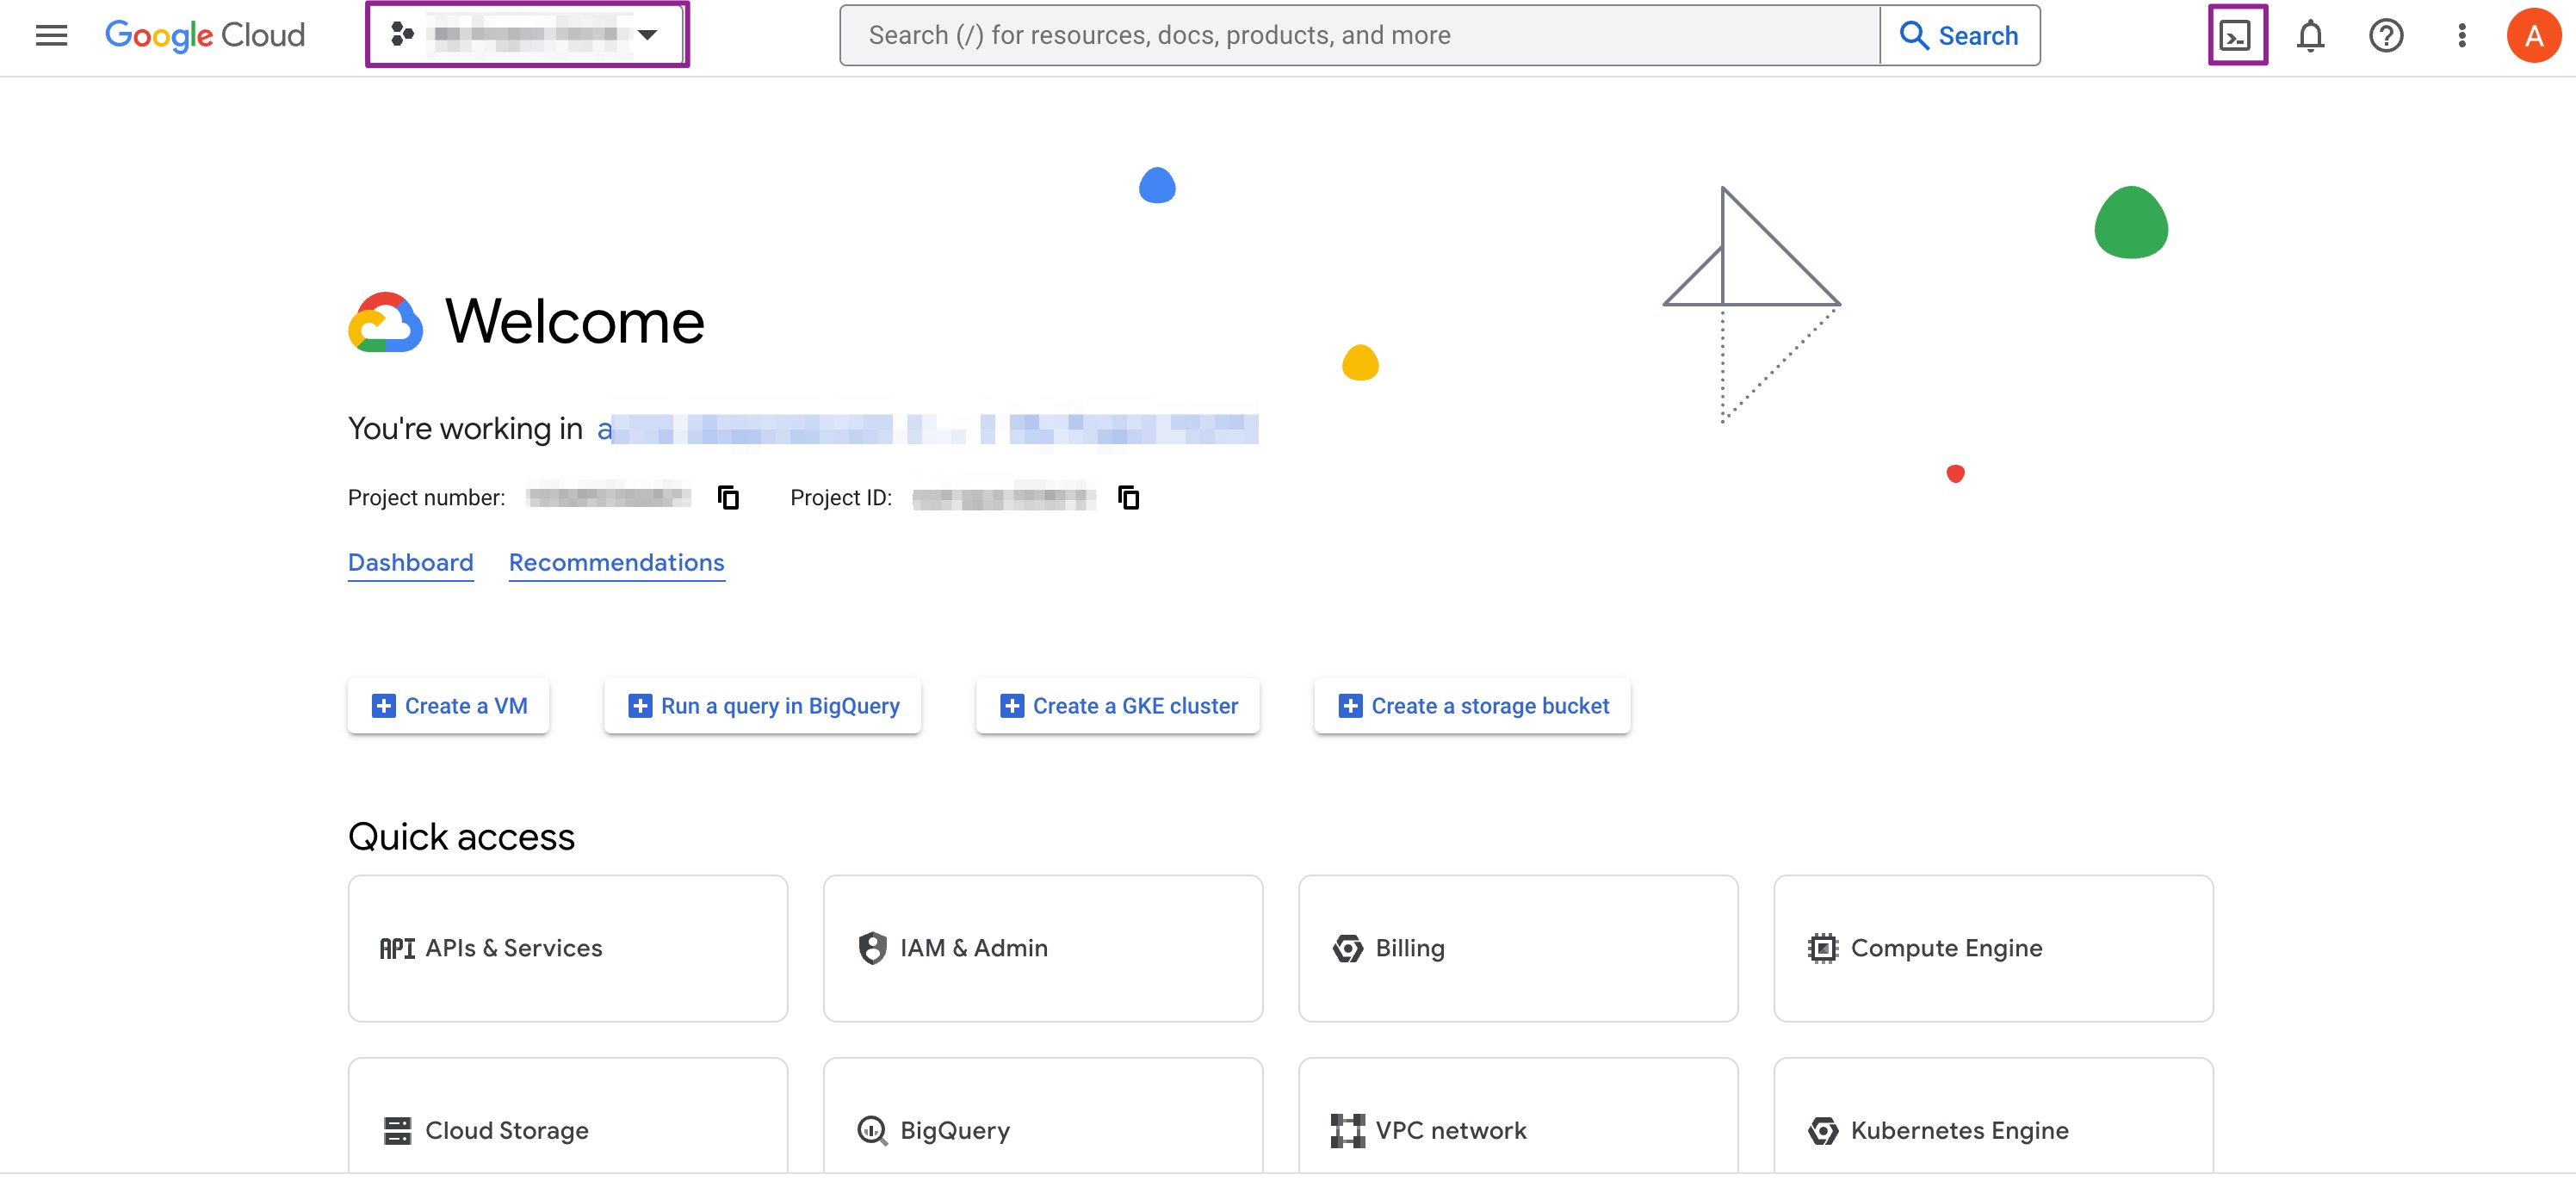
- Go to your GCP web console.
- Choose the project that you chose to create Entitle's service account at the top left corner.
- Click on the shell icon at the top right corner.
- Navigate to the path of the unzipped folder
entitle_google_integrator, and run the following commands:
# For a basic configuration, create a service account in the current project and assign the role to it at the project-level
bash run.sh -i gcp -k

# You may also assign the role in the parent folder or organization-level
bash run.sh -i gcp -b folder -k
bash run.sh -i gcp -b organization -k

# For more options use the -h flag
bash run.sh -h
# For a basic configuration, create a service account in the current project and assign the role to it at the project-level
bash run.sh -i gcp
# You may also assign the role in the parent folder or organization-level
bash run.sh -i gcp -b folder
bash run.sh -i gcp -b organization
# For more options use the -h flag
bash run.sh -hBe sure to select the correct tab, For a Service Account Key or For Workload Identity Federation, in the code block above.
For a Service Account Key
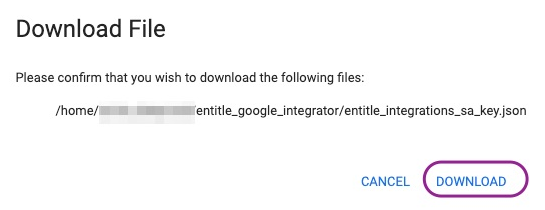
- Download the created JSON file on setup completion. You will use it later in this guide.
For Workload Identity Federation
- Open the GCP shell and execute:
# 1. Define the variables
export projectId=<your GCP project ID>
export poolId="entitle"
export providerId="entitle"
export serviceAccountName="entitle-integrations-sa"  # The name of the service account Entitle's Google integrator scripts create
# 2. Run the commands
# 2.1 Identiy your GCP project number
export projectNumber=$(gcloud projects describe ${projectId} --format="value(projectNumber)")
echo $projectNumber
# 2.2 Allow Entitle to authenticate to the service account you created:
export issuerUrl=$(gcloud iam workload-identity-pools providers describe "${providerId}" \
    --workload-identity-pool="${poolId}" \
    --location="global" \
    --project="${projectId}" \
    --format="value(oidc.issuerUri)")

gcloud iam service-accounts add-iam-policy-binding \
    "${serviceAccountName}@${projectId}.iam.gserviceaccount.com" \
    --role="roles/iam.workloadIdentityUser" \
    --member="principalSet://iam.googleapis.com/projects/${projectNumber}/locations/global/workloadIdentityPools/${poolId}/attribute.env/${issuerUrl}"
# 2.3 Identify your organization's universe domain value used in authentication
universeDomain=$(gcloud config get-value core/universe_domain)
echo $universeDomain
# 2.4 Grant yourself the serviceAccountTokenCreator role on the service account
export shellUser=$(gcloud auth list --filter=status:ACTIVE --format="value(account)")
gcloud iam service-accounts add-iam-policy-binding \
    ${serviceAccountName}@${projectId}.iam.gserviceaccount.com \
    --member="user:${shellUser}" \
    --role="roles/iam.serviceAccountTokenCreator" \
    --project=${projectId}

# 2.5 Wait up to five minutes for the role granting to take affect.

# 2.6 Generate a temporary token for the integration onbaording
nonceValue=$(gcloud auth print-access-token \
    --impersonate-service-account="${serviceAccountName}@${projectId}.iam.gserviceaccount.com" \
    --lifetime=10m)
echo $nonceValue
Configure domain-wide delegation
This step is required only if you wish to manage Google Groups in your GCP integration; otherwise, you may skip it.
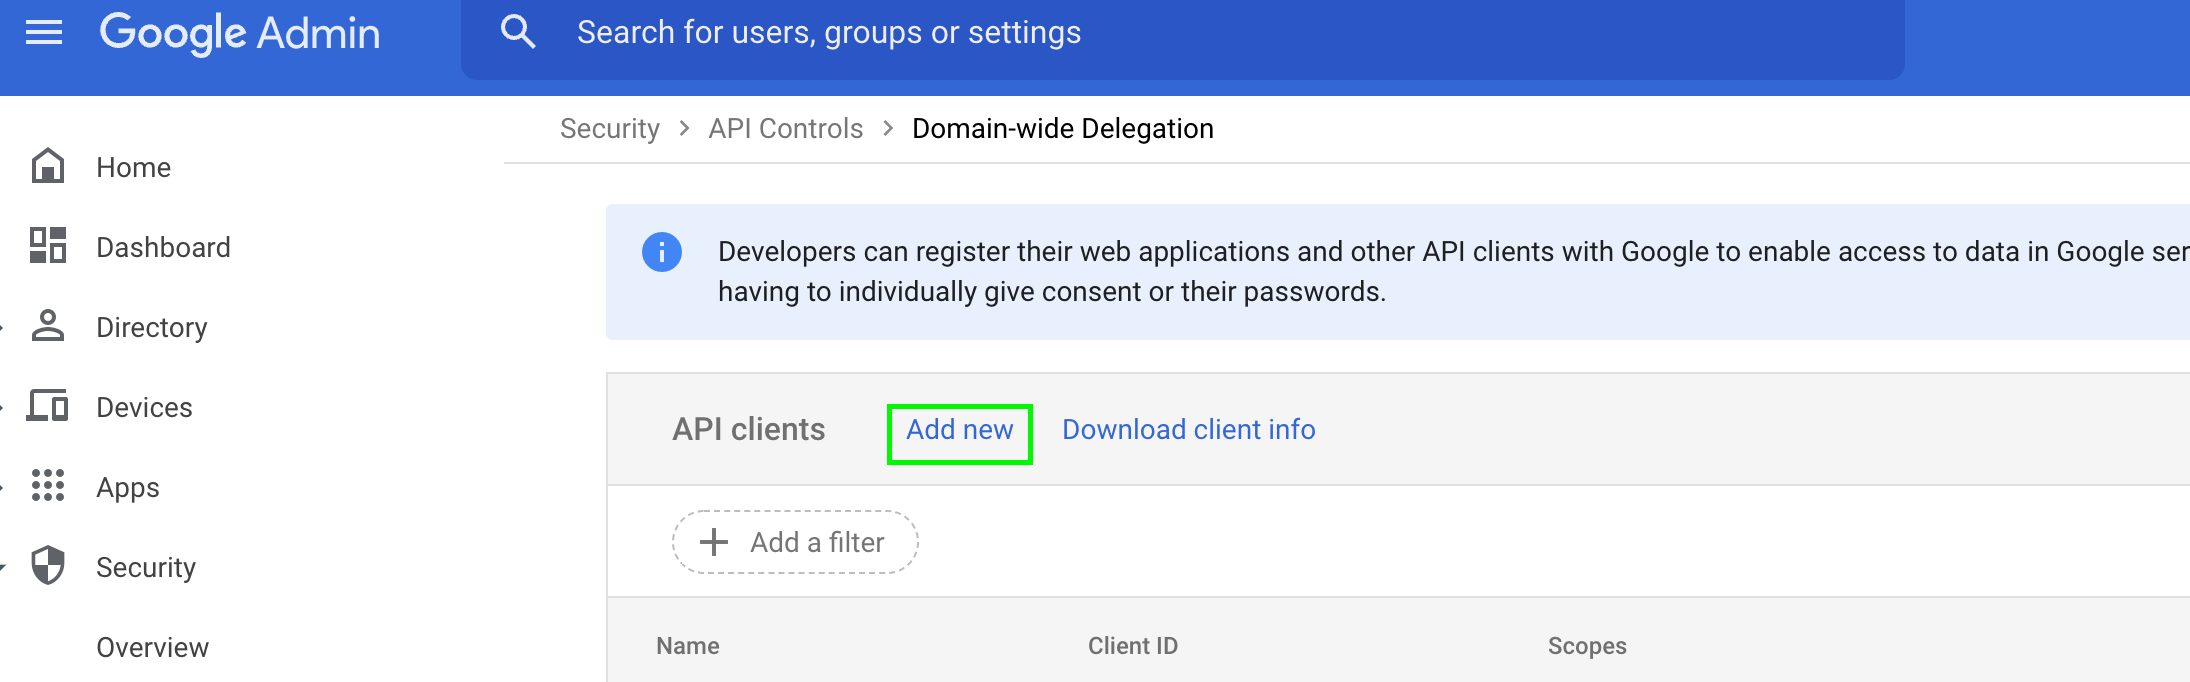
- To manage users in groups, your service account needs to have domain-wide delegation on certain scopes. Go to Manage domain-wide delegation.
- Click Add new:
- In the Client ID field, enter the 21-digit number obtained from the key JSON file under the
client_idfield. - In the OAuth scopes field, enter the following values (comma-delimited):
https://www.googleapis.com/auth/admin.directory.group,
https://www.googleapis.com/auth/admin.directory.group.readonly,
https://www.googleapis.com/auth/admin.directory.user,
https://www.googleapis.com/auth/admin.directory.user.readonly- Click Authorize.
After completing the required configuration in GCP, you may need to wait 2 to 5 minutes before creating the integration. GCP does not guarantee immediate propagation of IAM permission changes across all entities.
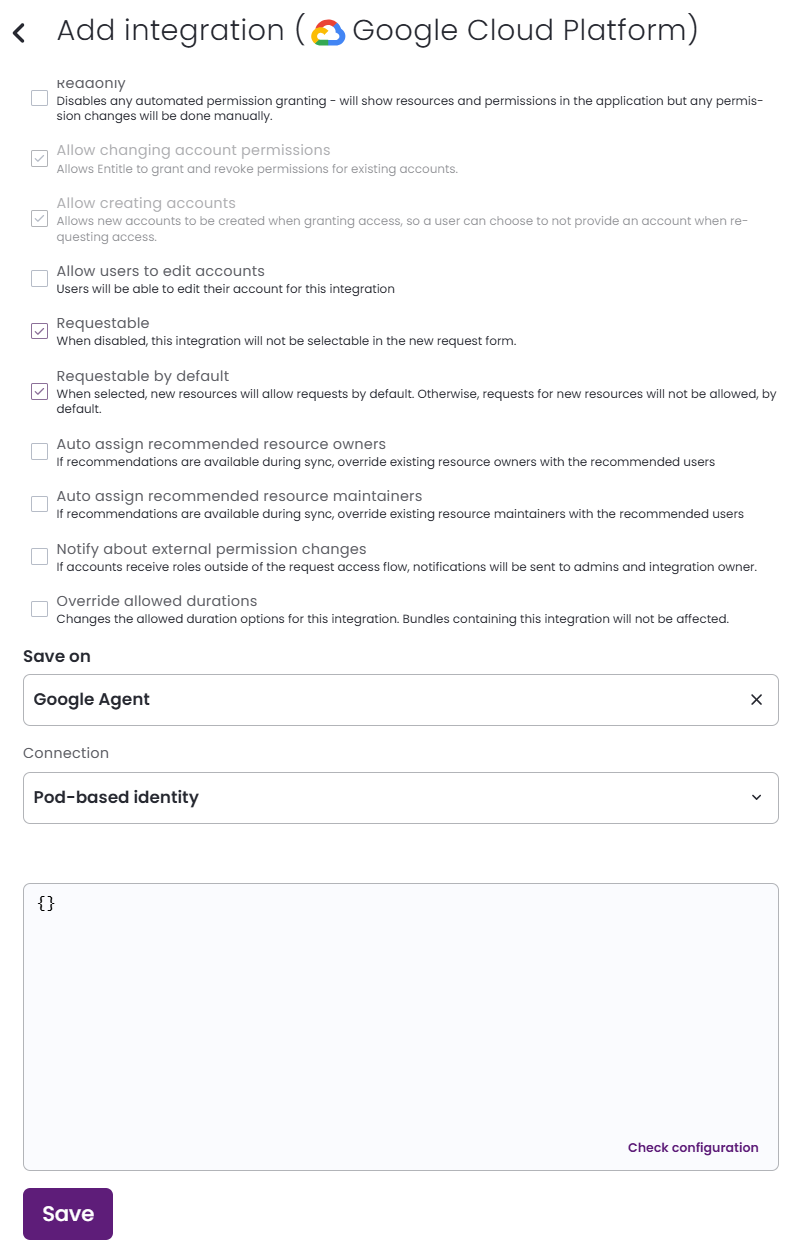
Create the integration in Entitle
- Log in to Entitle and go to the Integrations page.
- After clicking the Add Integration button, type Google Cloud Platform in the Application field.
- For Save on, choose whether you would like this integration to be saved on your own hosted agent or in Entitle’s cloud.
- In the Connection drop-down, select one of three options:
Option 1: Service Account Key connection
-
Select Service Account Key if you created a service account key for the integration.
-
In the connection JSON, under the
"service_account_key"field, paste the downloaded key JSON of your service account. -
If you want to manage groups in your GCP integrations, provide
"credential_subject"with the email address of an admin in your organization who has permission to view all users and groups. Otherwise, enterentitle-integrations-sa@<your project ID>.com. -
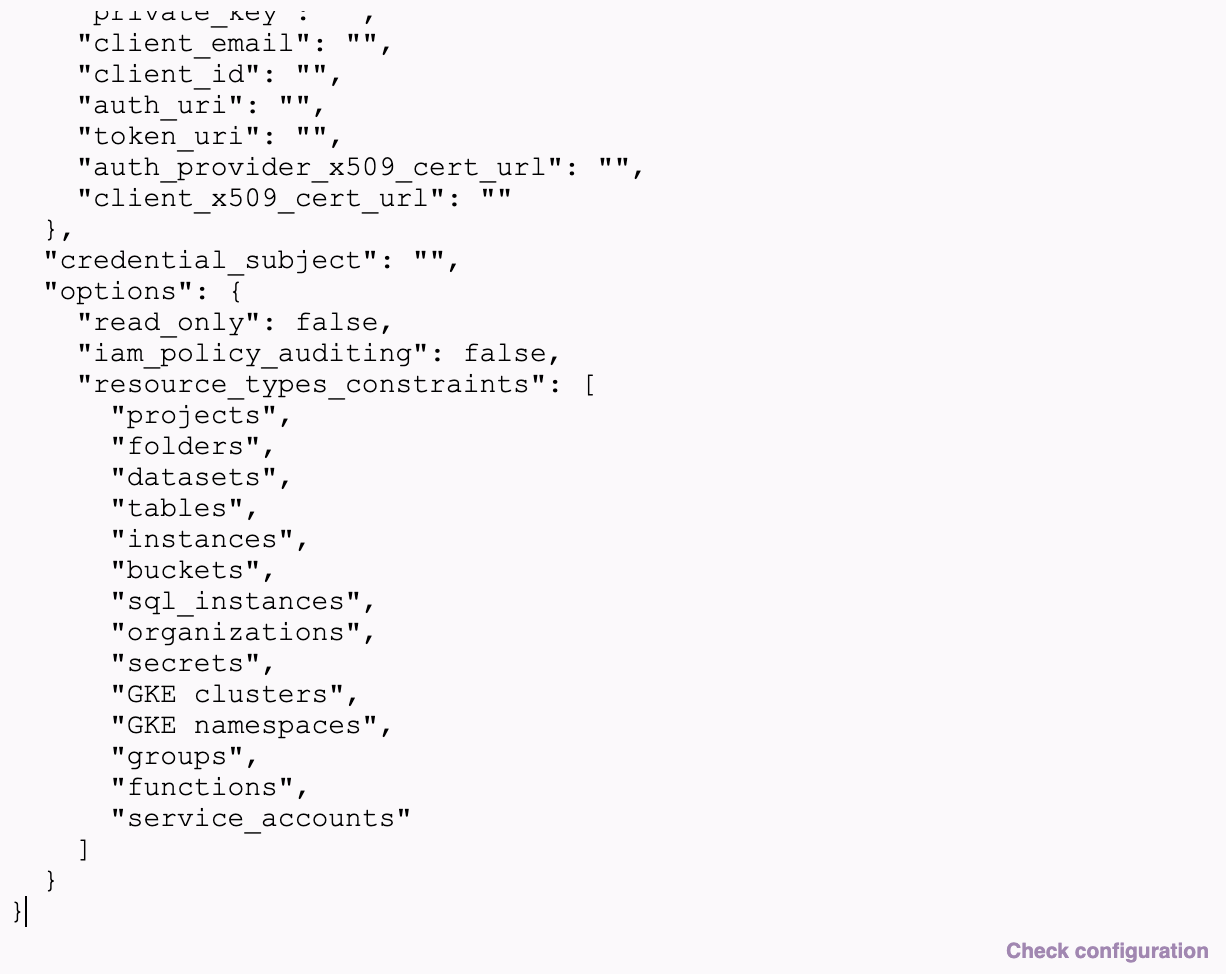
If you want to limit the resource types managed by Entitle, add
"resource_types_constraints": []in an"options": {}object beneath"credential_subject": "", and specify the allowed resources types as a list of strings.projects folders datasets tables instances buckets sql_instances organizations secrets GKE clusters GKE namespaces groups functions service_accountsExample… "credential_subject": "[email protected]", "options": { "resource_types_constraints": ["projects", "folders", "datasets"] } …A non-existent field or an empty list means all Entitle-supported resource types, except tables and instances, can be managed.
-
If Domain-wide delegation for managing groups was set as
.readonlyfor this integration, add"read_only": trueto the"options"object.Example… "credential_subject": "[email protected]", "options": { "read_only": true } … -
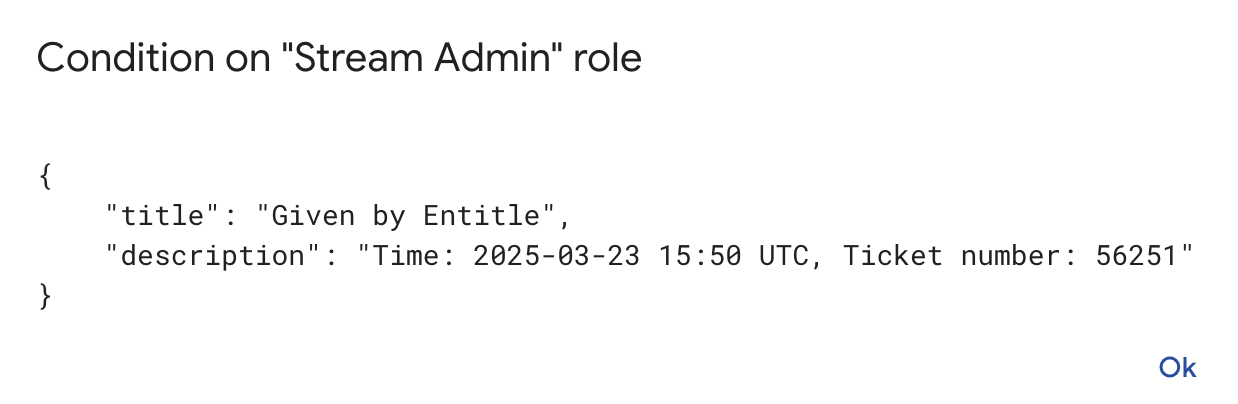
If you want to audit when and how often Entitle grants permissions, enable this option to record the grant time and request number in the GCP IAM policy.
In the
optionsobject, add"iam_policy_auditing": true.Limitations of the GCP IAM policy given by Google:
-
The policy cannot be larger than approximately 100kb.
Auditing significantly increases policy size. In environments with high usage, this can cause Entitle to reach the maximum policy size limit, preventing further access grants.
-
Maximum of 250 assignments in a binding (mapping between a role and users)
-
Maximum of 1500 assignments in a policy.
-
Example configuration JSON{ "service_account_key": { // A dictionary from tthe downloaded JSON file }, "credential_subject": "an email of an admin in your organization which has permission to view all users", "options": { "resource_types_constraints": ["buckets", "groups"], "read_only": false, "iam_policy_auditing": false } }Below is an example of how the options section should look. Make sure to add double quotations and commas in the appropriate places.

After access is granted, the user receives a message in Slack or the Entitle web app indicating that the user was added to the GCP IAM policy for the first time, not that a new user account was created.
Option 2: Workload Identity Federation connection
-
Under the
"workload_identity_federation"field, complete the relevant sub-fields:{ "workload_identity_federation": { "project_number": "<your GCP project number>", "pool_id": "entitle", "provider_id": "entitle", "service_account_email": "entitle-integrations-sa@<your project ID>.iam.gserviceaccount.com", "universe_domain": "<your GCP universe domain>", "nonce_value": "<the nonce value generated in the GCP shell>" }, "credential_subject": "[email protected]" } -
If you want to manage groups in your GCP integrations, provide
"credential_subject"with the email address of an admin in your organization who has permission to view all users and groups. Otherwise, enterentitle-integrations-sa@<your project ID>.com. -
If you want to limit the resource types managed by Entitle, add
"resource_types_constraints": []in an"options": {}object beneath"credential_subject": "", and specify the allowed resources types as a list of strings.projects folders datasets tables instances buckets sql_instances organizations secrets GKE clusters GKE namespaces groups functions service_accountsExample… "credential_subject": "[email protected]", "options": { "resource_types_constraints": ["projects", "folders", "datasets"] } …A non-existent field or an empty list means all Entitle-supported resource types, except tables and instances, can be managed.
-
If Domain-wide delegation for managing groups was set as
.readonlyfor this integration, add"read_only": trueto the"options"object.Example… "credential_subject": "[email protected]", "options": { "read_only": true } … -
If you want to audit when and how often Entitle grants permissions, enable this option to record the grant time and request number in the GCP IAM policy.
In the
optionsobject, add"iam_policy_auditing": true.Limitations of the GCP IAM policy given by Google:
-
The policy cannot be larger than approximately 100kb.
Auditing significantly increases policy size. In environments with high usage, this can cause Entitle to reach the maximum policy size limit, preventing further access grants.
-
Maximum of 250 assignments in a binding (mapping between a role and users)
-
Maximum of 1500 assignments in a policy.
-
Example configuration JSON{ "workload_identity_federation": { "project_number": "1079892362871", "pool_id": "entitle", "provider_id": "entitle", "service_account_email": "[email protected]", "universe_domain": "googleapis.com", "nonce_value": "ya29.c.c0AZ1aNiXnE52LzJcIpo-FHo*****************" }, "credential_subject": "[email protected]", "options": { "resource_types_constraints": [], "read_only": false, "iam_policy_auditing": false } }Below is an example of how the options section should look. Make sure to add double quotations and commas in the appropriate places.
After access is granted, the user receives a message in Slack or the Entitle web app indicating that the user was added to the GCP IAM policy for the first time, not that a new user account was created.
Option 3: GKE Pod-based identity connection
- Select GKE Pod-based identity if you’re using the pre-configured Workload Identity service account of your GKE cluster.
- Leave the connection JSON blank, and click Save.
Should you need to allowlist this integration, these are the IP address ranges from which Entitle's service reaches the integration:
- Entitle EU (Cloud deployment)
- 34.243.199.171
- 54.216.133.226
- Entitle US (Pathfinder deployment)
- 52.45.229.219
- 54.88.235.213
- 3.224.15.134
What's next?Make sure your setup is complete by testing your integration.
Updated 7 days ago
