Application analytics
What are applications?
Applications, as defined by EPM for Windows and Mac, include the following:
Windows application types
| Application Type | Aggregation Criteria |
|---|---|
| Executable (exe) |
|
| COM Class (com) |
|
| Installer Package (msi) |
|
| Uninstaller (unin/unex) |
|
| Store App (appx) |
|
| Windows Service (svc) |
|
| Control Panel Applet (cpl) |
|
| Management Console (msc) |
|
macOS application types
| Application Type | Aggregation Criteria |
|---|---|
| Binary (bin) |
|
| Bundle (bund) Package (pkg) System Preference Pane (pref) |
|
The Applications page
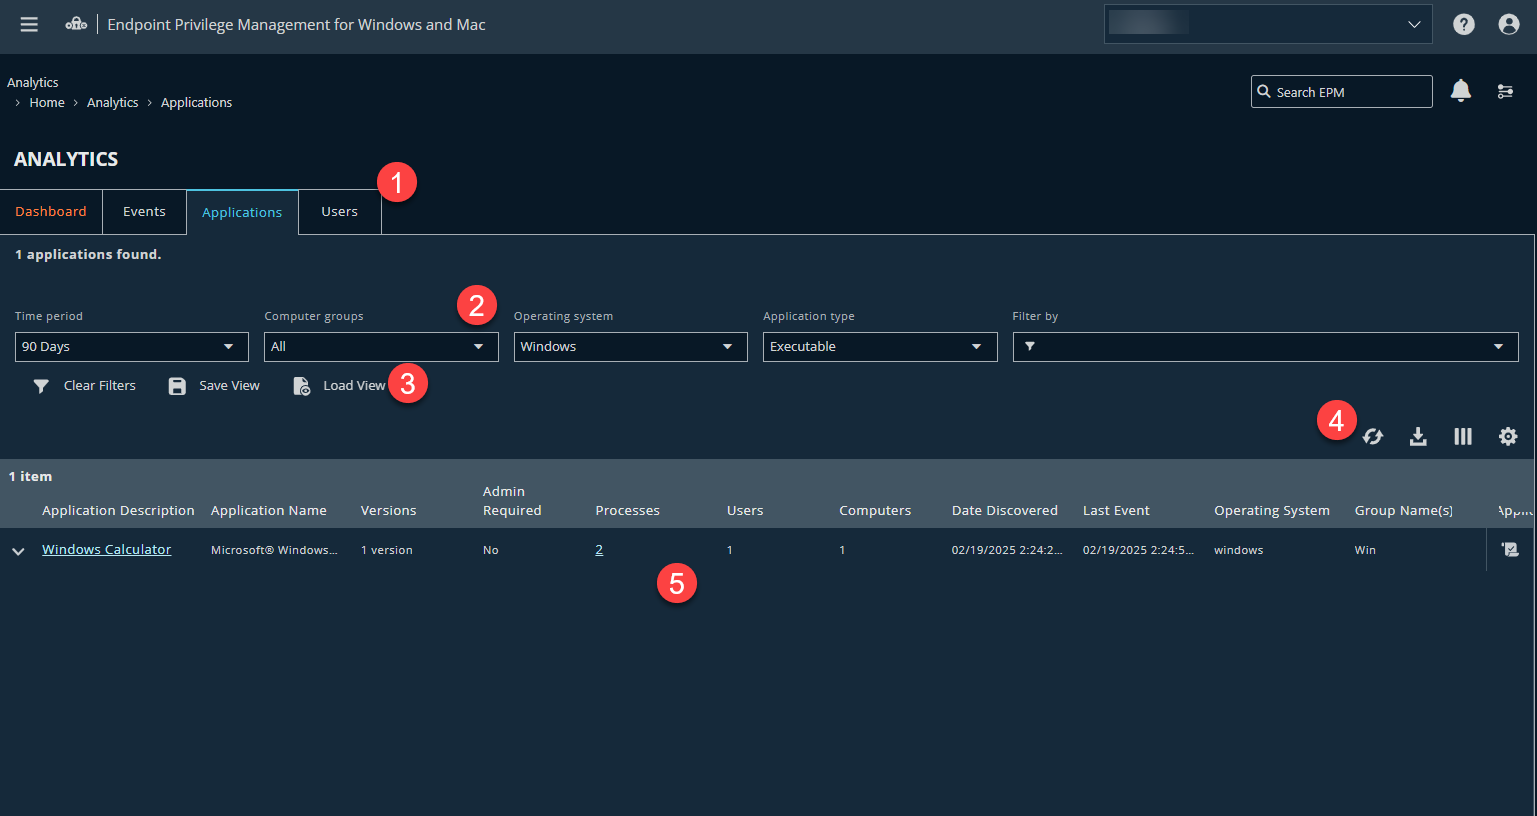
- Analytics tabs: Access the Dashboard, Events, Applications, and Users pages.
- Filters: Select a filter to refine your results. Click Clear Filters to remove all filters from your results.
Available filters
- Time Period
- Computer groups
- Operating system
- Application type
- Admin required
- App description
- App name
- Application group name
- Downloaded status
- Drive type
- Elevation method
- Elevation action
- Message name
- On demand
- Policy name
- Publisher
- Workstyle name
- Save View and Load View: Save your filter preferences and load the view later for quick access to your most frequently-used preferences.
-
List options: Click
 to refresh the list,
 ![Download icon in [%=Products.PMAb%] SaaS.](https://files.readme.io/0409dc72778b865c649d6bd0fc9d6042351367b265e483c1fde9404b45346d8f-icon-download.png) to download the list to a .csv file,
to download the list to a .csv file,  to select which columns to display on the page, and
 ![Download icon in [%=Products.PMAb%] SaaS.](https://files.readme.io/1da1862e7b8565ca38a623a35c566249525c7215d7a8fce5c316680cbc54d44d-icon-grid.png) to configure your page display.
to configure your page display. - Columns: Details for each event.
Available columns
- Application name
- Versions
- Admin Required
- Processes
- Users
- Computers
- Date Discovered
- Last Event
- Operating System
- Group Name(s)
- Application Type
- Publisher
- Event Action
- Application Group Name
- Message Name
- Elevation Method
- On Demand
- Drive Type
- Workstyle Name
- Policy Name
Add an application to a policy
NoteYou can only add an application to an unlocked policy.
- From the top left of the page, click
 > Endpoint Privilege Management for Windows and Mac > Analytics. The Analytics page displays.
 - Click Applications.
The Applications page displays. - Locate the application you want to add to a policy.
- In the application row, click
 .
.
The Application panel displays. - Select an unlocked policy and available application group from the drop-down list.
- Click Add and Edit Policy.
The Policy Editor opens and the Applications Group page displays. - Edit the application settings.
- Click Save Changes.
The policy saves.
View an application's details
Best practicesUse the application details to:
- View how often an application runs in your estate and the associated behavior at the end user level (for example, how often an event action occurred for an application over a given time period).
- View the number of users running an application, the reason given if one is required, all associated events, and metadata (such as versions run, application type, etc.).
- View event details specific to the application.
- From the top left of the page, click > Endpoint Privilege Management for Windows and Mac > Analytics. The Analytics page displays.
- Click Applications.
The Applications page displays. - Locate the application you want to view.
- Click the Application Description.
The Application Details page displays, where you can review at-a-glance user and event activity. - Optionally, click the User Activity or Events tabs to display additional details for each logged user or event activity.
Export to CSV
Click the Download icon to export all analytics data results in the currently filtered result set. When downloading from the Applications page:
- Includes up to 10,000 rows.
- Exports only child rows.
- Downloads only the current page. For example, if 25 items are selected on the page, you only see the child rows for the items on the current page).
- Exports all columns.
When saving an export file for events, you can set the number of records to download, the columns to include, and a file name.
Click the Notifications icon when the file is ready to download. Notifications only apply to the Events page.
Save and load views
EPM users with Analyze Group permissions can create and save a set of filters and columns so that the same set of filters does not have to be selected every time Analytics is accessed. Saving viewing preferences provides an easy way to return to views of data used frequently to monitor Endpoint Privilege Management activity in the estate.
You can load and save data sets from the Events page, Applications page, and Users page.
Access views on any device regardless of the device the views were created on.
- After selecting filters, select Save View to retain those preferences for viewing later. Preferences are saved locally.
- If a view name already exists, select Overwrite existing view, and then select the view you want to replace.
- The next time you access Analytics, your view settings are preserved. Click Load View to select and load a view.
- On the Load Event View pane, you can delete and refresh views.
Recommended views
The recommended views provide a selection of the most useful predetermined views. Use the views to review collected data and make informed decisions around policy editing.
- To access the views, go to Analytics.
- Click the Applications tab.
- Click Load View, and then click the Recommended Views tab.
Recommended views for applications load with the default filters.
| Name | Description |
|---|---|
| Discovered: Active Applications | To help build the Passive Allow and the Add Admin definitions. This view is used for implementation as it displays all the events captured by the (Default) rules. The report name in legacy reporting: Target Types |
| Discovered: by Publisher | To view discovered applications aggregated by Publisher, to decide if you want to treat all applications from that publisher the same way in policy and take that action. The report name in legacy reporting: Discovery by Publisher |
| Discovered: by Requiring Admin Rights | To see the applications that require admin rights and how they are granted, so you can track down genuine admins and what they are running. The report name in legacy reporting: Discovery Requiring Elevation |
| Discovered: from External Sources | Discover applications run from riskier places, to ensure the applications are not allowed admin rights. The report name in legacy reporting: Discovery from External Sources |
| Discovered: New and Uncategorized | Find the new and uncategorized applications running in your estate. Take action to add the applications to a category (add to a more specific application group). The report name in legacy reporting: Discovery All |
